


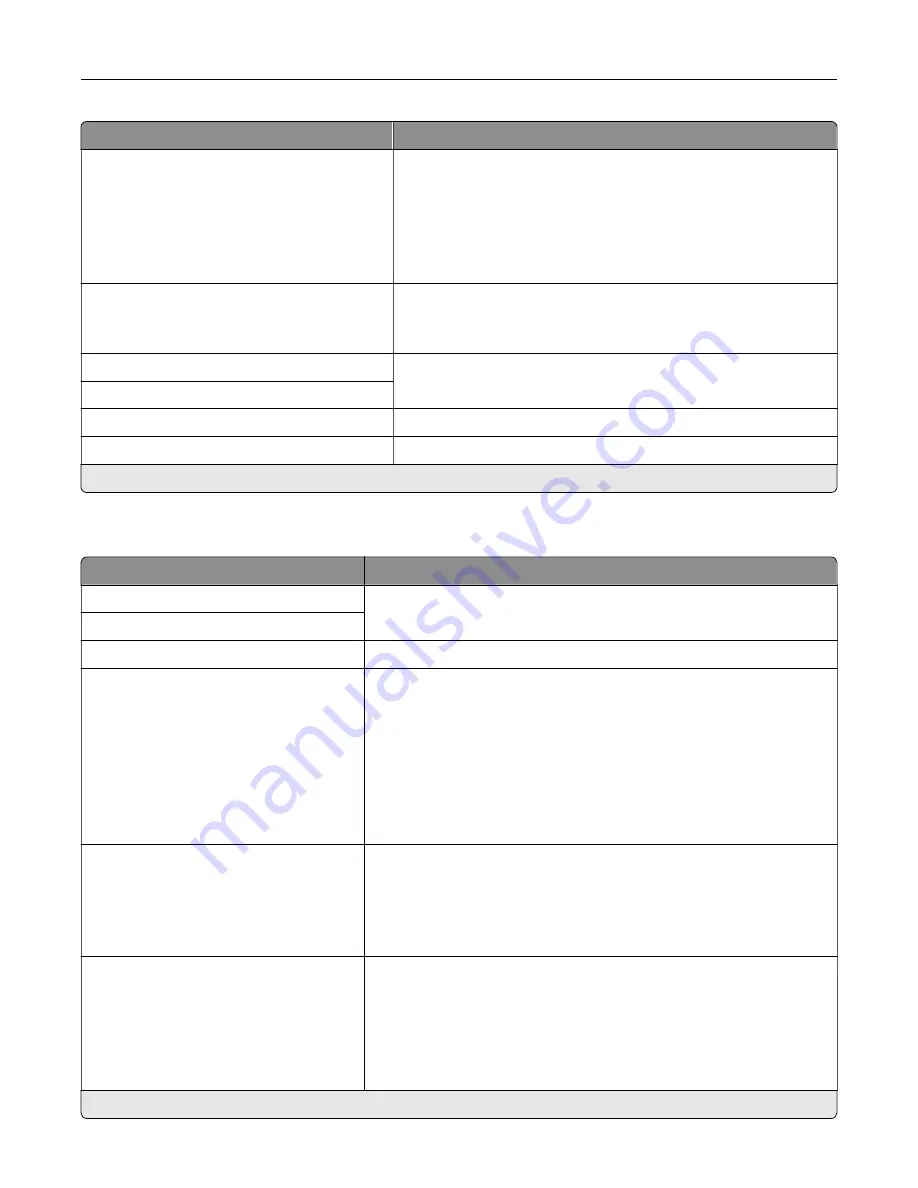
Menu item
Description
User
‑
Initiated E
‑
None*
Use Device SMTP Credentials
Use Session User ID and Password
Use Session E
‑
mail address and Password
Prompt user
Specify whether credentials are required for user
‑
initiated e
‑
mail.
Use Active Directory Device Credentials
Off*
On
Specify whether credentials are required for user
‑
initiated e
‑
mail.
Device Userid
Specify the user ID and password to connect to the SMTP server.
Device Password
Kerberos 5 REALM
Specify the realm for the Kerberos 5 authentication protocol.
NTLM Domain
Specify the domain name for the NTLM security protocol.
Note:
An asterisk (*) next to a value indicates the factory default setting.
E
‑
mail Defaults
Menu item
Description
Subject:
Specify the e
‑
mail subject and message.
Message:
File Name
Specify the filename for the scanned document.
Format
JPEG (.jpg)
PDF (.pdf)*
TIFF (.tif)
XPS (.xps)
TXT (.txt)
RTF (.rtf)
DOCX (.docx)
Specify the file format of the scanned document.
Global OCR Settings
Recognized Languages
Auto Rotate
Despeckle
Auto Contrast Enhance
Configure the settings for optical character recognition (OCR).
Note:
This menu item appears only if you have purchased and
installed an OCR solution.
PDF Settings
PDF Version (1.5*)
Archival Version (A
‑
1a*)
Highly Compressed (Off*)
Secure (Off*)
Archival (PDF/A) (Off*)
Configure the PDF settings of the scanned document.
Notes:
•
Archival Version and Archival (PDF/A) are supported only when
PDF Version is set to 1.4.
•
Highly Compressed appears only when hard disk is installed.
Note:
An asterisk (*) next to a value indicates the factory default setting.
Understanding the printer menus
124
Содержание XC9225
Страница 168: ... Scanner glass Scanner glass pad 3 Close the scanner cover Maintaining the printer 168 ...
Страница 171: ...2 Remove and then empty the hole punch box 3 Insert the hole punch box 4 Close the door Maintaining the printer 171 ...
Страница 176: ...5 Insert the new toner cartridge 6 Remove the waste toner bottle Maintaining the printer 176 ...
Страница 181: ...8 Insert the waste toner bottle and then close the door Maintaining the printer 181 ...
Страница 193: ...Replacing the ADF separator roller 1 Turn off the printer 2 Remove the ADF separator pad Maintaining the printer 193 ...
Страница 196: ...2 Open door B 3 Remove the ADF pick and feed rollers 4 Unpack the new pick and feed rollers Maintaining the printer 196 ...
Страница 198: ...2 Remove the empty staple cartridge 3 Unpack the new staple cartridge Maintaining the printer 198 ...
Страница 211: ... Below the fuser area Duplex area Clearing jams 211 ...
Страница 216: ...2 Open door J Clearing jams 216 ...
Страница 218: ... Areas H1 and H2 Area H6 Clearing jams 218 ...
Страница 222: ...2 Remove the staple cartridge holder 3 Remove the loose staples Clearing jams 222 ...
Страница 224: ...2 Remove the staple cartridge holder 3 Remove the loose staples Clearing jams 224 ...
Страница 226: ...2 Remove the staple cartridge holder 3 Remove the loose staples Clearing jams 226 ...
Страница 276: ...6 Remove the controller board shield 7 Unpack the printer hard disk Upgrading and migrating 276 ...
Страница 280: ...6 Remove the controller board shield Upgrading and migrating 280 ...
Страница 283: ...4 Remove the controller board shield Upgrading and migrating 283 ...
Страница 285: ...8 Attach the thumbscrews 9 Connect the wireless print server to the controller board Upgrading and migrating 285 ...
Страница 289: ...7 Connect the tray connector to the printer 8 Open trays 2 and 3 Upgrading and migrating 289 ...
Страница 294: ...9 Remove the stabilizing feet from the tray Upgrading and migrating 294 ...
Страница 298: ...17 Secure the tray cable with the clamp Upgrading and migrating 298 ...
Страница 299: ...18 Connect the tray cable to the printer 19 Attach the tray cable cover Upgrading and migrating 299 ...
Страница 300: ...20 Slide the tray until it clicks into place 21 Attach the stabilizing feet to the printer Upgrading and migrating 300 ...
Страница 305: ...7 Remove the paper guides 8 Attach the sensor cover Upgrading and migrating 305 ...
Страница 311: ...8 Attach the finisher to the printer Upgrading and migrating 311 ...


