background image

7.  Press the MENU button twice to exit the menu. The noisy/

unwanted TV station will no longer be shown when skipping 

through the channels using the P+/P- buttons.

8.  Repeat the same procedures to deleted all the nosily/unwanted 

stations as desired.

TELETEXT: 

Most set channels carry “Teletext”, pages of written information that 

provide information such like:

•  Sports results.

•  Subtitles for the hard of hearing.

•  Television programme times.

•  News bulletins and weather forecasts.

The Teletext pages are organized according to six categories as the 

figure:

A

B

C

D

E

F

TV - ON-SCREEN MENU

SETTING Menus

Press the MENU button to enter the setting menu (press again to 

exit). Press the P+/P-/V+/ V- buttons to highlight the function within 

the menu you want to set. Press the V+ button to confirm the 

selection. Press the P+/P- buttons to toggle the sub-menu options.

TV MODE

In TV mode, there are 5 main setting menus:

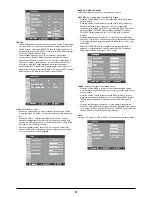
PICTURE-

 for picture quality setting.

•  Press the MENU button, the PICTURE setting menu will appear 

on screen.

•  Press the V+ button to highlight CONTRAST, and then press the  

P+/P- buttons repeatedly until the desired setting is highlighted  

(CONTRAST, BRIGHTNESS, HUE, SATURATION, SHARPNESS, 

COLOR TEMP or PICTURE MODE).

•  Press the V+/V- buttons repeatedly to adjust the setting.

•  When COLOR TONE is selected, press the V+/V- buttons  

repeatedly to select the color temperature to WARM, COOL or  

NORMAL.

•  When PICTURE MODE is selected, press the V+/V- buttons   

repeatedly to select the picture mode to BRIGHT, PERSONAL,   

NORMAL or SOFT.

NOTES:

 HUE will not functioning in TV mode.

HUE

COLOR TONE

STANDARD

ADJUST

ADJUST

NICAM/A2

STEREO

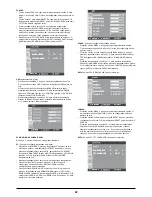
SOUND- 

for sound quality setting 

•  Press the MENU button, and then press the P- button repeatedly  

to highlight the SOUND icon, the sound setting menu will appear  

on screen. 

•  Press the V+ button to highlight BASS, then press the P+/ P-  

buttons repeatedly to select BASS, TREBLE, BALANCE, SOUND  

MODE or NICAM/A2.

•  Press the V+/ V- buttons repeatedly to adjust the setting. 

•  When SOUND MODE is selected, press the V+/V- buttons   

repeatedly to select the sound effect mode to THEATER, 

ODEUM, NEWS or PERSONAL.

•  When NICAM/A2 is selected, press V+/V- buttons repeatedly to 

select MONO, STEREO or DUAL I or DUAL II (depending on the 

type of audio signal broadcasted from your TV station).

A:  Selected page number. 

B:  Broadcasting station identity. 

C:  Current page number or search status.

D:  Date and time.

E:  Text.

F:  Status information.

Operations of Teletext: 

•  Press the P+/P- to select a preset channel providing the Teletext 

service. 

•  Press the TXT/TV button on the remote handset to activate the 

Teletext   mode. To return to normal TV mode, press the TXT/TV 

button again or press CANCEL button.

•  In the section “F” above figure shows, there will be four 

different control functions identify by different colours. Press the 

corresponding colour buttons on the remote handset to activate 

the corresponding functions. TXT-R button for Red, TXT-G button 

for Green, TXT-Y button for Yellow and TXT-C button for Cyan. 

For an example, if “P-” on the Teletext page section “F” shows 

in Red, press the TXT-R button to enter to the previous Teletext 

page. If “P+” on the Teletext page section “F” shows in Green, 

press the TXT-G button to enter to the next Teletext page.

•  In Teletext mode, press MIX button to display TV and Teletext 

page on the screen simultaneously. To exit, press MIX button 

again.

•  In Teletext mode, press the SIZE button once to display the upper 

half of the Teletext page to the full screen. Press the SIZE button 

again to display the lower half of the Teletext page to the full 

screen. To exit, press the SIZE button again.

•  Some of Teletext pages are linked with several secondary 

pages; the secondary pages are displayed in sequence. Press 

the REVEAL button repeatedly to view the secondary pages as 

desired. Press the HOLD button to freeze the current page (icon 

of lock will appear on the screen). To exit from the freeze mode, 

press this button again (icon of lock will disappear on the screen).

•  To enter to the desired number Teletext page in Teletext mode, 

enter the three digit of page number by the numeric buttons on 

the remote handset. (All the three digit of the page number should 

be entering, for an example, if the page number is “003”. Press 

the buttons “0” + “0” + “3”).

•  In Teletext mode, press the INDEX button to display the index 

page.

NOTES: 

•  Make sure the TV signal reception is good. Otherwise, the 

information of Teletext may not be displayed or corruptions. 

•  If any broken character appears while Teletext is being viewed, 

make sure that the Teletext language is identical with the 

language in the setup menu. If both languages are different, 

select the same language with Teletext language on the setup 

menu.

Содержание Spider-Man LCD1SP

Страница 1: ...Spider ManTM Flat Screen TV TELEVISÃO LCD DE 15 DO SPIDER MAN User guide Manual de Instruções LCD1SP ...

Страница 2: ... ...

Страница 3: ...NTS Important Safety Instructions 4 TV Power Source 6 Cable Connections 6 Location of Controls 7 Preparation 8 Basic Operation 8 The On Screen Menu 9 Retractable Stand 12 Troubleshooting 13 Specifications 13 ...

Страница 4: ...PLEASE READ BEFORE OPERATING THIS EQUIPMENT Before using the unit be sure to read all operating instructions carefully Please note that these are general precautions and may not pertain to your unit For example this unit may not have the capability to be connected to an outdoor antenna 1 Read these instructions All the safety and operating instructions should be read before the product is operated...

Страница 5: ... of antenna discharge product connection to grounding electrodes and requirements for grounding electrodes ANTENNA LEAD IN WIRE ANTENNA DISCHARGE UNIT NEC SECTION 810 20 GROUNDING CONDUCTORS NEC SECTION 810 21 GROUND CLAMPS NEC NATIONAL ELECTRICAL CODE ELECTRIC SERVICE EQUIPMENT GROUND CLAMP POWER SERVICE GROUNDING ELECTRODE SYSTEM NEC ART 250 PARTH EXAMPLE OF ANTENNA GROUNDING AS PER NATIONAL ELE...

Страница 6: ...he SOURCE of the TV to TV mode CONNECTION USING AUDIO VIDEO CABLES Follow the instructions below to connect an external unit such as a VCR DVR DVD player to your unit using Audio Video cables CABLES INCLUDED From external unit s AV OUTPUT jacks AV connection cable external unit T N A O E D I V S S E N O H P N I O I D U A C P AV IN VIDEO L R SCART 1 Connect the left and right audio connection cable...

Страница 7: ...L Return to previous TV channel in TV mode only 3 P Channel up Move the cursor in setting menu to up position 4 OSD On Screen Display 5 MENU Enter settings menu 6 V Volume down Move the cursor in setting menu to the left 7 SWAP SWAP channels between source channel and target channel 8 SOUND Press repeatedly to select the presetting sound effect modes 9 P Channel down Move the cursor in setting men...

Страница 8: ...ON Press the SOUND button repeatedly to select the preset sound modes as desired PICTURE MODE SELECTION Press the PICTURE button repeatedly to select the preset picture modes as desired CHANNEL SELECTION Press the P or P buttons to select a preset channel as desired For direct channels access 1 Channel number 1 9 Press the button once and enter the channel number by press the numeric keys on the r...

Страница 9: ...sted from your TV station A Selected page number B Broadcasting station identity C Current page number or search status D Date and time E Text F Status information Operations of Teletext Press the P P to select a preset channel providing the Teletext service Press the TXT TV button on the remote handset to activate the Teletext mode To return to normal TV mode press the TXT TV button again or pres...

Страница 10: ...he MENU button and then press the P button repeatedly to highlight SOUND The sound setting menu will appear on screen Press the V button to highlight BASS then press the P P buttons repeatedly to select BASS TREBLE BALANCE or SOUND MODE Press the V V buttons repeatedly to adjust the setting When SOUND MODE is selected press the V V buttons repeatedly to select the sound effect mode toTHEATER ODEUM...

Страница 11: ...ect CONTRAST BRIGHTNESS H POSITION V POSITION CLOCK PHASE or COLOR MODE Press V V buttons repeatedly to adjust the setting When AUTO is selected Press the V V buttons to start setting the TV will set the CLOCK PHASE and position to the best condition automatically When COLOR MODE is selected Press the V V buttons to set the preset color mode to NORMAL WARM COOL SRGB or USER In the USER setting pre...

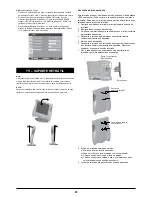
Страница 12: ... kit You can buy the bracket in the shop you buy the TV Before mounting the TV on the wall the stand must be removed from the bottom of TV 1 Power off the unit by the main power switch on the rear of TV 2 Disconnect all the cables from the TV 3 Place the TV on a clean and soft surface as the figure on left 4 Unscrew and remove the two screws from the rear cabinet as the figure on left 5 Pull out t...

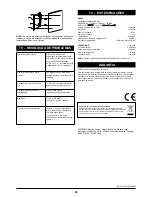
Страница 13: ...A Speaker output power 3 Wattsx2 Resolution 1024x768 Contrast ration 450 1 Responsible time 16ms Brightness 250cd m2 Vertical frequency for PC input 60 70Hz Dimensions 47 3 W x41 6 H x7 2 D cm ACCESSORIES Remote handset 1 pc Remote handset batteries AAA 2 pcs Owner s manual 1 set AC DC adaptor 1 pc AC cord for AC DC adaptor 1 pc NOTE The design and structure is subject to change without notice Thi...

Страница 14: ...ortantes sobre Segurança 15 TV Fonte de Alimentação 17 Conexões de Cabo 17 Localização dos Controles 18 Preparação 18 Operação Básica 19 Menu na Tela 20 Suporte Retrátil 23 Resolução de Problemas 24 Características Técnicas 24 ...

Страница 15: ...e funcionamento e segurança devem ser lidas antes de utilizar o produto 2 Guarde estas instruções As instruções de funcionamento e segurança devem ser guardadas para futuras consultas 3 Siga todos os avisos Todos os avisos no produto e nas instruções de uso devem ser cumpridos 4 Siga todas as instruções Todas as instruções de uso e operação devem ser seguidas 5 Não utilize este aparelho próximo à ...

Страница 16: ...tuições não autorizadas podem causar fogo choques elétricos ou outros tipos de perigos EXEMPLO DE ATERRAMENTO DE ANTENA CONFORME O CÓDIGO ELÉTRICO NACIONAL 22 Verificação de segurança Após terminar quaisquer reparos neste produto peça ao técnico que efetuou os reparos que faça uma verificação de segurança a fim de determinar se o produto se encontra em condições de operação apropriadas 23 Montagem...

Страница 17: ...struções apresentadas abaixo para ligar uma unidade externa com um cabo de ligação S VIDEO CABOS NÃO INCLUÍDOS 1 Conecte o cabo de áudio da esquerda e direita provenientes dos conectores AUDIO OUTPUT saída de áudio das unidades externas aos conectores AUDIO IN da TV 2 Conecte o conector S VIDEO OUTPUT da unidade externa ao conector SVIDEO da TV 3 Ajuste a FONTE da TV ao modo S VIDEO CONEXÃO UTILIZ...

Страница 18: ...nu de configuração de FONTE 2 RECALL Volta ao canal de televisão anteriormente visto apenas no modo TV 3 P Sobe um canal Move o cursor no menu de configuração para a posição superior 4 OSD Apresentação Na Tela 5 MENU Serve para entrar no menu de configuração 6 V Diminui o volume Move o cursor no menu de configuração para a esquerda 7 SWAP Alterna entre os canais fonte e alvo 8 SOUND Pressione repe...

Страница 19: ...e este botão ou um dos botões V ou V duas vezes para voltar a ouvir o som CONFIGURAÇÃO DA FONTE 1 Pressione o botão MODE na televisão ou o botão TV AV no controle remoto para entrar no menu de configuração da FONTE 2 Pressione os botões P ou P para selecionar a fonte TV AV S VIDEO SCART ou PC conforme desejado 3 Pressione o botão V para confirmar a escolha BUSCA AUTOMÁTICA Este método foi criado p...

Страница 20: ...ã Para sair prima novamente o botão MIX No modo de teletexto prima uma vez o botão SIZE para ver a parte superior da página de teletexto no ecrã por completo Prima novamente o botão SIZE para ver a parte inferior da página de teletexto no ecrã por completo Para sair prima novamente o botão SIZE Algumas das páginas de teletexto estão ligadas a várias páginas secundárias As páginas secundárias são a...

Страница 21: ... V para selecionar o idioma desejado MOVE MODO AV S VIDEO ou SCART Estes modos possuem 4 menus de configuração principais PICTURE para a configuração da qualidade de imagem Pressione o botão MENU O menu de configuração PICTURE imagem aparece no tela Pressione o botão V para destacar a opção CONTRAST contraste e pressione repetidamente os botões P P até que a configuração desejada seja destacada CO...

Страница 22: ...nte os botões V V para ajustar as configurações Quando escolher AUTO prima os botões V V para começar a configuração A televisão acerta o RELÓGIO FASE e escolhe automaticamente a melhor condição Quando escolher COLOR MODE prima os botões V V para definir o modo de cor predefinido para NORMAL WARM quente COOL frio SRGB ou USER utilizador Na configuração USER prima os botões P P para escolher USER R...

Страница 23: ...ndo um kit de fixação VESA compatível Pode comprar o suporte na loja onde comprou a televisão Antes de montar a televisão na parede a base tem de ser retirada da parte inferior da televisão 1 Desligue a unidade no interruptor principal na parte traseira da televisão 2 Desligue todos os cabos da televisão 3 Coloque a sua televisão numa superfície suave e limpa conforme apresentado à esquerda 4 Desa...

Страница 24: ...sso pedimos para que nos apoie contribuindo activamente na poupança de recursos e na protecção do ambiente ao entregar este aparelho nos pontos de recolha caso existam LEXIBOOK Electronica Lda Quinta dos Loios Praceta José Domingos dos Santos 6B 8ª 2835 343 Lavradio Barreiro Portugal Apoio Técnico 212 06 1 348 Não há som nem imagem erifique se o indicador de alimentação no painel da televisão está...

Отзывы: