1
ON
WEST
BLUE SCREEN
BLUE SCREEN
TXT LANGUAGE
TXT LANGUAGE
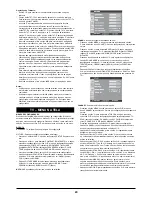
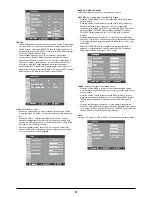
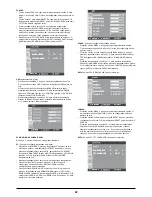
ADJUST
OSD
(On Screen Display)
• Press the MENU button, and then press the P- button repeatedly
to highlight OSD; the OSD setting menu will appear on screen.
• Press the V+ button to highlight LANGUAGE, then press the
P+/P- buttons repeatedly to select LANGUAGE, H-POSITION,
V-POSITION, DURATION, or HALFTONE.
• Press the V+/V- buttons repeatedly to adjust the setting.
• When LANGUAGE is selected, press the V+/V- buttons
repeatedly to select the language as desired.
MOVE
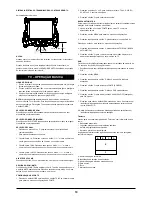
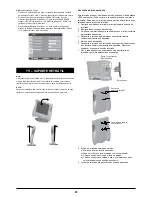
TV - RETRACTABLE STAND
NOTE:
The maximum tilt angle is 15 degrees in the backward direction.
Please do not tilt the TV outside the specified range. Using excessive
force to tilt the TV may cause permanent damage to the mechanical
part of the stand.
NOTE:
To avoid damaging the screen, never touch the screen or used liquid
cleaners or aerosol cleaners to clean the screen. Use a dry cloth only.
15
0
5
0
WALL MOUNTING TIPS
This TV can be mounted on wall using a VESA compliant wall-mount
bracked kit.(You can buy the bracket in the shop you buy the TV)
Before mounting the TV on the wall, the stand must be removed from
the bottom of TV.
1. Power off the unit by the main power switch on the rear of TV.
2. Disconnect all the cables from the TV.
3. Place the TV on a clean and soft surface, as the figure on left.
4. Unscrew and remove the two screws from the rear cabinet as the
figure on left.
5. Pull out the stand from the TV.
6. Unscrew and remove the 4 pcs mounting screws from the rear
cabinet as the figure on left. Do not remove any other screws from
the TV.
7. Fix hanging wheel and screws on the back of TV as the figure on
left.
Remove the 2 M4x 12 screws
from the stand
Pull out the
stand
Remove the 4
screws (M4X12)
Fix hanging whee l
and screws
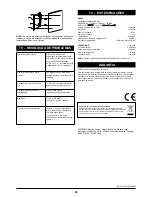
8. Connect wall bracket to the wall.
a) Mark the location of hole on the wall.
b) Make hole on the marked location using drill.
c) Fix anchors on each hole on the wall.
d) Connect bracket to the wall with screws after fitting the anchors
into the bracket holes.
9. Lift the TV to the socket of the wall bracket.
NOTE:
Above illustrates and instructions only for reference. For
details, please refer to the Installation Instruction Manual of the Wall
Mount Bracket.


