background image

-41- 


3.  Resetting LevelOne Wireless Access Point to Factory Default Setting. 

You may choose to Reset the Wireless Access Point by doing the following: 

♦ 

Locate the Reset button on the back of the Wireless Access Point 

♦ 

Use a paper clip to press the Reset button 

♦ 

Hold the reset button for at least 5 seconds before you release 

♦ 

Wait till the Wireless Access Point reboots itself (it may take a few minutes), then the 
configuration will be set back to factory default values. 


4.  What are the operation modes supported by LevelOne Wireless Access Point? 

The Wireless Access Point supports 4 operation modes: 

Access Point:  

Forms a wireless network and works as a bridge to communicate with Ethernet LAN 
network. 

AP Client:   

Acts as an wireless client which allows the computers that are connected to the AP to 

communicate with other wireless clients. 

Point-to-Point Bridge:   

Connects two independent Ethernet LAN networks or computers wirelessly. 

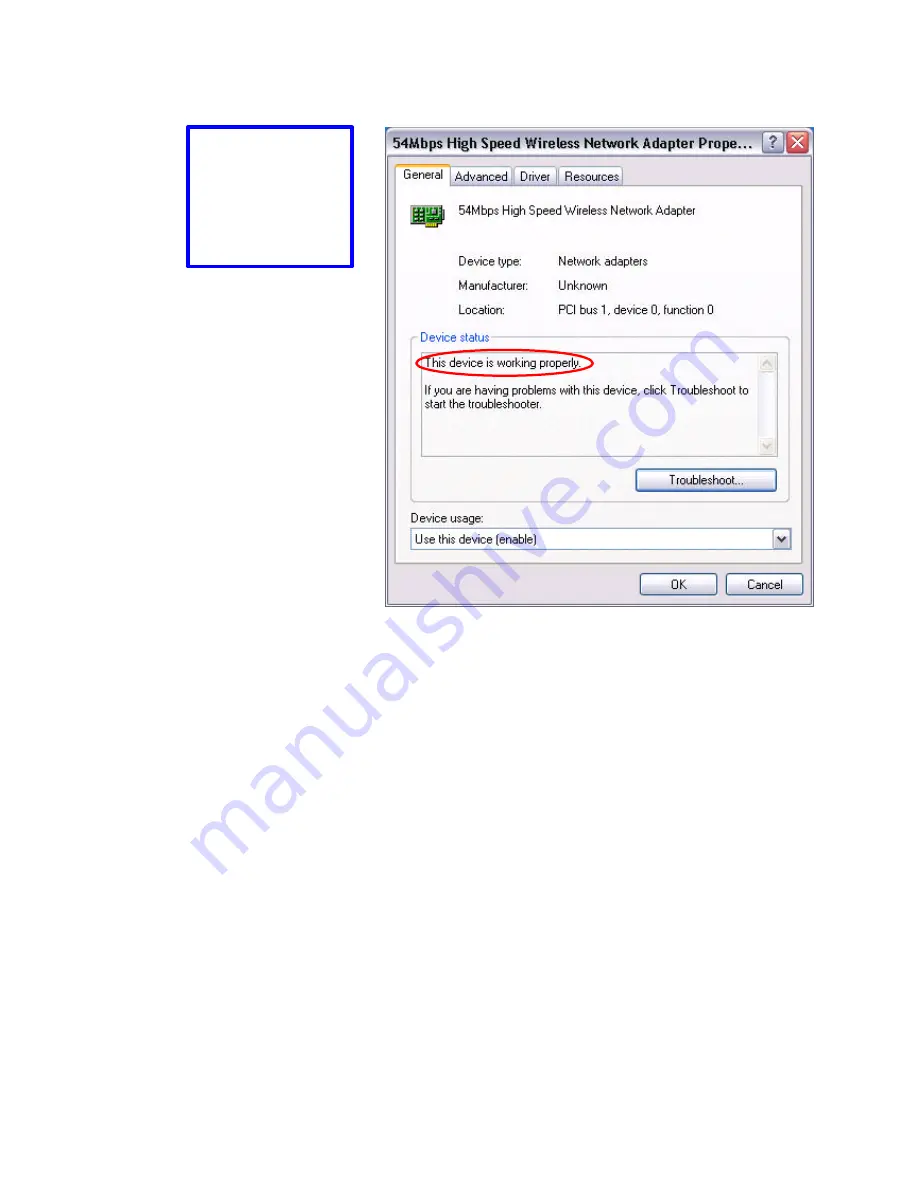
Check and make 

sure that the 
network adapter is 

working properly 

Содержание WAP-0003

Страница 1: ...1 LevelOne WAP 0003 54Mbps Wireless Access Point User s Manual V 1 0...

Страница 2: ...pearing in this document are registered property of their respective owners FCC STATEMENT This product has been tested and complies with the specifications for a Class B digital device pursuant to Par...

Страница 3: ...Page 12 Basic Setting 14 IP Setting 16 Advanced Setting 18 Security 20 802 1x 23 Tools 25 Using AP 54M U tility for Management 27 Installing AP 54M Utility 27 Manage and Configure Access Point with 54...

Страница 4: ...ity LevelOne WAP 0003 2 4GHz 802 11g b Wireless Access Point offers unbeatable performance for both data throughput and range coverage which is an ideal device to be deployed not o nly in complex Ente...

Страница 5: ...h cable is required to connect with router or switch Cross Over cable is required to connect to computer directly LevelOne WAP 0003 WIRELESS ACCESS POINT S LEDS Power LED ON when the unit is powered u...

Страница 6: ...Access Point to connect with the Router to form a wireless infrastructure network 5 Wireless clients equipped with wireless networking devices such as wireless PC Card for wireless connection Setting...

Страница 7: ...ess to the computer that you are using to configure the Access Point Please go to check item no 6 4 If you are not connecting LevelOne Access Point through a router or a local area network which has D...

Страница 8: ...e is the default IP address for LevelOne Access Point Use this IP address when connecting to a network consisting of Access Points set to default settings If the IP address of the Access Point is bein...

Страница 9: ...ult username is admin and the default password is also admin The configuration menu will appear You can configure and get information about LevelOne Access Point by going through each tab Here Statusp...

Страница 10: ...in 4 easy steps by clicking on the Wizard button on the function menu The following screen will appear Please click Next to continue Step 1 Set Password LevelOne Access Point is password protected to...

Страница 11: ...enable the WEP security by selecting Enabled otherwise simply click Next to continue Select one of the WEP enc ryption key size and enter the value of the key in the Key text box then click Next to c...

Страница 12: ...12 LevelOne Access Point is now rebooting click Close to close the Setup wizard window and go back to the main menu Status Page This page displays the followinginformation...

Страница 13: ...ESSID the status of Encryption Function Enable or Disable the cu rrent using channel The current wireless traffic calculated in terms of number of packets sent and received by AP through wireless com...

Страница 14: ...ll operate in You can select the channel range of 1 to 11 for North America FCC domain 1 to 13 for European ETSI domain and 1 to 14 for Japanese domain WEP Key To disable WEP security click on the Dis...

Страница 15: ...15 The new settings are now been saved to Access Point and will be effective once the Access Point restarts Click Back to go back to Basic Setting page...

Страница 16: ...obtain the IP from a DHCP server but it is not recommended Once set it will be di fficult to determine the dynamic IP assigned to the Access Point Select the option Obtain IP Automatically and click...

Страница 17: ...17 The new settings are now been saved to Access Point and will be effective once the Access Point restarts Click Back to go back to Basic Setting page...

Страница 18: ...work with its wireless clients 2 AP Client Acts as an Ethernet to Wireless Bridge which allows a LAN or a single computer station to join a wireless ESS network through it Y ou must make sure that the...

Страница 19: ...To set the number of bytes used for the fragmentation boundary for directed messages Default is 2436 bytes DTIM Interval This value indicates the interval of the Delivery Traffic Indication Message DT...

Страница 20: ...e the new login password Here are the necessary steps 1 Enter the new password in the AP Password New field 2 Enter the new password again in the Confirm field 3 Click Apply NOTE The wireless clients...

Страница 21: ...MAC Filter is enabled by selectingthe Enabled radio box select one of two choices Only deny PCs with MAC listed below to access device or Only allow PCs with MAC listed below to access device The max...

Страница 22: ...22 For any changes made in the security page click Apply for the changes to be effective When the above page will appear Click Back to go back to the previous page...

Страница 23: ...MD5 EAP method is used then you can skip step 2 and go to step 3 3 Select the Encryption Key Length Size ranging from 64 to 256 Bits that you would like to use Select the Lifetime of the Encryption K...

Страница 24: ...reboots itself NOTE As soon as 802 1x security is enabled all the wireless client stations that are connected to LevelOne Access Point currently will be disconnected The wireless clients must be confi...

Страница 25: ...ich you save previous settings and configurations to be opened Upon selecting the saved file click Restore and complete the restore process when LevelOne Access Point re operates after it restarts Res...

Страница 26: ...26 when LevelOne Access Point re operates after it restarts...

Страница 27: ...the steps below for installation and refer to Manage and Configure AP with AP 54M Utility session Access point configuration NOTE The installation demonstrated is based on Windows XP operating system...

Страница 28: ...28 4 Click Install on the menu bar to proceed with 54M AP installation...

Страница 29: ...29 The 54M AP Utility loads the Install wizard for installation Click Next to start installation Click Next to install in default folder or Click Browse to install in a different folder...

Страница 30: ...30 Installation wizard copies the utility program files in your PC 5 Click Finish to complete the installation...

Страница 31: ...lows you to configure one AP to another to save the trouble of logging into the web configuration utility of each AP However all the Access Points that you wish to configure using 54M AP Utility must...

Страница 32: ...starts up Status displays the basic settings of the selected Access Point Available AP lists all the 54Mbps Access Point of the same network domain detected on the network You can select a particular...

Страница 33: ...n choose 1 Access Point 2 Access Point Client 3 Wireless Bridge and 4 Multiple Bridge Please refer to Appendix C Glossary for the functionalities and definitions of these operating modes Advanced Sett...

Страница 34: ...rity protection to make sure you have the right authorization NOTE The default username is admin and the default password is also admin Enter UserName and Password for the Access Point Click OK button...

Страница 35: ...about Network and IP address Click Apply button for any changes made to be effective The utility program will prompt you for user name and password for security protection Select DHCP Client if there...

Страница 36: ...age that allows you to configure the WEP settings for the Access Point Enable WEP Key security by clicking Data Encryption Select the Auth Mode and the Key Length Fill at least one of the 4 Web Key fi...

Страница 37: ...r the IP address of and the Port used by the Primary Radius ServerEnter the Shared Secret which is used by the Radius Server 6 RADIUS Server 2 Enter the IP address of Port and Shared Secret used by th...

Страница 38: ...Wireless Access Point properly and the Ethernet LED of the Wireless Access Point is ON Check that the IP address of the computer is in the same IP range and subnet as that of the Wireless Access Point...

Страница 39: ...ess clients cannot access the network in the infrastructure mode Check that the wireless network device is being installed and working properly Go to Start Right mouse click on My Computer Properties...

Страница 40: ...40 Go to Device Manager Right mouse click on the network adapter which you connect RJ45 cable with And go to Properties...

Страница 41: ...tes then the configuration will be set back to factory default values 4 What are the operation modes supported by LevelOne Wireless Access Point The Wireless Access Point supports 4 operation modes Ac...

Страница 42: ...level Unlike IP addresses which can be changed or dynamically assigned by the network the MAC address of a networking device is permanent 7 What is WEP Wired Equivalent Privacy WEP is a type of data...

Страница 43: ...earn the basics of home networking Using the Windows XP Network Setup Wizard Go to Start menu Control Panel Network Connections In the menu on the left side of the window select Set up a home or small...

Страница 44: ...our computer to the Internet In the case of using router in the network choose the second option Click Next to continue 1 Enter a short description for your computer 2 Enter a name for your computer t...

Страница 45: ...45 Enter Workgroup name for your home network Click Next to continue Click Next and wait for the wizard to apply the settings...

Страница 46: ...ou may create a network setup disk which saves you the trouble of having to configure every PCs in your network Select the first choice and insert a floppy disk into your disk drive Click Next to cont...

Страница 47: ...47 Click Format Disk if you wish to format the disk Click Next to copy the necessary files to the disk Click Next to continue with the Network Setup Wizard...

Страница 48: ...k into the disk drive of a PC and open to browse the content of the disk with My Computer or Windows File Manager Double click and run the file netsetup for the program to handle the rest Click Finish...

Страница 49: ...Access Point for you can configure and access the AP When the command prompt window appears type command ipconfig all and press Enter This command will display the IP addresses of all the network adap...

Страница 50: ...network adapter might would not be the same NOTE To renew IP under Windows 98 and Windows ME you will have to go to theStart menu Run type winipcfg and click OK The Windows IP Configuration Menu windo...

Страница 51: ...addresses will expire and may be changed over time Static IP addresses are the IP addresses that users manually enter for each of the network adapters NOTE There might be two or more Local Area Connec...

Страница 52: ...ect Obtain an IP address automatically if you are on a DHCP enabled network Click OK to close the window with the changes made The Local Area Connection Properties would appear Select Internet Protoco...

Страница 53: ...ter the IP address and subnet mask fields Enter the IP address of the Router in the Default gateway field Enter the IP address of the Router in the DNS server field Click Ok to close the window Go to...

Страница 54: ...CP enabled network Click OK to close the window with the changes made Select Use the following IP address Enter the IP address and subnet mask fields Enter the IP address of the Router in the Default...

Страница 55: ...ge Link Information Go to Start menu Settings Control Panel Double click on Network Select TCP IP of the network device Click Properties to continue The TCP IP Properties window appears Select Obtain...

Страница 56: ...an IP address Enter the IP address and subnet mask fields In the DNS Configuration Tab Page 1 enter the IP address of the Router in the Default gateway field 2 Enter the IP address of the Router in th...

Страница 57: ...ill introduce the 802 1x Authentication infrastructure as a whole and going into details of the setup for each essential component in 802 1x authentication 802 1x Authentication Infrastructure The Inf...

Страница 58: ...e Access Point forwards the NAI to the RADIUS server with a RADIUS Access Request message 5 The RADIUS server responds to the client with its digital certificate 6 The client validates the digital cer...

Страница 59: ...59 4 Click Properties to open up the Properties setting window 5 Click on the Wireless Network tab 54Mbps High Speed Network Adapter...

Страница 60: ...o change to a different 802 1x authentication EAP method i e switch from using MD5 to TLS you must remove the current existing wireless network from your Preferred networks first and add it in again T...

Страница 61: ...The key is provided for me automatically option 8 Click OK to close the Wireless Network Properties window 9 Click Authentication tab 10 Select Enable network access control using IEEE 802 1x option...

Страница 62: ...ies window thus make the changes effective The wireless client configuration in the zero configuration utility provided in Windows XP is now completed for TLS configuration Before you can enable IEEE...

Страница 63: ...rom Windows 2000 Server which can act as a CA server assuming you have a valid account password to access the server 13 Connect to the server and ask for access and the server will prompt you to enter...

Страница 64: ...64 16 Now we are connected to the Certificate Service Select Request a certificate and click Next to continue...

Страница 65: ...65 17 Select User Certificate request and click Next to continue...

Страница 66: ...66 18 Click Submit to continue...

Страница 67: ...67 19 The Certificate Service is now processing the certificate request...

Страница 68: ...68 20 The certificate is issued by the server click Install this certificate to download and store the certificate to your local computer 21 Click Yes to store the certificate to your local computer...

Страница 69: ...69 22 Certificate is now installed All the configuration and certificate download are now complete Let s try to connect to the Access Point using 802 1x TLS Authentication...

Страница 70: ...70 23 Windows XP will prompt you to select a certificate for wireless network connection Click on the network connection icon in the system tray to continue...

Страница 71: ...the certificate that was issued by the server WirelessCA and click OK to continue 25 Check the server to make sure that it s the server that issues certificate and click OK to complete the authentica...

Страница 72: ...ASCII 26 characters for HEX 29 After deciding the key format and key length that you wish to use for network key Enter the network key in Network key text box Please note that that value of Network ke...

Страница 73: ...ble network access control using IEEE 802 1X to enable 802 1x authentication 33 Select MD 5 Challenge from the drop down list box for EAP type 34 Click OK to close Wireless Network Connection Properti...

Страница 74: ...MD 5 Authentication is based on the user account password Therefore you must have a valid account used by the server for validation 35 WindowsXP will prompt you to enter your user name and password Cl...

Страница 75: ...75 36 Enter the user name password and the logon domain that your account belongs if you have one or more network domain exist in your network 37 Click OK to complete the validation process...

Страница 76: ...ey is over the Encryption Key will be renewed by the Radius server 4 Enter the IP address of and the Port used by the Primary Radius Server Enter the Shared Secret which is used by the Radius Server 5...

Страница 77: ...tion which includes setting up Certificate Service for TLS Authentication and enable EAP methods 1 Login into your Windows 2000 Server as Administrator or account that has Administrator authority 2 Go...

Страница 78: ...78 5 Select Enterprise root CA and click Next to continue 6 Enter the information that you want for your Certificate Service and click Next to continue...

Страница 79: ...dministrative Tools Certificate Authority 8 Right click on the Policy Setting select new 9 Select Certificate to Issue 10 Select Authenticated Session and Smartcard Logon by holding down to the Ctrl k...

Страница 80: ...0 11 Go to Start Program Administrative Tools Active Directory Users and Computers 12 Right click on domain and select Properties to continue 13 Select Group Policy tab and click Properties to continu...

Страница 81: ...81 14 Go to Computer Configuration Security Settings Public Key Policies 15 Right click Automatic Certificate Request Setting and select New 16 Click Automatic Certificate Request...

Страница 82: ...Click Finish to comple te the Automatic Certificate Request Setup 19 Go to Start Run and type command and click Enter to open Command Prompt 20 Type secedit refreshpolicy machine_policy to refresh po...

Страница 83: ...83 23 Select Internet Authentication Service and click OK to install...

Страница 84: ...84 Setting Internet Authentication Service 24 Go to Start Program Administrative Tools Internet Authentication Service 25 Right click Client and select New Client...

Страница 85: ...xt field a memorable name for the Access Point in theClient Vendor text field the access password used by the Access Point in the Shared secret text field Re type the password in the Confirmed shared...

Страница 86: ...86 28 In the Internet Authentication Service right click Remote Access Policies 29 Select New Remote Access Policy 30 Select Day And Time Restriction and click Add to continue...

Страница 87: ...less you want to specify the active duration for 802 1x authentication click OK to accept to have 802 1x authentication enabled at all times 32 Select Grant remote access permission and click Next to...

Страница 88: ...88 33 Click Edit Profile to open up...

Страница 89: ...89 For TLS Authentication S etup Steps 34 38 34 Select Authentication Tab 35 Enable Extensible Authentication Protocol and select Smart Card or other Certificate for TLS authentication...

Страница 90: ...sers and double click on the user that can be newly created or currently existing who will be configured to have the right to obtain digital certificate remotely Please note that in this case we have...

Страница 91: ...91 38 Go to the Dial in tab and check Allow access option for Remote Access Permission and No Callback for Callback Options...

Страница 92: ...92 For MD5 Authentication Steps 39 54 39 Go to Start Program Administrative Tools Active Directory Users and Computers 40 Right click on the domain and select Properties...

Страница 93: ...93 41 Select Group Policy tab and click Edit to edit the Group Policy...

Страница 94: ...94 42 Go to Computer Configuration Windows Settings Security Settings Account Policies Password Policies 43 Click Define this policy setting select Enabled and click OK to continue...

Страница 95: ...95 44 Go to Start Progra m Administrative Tools Active Directory Users and Computers 45 Go to Users Right click on the user that you are granting access and select Properties...

Страница 96: ...96 46 Go to Account tab and enable Store password using reversible encryption 47 Click OK to continue...

Страница 97: ...97 48 Go to Start Program Administrative Tools Internet Authentication Service 49 Go to Remote Access Policies 50 Make sure that MD5 is moved up to Order 1 51 Right click MD5 and select Properties...

Страница 98: ...98 52 Go to Authentication tab 53 Enable Extensible Authentication Protocol 54 Select MD5 Challenge for EAP type...

Страница 99: ...cipient station is set to Open System authentication Shared Key Shared Key authentication supports authentication of stations as either a member of those who knows a shared secret key or a member of t...

Страница 100: ...als collide When the collision is detected they both back off and wait a random amount of time before retrying DHCP Dynamic Host Conf iguration Protocol which is a protocol that lets network eblinistr...

Страница 101: ...hold is to increase the transfer reliability thru cutting a MAC Service Data Unit MSDU into several MAC Protocol Data Units MPDU in smaller size The RF transmission can not allow to transmit too big f...

Страница 102: ...eaders are definedas the mandatory supported long preamble and header which interoperates with the current 1 and 2 Mbit s DSSS spe cification as described in IEEE Std 802 11 1999 and an optional short...

Страница 103: ...in a private network i e intranet or internet When you are set up with direct access to the Internet your computer is provided with a copy of the TCP IP program just as every other computer that you m...

Страница 104: ...dulation BPSK QPSK CCK and OFDM BPSK QPSK 16 QAM 64 QAM RF Frequency 2412 MHz 2462 MHz North America 2412 MHz 2472 MHz GeneralEurope 2412 MHz 2484 MHz Japan Operating Channel 1 11 Channels North Ameri...

Страница 105: ...Fi Protected Access TBD Antenna Type 1 X 2 4GHz Dipole Antenna 1 X 2 4GHz Embedded Antenna Memory SDRAM 8 MB up to 16 MB FLASH 1 MB up to 4MB Dimension 190 X 149 X 36 mm Power Consumption Operation m...

Отзывы: