Instructions for Use
Once the pressure cooker is assembled properly, you are ready to begin pressure cooking.
1.
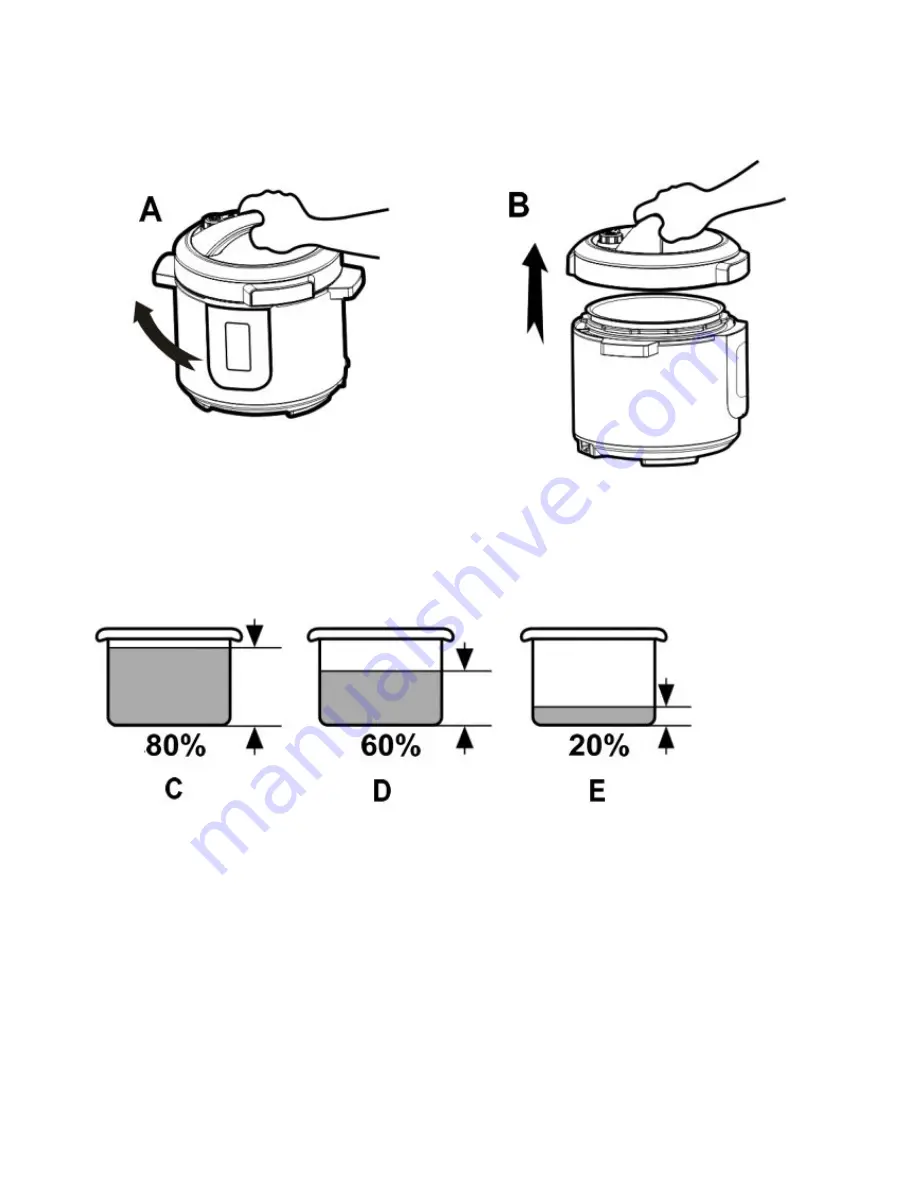
To remove the lid, grasp handle and turn clockwise, then lift. (See figure A,B)
2.
Remove cooking pot from pressure cooker and add food and liquids as
the recipe directs.
Note
: The total volume of food and liquid must not exceed 80% of the capacity of
the cooking pot (figure C). For foods such as dried vegetables and beans, or rice and grains, the
total volume must not exceed 60% capacity (figure D). Always use at least 1/2 cup liquid when
pressure cooking. The total volume of food and liquid must not be less than 20% of the capacity of
the cooking pot (figure E).
3.
To lock the lid in place, remove any food residue from upper rim of the cooking pot to ensure a
proper seal. Make sure the sealing ring is securely in place on the sealing ring supporting cover
(figure F).
4.
Brush the water and anything else away before placing the cooking pot back to the external pot.
Make sure inner pot is settled firmly on the heating plate (figure G).
5.
Close the cover. Make sure the inner lid covers the inner pot. Then rotate the handle of cover
counterclockwise until you hear a “crack” sound (figure H-1,H-2).
6.
Position the float valve and turn it to the sealed position, then check if the float valve has fallen
down (figure
I-1,I-2
).
Note:
The float valve does not click or lock into place. Even though it will have a loose fit, it is safely
secured. The float in handle must be fully down to properly seal the pot before cooking.
7.
Plug the power cord into the pressure cooker and then into the wall outlet. The LED display will
show ”
—
—
—
—
“.


