• Youku: http://list.youku.com/albumlist/show/id_50481024
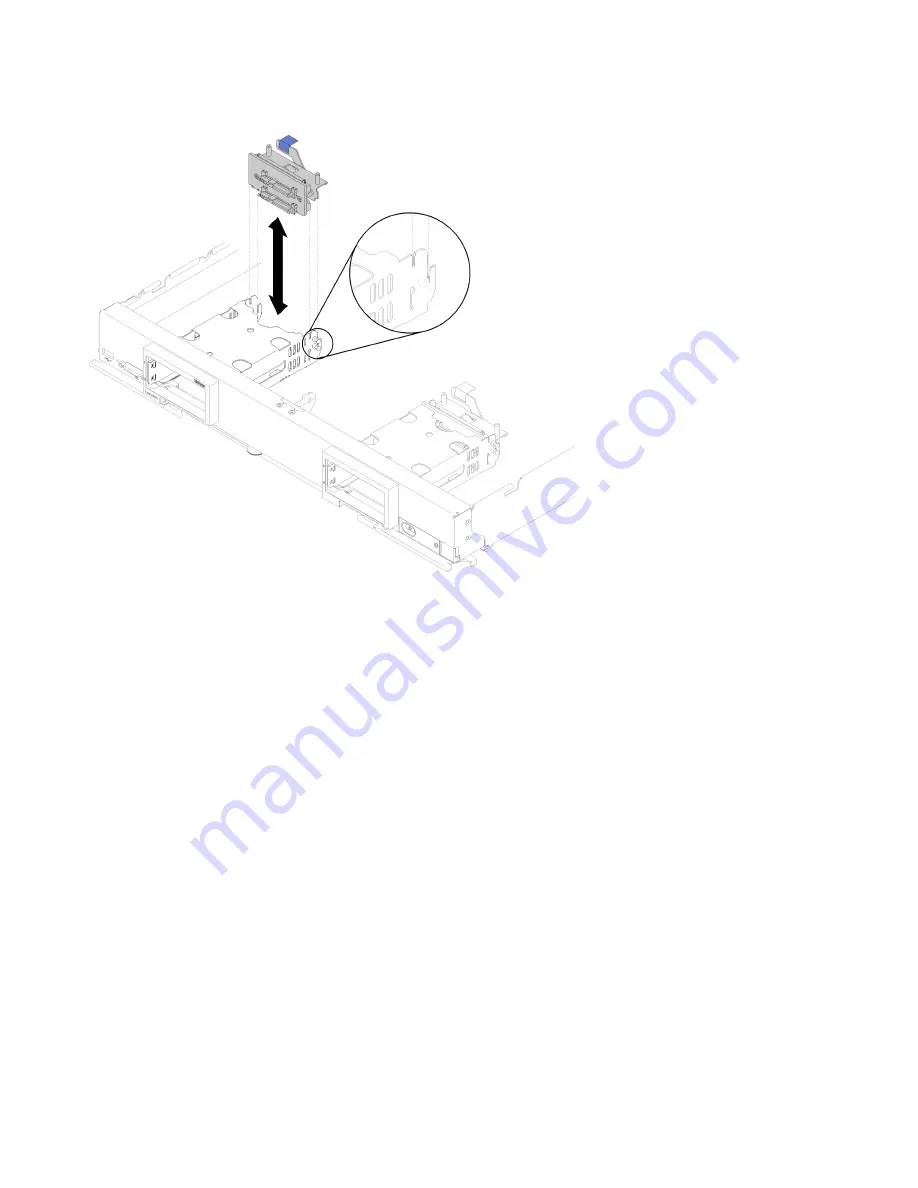
Figure 12. 2.5-inch drive backplane installation
Step 1. Align the backplane with the storage cage and the connector on the system board and press the
backplane into position until it is fully seated in the connector.
Note:
All drive backplanes use the same connector on the system board; however, there are two
alignment slots in the storage cage to accommodate different backplane types. Make sure that you
align the backplane and system board connectors when inserting the backplane in the storage
cage.
Step 2. Insert the hot-swap drives and drive bay fillers.
After you install the drive backplane, complete the following steps:
• Install any removed storage drives and drive bay fillers (see “Install a 2.5-inch hot-swap drive” on page
Note:
Install storage drives in the same bay locations as from which they were removed.
Install a 2.5-inch hot-swap drive
Use this information to install a 2.5-inch hot-swap hard disk or solid-state drive option.
Before you install a 2.5-inch hot-swap drive, complete the following steps:
1. Read “Installation Guidelines” on page 26 to ensure that you work safely.
2. Carefully lay the compute node on a flat, static-protective surface, orienting the compute node with the
bezel pointing toward you.
32
ThinkSystem SN850 Compute Node Setup Guide
Содержание thinksystem SN850 7X15
Страница 1: ...ThinkSystem SN850 Compute Node Setup Guide Machine Type 7X15 ...
Страница 4: ...ii ThinkSystem SN850 Compute Node Setup Guide ...
Страница 8: ...vi ThinkSystem SN850 Compute Node Setup Guide ...
Страница 22: ...14 ThinkSystem SN850 Compute Node Setup Guide ...
Страница 76: ...68 ThinkSystem SN850 Compute Node Setup Guide ...
Страница 84: ...76 ThinkSystem SN850 Compute Node Setup Guide ...
Страница 87: ......
Страница 88: ...Part Number SP47A10189 Printed in China 1P P N SP47A10189 1PSP47A10189 ...


