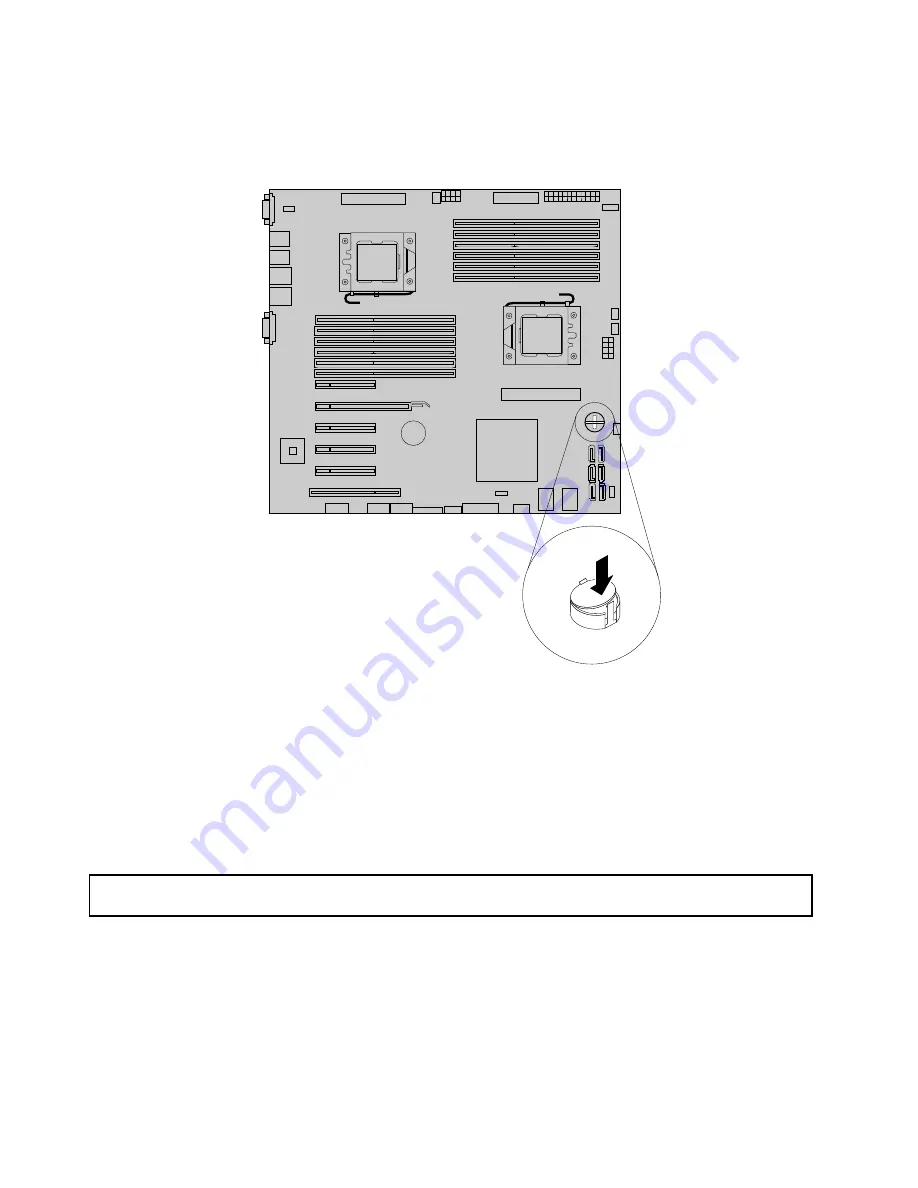
6. Insert one side of the TR 100 or TR 300 Key under one of the retaining clips on the iButton socket. Then,
carefully press the other side of the TR 100 or TR 300 Key straight down until the key snaps into position
and is secured by the two retaining clips on the iButton socket.
Figure 56. Installing the TR 100 or TR 300 Key
What to do next:
• To work with another piece of hardware, go to the appropriate section.
• To complete the installation, go to “Completing the parts replacement” on page 200. Then, the onboard
SATA or SAS software RAID 5 is available for your server if your server has the required number of hard
disk drives installed. To configure RAID, see “Configuring RAID” on page 72.
Removing the TR 100 or TR 300 Key
Attention:
Do not open your server or attempt any repair before reading and understanding “Safety information”
on page iii and “Guidelines” on page 83.
This topic provides instructions on how to remove the TR 100 or TR 300 Key if your server has one installed.
114
ThinkServer TD340 User Guide and Hardware Maintenance Manual
Содержание ThinkServer TD340
Страница 1: ...ThinkServer TD340 User Guide and Hardware Maintenance Manual Machine Types 70B4 70B5 70B6 and 70B7 ...
Страница 16: ...4 ThinkServer TD340 User Guide and Hardware Maintenance Manual ...
Страница 18: ...6 ThinkServer TD340 User Guide and Hardware Maintenance Manual ...
Страница 94: ...82 ThinkServer TD340 User Guide and Hardware Maintenance Manual ...
Страница 224: ...212 ThinkServer TD340 User Guide and Hardware Maintenance Manual ...
Страница 238: ...226 ThinkServer TD340 User Guide and Hardware Maintenance Manual ...
Страница 239: ......
Страница 240: ......


