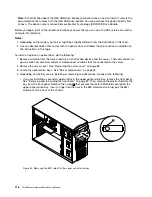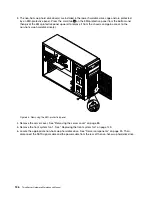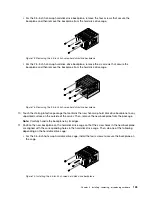
3. The non-hot-swap hard disk drive(s) are installed in the lower hard disk drive cage and are protected
by an EMI-protective panel. Press the small tab
1
on the EMI-protective panel from the bottom and
then pivot the EMI-protective panel upward to remove it from the chassis and gain access to the
non-hot-swap hard disk drive bays.
CPU
MEM
PSU
CPU
MEM
PSU
1
2
Figure 67. Removing the EMI-protective panel
4. Remove the server cover. See “Removing the server cover” on page 85.
5. Remove the front system fan 1. See “Replacing the front system fan” on page 149.
6. Locate the appropriate non-hot-swap hard disk drive bay. See “Server components” on page 25.
7. Touch the static-protective package that contains the new non-hot-swap hard disk drive to any
unpainted surface on the outside of the server. Then, take the new non-hot-swap hard disk drive and
the signal cable out of the package.
Note:
Do not touch the circuit board on the hard disk drive.
130
ThinkServer Hardware Maintenance Manual
Содержание THINKSERVER 387
Страница 1: ...ThinkServer Hardware Maintenance Manual Machine Types 0387 0388 0389 0390 0391 0392 0393 and 0441 ...
Страница 16: ...4 ThinkServer Hardware Maintenance Manual ...
Страница 18: ...6 ThinkServer Hardware Maintenance Manual ...
Страница 94: ...82 ThinkServer Hardware Maintenance Manual ...
Страница 190: ...178 ThinkServer Hardware Maintenance Manual ...
Страница 228: ...216 ThinkServer Hardware Maintenance Manual ...
Страница 246: ...234 ThinkServer Hardware Maintenance Manual ...
Страница 247: ......
Страница 248: ......

