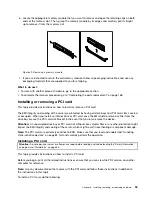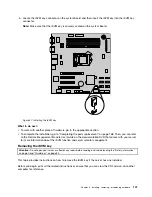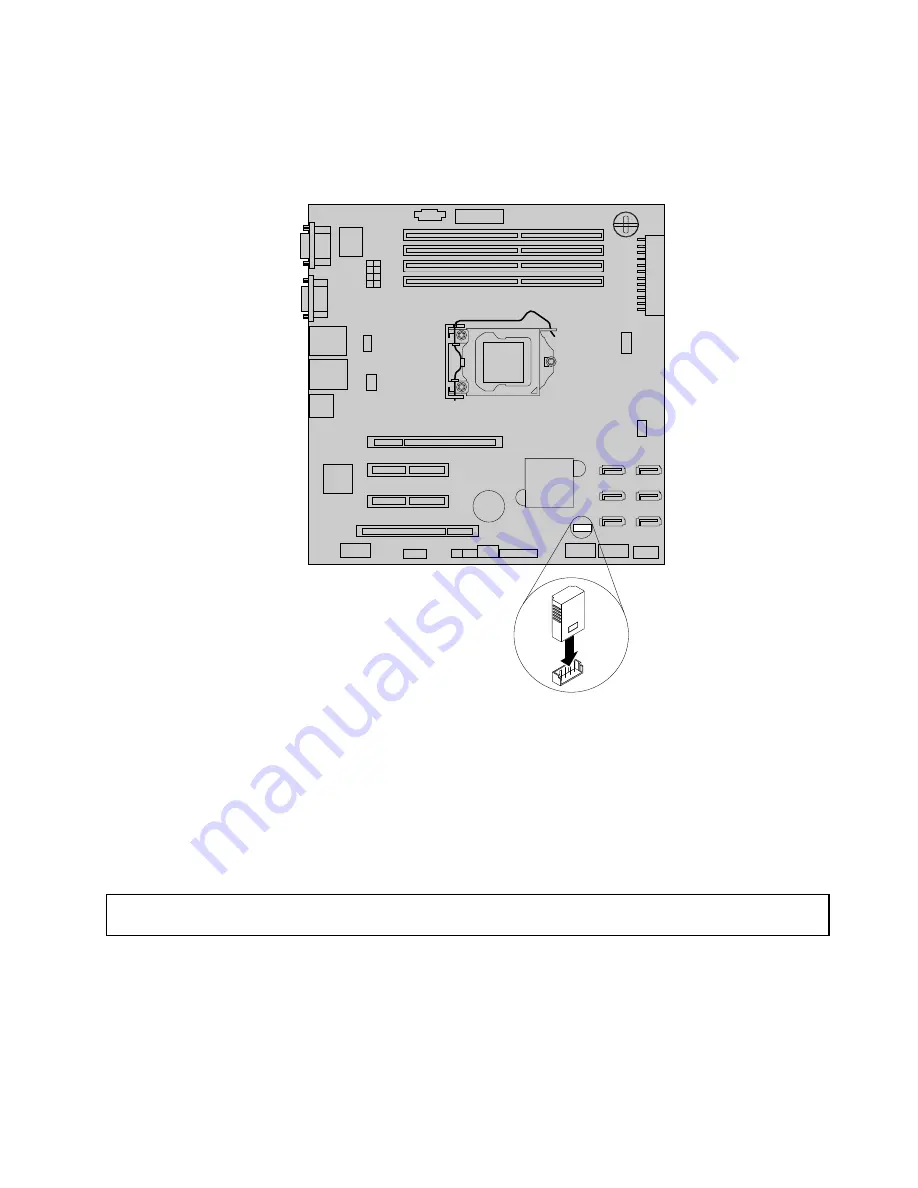
5. Locate the iKVM key connector on the system board and then insert the iKVM key into the iKVM key
connector.
Note:
Make sure that the iKVM key is securely seated on the system board.
Figure 47. Installing the iKVM key
What to do next:
• To work with another piece of hardware, go to the appropriate section.
• To complete the installation, go to “Completing the parts replacement” on page 168. Then, you can refer
to the
Remote Management Module User Guide
on the documentation DVD that comes with your server
for more information about the iKVM function and server remote management.
Removing the iKVM key
Attention:
Do not open your server or attempt any repair before reading and understanding the “Safety information”
on page iii and “Guidelines” on page 83.
This topic provides instructions on how to remove the iKVM key if the server has one installed.
Before you begin, print all the related instructions or ensure that you can view the PDF version on another
computer for reference.
Chapter 6
.
Installing, removing, or replacing hardware
107
Содержание THINKSERVER 387
Страница 1: ...ThinkServer Hardware Maintenance Manual Machine Types 0387 0388 0389 0390 0391 0392 0393 and 0441 ...
Страница 16: ...4 ThinkServer Hardware Maintenance Manual ...
Страница 18: ...6 ThinkServer Hardware Maintenance Manual ...
Страница 94: ...82 ThinkServer Hardware Maintenance Manual ...
Страница 190: ...178 ThinkServer Hardware Maintenance Manual ...
Страница 228: ...216 ThinkServer Hardware Maintenance Manual ...
Страница 246: ...234 ThinkServer Hardware Maintenance Manual ...
Страница 247: ......
Страница 248: ......

