

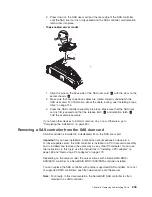

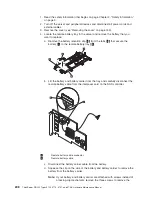
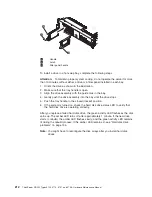


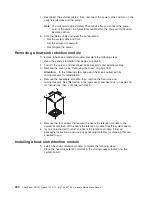


7. Remove the tape drive
1
from the drive tray
2
by removing the four screws
on the sides of the tray.
8. If you are not installing another drive in the bay, insert the tape drive filler panel
into the empty tape drive bay.
9. If you are instructed to return the drive, follow all packaging instructions, and
use any packaging materials for shipping that are supplied to you.
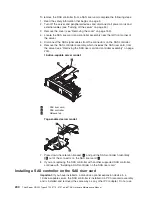
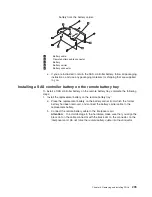
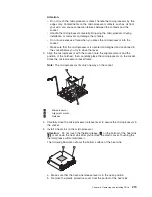
Installing a tape drive
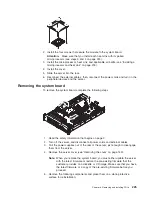
1
SAS riser card
To install a tape drive, complete the following steps:
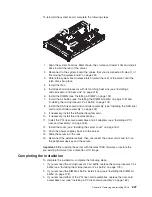
1. If the tape drive came with metal spacers on the installed on the sides, remove
the spacers.
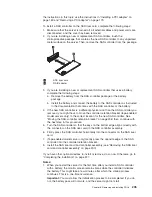
2. Install the drive tray on the new tape drive as shown, using the four screws
that you removed from the former drive.
Chapter 6. Removing and installing FRUs
215
Содержание THINKSERVER 3729
Страница 1: ...Hardware Maintenance Manual ThinkServer RD220 Types 3797 3798 3779 and 3729 ...
Страница 2: ......
Страница 3: ...ThinkServer RD220 Types 3729 3779 3797 and 3798 Hardware Maintenance Manual ...
Страница 8: ...vi ThinkServer RD220 Types 3729 3779 3797 and 3798 Hardware Maintenance Manual ...
Страница 156: ...148 ThinkServer RD220 Types 3729 3779 3797 and 3798 Hardware Maintenance Manual ...
Страница 238: ...230 ThinkServer RD220 Types 3729 3779 3797 and 3798 Hardware Maintenance Manual ...
Страница 262: ...Japanese recycling statements 254 ThinkServer RD220 Types 3729 3779 3797 and 3798 Hardware Maintenance Manual ...
Страница 264: ...256 ThinkServer RD220 Types 3729 3779 3797 and 3798 Hardware Maintenance Manual ...
Страница 265: ......
Страница 266: ...Part Number 40M2493 Printed in USA 1P P N 40M2493 ...


