background image

34

T14s Gen 3 and X13 Gen 3 User Guide

Содержание ThinkPad X13 Gen 3

Страница 1: ...T14s Gen 3 and X13 Gen 3 User Guide ...

Страница 2: ... Warranty Guide Setup Guide Generic Safety and Compliance Notices First Edition April 2022 Copyright Lenovo 2022 LIMITED AND RESTRICTED RIGHTS NOTICE If data or software is delivered pursuant to a General Services Administration GSA contract use reproduction or disclosure is subject to restrictions set forth in Contract No GS 35F 05925 ...

Страница 3: ...ected models 27 Log in with your face ID for selected models 28 Detect human presence for selected models 28 Protect your privacy for selected models 29 Protect data against power loss for selected models 29 UEFI BIOS passwords 29 Password types 29 Set change and remove a password 31 Associate your fingerprints with passwords for selected models 32 Certificate based BIOS management 32 Chapter 5 Co...

Страница 4: ...Appendix B Notices and trademarks 61 ii T14s Gen 3 and X13 Gen 3 User Guide ...
Страница 5: ...formation Illustrations in this documentation might look different from your product Depending on the model some optional accessories features software programs and user interface instructions might not be applicable to your computer Documentation content is subject to change without notice To get the latest documentation go to https pcsupport lenovo com Copyright Lenovo 2022 iii ...

Страница 6: ...iv T14s Gen 3 and X13 Gen 3 User Guide ...

Страница 7: ...ely Intel and Advanced Micro Devices AMD Hereby Intel models and AMD models are used to distinguish computer models with different microprocessors Front view Microphone Infrared camera Camera Webcam privacy shutter Touch screen Power button with or without fingerprint reader TrackPoint pointing stick Copyright Lenovo 2022 1 ...

Страница 8: ...r privacy Related topics Detect human presence for selected models on page 28 Log in with your face ID for selected models on page 28 Log in with your fingerprint for selected models on page 27 Set up an NFC connection for selected models on page 25 Use the touch screen for selected models on page 14 Use the trackpad on page 13 Use the TrackPoint pointing device on page 12 2 T14s Gen 3 and X13 Gen...

Страница 9: ...tor Gen 1 Audio connector Smart card slot USB 3 2 connector Gen 1 Security lock slot for selected models Related topics Charge the computer on page 23 Connect to an external display on page 16 Lock the computer on page 27 USB specifications on page 7 Use a smart card for selected models on page 25 Chapter 1 Meet your computer 3 ...

Страница 10: ...io connector Smart card slot USB 3 2 connector Gen 1 Security lock slot for selected models Related topics Charge the computer on page 23 Connect to an external display on page 16 Lock the computer on page 27 USB specifications on page 7 Use a smart card for selected models on page 25 4 T14s Gen 3 and X13 Gen 3 User Guide ...

Страница 11: ...uter CAUTION When the computer is operating it should be placed on a hard and flat surface with its bottom area not in contact with user s bare skin Under normal operating conditions the temperature of the bottom surface will remain within an acceptable range as defined in IEC 62368 1 but such temperatures can still be high enough to cause discomfort or harm to the user if directly touched for ove...

Страница 12: ...Rear view Nano SIM card tray for selected models Related topic Connect to a cellular network for selected models on page 9 6 T14s Gen 3 and X13 Gen 3 User Guide ...
Страница 13: ...brid Graphics mode and Discrete Graphics mode 1 Restart the computer When the logo screen is displayed press F1 to enter the UEFI BIOS menu 2 Select Config Display Graphic Devices and follow the on screen instructions Security features Face authentication Human presence detection Fingerprint reader integrated in power button Glance Privacy Guard Glance Privacy Alert ePrivacy panel Trusted Platform...

Страница 14: ...o 5120 x 3200 pixels 60 Hz Connect to USB C accessories to help expand your computer functionality To purchase USB C accessories go to https www lenovo com accessories Statement on USB transfer rate Depending on many factors such as the processing capability of the host and peripheral devices file attributes and other factors related to system configuration and operating environments the actual tr...

Страница 15: ... Lenovo USB C to Ethernet Adapter Lenovo USB C to Ethernet Adapter is available as an option and shipped with some computer models You can purchase one from Lenovo at https www lenovo com accessories Connect to a cellular network for selected models To connect a 4G or 5G cellular data network you must have a wireless wide area network WWAN card and a nano SIM card installed The nano SIM card might...

Страница 16: ...off the computer 2 Locate the nano SIM card slot and insert the nano SIM card as shown Note the orientation of the card and ensure that it is seated correctly 3 Turn on the computer 4 Click the network icon and then select the cellular network icon from the list Provide required information if needed Turn on the Airplane mode When the Airplane mode is enabled all wireless features are disabled 1 T...

Страница 17: ...ble microphones Darken display Brighten display Manage external displays Enable disable airplane mode Open collapse notification center Answer incoming calls on Microsoft Teams Decline incoming calls on Microsoft Teams Customize the function of this key on the Vantage app Open Snipping Tool Toggle keyboard backlight for selected models Break operation Pause operation Scroll contents Send system re...

Страница 18: ...cordingly The higher the pressure applied the faster the pointer moves TrackPoint buttons The left click button and right click button correspond to the left and right buttons on a traditional mouse Press and hold the dotted middle button while using your finger to applying pressure to the pointing stick in the vertical or horizontal direction Then you can scroll through the document Web site or a...

Страница 19: ... that the new cap has grooves a Use the trackpad You can use the trackpad to perform all the pointing clicking and scrolling functions of a traditional mouse Use the trackpad Left click zone Right click zone Chapter 2 Get started with your computer 13 ...

Страница 20: ...uter first Then gently wipe the trackpad surface with a soft and lint free cloth moistened with lukewarm water or computer cleaner For more gestures see the help information of the pointing device Disable the trackpad The trackpad is active by default To disable the device 1 Open the Start menu and then click Settings Devices Touchpad 2 In the Touchpad section turn off the Touchpad control Use the...

Страница 21: ...Swipe from the left view all open windows Windows 10 Swipe from the left open widget panel Windows 11 Swipe from the right open action center Windows 10 Swipe from the right open notification center Windows 11 Swipe downwards shortly show title bar Swipe downwards close the current app Drag Chapter 2 Get started with your computer 15 ...

Страница 22: ...and your workspace Connect to a wired display If your computer cannot detect the external display right click a blank area on the desktop and select display settings Then follow the on screen instructions to detect the external display Supported resolution The following tables list the supported maximum resolution of the external display Table 1 Intel models Connect the external display to Support...

Страница 23: ...isplay To use a wireless display ensure that both your computer and the external display support the Miracast feature Press Windows logo key K and then select a wireless display to connect with Set the display mode Press or and then select a display mode of your preference Change display settings 1 Right click a blank area on the desktop and select display settings 2 Select the display that you wa...

Страница 24: ...18 T14s Gen 3 and X13 Gen 3 User Guide ...
Страница 25: ...ok up warranty status online Access User Guide and helpful articles Notes The available features vary depending on the computer model The Vantage app makes periodic updates of the features to keep improving your experience with your computer The description of features might be different from that on your actual user interface Lenovo Quick Clean Clean Your Device Depending on the model your comput...

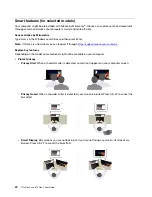
Страница 26: ...ugh https support lenovo com contactus Explore key features Depending on the model some features might not be available on your computer Protect privacy Privacy Alert When a shoulder surfer is detected an alert icon appears on your computer screen Privacy Guard When a shoulder surfer is detected your screen is blurred Press Alt F2 to cancel the blur effect Smart Display Blur screens you are not lo...

Страница 27: ...rt Pointer Relocate the pointer to the screen you are facing When the pointer moves from one screen to another it is temporarily drawn large Note Snap Window and Smart Pointer only work when your computer is connected to external displays Ensure that external displays are placed at the same height of your computer Promote digital wellness Posture check Remind you to adjust your posture once you hu...

Страница 28: ...a 2 Move the slider to the left or right to select a preferred mode Eco mode power consumption fan speed and performance are lowered to get your computer cooler quieter and more eco friendly and to get the best battery life Balanced mode power consumption fan speed and performance are dynamically balanced for better experience Performance mode The performance is prioritized allowing higher tempera...

Страница 29: ...formation in this section to achieve the best balance between performance and power efficiency Check the battery status Go to Settings System to check the battery status For more details about your battery refer to the Vantage app Charge the computer Use ac power Power source of the ac power adapter Power 45 W or 65 W depending on the model Sine wave input at 50 Hz to 60 Hz Input rating of the ac ...

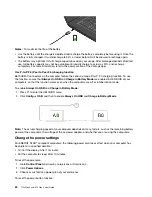
Страница 30: ... in UEFI BIOS of your computers so that the function works even when the computers are off or in hibernation mode To enable Always On USB and Charge in Battery Mode 1 Press F1 to enter the UEFI BIOS menu 2 Click Config USB and then to enable Always On USB and Charge in Battery Mode Note The actual charging speed of your computer depends on many factors such as the remaining battery power of the co...

Страница 31: ...box and then press Enter 2 Turn on Bluetooth if it is off 3 Select a Bluetooth device and then follow the on screen instructions Set up an NFC connection for selected models If your computer supports NFC you will see an NFC mark or label around the trackpad area To turn on NFC 1 Type Airplane mode in the Windows search box and then press Enter 2 Ensure that the Airplane mode is off and turn on the...

Страница 32: ...ect media 2 Select the corresponding item to eject the card from the Windows operating system 3 Press the card and remove it from your computer Store the card safely for future use Accessories This section provides instructions on how to use hardware accessories to expand your computer functionalities Purchase accessories Lenovo has a number of hardware accessories and upgrades to help expand the ...

Страница 33: ... single touch It eliminates the need to enter complex passwords saving your time and boosting your productivity 1 Type Sign in options in the Windows search box and then press Enter 2 Select the fingerprint setting and then follow the on screen instruction to enroll your fingerprint Note It is recommended that you put your finger at the middle of the fingerprint reader during enrollment and enroll...

Страница 34: ...u are approaching it With a face ID created your computer can recognize your face and log in to the system automatically You need to face the camera and be at most 1 4 meters 4 6 feet from the computer The function does not work when your computer is in hibernation mode or has been turned off Dim the display and lock the computer when you are leaving The function does not work if you set the power...

Страница 35: ...ast ratio and the physical environment where you are using this function Press to increase the privacy level Press to decrease the privacy level Protect data against power loss for selected models NVMe M 2 solid state drive features the Lenovo unique PLP Power Loss Protection function to avoid data loss or damage If your computer is not responding and you might have to shut down your computer by p...

Страница 36: ... Password System Management Password Access Control 3 Follow the on screen instructions If you have set both the supervisor password and the system management password the supervisor password overrides the system management password If you have set both the system management password and the power on password the system management password overrides the power on password NVMe passwords The NVMe pa...

Страница 37: ... on password removed What to do if you forget your NVMe password If you forget your NVMe password Single password or both user and admin NVMe passwords Dual password Lenovo cannot reset your passwords or recover data from the storage drive You can contact a Lenovo authorized service provider to have the storage drive replaced A fee will be charged for parts and service If the storage drive is a CR...

Страница 38: ...ervisor password system management password for authentication if you have set one Note Supervisor password system management password are disabled automatically when certificate mode is enabled But the power on password NVMe password still can be used normally in certificate mode if you have set one For certificate enrollment see Certificate Enrollment Guide at https support lenovo com docs certi...

Страница 39: ...4 Follow the on screen instructions to enter the reset code provided by IT admin Chapter 4 Secure your computer and information 33 ...

Страница 40: ...34 T14s Gen 3 and X13 Gen 3 User Guide ...
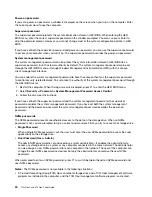
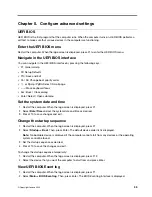
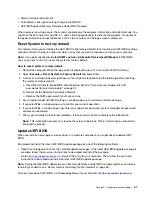
Страница 41: ...logo screen is displayed press F1 2 Select Date Time and set the system date and time as desired 3 Press F10 to save changes and exit Change the startup sequence 1 Restart the computer When the logo screen is displayed press F1 2 Select Startup Boot Then press Enter The default device order list is displayed Note No bootable device is displayed if the computer cannot start from any devices or the ...

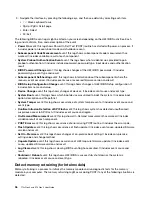
Страница 42: ...t event this log shows which boot device was utilized to boot the system It includes boot option description and file path list System Tamper event this log shows occurrence of system tamper events It includes event cause and event type Runtime Intrusion Detection of SPI Flash event this log shows system has detected unauthorized suspicious access to SPI Flash It includes event cause and region On...

Страница 43: ...elected models on page 32 b Deactivate the Absolute Persistence Module c Remove the NVMe password if your have set one 4 For computer model with RAID settings a window pops up to remind you of data damage 5 If you select Yes a window pops up to confirm your current operation 6 If you select Yes a windows pops up Enter your supervisor password system management password or power on password 7 Then ...

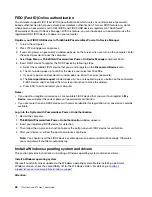
Страница 44: ...d to press a button on the connected FIDO2 device and then follow the on screen instruction to close the window e Press ESC to exit and restart your computer Notes If you want to unregister your devices click available FIDO2 device that you want to unregister in My Device area and enter the correct power on password for verification If you use more than one FIDO2 devices with common identifier for...

Страница 45: ...ation program for example USB HDD Then press Esc Attention After you change the startup sequence ensure that you select the correct device during a copy a save or a format operation If you select the wrong device the data on that device might be erased or overwritten 7 Select Restart and ensure that OS Optimized Defaults is enabled Then press F10 or Fn F10 to save the settings and exit 8 Follow th...

Страница 46: ...40 T14s Gen 3 and X13 Gen 3 User Guide ...
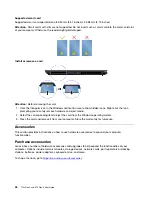
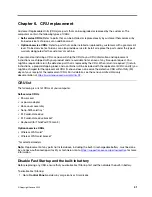
Страница 47: ...label and a container will be included with the replacement CRU and 2 you might be charged for the replacement CRU if Lenovo does not receive the defective CRU within thirty 30 days of your receipt of the replacement CRU For full details see the Lenovo Limited Warranty documentation at https www lenovo com warranty llw_02 CRU list The following is a list of CRUs of your computer Self service CRUs ...

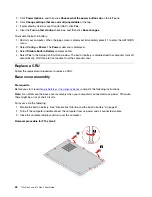
Страница 48: ...ttery is disabled and the computer turns off automatically Wait three to five minutes to let the computer cool Replace a CRU Follow the replacement procedure to replace a CRU Base cover assembly Prerequisite Before you start read Generic Safety and Compliance Notices and print the following instructions Note Do not remove the base cover assembly when your computer is connected to ac power Otherwis...

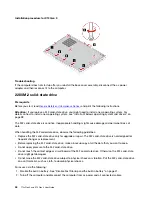
Страница 49: ...Installation procedure for T14s Gen 3 Removal procedure for X13 Gen 3 Chapter 6 CRU replacement 43 ...

Страница 50: ...lid state drive observe the following guidelines Replace the M 2 solid state drive only for upgrade or repair The M 2 solid state drive is not designed for frequent changes or replacement Before replacing the M 2 solid state drive make a backup copy of all the data that you want to keep Do not apply pressure to the M 2 solid state drive Do not touch the contact edge or circuit board of the M 2 sol...

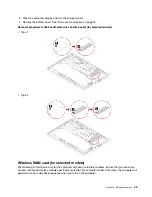
Страница 51: ...r selected models Type 1 Type 2 Wireless WAN card for selected models The following information is only for the computer with user installable modules Ensure that you use only a Lenovo authorized wireless module specifically tested for this computer model Otherwise the computer will generate an error code beep sequence when you turn on the computer Chapter 6 CRU replacement 45 ...

Страница 52: ...and the built in battery on page 41 2 Turn off the computer and disconnect the computer from ac power and all connected cables 3 Close the computer display and turn the computer over 4 Remove the base cover assembly See Base cover assembly on page 42 Removal procedure Note A Mylar film might cover the wireless WAN card To access the wireless WAN card peel off the film first Depending on your compu...

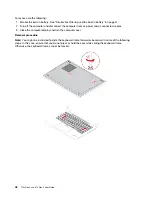
Страница 53: ...range cable to the connector labeled ORANGE the blue cable to the connector labeled BLUE the white and grey cable to the connector labeled WHITE GREY and the black and grey cable to the connector labeled BLACK GREY Keyboard for ThinkPad X13 Gen 3 Prerequisite Before you start read Generic Safety and Compliance Notices and print the following instructions Chapter 6 CRU replacement 47 ...

Страница 54: ...er and all connected cables 3 Close the computer display and turn the computer over Removal procedure Note You might be instructed to slide the keyboard frame forward or backward in some of the following steps In this case ensure that you do not press or hold the keys while sliding the keyboard frame Otherwise the keyboard frame cannot be moved 48 T14s Gen 3 and X13 Gen 3 User Guide ...
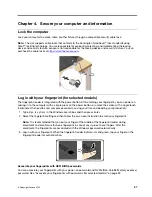
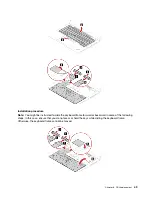
Страница 55: ...cted to slide the keyboard frame forward or backward in some of the following steps In this case ensure that you do not press or hold the keys while sliding the keyboard frame Otherwise the keyboard frame cannot be moved Chapter 6 CRU replacement 49 ...

Страница 56: ...50 T14s Gen 3 and X13 Gen 3 User Guide ...
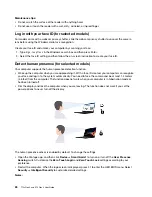
Страница 57: ... power button for about seven seconds Then reconnect to ac power and restart the computer What do I do if I spill liquid on the computer 1 Carefully unplug the ac power adapter and turn off the computer immediately The more quickly you stop the current from passing through the computer the more likely you will reduce damage from short circuits Attention Although you might lose some data or work by...

Страница 58: ...ge due to insufficient storage space after POST The non volatile system UEFI variable storage is used by the UEFI BIOS and by the operating system or programs This error occurs when the operating system or programs store large amounts of data in the variable storage All data needed for POST such as UEFI BIOS setup settings chipset or platform configuration data are stored in a separate UEFI variab...

Страница 59: ...e proper diagnostic app and install it on your smartphone 3 Run the diagnostic app and place the smartphone near the computer 4 Press Fn on your computer to emit the beep again The diagnostic app decodes the beep error and shows possible solutions on the smartphone Note Do not attempt to service a product yourself unless instructed to do so by the Customer Support Center or product documentation O...

Страница 60: ...avigate to the troubleshooting menu to diagnose the operating system for recovery instructions Use the Vantage app to Configure device settings Download and install UEFI BIOS drivers and firmware updates Secure your computer from outside threats Diagnose hardware problems Check the computer warranty status Access User Guide and helpful articles Note The available features vary depending on the com...

Страница 61: ...countries and regions the Genuine Microsoft label is required only on computer models licensed for Windows Pro editions The absence of a Genuine Microsoft label does not indicate that the preinstalled Windows version is not genuine For details on how to tell whether your preinstalled Windows product is genuine refer to the information provided by Microsoft at https www microsoft com en us howtotel...

Страница 62: ... latest phone numbers Note Phone numbers are subject to change without notice If the number for your country or region is not provided contact your Lenovo reseller or Lenovo marketing representative Services available during the warranty period Problem determination Trained personnel are available to assist you with determining if you have a hardware problem and deciding what action is necessary t...

Страница 63: ...erating systems NOS Installation and maintenance of programs For the terms and conditions of the Lenovo Limited Warranty that apply to your Lenovo hardware product go to https www lenovo com warranty llw_02 https pcsupport lenovo com warrantylookup Purchase additional services During and after the warranty period you can purchase additional services from Lenovo at https pcsupport lenovo com warran...

Страница 64: ...58 T14s Gen 3 and X13 Gen 3 User Guide ...
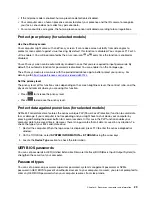
Страница 65: ...d X13 Gen 3 LTE11 ThinkPad X13 Gen 3 LTE21 ThinkPad X13 Gen 3 5G1 TP00131C TP00131C02 TP00131C12 21BN and 21BQ Table 4 AMD models Product name Compliance ID Machine type s ThinkPad T14s Gen 3 ThinkPad T14s Gen 3 LTE11 TP00130D 21CQ and 21CR ThinkPad X13 Gen 3 ThinkPad X13 Gen 3 LTE11 TP00131D TP00131D02 TP00131D12 21CM and 21CN 1 for mainland China only 2 for India only Further compliance informat...

Страница 66: ... models Operating environment Maximum altitude without pressurization 3048 m 10 000 ft Temperature Operating 5 C to 35 C 41 F to 95 F Storage and transportation in original shipping packaging 20 C to 60 C 4 F to 140 F Storage without packaging 5 C to 43 C 41 F to 109 F Note When you charge the battery its temperature must be no lower than 10 C 50 F Relative humidity Operating 8 to 95 at wet bulb t...

Страница 67: ...ht to improve and or modify the products and software programs described in the manuals included with your computer and the content of the manual at any time without additional notice The software interface and function and hardware configuration described in the manuals included with your computer might not match exactly the actual configuration of the computer that you purchase For the configura...

Страница 68: ...ation or any questions or comments contact or visit the Lenovo Web site https pcsupport lenovo com Trademarks LENOVO LENOVO logo THINKPAD THINKPAD logo TRACKPOINT and ULTRACONNECT are trademarks of Lenovo Intel and Thunderbolt are trademarks of Intel Corporation or its subsidiaries in the U S and or other countries Linux is the registered trademark of Linus Torvalds in the U S and other countries ...

Отзывы: