• For AMD models, the HDMI connector on your computer supports the HDMI 2.0 standard by default. If
you connect an external display to your computer through the HDMI connector with an HDMI 1.4 cable,
the external display might not work. In this case, do one of the following:
– Use a qualified HDMI 2.0 cable.
– Change the HDMI standard of the HDMI connector from 2.0 to 1.4. To change the HDMI standard,
enter the UEFI BIOS menu (see “Enter the UEFI BIOS menu” on page 35), and then configure
HDMI
Mode Select
in the
Config
menu.
Connect to a wireless display
To use a wireless display, ensure that both your computer and the external display support the Miracast
®
feature.
Press Windows logo key + K and then select a wireless display to connect with.
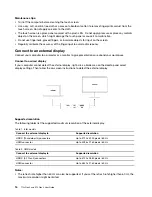
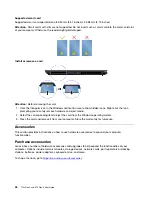
Set the display mode
Press
or
and then select a display mode of your preference.
Change display settings
1. Right-click a blank area on the desktop and select display settings.
2. Select the display that you want to configure and change display settings of your preference.
You can change the settings for both the computer display and the external display. For example, you can
define which one is the main display and which one is the secondary display. You also can change the
resolution and orientation.
Get started with your computer
17
Содержание ThinkPad X13 Gen 3
Страница 1: ...T14s Gen 3 and X13 Gen 3 User Guide ...
Страница 4: ...Appendix B Notices and trademarks 61 ii T14s Gen 3 and X13 Gen 3 User Guide ...
Страница 6: ...iv T14s Gen 3 and X13 Gen 3 User Guide ...
Страница 24: ...18 T14s Gen 3 and X13 Gen 3 User Guide ...
Страница 40: ...34 T14s Gen 3 and X13 Gen 3 User Guide ...
Страница 46: ...40 T14s Gen 3 and X13 Gen 3 User Guide ...
Страница 49: ...Installation procedure for T14s Gen 3 Removal procedure for X13 Gen 3 Chapter 6 CRU replacement 43 ...
Страница 56: ...50 T14s Gen 3 and X13 Gen 3 User Guide ...
Страница 64: ...58 T14s Gen 3 and X13 Gen 3 User Guide ...


