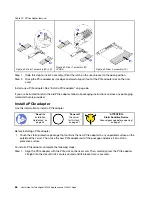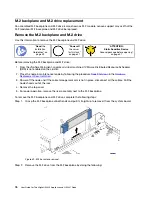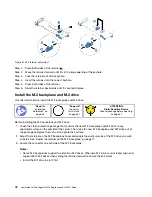
Figure 44. Instruction for sliding the retainer
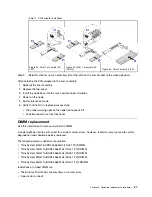
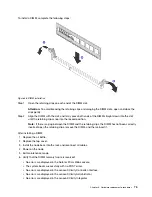
Step 4. Align the blue plastic supports at each end of the M.2 backplane with the guide pins on the system
board. Then, insert the M.2 backplane into the M.2 slot on the system board and press it down to
fully seat it.
Figure 45. M.2 backplane installation
After installing the M.2 drive and M.2 backplane:
1. Reinstall the riser assembly next to the M.2 backplane.
2. Replace the top cover.
3. Install the node back into the rack and reconnect all cables.
4. Power on the node.
5. Exit maintenance mode.
6. Use the Lenovo XClarity Provisioning Manager to configure the RAID. For more information, see:
80
User Guide for ThinkAgile HX2320 Appliance and HX2321 Node
Содержание ThinkAgile HX2320 Appliance
Страница 1: ...User Guide for ThinkAgile HX2320 Appliance and HX2321 Node Machine Types 7Y89 7Z04 7X83 7Z40 7X41 ...
Страница 4: ...ii User Guide for ThinkAgile HX2320 Appliance and HX2321 Node ...
Страница 16: ...12 User Guide for ThinkAgile HX2320 Appliance and HX2321 Node ...
Страница 32: ...28 User Guide for ThinkAgile HX2320 Appliance and HX2321 Node ...
Страница 38: ...34 User Guide for ThinkAgile HX2320 Appliance and HX2321 Node ...
Страница 86: ...82 User Guide for ThinkAgile HX2320 Appliance and HX2321 Node ...
Страница 90: ...86 User Guide for ThinkAgile HX2320 Appliance and HX2321 Node ...
Страница 92: ...88 User Guide for ThinkAgile HX2320 Appliance and HX2321 Node ...
Страница 94: ...90 User Guide for ThinkAgile HX2320 Appliance and HX2321 Node ...
Страница 96: ...92 User Guide for ThinkAgile HX2320 Appliance and HX2321 Node ...
Страница 99: ......
Страница 100: ......

