


11
STARTUP PROCEDURE
Whenever the pump is to be used, it must be pre-
pared for the type of paint to be used. This requires the
unit to be flushed out with an appropriate solvent (water
for latex, mineral spirits for oil base, etc.). Incorrect
flushing can cause gumming of the valves and priming
problems.
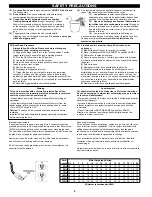
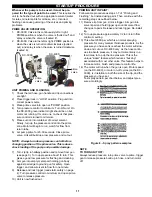
PRIME VALVE OPERATION:
1.
DC-3000: Valve turns continuously left or right.
PRIME position is when the valve is "pulled out" and
spray is when the valve is "seated in".
2.
DC-4000: Valve turns left or right. PRIME position is
when the valve is turned counterclockwise (pulled
out) ,and spray is when the valve is turned clockwise
(seated in).
UNIT PRIMING AND FLUSHING:
1) Check that all hose, gun handle and tip connections
are tight.
2) Place trigger lock in “LOCK” position. Plug unit into
correct power source.
3) Place prime valve into open or “PRIME” position.
4) Turn pressure control to minimum. Turn ON unit. On
the DC-4000 green indicator light should be on but
motor not running. If motor runs, re-check that pres-
sure control is turned to minimum.
5) Place suction into container of correct solvent.
Slowly, turn up the pressure control into the prime
zone. Motor will begin to run, watch for flow from
return tube.
6) Let pump prime for 20-30 seconds. Close prime
valve. Unit will build up a low pressure and cut out.
NOTE: Always turn down pressure control before
changing position of the prime valve. This reduces
shock loading of the pump and possible damage.
7) Turn zip tip to halfway position and remove from gun
(see page 9). Turn up pressure about 1/6 turn. This
gives a good low pressure for flushing and cleaning.
8) Aim gun into empty metal pail, holding gun body
against pail edge to ground gun for safety. Open
trigger, and allow solvent to flow for one minute.
9) Release and lock trigger (read static safety on page
4). Turn pressure control to minimum and open prime
valve to release pressure.
10) Unit is now flushed out.
PRIMING UNIT IN PAINT:
Follow same procedure as steps 1-7 of “Priming and
Flushing”, but instead using paint. Then continue with the
remaining steps as outlined below.
11) Remove tip from gun. Unlock trigger. Aim gun into
solvent pail and hold trigger open until solvent flow
changes to paint. Release and lock trigger. Re-install
tip.
12) Turn up pressure approximately 1/2 to 3/4 turn from
minimum setting.
13) This about 2000 psi, which is a normal spraying
pressure for many medium thickness products. As the
pressure you have set is reached, the motor will slow
down and cut out. DC-4000 only: as the hose contin-
ues to absorb pressure, it may cut momentarily in a
few times, to top up the line pressure. This is the
unique “kicker” feature which reduces “buzzing”
associated with most other units. This feature helps to
increase motor, brush and pressure control life.
14) The motor will run when the gun is open. Motor speed
(on the DC-4000), or motor on-off cycles (on the DC-
3000), is in relation to both the size of the tip, and the
pressure you have set.
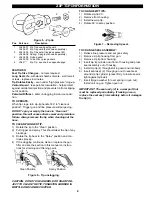
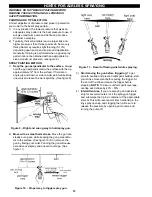
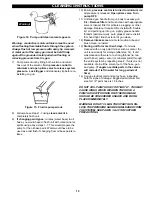
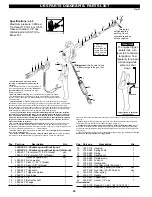
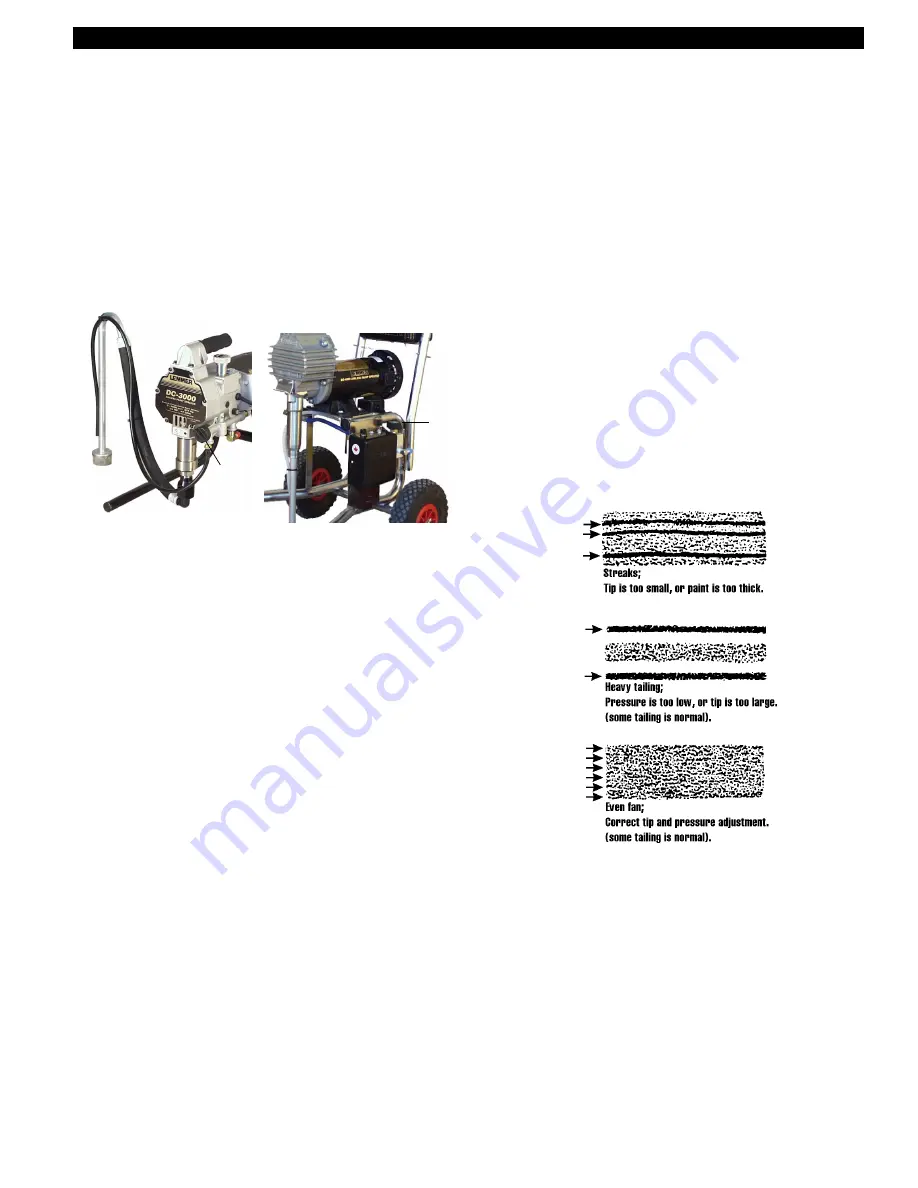
Test spray pattern per chart below, and adjust pres-
sure accordingly.
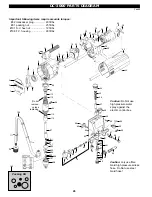
Figure 8. - Spray pattern examples.
NOTE
TO TURN UNIT OFF:
Always reduce pressure, turn prime valve to prime, trigger
gun to release pressure build up in hose, and turn motor
off.
prime
valve
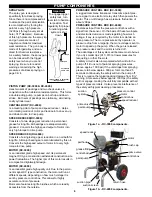
DC-4000
DC-3000
prime
valve


