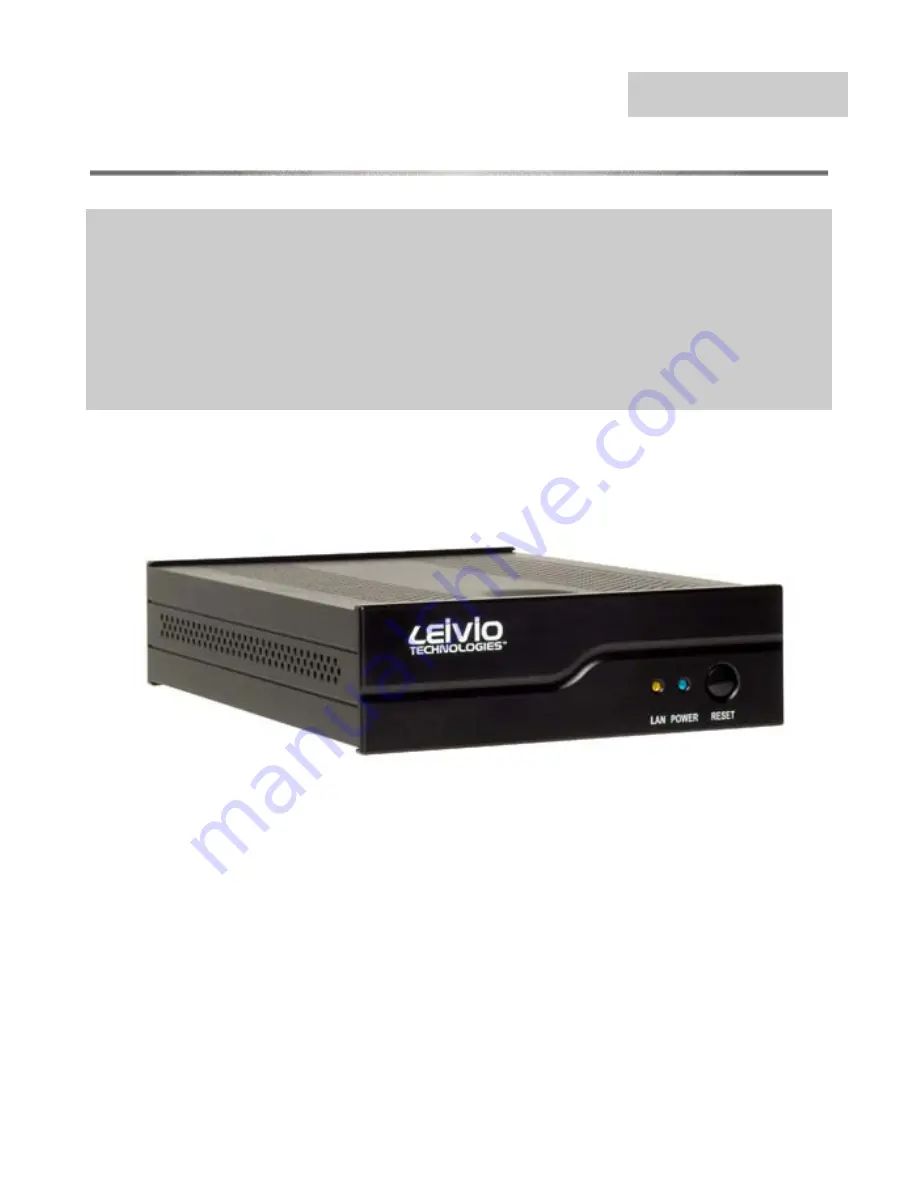
manualshive.com logo in svg
background image

Model


IPVS-100 Series


LEIVIO TECHNOLOGIES, INC. 


MPEG-4 Encoder Manual 


This Manual and its contents are all 

©

 Copyright Leivio Technologies, Inc. 

All rights reserved.  

No republication, use in any form, or reproduction are allowed  

without prior written permission of Leivio Technologies, Inc.  

473 Sapena Court • Suite 8 

Santa Clara, CA. 95054 

Phone 408.986.9688 • Fax 408.986.9788 

Содержание IPVS-100 Series

Страница 1: ...nd its contents are all Copyright Leivio Technologies Inc All rights reserved No republication use in any form or reproduction are allowed without prior written permission of Leivio Technologies Inc 473 Sapena Court Suite 8 Santa Clara CA 95054 Phone 408 986 9688 Fax 408 986 9788 ...

Страница 2: ...g and Connecting Setup 6 Video Connections 6 Audio Connections 7 Network Cable Connections 7 Configuring the network interface 8 Needed information 8 Configuring Step One 9 Terminal Program set up 9 Configuring Step Two 12 Serial Port Main Menu 13 Configuring Step Three 14 Configuring Step four 17 Chapter 3 Web Control Interface 18 Encoder Main Network Control 18 Network Bit Rate Control 21 Chapte...

Страница 3: ...Front and Back connectors and ports Figure 1 Unit view with connector diagram ...

Страница 4: ...cautions should be followed including the following W S A F E T Y P R E C A U T I O N S Read and follow the specific precautions in this section at all times This unit must be grounded Connect only to a properly grounded outlet See the Grounding Instructions section of this manual Install or locate this appliance only in accordance with the provided Installation Instructions Be certain to place th...

Страница 5: ...ration Î Do not operate this unit if it has a damaged power cord or plug if it is not working properly or if it has been damaged or dropped If the power cord is damaged it must be replaced by Leivio Technologies Inc or an authorized service agent using a power cord available from Leivio Technologies Inc Î Do not cover or block any openings on the unit Î Use this appliance only for its intended use...

Страница 6: ...ervice technician if the grounding instructions are not completely understood or if doubt exists as to whether the appliance is properly grounded If the outlet is a standard 2 prong wall outlet it is your personal responsibility and obligation to have it replaced with a properly grounded 3 prong wall outlet Do not under any circumstances cut or remove the third ground prong from the power cord We ...

Страница 7: ...w does not ground the appliance unless the cover screw is metal and not insulated and the wall receptacle is grounded through the house wiring You should have the circuit checked by a qualified electrician to make sure the receptacle is properly grounded When disconnecting the power cord from the adapter always hold the adapter with one hand If this is not done the adapter ground terminal is very ...

Страница 8: ...sion cord should be at least as great as the electrical rating of the unit a The extension cord must be a grounding type 3 wire cord and it must be plugged into a 3 slot outlet aThe extension cord should be arranged so that it will not drape over the counter top or tabletop where it can be pulled on by children or tripped over unintentionally If you use an extension cord the quality of encoding an...

Страница 9: ...up the unit with a cross over network cable prior to placing the units in a live network environment to familiarize yourself with operation set up and use Once the units are configured and communicate to each other then adding a hub for use with the web based interface connected to a computer with the same gateway and IP range will be useful At that point you will be ready to place the units in a ...

Страница 10: ...nit and the power supply into a grounded and polarized electrical socket The unit as shipped will have default configurations already loaded into memory so once you turn the power on the unit is encoding and outputting to the network connection HOWEVER THIS IS LIKELY NOT COMPATIBLE WITH YOU CURRENT NETWORK SETTINGS SO YOU WON T SEE ANY AUDIO OR VIDEO AT THIS POINT The blue encoding LED and the LAN...

Страница 11: ... to the unit You will also need a PC with a serial port interface and serial Cable with gender changer on one side or a female to female serial cable and a terminal program to communicate directly with the base level program on the unit We will illustrate with a Microsoft Windows XP Pro program HyperTerminal included with all Microsoft OS programs but the many Linux and Apple based terminal progra...

Страница 12: ...l ask for the connections name We don t use a special one so enter anything you d like to Then you will go to a screen like this one Figure 2 1 Identify COM port You must have a COM port free and configured to communicate with Leivio unit Now just select the free COM port you will use to communicate with the Leivio unit Many times the serial ports for many modern computers are disabled by the BIOS...

Страница 13: ...o and from the computer at 9600 bits per second so we must adjust up from the default value for the serial port Figure 2 3 Adjust property s for the connection Now that we have set the speed we need to define the language So we go to the Properties box under File And select it 10 ...

Страница 14: ... properties box We don t need to use anything on the front page but the top tabs include one named settings which we do need to select at this time Figure 2 5 select ASCII Setup In the Settings Tab area there is a button for ASCII Setup Please select this 11 ...

Страница 15: ...functions programmed to non volatile memory to restore default operation after a power loss The power cycle values will be the defaults you now enter into the unit So if the unit loses the power source it will restart using the values programmed with the serial port when power is restored Please write your default settings in appendix A Serial port menu options and use that worksheet to gather inf...

Страница 16: ...enu Warning once you enter the requested parameter or value it will write to the unit s buffer Then once menu items 20 or 21 are selected the encoder will immediately change function to the buffered values The main menu is pretty simple It has four sections 1 IP address parameters 2 Encoding parameters 3 Parameter saving and designating the default parameters 4 Operations Start and Restart encodin...

Страница 17: ...ting three digit entries You just enter them like normally with a period separating the four blocks of three digits each XXX XXX XXX XXX after you select the IP address hit enter and that data will be buffered on the encoder ready to be written into memory The fourth menu item asks for the target decoder This is for companies wanting point to point communication where the receiver is a decoder Lei...

Страница 18: ...his allows many people to share the one IP stream Figure 7 Other options are simply numbered as well Fortunately most of the menu items are simple The video standard relates to the native resolution and the video native format NTSC has been around a long time and is the North American format of choice while PAL is a European and Pacific Rim favorite 15 ...

Страница 19: ...ere for now As you experiment with the network interface or our web page interface you will learn which formats are better suited for which source materials and content segments For instance Sports footage usually requires higher resolution higher bandwidth and faster frame rates when encoding owing to its complex screen image And News and Interviews frequently require less of those so you can lea...

Страница 20: ...r start the encoder as shown in fig 6 using the 88 or start encode command and then disconnect the serial port if your done with programming the default values for the unit WARNING Once you enter this menu number 21 the existing defaults will be over written instantly Now verify that your video source is on and sending to the encoders along with any audio sources and then either log on to the stre...

Страница 21: ...ion Encoder Main Network Control Figure 10 Web Browser control interface It will not control all aspects of network and encoding available to the owner but a wide subset of valuable information and controls for routine use and unit informational tools Typically the values for different encoding jobs will require bit rate adjustment for optimal image reproduction and so the network interface allows...

Страница 22: ...P address configured in Step One of chapter two When you type the IP address you configured the device to have you will see a web page similar to the one illustrated in Figure 10 There are two functional sections to the web interface One is a network informational request section for displaying the information of the unit you are now connected to By selecting the current status button you will go ...

Страница 23: ...s The other functions are accessed by navigating to the Settings link from the main page The Settings link accesses a page like the one illustrated at Figure 12 You re able to directly change the Bitrate of the encoder from this page 20 ...

Страница 24: ...o Bit Rate Web Control Interface The other functions are accessed by navigating to the Settings link The Settings link accesses a page like the one illustrated at Figure 12 You re able to directly change the Bitrate of the encoder from this page 21 ...

Страница 25: ...instance The softness filter is sometimes needed for low bit rates and the sharpness filter is applied to higher bit rate videos for quality purposes However if when you configured this value to auto which adjusts this automatically when programming the unit with the serial cable the unit network control panel will not override that setting saved to the defaults Critical Clicking On a value and th...

Страница 26: ... standard IP MPEG 4 video stream It is a very powerful and highly optimized solution for high quality low latency situations Set up is the same as the encoder unit with a few important exceptions 1 no web interface or SNMP agent 2 You only need to configure network address and either NTSC default or PAL video output in terminal mode 3 The front panel Reset button used for instant on encoding is on...

Страница 27: ...eration To start communication between the Leivio unit and the connected computer press the TERM button on the Leivio front panel and hold it for 2 seconds THEN while holding the term button down you press and hold for 1 second the RESET switch on the FRONT of the unit You should then see something like the following fig 15 image Figure 13 Decoder Terminal Screen Basically with the decoder all you...

Страница 28: ...andard ________ Choices NTSC North American or PAL worldwide 7 Set Input Video Mode ___________ Choices Composite or S Video Factory options allow composite or s video modes Depending on the model of encoder you may or may not be able to use this option 8 Set Encode Mode __________ Choices Supported Video Resolutions NTSC CIF 352X240 2CIF 704X240 HALF D1 352X480 4CIF 704X480 D1 720X480 PAL CIF 352...

Страница 29: ...e encoder then CBR mode will give a constant signal of the maximum allowed bandwidth regardless of the content of the video CBR is most useful for Satellite and Microwave use and VBR for network applications 11 Set Initial Bitrate ___________ bps Here the choices range from the tiny 64 Kilobytes per second to the 4 megabytes per second for high quality video We recommend setting this value to the ...

Страница 30: ...tion 20 Save parameters Saves settings for use currently 21 Set as default parameters Sets as the Default so if unit loses power it will recover to this saved parameter 88 Start ENCODE This starts the encoder now 27 ...

Страница 31: ...oes Try this Experiment with setting different encoding values for different video content Sports footage sea and water shots and high motion video require a higher bit rate than newsroom or static talking head shots Don t be afraid to learn more about how to configure this unit on the fly for best image reproduction Remember that latency is best reduced with as few network devices between encoder...

Страница 32: ... Technologies products Thank you for buying our product and we hope you will keep us in mind for your next project as well We want to help contribute to your success Leivio Technologies Inc 473 Sapena Court Suite 8 Santa Clara CA 95054 Phone 408 986 9688 Fax 408 986 9788 29 ...

Отзывы: