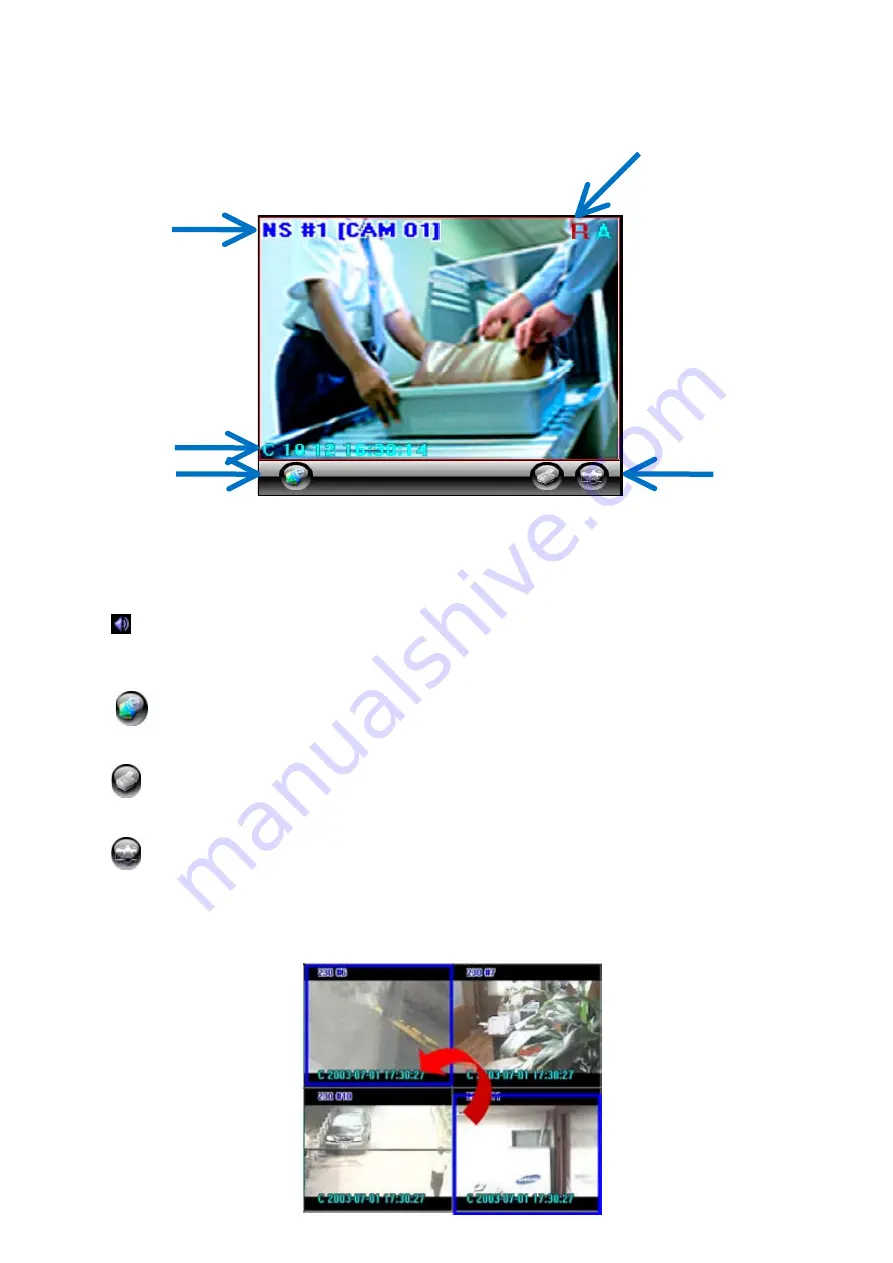
Display screen
•
#1 [CAM01] :
•
It represents DVR name, screen number, and camera name.
R :
•
“R” is present if this image is saved on CMS software.
•
: this image is with audio data.
C 10-12 16:30:14 :
•
It represents the date and time of transmitted data.
“10-12 16:30:14” DVR System time
•
:E-Map : Click this button to enable ‘E-MAP’.
•
Print: Click the button to print the image.
Snapshot: Click the button to save the appropriated image.
(Location for saving - C:\CMS_2KV3\Image)
Screen Switch on Display mode :
•
put the mouse on the screen, and click right mouse button
and drag to the desired screen to display.
¢—
E-Map, Print, Snapshot button shown on one division screen.
E-Map, Print, Snapshot button shown on one division screen.
7
Содержание 430 557
Страница 4: ...Chapter 2 Display Mode 4...
Страница 13: ...The button will switch automaticaly to If you want to switch back to Pre Memorize screen click on button 13...
Страница 16: ...Chapter 3 CMS Setup Mode To enter in this menu Click on start Click on Setup 16...
Страница 23: ...PTZ info check the information of PTZ SETUP OF EACH DVR 23...
Страница 37: ...Chapter 4 Remote Search Mode To enter in this menu 1 Choose the DVR 2 Click on Remote Search 37...
Страница 43: ...2 Select the date and click on Data Backup button 43...
Страница 46: ...5 Chose the file and open it Refer to the DVR Manual to use the Backup Viewer 46...
Страница 52: ...Your new image will appear on the screen Click on Site and click on the map to place the DVR location 52...
Страница 58: ...The map is shown Click on one camera The video will be displayed for this camera 58...
Страница 62: ...The name of the cameras will be automaticaly filled Cam 01 Cam 02 Give a name to this page ex E map 62...


