background image

5

Features

It’s about options:

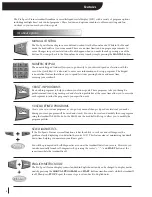
The Pro Sports Trainer treadmill combines a versatile liquid crystal display (LCD) with a variety of program options
including multiple heart rate control programs. These features and options combine to offer an exciting and fun
workout so you can reach your fitness goals.

MANUAL CONTROL

The Pro Sports Trainer begins a user-defined workout via the Manual mode. While in the Manual
mode the treadmill is at your command. There are no time limits and no program parameters to
enter. Changes in speed or elevation will only happen when you make them by pressing one of the
buttons. You can get back to the Manual mode at any time by simply pressing the 

MANUAL

button.

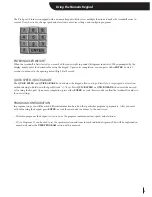
NUMERIC KEYPAD

The numeric keypad feature allows you to go directly to your desired speed or elevation with the
use of the Quick Keys. It is also used to enter user information and set up programs. The keypad
is an excellent feature that allows you to spend less time pressing buttons and more time
enjoying your workout!

5 BUILT-IN PROGRAMS

Five built-in programs to help you attain your fitness goals. These programs take you through a 
predetermined twenty-segment speed and elevation profile but at the same time allow you to override
each segment to tailor the program to your specific needs.

5 USER-DEFINED PROGRAMS

Create your own custom programs as you go. Any manual changes (speed or elevation) you make 
during your user-program will be saved and stored.  You can also create and modify the user-program
using the treadmill’s Edit Mode. In the Edit Mode the treadbelt will stop to allow you to modify the
program profiles.

SELF-DIAGNOSTICS 

If the Pro Sports Trainer ever malfunctions, it has the ability to seek out and self diagnose the 
problem, clearly displaying it in detail in the center LCD.  This feature aims at minimizing treadmill
down time, helping you maintain your fitness goals.

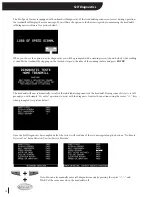
You will be prompted with self-diagnostics as soon as the treadmill detects any errors.  However, you
can also manually launch self-diagnostics by pressing the center “+”, “-”, and 

START

button at the

same time while the treadmill is off.

ENGLISH/METRIC MODE

The Pro Sports Trainer display comes standard in English units and can be changed to display metric
units by pressing the 

MANUAL

PROGRAMS

, and 

START

buttons simultaneously while the treadmill

is off. Then press 

STOP

. Repeat the same steps to return back to English units.

Содержание Pro Sports Trainer

Страница 1: ...PART NUMBER 7209I Worldwide excellence for over 40 years Pro Sports Trainer Owner s Manual ...

Страница 2: ...ing STOP stops the treadbelt The treadmill will shut off and all current statistical information will be cleared To change speed Hold speed key down to increase speed Holding speed key depressed for longer than 2 seconds causes the speed to increase at a faster rate Hold speed key down to decrease speed Holding speed key depressed for longer than 2 seconds causes the speed to decrease at a faster ...

Страница 3: ...de rail until the belt starts moving 5 Always wear the emergency stop safety strap securely around your wrist while exercising Failure to do so can result in severe injuries should you accidentally fall while exercising 6 Test the emergency stop safety key on a regular basis by pulling on the cord and ensuring that the treadbelt comes to a complete stop 7 Always remove the safety key from the trea...

Страница 4: ... grounding provides a path of least resistance for electric current to reduce risk of electric shock This product is equipped with a cord that has an equipment grounding conductor and a grounding plug The plug must be plugged into an outlet that is properly installed and grounded in accordance with all local codes and ordinances 120 VOLT TREADMILLS Treadmills marked 120 VAC are intended for use in...

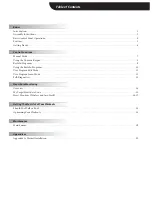
Страница 5: ...t In Programs 9 Using the Built In Programs 10 User Program Edit Mode 11 User Program Learn Mode 12 Self Diagnostics 13 Heart Rate Monitoring Overview 14 My Target Heart Rate Zone 15 Heart Monitors Wireless and AccuTrack 16 17 Getting The Most Out of Your Workouts Should You Walk or Run 18 Optimizing Your Workouts 18 Maintenance Maintenance 19 Appendices Appendix A Medrail Installation 20 ...

Страница 6: ...self with this manual Look it over carefully Be sure you understand the control panel operation before using the treadmill WARRANTY INFORMATION Fill out your warranty registration card and mail it in today Landice backs your treadmill with a strong warranty For the factory to respond to any problems you may have we need your warranty information on file Do it today Landice will send you a complime...

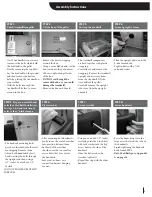
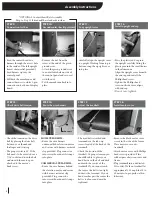
Страница 7: ...ts have been threaded into the rails for shipping Remove them Attach both handrails by first hand starting the bolts through the upright and then using a 1 2 socket Leave about 1 8 of slack DO NOT TIGHTEN FLUSH TO SURFACE After mounting both handrails gently lower the curved crossbar into position between them Each end of the crossbar should cover the two smaller access holes that are cut into the...

Страница 8: ...ign the upright cover beneath the end cap and install the Phillips head screw Tighten the Phillips head screw until side cover aligns with endcap Do not over tighten STEP 12 Install upright end cap HOME TREADMILL Route the wire harness underneath the elevation motor and secure with harness restraint clip provided Plug connector into circuit board until it snaps into place COMMERCIAL TREADMILL Rout...

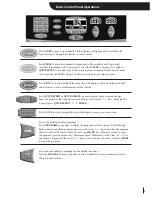
Страница 9: ...achieve instant speed or grade change Enter the desired value using the numeric keypad or the center keys Example for 5 0 mph press QUICK SPEED 5 0 ENTER Press ENTER to rotate through the selectable display screens or enter any data To use the built in workout programs Press PROGRAMS at any time to display the programs selection screen Scroll through built in and user defined program previews with...

Страница 10: ...se programs take you through a predetermined twenty segment speed and elevation profile but at the same time allow you to override each segment to tailor the program to your specific needs 5 USER DEFINED PROGRAMS Create your own custom programs as you go Any manual changes speed or elevation you make during your user program will be saved and stored You can also create and modify the user program ...

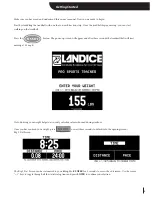
Страница 11: ...ppear and after three seconds the treadmill belt will start moving at 0 5 mph Note Entering your weight helps to accurately calculate calories burned during workout Once you have entered your weight press or wait three seconds to default into the opening screen Big 3 Stat Screen The Big 3 Stat Screen can be customized to your liking Hold ENTER for 3 seconds to access the edit screen Use the center...

Страница 12: ...ged on treadmill displayed as Minutes Seconds DISTANCE Miles logged on treadmill kilometers when in metric PACE Time to complete 1 mile 1 kilometer when in metric CALORIES Total calories burned which is based on user s weight CALS HR Rate in calories hour which is based on user s weight LAP PROGRESS 1 4 mile 400 meter in metric track and Lap Indicator in STAT SCREEN LAP COUNTER Number of laps comp...

Страница 13: ...elow the keypad allow you to go directly to a target speed or elevation without having to hold down the Speed Grade keys Press QUICK SPEED or QUICK GRADE then enter the desired value using the keypad Upon entry completion press either ENTER or wait three seconds to allow the treadmill to adjust to the new settings PROGRAM CONFIGURATION In program setups you will be asked different information base...

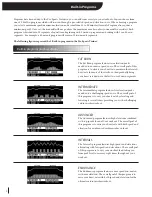
Страница 14: ... elevate your heart rate maintain the elevated heart rate for most of the workout then gradually bring your heart rate down via the last two cool down segments INTERMEDIATE The Intermediate program features five elevation peaks matched to a challenging speed curve The overall goal of this program is to vary your heart rate by elevating and lowering it several times providing you with a challenging...

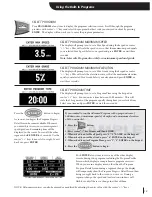
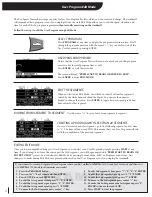
Страница 15: ... the button to begin As soon as you begin the Program Progress Detail Screen becomes available Whenever you enter this screen your current segment speed grade and remaining time will be displayed in the center To view all the other segments hold ENTER for 3 seconds Use the center keys to move left or right To exit back out press ENTER Push ENTER at any time to view any of the other display screens...

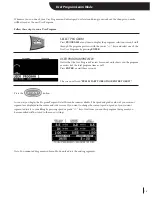
Страница 16: ... toggle between speed grade and time values for that segment MOVING FROM SEGMENT TO SEGMENT Use the center keys to move from segment to segment CREATING A PROGRAM WITH LESS THAN 20 SEGMENTS Once you ve created your last segment go to the following segment and set time to 0 The time will now read END This means that your User Program will end with the completion of the previous segment EXITING EDIT...

Страница 17: ...review Screen not only shows you the program overview but the total program time as well Press ENTER or wait three seconds The screen will read PRESS START TO BEGIN OR ENTER TO EDIT Press the button As soon as you begin the Program Progress Detail Screen becomes available The speed and grade values of your current segment are displayed in the center and side screens If you want to change the curre...

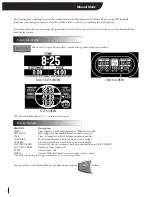
Страница 18: ...on strips on the sides of the running surface and press ENTER The treadmill will now systematically test all of the individual components of the treadmill During some of its tests it will prompt you with simple Yes or No questions to assist with the diagnosis Answer the questions using the center keys when prompted see picture below Once the Self Diagnostics has completed all of the tests it will ...

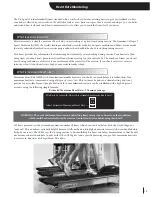
Страница 19: ... intensity is high Maximum Heart Rate MHR is the maximum attainable heart rate your body can reach before total exhaustion True maximum heart rate is measured during a fatigue or stress test This test must be done in a clinical setting and is not practical or accessible for most people Fortunately your maximum heart rate can be established with a high degree of accuracy using the following simple ...

Страница 20: ...that all individuals should work within a Target Heart Rate Zone of 60 to 85 of Maximum Heart Rate This means that your heart rate during exercise should not fall below 60 or rise above 85 of your maximum heart rate Let s look at John from our earlier example John is 35 years old so his estimated maximum heart rate is 220 minus 35 or 185 beats per minute bpm The ACSM says that John should exercise...

Страница 21: ...ps SECURE THE CHEST STRAP Center the transmitter on the chest as high under the pectoral muscles breasts as possible Tighten the strap so that the belt is as tight as possible without being uncomfortable APPLY CARDIO GEL TO THE ELECTRODES A tube of Landice Cardio Gel was shipped with your Pro Sports Trainer treadmill Pull the belt away from your chest and apply a small dab to each electrode This w...

Страница 22: ... hands remain on the grips NOTE If you are wearing the wireless chest strap the AccuTrack system will override the wireless signal while your hands are on the bar Once you release the AccuTrack bar the treadmill then default back to the wireless chest strap signal NOTE You do not have to be viewing the Heart Rate Status screen for the AccuTrack system or wireless chest strap to function The AccuTr...

Страница 23: ... ve reached your target weight reevaluate If you like walking and want to stick with it terrific On the other hand if some running is appealing try it out and see what it s like Just remember that walking will get you fit and keep you fit FREQUENCY OF EXERCISE Walkers Walk 3 6 times a week 20 60 minutes per day Runners Run 3 5 times a week 20 60 minutes per day DURING YOUR WORKOUT Stay in the midd...

Страница 24: ...readmill to 5 mph Then while jogging lightly check for any sudden slipping hesitating of the treadbelt Repeat treadbelt tensioning instructions if required MOTOR DRIVE BELT TENSIONING pre set from factory The drive belt is tensioned by a nut located under the motor pan This nut is screwed to a hook which is attached to the motor bracket By turning the nut clockwise you will tighten the nut pulling...

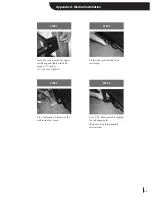
Страница 25: ...et Do not over tighten Use a soft mallet to firmly set the rails inside the clamp Use a 3 16 allen wrench to tighten the rail clamp bolts Return to Step 9 in Assembly Instructions STEP 1 STEP 2 STEP 3 STEP 4 Fit the side rail to the bottom rail clamp Appendix A Medrail Installation 20 ...

Страница 26: ..._________________________________________________ ___________________________________________________________________________________________________________ ___________________________________________________________________________________________________________ ___________________________________________________________________________________________________________ __________________________...

Страница 27: ..._________________________________________________ ___________________________________________________________________________________________________________ ___________________________________________________________________________________________________________ ___________________________________________________________________________________________________________ __________________________...

Страница 28: ... for over 40 years 111 Canfield Avenue Randolph NJ 07869 1 800 LANDICE Tel 973 927 9010 Fax 973 927 0630 www landice com 111 Canfield Avenue Randolph NJ 07869 1 800 LANDICE Tel 973 927 9010 Fax 973 927 0630 www landice com ...

Отзывы: