


Point to Point and FTP Communication
4-5
-
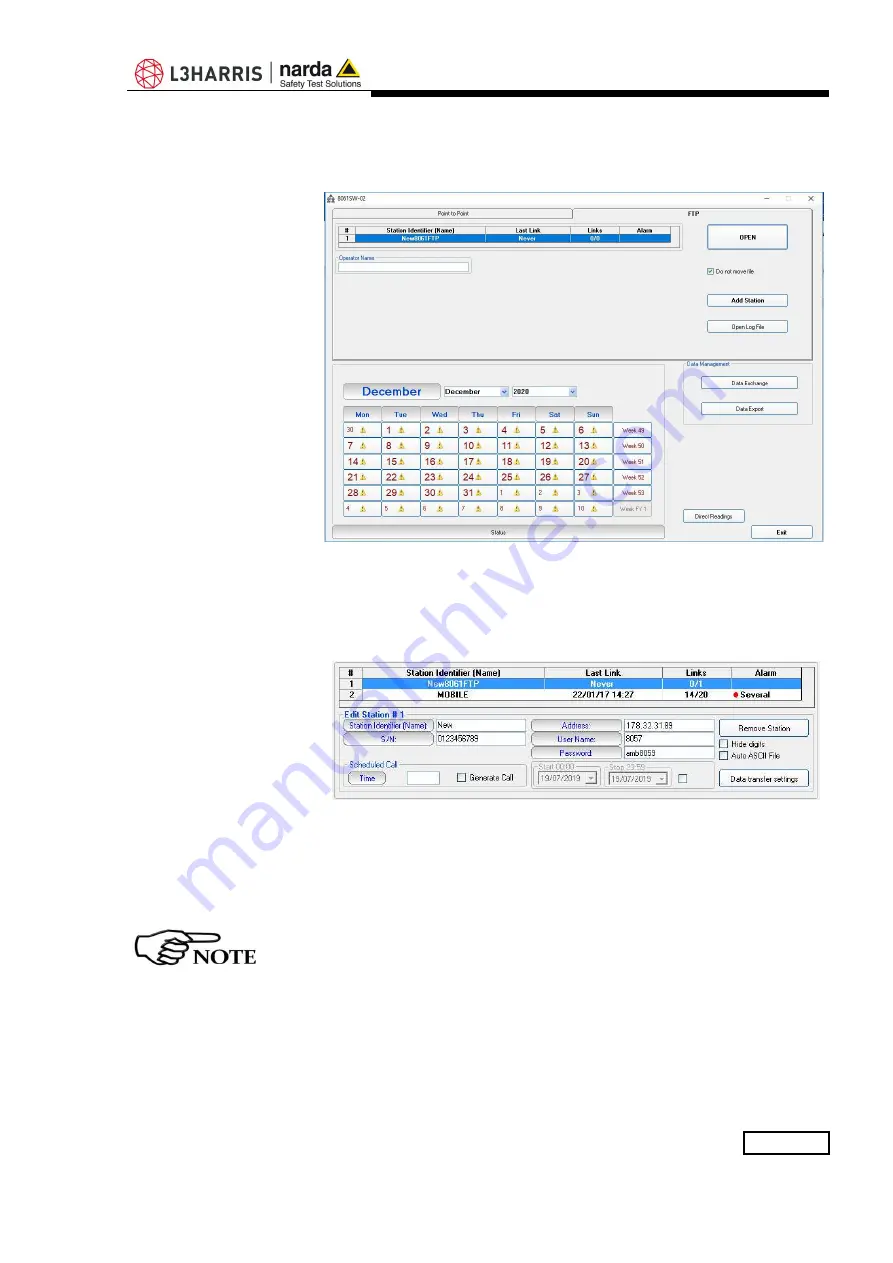
Run 8061SW-02 and the main window appears as follows. The
software ask you to enter a Terminal and Setting password (see
§3.4.1, §3.4.1.1, §3.4.2, §3.4.2.1).
-
Double click the first station listed in the FTP station list (new software
installations show the “New8061FTP” station, on the list, as an
example).
A new area monitor must be added to the list as follow (all field are
necessary).
-
Insert the Station Identifier: it is the name you decide to give to your
monitor station.
-
Insert the Serial Number of the station.
-
Insert the Address, User Name and Password: these parameters are
of our FTP server for preliminary test. Beware that our FTP server is
periodically cleaned, do not use it in a definitive way.
For every field the computer will request the Terminal Password (see
§3.4.1 and §3.4.1.1).
-
Click the button “Data transfer settings”.
Содержание NARDA AMS-8061
Страница 10: ...X EC Conformity This page has been left blank intentionally ...
Страница 18: ...1 8 General Information This page has been left blank intentionally ...
Страница 25: ...Installation and use 2 7 Upper L shaped bracket S shaped bracket and PA6 black bracket 55deg lower support ...
Страница 50: ...2 32 Installation and use This page has been left blank intentionally ...
Страница 124: ...3 74 8061SW 02 User s guide and Data Display This page has been left blank intentionally ...
Страница 142: ...4 18 Point to Point and FTP Communication This page has been left blank intentionally ...
Страница 214: ...5 46 SMS Messages and Commands This page has been left blank intentionally ...
Страница 218: ...6 4 Action of the wind on the AMS 8061 This page has been left blank intentionally ...
Страница 234: ...8 2 Packaging Instructions Box C inside view Box C contains power pack and box B Box F contains the receiver unit ...
Страница 235: ...Packaging Instructions 8 3 Box E contains antenna Box D contains box F and box E Box D inside view ...
Страница 236: ...8 4 Packaging Instructions Box G contains radome Box H main box ...
Страница 237: ...Packaging Instructions 8 5 Insert Box C in the Box H Insert Box D in the Box H ...
Страница 238: ...8 6 Packaging Instructions Insert Box G in the Box H Insert Box A in the Box H ...
Страница 239: ...Packaging Instructions 8 7 Box H Main Use pallet and straps for the final packing ...
Страница 240: ...8 8 Packaging Instructions This page has been left blank intentionally ...
Страница 242: ...Suggerimenti Commenti Note Suggestions Comments Note ...


