


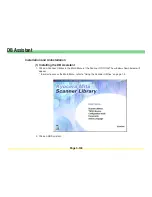


Page 3-127
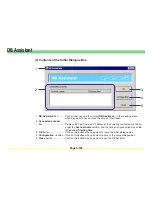
Configuration Tool
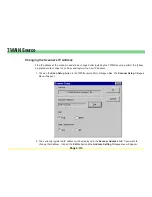
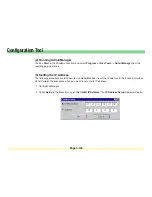
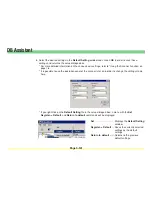
3. Enter the Ethernet address of the Scanner Interface Card in the
Ethernet Address
field (e.g. “00 c0 ee
10 00 0d”). The Ethernet address is listed on the label that is attached near the connector on the
Scanner Interface Card.
4. Enter the IP address that the network administrator gives you for the Scanner Interface Card in the
IP
Address
field (e.g. “192 168 110 171”).
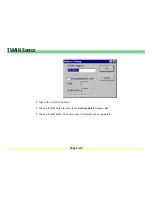
5. Click on the
OK
button. Follow the instructions on-screen in order to reboot the Scanner Interface Card.
After rebooting, the Scanner Interface Card should appear in the AdminManager display.
Next, the Subnet Mask and Gateway address can be registered.
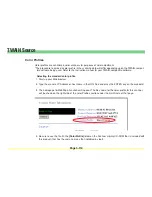
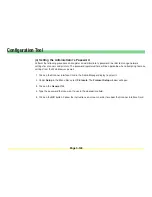
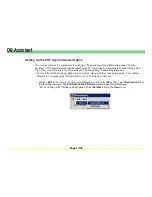
• Registering the Subnet Mask and Gateway address
1. Click on the Scanner Interface Card in the AdminManager display to select it.
2. Under
Setup
in the Menu Bar, select
Protocols
.
3. Click on the
TCP/IP
Tab.
4. Enter the Subnet Mask and the Default Gateway address in the appropriate fields.
5. Click on the
OK
button. Follow the instructions on-screen in order to reboot the Scanner Interface Card.
Содержание KM-1650
Страница 19: ...Page 1 1 What is the Network Scanning System Section 1 ...
Страница 53: ...Page 2 1 Making Settings from a Web Browser Section 2 ...
Страница 97: ...Page 3 1 Section 3 Additional Utilities ...
Страница 138: ...Page 3 42 Address Editor In Network2 tab 15 16 17 18 19 20 21 22 ...
Страница 142: ...Page 3 46 Address Editor In IP Filters tab Refer to page 2 17 for the details of the IP Filters 22 23 24 ...
Страница 245: ...Page A 1 Error Codes Appendix A ...
Страница 250: ...Page B 1 Error messages Appendix B ...
Страница 255: ...Page C 1 Specifications Appendix C ...


