background image

45

s

 / 

m

Using the Camera “

s

” Mode and 

Movie “

m

” Mode Functions

This camera is equipped with many functions for shooting.
Use these functions to shoot images in accordance with surrounding 
conditions.


s


Using Flash Functions

This camera is equipped with an automatic flash function that judges the surrounding 
light conditions and determines whether or not flash is necessary.

There are useful ways to use flash besides under dark conditions. This section 
describes how to use the flash modes in accordance with the scene to be shot, 
including using flash even when surroundings are bright and not using flash even 
when surroundings are somewhat dark.

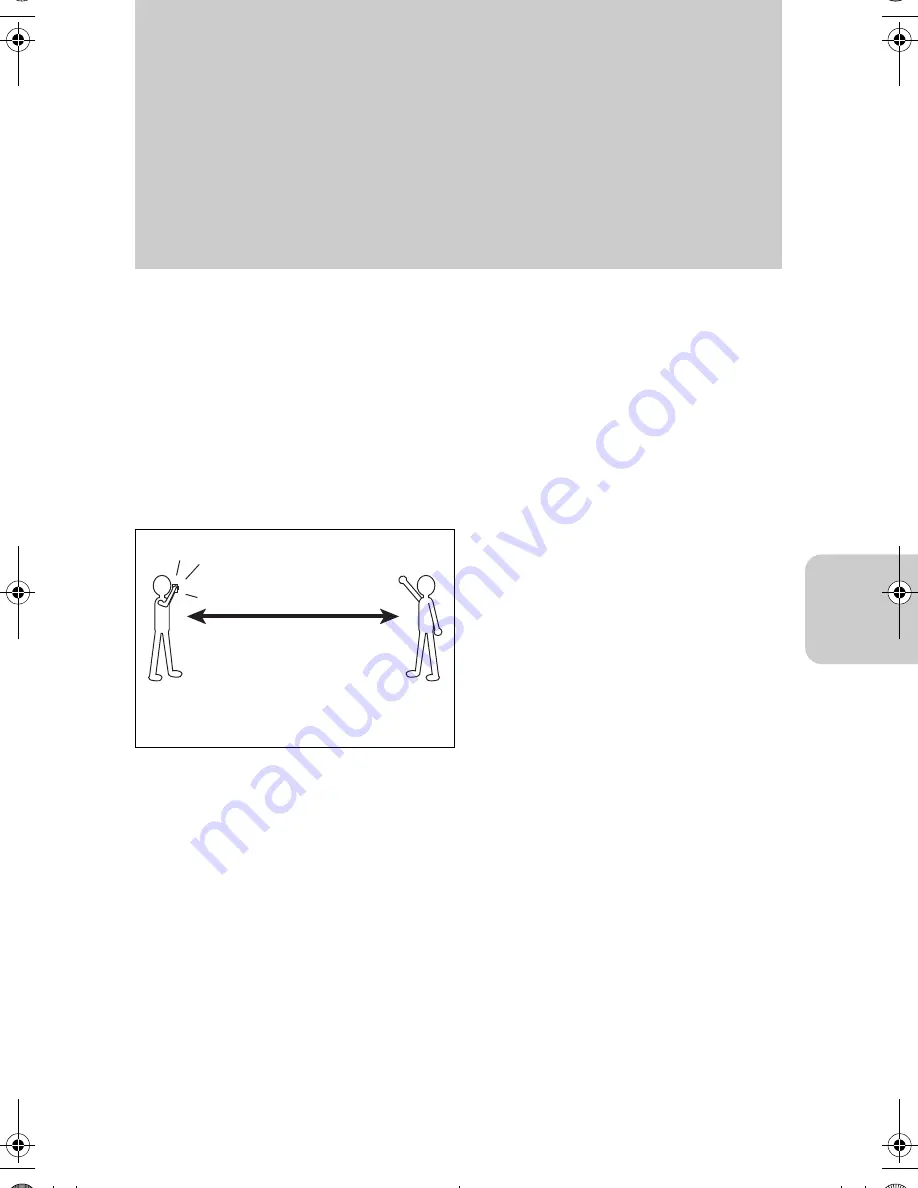
Usable Flash Range 

The flash range differs depending on zooming 
status and ISO sensitivity.
Use the following distances as a reference 
when shooting images. (page 64)

ISO:160

Zoom set at wide-angle: Approx. 60 cm to 3.5 m
Zoom set at telephoto:  Approx. 60 cm to 2 m

00_8CQ.book  Page 45  Wednesday, May 14, 2003  8:10 PM

Содержание Finecam L3

Страница 1: ...se Secure Digital SD Memory Cards or Multi Media Cards MMC for use with this camera These cards are referred to in these User s Manuals as Memory Cards Faites l acquisition de Cartes Mémoire Secure Digital SD ou de Cartes MultiMedia MMC que vous utiliserez dans cet appareil Dans le présent manuel ces cartes sont appelées Cartes Mémoire Introduction Introduction Preperations of Camera Préparatifs d...

Страница 2: ...r the operation of the camera please read this User s Manual carefully and follow its instructions to assure proper use Check the Contents Make sure all the items below are included in the box Digital camera Finecam L4 or Finecam L3 User s Guide this book Quick Start Guide USB cable for the connection to PC page 31 Hand strap page 13 CD ROM for the driver software Memory card SD Memory Card page 1...

Страница 3: ...ich are set before shooting images Such functions include the flash and exposure compensation This section is intended for those who have understood the basic operations of the camera and have become used to shooting operations The section Using Playback p Mode Functions describes how to use functions used for viewing images as well as functions that allow simple image processing such as resizing ...

Страница 4: ...ra Steady 20 LED Displays after Shooting 20 Shutter Release Button Half way Down 20 Using and buttons 21 Let s Shoot Movies too 22 Checking the Pictures Playback of Images 23 Checking Image Information 24 Movie Display 24 Display during Movie Playback 24 Erasing Unwanted Images 25 Using the directional keypad and execute button 26 When the Memory Card is Full 27 Connecting to a PC 28 Installing th...

Страница 5: ...e 56 sM CHROMA Changing the Contrast 57 sM SHARPNESS Sharpening the Outline 58 sM mM WB PRESET Setting White Balance Manually 59 sM AE MODE Selecting the Exposure Mode 60 sM mM FOCUSING Selecting the Focus Mode 61 sM LONG EXP Slowing the Shutter Speed 63 sM ISO Changing ISO Sensitivity to Shoot Subjects 64 sM METERING Selecting the Area to be Exposed 65 sM DIGITAL ZOOM Using Digital Zoom or Not 66...

Страница 6: ...ing a function to the and button 85 COLOR SELECT Setting the Color of Menu Display 88 START SCREEN Selecting the Startup Screen 89 REC REVIEW Reviewing the Image Just after Shooting 90 LANGUAGE Selecting the Display Language 90 FILE NO Resetting the File Number to 0001 91 MODE RESET Restoring Default Settings of Functions 92 Appendix 93 Troubleshooting 93 List of Menus and Icons Displayed on the L...

Страница 7: ...ning the equipment off and on the user is encouraged to try to correct the interference by one or more of the following measures Change the direction of the radio or TV antenna Move the equipment or the radio or TV For example if the equipment is to the right of the TV move it to the left of the TV Or move the equipment farther away from the radio or TV Plug the equipment into a different outlet D...

Страница 8: ...e sun or other strong light source since your eyesight may be damaged Do not attempt to take pictures while driving or walking particularly when looking through the viewfinder or at the LCD monitor since you may cause an accident When taking pictures remain aware of your surroundings and what is happening around you CAUTION Clean the camera well after using it at the beach or other locations subje...

Страница 9: ... or damage caused by the use of accessories made by other manufacturers or fashioned by the user Photographs taken of professional performances exhibitions displays or copyrighted materials may be used only for your own personal enjoyment and only with the consent of the copyright holders Other use may constitute violation of applicable copyright laws Be aware that some performances exhibitions or...

Страница 10: ...d trademarks or trademarks of their respective owners PRINT Image Matching This product supports PRINT Image Matching II When used in combination PRINT Image Matching II enabled digital still cameras printers and software help photographers to produce images more faithful to their intentions USB DIRECT PRINT This digital camera supports the USB DIRECT PRINT function and can directly be connected t...

Страница 11: ...river first then connect the camera to a PC Otherwise you cannot install the USB driver correctly For details refer to page 28 Sending images by e mail Editing images using image editing software You can e mail digital images or take the mem ory card to a photo lab for printing just as ordi nary films Ask about services at the photo lab Digital Print Printer Photo lab Saving images as background o...

Страница 12: ...mory card supplied PC AC adapter Not included Photo lab Printer E mail Digital camera USB DIRECT PRINT This function is supported only by the EPSON PM 860PT Printer Note that the function is not supported by the other manufacturers and other models made by EPSON This printer is not available in some regions For the details contact your local EPSON service support ...

Страница 13: ...t illumination page 99 DCaution LED red page 100 EStandby LED green page 100 FViewfinder page 43 GLCD monitor page 96 HDirectional keypad Up Down Left Right page 26 Ie button page 26 JMENU button page 25 KDISP button page 44 LZoom buttons wide angle telephoto page 42 MMemory card access LED orange page 100 NStrap lug OMemory card door page 14 PTripod socket Q button button RBattery cover page 14 S...

Страница 14: ...ch a seal etc on the memory card If you do so you may not be able to remove the memory card 3 Open the battery cover Put your finger on the battery pack cover release lever and slide it to open the battery pack cover 4 Insert the supplied lithium battery pack CR V3 Make sure of the direction of the and of the bat tery 5 Close the card cover and the battery cover 1Close the card cover Then the batt...

Страница 15: ... shooting or erasing images are disabled and the WRITE PROTECT will be displayed on the LCD monitor The AA batteries may also be used You can also use 2 nickel metal hydride rechargeable battery and 2AA nickel batteries other than the supplied lithium battery pack CR V3 In comparison with the supplied CR V3 the recording capacity and playback time will be shortened by using the batteries above Man...

Страница 16: ... to SET UP The setup menu is displayed 2 Set the date and time 1 Press Down on the directional keypad to select DATE then press Right on the directional keypad 2 Use the directional keypad to set the date and time Press Left or Right on the directional keypad to move the cursor to Year Month Day Hour Minute Display format Press Up or Down on the directional keypad to change each value and the disp...

Страница 17: ... are saved it is practical to organize image data in an album etc on your PC Display format of date You can select the display format order of year month and date There are 3 types When INSERT DATE is set to ON the date is shown in the format which was selected in the date setting page 81 DISP MENU SET UP 1 3 BRIGHT CNTRL STANDARD DATE INSERT DATE FORMAT POWER SAVE 2003 02 01 NO DATE EXECUTE 3MIN ...

Страница 18: ...Camera Mode Set the mode select dial to s then press the POWER power button to turn on the camera s power After the start screen is displayed the date is shown for approximately 3 seconds Make sure that the date is correct 2 Compose your picture for the subject Compose your picture while watching on the LCD monitor Take care of camera shake See also For Camera shake see page 49 Holding the Camera ...

Страница 19: ... When exposure and focus are not set The standby LED and focus mark are flashing and no electronic beep is heard Repress the shutter release button halfway down or use the focus lock to set exposure and focus properly If the focus should improperly be set the shut ter is released to take a picture 4 Take a picture Fully depress on the shutter release button to take the picture the shutter sound is...

Страница 20: ...ED flashes after shooting the flash is being charged Wait until the caution LED goes before taking the next picture Shutter Release Button Half way Down When the shutter release button is pressed it will stop partway in its travel In this semi depressed position the camera sets exposure and focus for shooting When the shutter release button is fully depressed the picture is taken and recorded Rela...

Страница 21: ... before shooting You can also use the settings for handling the EX COMP or W BALANCE in addition to LCD BRIGHT For details refer to CUSTOM SET in the Setup modes page 85 By pressing these buttons on Multiple Image Display in Playback modes or in Setup modes the pages on the display can be turned over Multiple Image Display in Playback modes Press the Right or Left button on the directional keypad ...

Страница 22: ... button can be used before recording but it is disabled during recording To stop recording before 30 seconds have elapsed press the shutter release button When PIXELS is set to 160x120 you can record a max 120 seconds movie U P TES DISP MENU Remaining seconds for recording The camera controls the exposure in record ing according to the surrounding brightness Focusing mark green Lights when the sub...

Страница 23: ...ss Left Reverse direction You can also check the recorded image by pressing or button Press Forward direction Press Reverse direction Playing Back a Still Picture To enlarge or contract the image press the zoom button Press the telephoto button to enlarge the image Press the wide button to contract the image to the original size After the image is enlarged use the direc tional keypad to move the s...

Страница 24: ... To delete the information repress the display button 1Press the e button to start playback of the movie 2Pressing Right or Left on the directional keypad once pauses the picture and starts forward frame advance playback Each time you press a frame advances in forward direction 3Press the e button to stop playback INFORMATION 0 PCS The information will be displayed Folder name and file name Date o...

Страница 25: ... Press the MENU button The menu icons for the playback mode are displayed 3 Press Right on the directional keypad to select ERASE 4 Press the e button 2 Select the image you want to erase Press Right or Left on the directional keypad to display the image to be erased As an example erase the displayed image DISP MENU MULTI DISP MENU ERASE DISP MENU ERASE IMAGE EXECUTE CANCEL ...

Страница 26: ...s the MENU button to exit the operation Using the directional keypad and execute button To select the item from the menu icon or menu use the directional keypad and execute button DISP MENU ERASE IMAGE EXECUTE CANCEL DISP MENU ERASE IMAGE EXECUTE CANCEL In this manual we call the center section as execute button and its surrounding area directional keypad Directional keypad Execute button To selec...

Страница 27: ... supplied PC cable to save images to a PC For details see page 28 Also there are two ways to erase all images on a memory card Erase all and Format For details on the Erase all function see page 71 For details on the Format function see page 82 If it becomes impossible to record any further images on the memory card due to lower memory capacity the message MEMORY CARD FULL is displayed on the LCD ...

Страница 28: ...rver should be excluded If the operating system you are using is not one of the above or if it is one of the above but is updated from a previous version correct behavior is not guaranteed In addition any PC requires the following installation PC with a USB port for connection CD ROM drive for installing software Caution Be sure to install the USB driver before connecting the camera to the PC with...

Страница 29: ...CD ROM into the CD ROM drive on your PC or Mac For Windows 98 and Windows 98 SE users 1 In the My Computer window double click the Cd_41 D or Cd_40 D folder to open it The alphabetical letter D may vary with the PC you are using 2 Double click the Eng folder then the Disk1 folder to open it Double click the Setup exe file to start installations Follow the instruction and install the driver ...

Страница 30: ...ouble click the CD ROM icon CD_41 or CD_40 displayed on the screen to open the CD ROM window 2 Double click the UD0105 E folder to open it then copy the following files to the folder Extensions in the system folder UD0105 USB Storage Driver UD0105 USB Storage Shim E Caution If you failed in installation uninstall the USB driver following the procedure shown in page 37 and reinstall it ...

Страница 31: ...the PC 2 Turn on the camerapower If you can con firm the follow ing steps the connection is completed Camera s LCD after connecting to your PC PC MODE will appear on the LCD monitor The self timer LED stays lit while the camera is connected to the PC Caution When PC mode is displayed on the LCD monitor of the camera but when Removable Disk or Untitled Folder icon does not appear on the PC display ...

Страница 32: ...ting the camera Windows New Removable Disk icon appears in My Computer window The alphabetical letter in the parentheses varies with the PC you are using For Windows XP users The following Window will appear Macintosh Untitled Folder icon appears on the Desktop ...

Страница 33: ...ows XP users The following Window will appear The 100 in the folder 100KCBOX means the number from 100 to 999 For the sequential number reset see page 91 Double click this icon If you select this icon a folder containing image files opens Removable Disk Still images Movies All the file names should be unique If you delete an image the name for the image will never be used again This folder will be...

Страница 34: ...back on the camera Be sure to copy the image before editing or rotating it The batteries built in the camera will be consumed while the camera and your PC are con nected It is recommended only to copy an image in the PC folder during connection Use caution to connect the camera and the PC for short time as possible If you connect the camera and the PC for a few hours it is recommended to use an op...

Страница 35: ...rent unit was selected Click Cancel in this step and return to step 2 Then select another USB Mass Storage Device In some PCs select Kyocera Finecam L3 USB device 4 When the message USB Mass Storage Device can be removed safely appears click OK 5 Disconnect the USB cable and turn off the power switch of the camera For Windows 98 98SE Turn off the power then disconnect the USB cable For Windows XP ...

Страница 36: ...card may not be able to be used on the camera DO NOT delete or move image data directly from the memory card to a PC If you want to delete any image data from the memory card use the DELETE command on the camera Uninstalling the USB Driver and Remedies For Windows 98 and Windows 98SE users if you have connected the USB cable before installing the driver software the driver software is not installe...

Страница 37: ...Access the Device Manager 1 Right click the My Computer icon then click Properties 2 On the System Properties window click the Device Manager tab 5 Click Other Devices and click Delete of Kyocera Finecam L4 or Kyocera Finecam L3 with mark 6 When the window confirming the deletion of the device appears click OK 7 Turn off the camera power and disconnect the USB cable then restart your PC When the c...

Страница 38: ...ified in PRINT page 76 Only available with printers which support DPOF For details on the operation refer to the instruction manual of the printer that supports DPOF Even if the date print is set by DPOF some printers may not print the date Through this function you can connect the digital camera to the printer using the USB cable to print an image The printer is not available in some regions For ...

Страница 39: ...dels and printers made by other manufacturers don t support the print functions above As of the end of February in 2003 Setting and Using the Printing Functions 1 To use the DPOF Print set the mode to print DPOF in the playback mode page 76 2 Connect the camera and the printer with the supplied USB cable DISP U P T ES ALL RESET EXECUTE INDEX SET PRINT SEL IMAGE SETTING PRINT RETURN INDEX SETS DPOF...

Страница 40: ...directional keypad The submenu will be displayed Press Up or Down on the directional keypad to select the sub menu and press the execute button After the printing function is set select EXECUTE PRT and press the execute button You can now set the paper type image layout etc For details refer to the instruction manual of the printer 5 Print the image Check the paper set on the printer and printer s...

Страница 41: ...This function can also be used for subjects which are hard to bring into focus 1 Align the focus frame with the subject you wish to bring into focus then press the shutter release button halfway Focus has been achieved when you hear the beep and the standby LED lights Focus and Exposure are locked Focus Lock AE Lock 2 Move the camera while the shutter release button is half pressed until you have ...

Страница 42: ... to take a close up of a flower you cannot get near to such as at a school presentation of field day Compose your picture by pressing the telephoto button to enlarge the subject and the wide angle button to reduce the size of the subject In addition to an optical zoom this camera is also equipped with an electronically con trolled digital zoom function for increasing the magnification Although ima...

Страница 43: ...o turn off the LCD monitor and shoot images using the viewfinder when you wish to save battery power Pressing the DISPLAY button twice turns off the LCD monitor Shoot the image while paying attention to camera shake page 49 field of view and parallax page 49 See Specifications page 104 for field of view DISP MENU ...

Страница 44: ... it may be difficult to use during shooting Press the DISP button to turn off icon displays if necessary When the camera is ready to shoot with the mode select dial set to s or m mode pressing the DISPLAY button toggles the display of icons on the LCD monitor as shown below LCD monitor ON LCD monitor OFF LCD monitor ON Icons are displayed Icons are not displayed Flash mode Macro Landscape mode Foc...

Страница 45: ... flash is necessary There are useful ways to use flash besides under dark conditions This section describes how to use the flash modes in accordance with the scene to be shot including using flash even when surroundings are bright and not using flash even when surroundings are somewhat dark Usable Flash Range The flash range differs depending on zooming status and ISO sensitivity Use the following...

Страница 46: ... the lighting avoid camera shake by stabilizing the camera with a tripod a Fill in Flash Mode In this mode the flash fires regardless of surrounding light conditions A portrait becomes darker when shooting with strong sunlight or with lighting coming from behind the people In such cases it is possible to take a clear shot of both subject and background Night Backdrop Mode When shooting people in f...

Страница 47: ...ction of light entering the eye Operation setting to This mode will be returned to the default setting when the power is turned off If you want to preserve the setting set MODE LOCK to ON page 84 1 Turn on the power and set the mode select dial to s 2 Press Up on the directional keypad When appears the setting is completed Each time you press Up on the directional keypad the flash mode icon change...

Страница 48: ...nice for shooting the low contrast landscape such as sky 1 Turn on the power and set the mode select dial to s 2 Press Down on the directional keypad When appears the setting is completed Each time you press Down on the directional keypad the Macro Landscape mode icon changes In the macro mode you cannot use the zooming control The focus is fixed to wide focus area You can use a digital zoom In th...

Страница 49: ...ng macro shots What is Parallax Parallax refers to the difference between the composition of a picture as viewed through the viewfinder and the image that is actually taken Pay attention to the parallax particularly in macro shooting mode When taking macro shots using the viewfinder take the picture by estimating the parallax and slightly moving the camera to compensate Since the amount of paralla...

Страница 50: ...ake another picture using the self timer Use a tripod to stabilize the camera To cancel the self timer before the shutter is released press the shutter release button OFF Normal shooting default t10 Sets the 10 seconds timer t2 Sets the 2 seconds timer 1 Turn on the power and set the mode select dial to s or m 2 Press the MENU button to display the menu icons 3 Press Left or Right on the direction...

Страница 51: ...r m Since the setting for this mode is saved even if the power is turned off it is necessary to reset the setting depending on the scene and subject to be shot Still images Movies Finecam L4 Finecam L3 Finecam L4 and Finecam L3 2304x1728 default 2048x1536 default 320x240 default 1600x1200 1600x1200 160x120 1280x960 1280x960 640x480 640x480 2 Press the MENU button to display the menu icons 3 Press ...

Страница 52: ...r mov ies Operation setting to FINE 1 Turn on the power and set the mode select dial to s Since the setting for this mode is saved even if the power is turned off it is necessary to reset the setting depending on the scene and subject to be shot FINE Fine Low compression ratio is applied when shooting NORMAL Normal default High compression ratio is applied when shooting 2 Press the MENU button to ...

Страница 53: ...mage as an e mail attachment decrease the size of the file by selecting image dimensions To emphasize picture quality set the image quality to FINE In other cases use NORMAL to keep image files small and increase the number of recordable images Image Dimensions Pixels Quality 1 File Size 2 Number of Images Recordable in a Memory Card 3 s Camera mode still images 2304x1728 L4 only F About 2 0 MB Ab...

Страница 54: ...Use this mode when suitable exposure cannot be obtained due to extreme differences in the brightness of the subject versus the background or when you wish to intentionally under or over expose an image As an example of extreme differences in the brightness of the subject versus background a scene on the stage with lighting coming from the spot light or a portrait in the location covered with snow ...

Страница 55: ...tions Bright sun Since the light source is specified you can take a picture without being influenced by the color of the subject Incandescent light bulbs tungsten Cloudy weather Fluorescent lights Preset The white balance selected in the SET DETAILS menu is used The setting must be made before shooting images page 59 Custom White Balance You can easily control the white balance just before shootin...

Страница 56: ... B W B W SEPIA SEPIA 2 Press the MENU button to display the menu icons 3 Press Left or Right on the directional keypad to select sM or mM then press the e button 4 Press Up or Down on the directional keypad to select COLOR MODE then press Right on the directional keypad 5 Press Up or Down on the directional keypad to select SEPIA then press the e button 6 Press the MENU button When the menu displa...

Страница 57: ...Since the setting for this mode is saved even if the power is turned off it is necessary to reset the setting depending on the scene and subject to be shot 1 High contrast No icon STANDARD default 1 Low contrast 4 Press Up or Down on the directional keypad to select CHROMA then press Right on the direc tional keypad 5 Press Up or Down on the directional keypad to select then press the e button 6 P...

Страница 58: ...ode is saved even if the power is turned off it is necessary to reset the setting depending on the scene and subject to be shot 3 3 Intensifies outline enhancement 2 2 1 1 No icon STANDARD default 1 1 Suppresses outline enhancement 4 Press Up or Down on the directional keypad to select SHARPNESS then press Right on the directional keypad 5 Press Up or Down on the directional keypad to select 2 the...

Страница 59: ...e and subject to be shot Set the mode respectively in Camera s and Movie m mode 3 Press Left or Right on the directional keypad to select sM or mM then press the e button 4 Press Up or Down on the directional keypad to select WB PRESET then press Right on the direc tional keypad 5 Locate the camera above the white subject you have prepared until the image fills the screen and select SET then press...

Страница 60: ...cessary to reset the setting depending on the scene and subject to be shot No icon PROGRAM default The camera determines the shutter speed and aperture value according to the subject F2 8 F2 8 The area that is clearly in focus at the front and back of the subject is lengthwise narrower making the subject stand out F7 5 F7 5 The area that is clearly in focus at the front and back of the subject is ...

Страница 61: ... a wide focus frame The area clearly in focus becomes wider so that this mode is good to shoot two people standing side by side SPOT AF default Shots are taken with a regular focus frame MF Allows you to focus manually by determining the focus distance Focus distance 0 6 m to 4 Press Up or Down on the directional keypad to select FOCUSING then press Right on the direc tional keypad 5 Press Up or D...

Страница 62: ...his mode is saved even if the power is turned off it is necessary to reset the setting depending on the scene and subject to be shot Press Left or Right on the directional keypad to select the desired focus distance The focus cannot be set with the viewfinder when MF is selected Use the LCD monitor Approximately 3 m Approximately 5 m Approximately 1 m ...

Страница 63: ...d off the mode will be returned to the default setting OFF and the normal shooting mode will be restored Use a tripod to avoid camera shake LT4S 4 SEC or LT8S 8 SEC might not be selected in this mode according to your selec tion of ISO sensitivity page 64 For the details see page 103 LT8S 8SEC Shutter speeds of 2 seconds 4 seconds and 8 seconds can be set LT4S 4SEC LT2S 2SEC No icon OFF default No...

Страница 64: ...ing the ISO sensitivity to 320 Since the setting for this mode is saved even if the power is turned off it is necessary to reset the setting depending on the scene and subject to be shot ISO160 or ISO320 might not be selected in this mode according to your selection of LONG EXP page 63 For the details see page 103 ISO320 320 Sets a fixed ISO sensitivity ISO160 160 ISO80 80 No icon AUTO default ISO...

Страница 65: ...scene and subject to be shot No icon EVALUATION default With this method the entire screen is divided into 224 sections and the amount of light is measured for each to determine the best exposure value for the subject CENTER With this method weight is given to the amount of light in the central area of the screen larger than SPOT AREA SPOT AREA With this method the amount of light at the center of...

Страница 66: ...s Left or Right on the directional keypad to select sM SET DETAILS then press the e button Since the setting for this mode is saved even if the power is turned off resetting will be nec essary depending on the scene and subject to be shot ON Default Digital zoom can be used OFF Digital zoom cannot be used 4 Press Up or Down on the directional keypad to select DIGITAL ZOOM then press Right on the d...

Страница 67: ...back With multiple image display it is possible to display six thumbnail images on the LCD monitor Viewing Pictures on the Multiple Image Display 1 Turn on the power and set the mode select dial to p 2 Press the MENU button to display the menu icons 3 Press Left or Right on the directional keypad to select MULTI then press the e button The multiple image playback screen appears MULTI ...

Страница 68: ... to move the cursor to the previous image and Right on the directional keypad to move the cursor to the next image Press Up on the directional keypad to move the cursor to the image above and Down on the directional keypad to move the cursor to the image below You can change over the displayed page by pressing or button Press Forward direction Press Reverse direction Press the MENU button to displ...

Страница 69: ... keypad to move the cursor to the image you wish to erase 4 Press Up on the directional keypad to select EXE CUTE then press the e button The image will be erased To erase other images repeat steps 3 and 4 5 Press the MENU button to finish the erasure opera tion The multiple image display will appear again 1 Use the directional keypad to move the cursor to the image you wish to display for the nor...

Страница 70: ... Images Use caution when erasing an image You cannot restore the erased image The protected images cannot be erased page 70 You cannot use this operation while the SD memory card is write protected For write protect see page 15 To Erase an Image 1 Turn on the power and set the mode select dial to p 2 Press the MENU button to display the menu icons 3 Press Left or Right on the directional keypad to...

Страница 71: ...keypad to select ERASE then press the e button 4 Press Left or Right on the directional keypad to select the image you wish to erase 5 Press Up on the directional keypad to select EXE CUTE then press the e button to erase the image To erase other images repeat steps 4 and 5 2 Press the MENU button to display the menu icons 3 Press Left or Right on the directional keypad to select ERASE ALL then pr...

Страница 72: ...ess Left or Right on the directional keypad to select RESIZE then press the e button 4 Select EXECUTE RESIZING then press the e button 5 Press Left or Right on the directional keypad to select the image press Up on the directional key pad to select OK then press the e button 6 Set the area to be resized DCIM RESIZE R00_0001 jpg Resized images are recorded in the directory as shown on the right A n...

Страница 73: ...then press the e button 8 The name of the resized image will be displayed Press the e button after checking the name 4 Press Down on the directional keypad to select RESIZED IMAGE PLAYBACK then press the e button The resized image will be displayed Press Left or Right on the directional keypad to view the images in forward or reverse order 5 To erase the resized image press Up or Down on the direc...

Страница 74: ... 2 Press the MENU button to display the menu icons 3 Press Left or Right on the directional keypad to select ROTATE then press the e button 4 Press Left or Right on the directional keypad to select the image you wish rotate 5 Press Up or Down on the directional keypad to select then press the e button Rotate 90 to the left Rotate 90 to the right RETURN Returns to the menu icon display The rotated ...

Страница 75: ... press Right on the directional keypad 2 Press Up or Down on the directional keypad to select a playback interval then press the e button 5 Set the first frame 1 Press Up or Down on the directional keypad to select START FRAME then press Right on the directional key pad 2 Press Up or Down on the directional keypad to select THIS FRAME or 1ST FRAME then press the e but ton 6 Press Up or Down on the...

Страница 76: ...the operating instructions for it You cannot use this operation while the SD memory card is write protected For write protect see page 15 Operation 1 Turn on the power and set the mode select dial to p 2 Press the MENU button to display the menu icons 3 Press Left or Right on the directional keypad to select PRINT then press the e button 4 Press Up or Down on the directional keypad to select PRINT...

Страница 77: ...t in this mode the date printing is doubled 8 Press Up or Down on the directional keypad to select PRINT SET then press Right on the direc tional keypad 9 Press Up or Down on the directional keypad to select EXECUTE then press the e button to complete the DPOF setting If you select RETURN changes will not be applied to the set ting and the display returns to the SETTING PRINT screen The display re...

Страница 78: ...ETURN The display returns to the SETTING PRINT screen 4 Press Up or Down on the directional keypad to select ALL RESET then press Right on the direc tional keypad 5 Press Up or Down on the directional keypad to select EXECUTE then press the e button to release all print settings The display returns to the SETTING PRINT screen ALL RESET EXECUTE INDEX SET PRINT SETTING PRINT RETURN SEL IMAGE INDEX S...

Страница 79: ... the images that should be kept Use the multiple image display 1 Display the menu icons and select PROTECT Then erase all images 2 Press Left or Right on the directional keypad to display the image desired that should be kept then press the e button Repeat this procedure to select the images that should be kept 1 Display the menu icons to select ERASE ALL then press the e button ERASE ALL appears ...

Страница 80: ...nitor This function adjusts brightness of the LCD monitor Operation 1 Turn on the power and set the mode select dial to SET UP 2 Press Up or Down on the directional keypad to select BRIGHT CNTRL then press Right on the directional keypad 3 Press Up or Down on the directional keypad to select the brightness press the e button to com plete the setting Select to make the LCD monitor brighter and to m...

Страница 81: ...oting NO DATE default The date is not written 2 Press Up or Down on the directional keypad to select INSERT DATE then press Right on the directional keypad 3 Press Up on the directional keypad to select WITH DATE then press the e button to complete the setting When the function is set to WITH DATE the date is always dis played on the LCD monitor when shooting Note that the date will be printed twi...

Страница 82: ...ght on the direc tional keypad 3 Press Up on the directional keypad to select EXE CUTE then press the e button to begin format ting 4 When formatting is completed the display returns to the SET UP 1 3 screen Note that protected images will also be erased If you want to record the image from the file KIF_0001 jpg in the folder 100KCBOX remove the memory card after formatting and follow the Resettin...

Страница 83: ...n POWER SAVE is set to NO PWR OFF With this setting when the camera is left inactive for more than six minutes it automatically enters the sleep mode In this case the camera remains in the sleep mode indefinitely without the power turning off To restore the camera to its normal shooting mode depress the shutter button halfway or press one of the other function buttons 2 Press Up or Down on the dir...

Страница 84: ...ettings will be returned to their default values when the power is turned off 2 Press Up or Down on the directional keypad to select MODE LOCK then press Right on the directional keypad 3 Press Up on the directional keypad to select ON then press the e button to complete the setting ON Set the Beep to ON OFF Turns the beeping sound off 2 Press Up or Down on the directional keypad to select BEEP th...

Страница 85: ...CD monitor can be changed in 9 levels EX COMP The exposure can be controlled from 2 0 to 2 0 in 0 1 EV increments W BALANCE An adequate White Balance type AUTO can be selected 2 Press the Up or Down button on the directional key pad and select CUSTOM SET Then press the Right button on the directional keypad 3 Press the Up or Down button on the directional key pad and select EX COMP When the settin...

Страница 86: ...ed with the and buttons will be released when any of the following operations are executed To fix the brightness on the LCD set the value using BRIGHT CNTRL page 80 in the SETUP mode Pressing the menu button Turning the mode select dial to switch over to other modes Turning off the power switch The compensation value can be set between 2 0 and 2 0 in 0 3 EV steps by pressing the or button each tim...

Страница 87: ... page 54 in the camera modes or the movie modes Pressing the menu button Turning the mode select dial to switch over to other modes Turning off the power switch You can use this function in Camera or Movie modes You can select the white balance fitting to your light source by pressing the or button each time Operations when W BALANCE is selected AUTO Auto default This sets the white balance automa...

Страница 88: ...ower switch is turned on set the value using WB page 55 in the camera modes or the movie modes Pressing the menu button Turning the mode select dial to switch over to other modes Turning off the power switch COLOR SELECT Setting the Color of Menu Display Operation setting to RED 1 Turn on the power and set the mode select dial to SET UP YELLOW default RED PURPLE BLUE 2 Press Up or Down on the dire...

Страница 89: ...tup screen OFF Nothing appears on start screen 1 Turn on the power and set the mode select dial to SET UP 2 Press Up or Down on the directional keypad to select START SCREEN then press Right on the directional keypad 3 Press Left or Right on the directional keypad to select one of the screens then press the e button to complete the setting 2 Press Left or Right on the directional keypad to select ...

Страница 90: ...s after shooting 2 Press Up or Down on the directional keypad to select REC REVIEW then press Right on the directional keypad REC REVIEW menu screen appears 3 Press Up or Down on the directional keypad to select OFF then press the e button to complete setting Japanese ENGLISH English FRANÇAIS French DEUTSCH German ESPAÑOL Spanish Chinese simplified 2 Press Up or Down on the directional keypad to s...

Страница 91: ...mode select dial to SET UP 2 Press Up or Down on the directional keypad to select FILE NO then press Right on the direc tional keypad 3 Press Up on the directional keypad to select OK then press the e button to complete the setting 100KCBOX KIF_0001 JPG KIF_0002 JPG KIF_0003 JPG 101KCBOX KIF_0001 JPG KIF_0002 JPG New folder When the folder name is 999KCBOX the file number cannot be reset A new fil...

Страница 92: ...on the power and set the mode select dial to SET UP 2 Press Up or Down on the directional keypad to select MODE RESET then press Right on the directional keypad 3 Press Up on the directional keypad to select EXE CUTE then press the e button to complete the setting For default settings of each menu see page 101 SET UP 3 3 REC REVIEW 2SEC ENGLISH FILE NO MODE RESET EXECUTE EXECUTE RESET CAMERA EXECU...

Страница 93: ...After that the LCD doesn t display remove the battery pack once and reinstall it in the original location The number of images recordable does not change when a picture is taken The file size of the recorded image was very small File size and number of pictures recordable differ depending on the image quality setting and subject conditions not a malfunction Image cannot be erased mark appears The ...

Страница 94: ...o over exposure Either turn off the long exposure or reset the mode settings Image cannot be rotated set for DPOF protected or resized The message WRITE PROTECT appears The write protect switch is set SD memory card Release the SD memory card s write protect lock or insert a different memory card page 15 Much noise is found on the image Noise occurs easily by increasing the ISO sensitivity or sett...

Страница 95: ...e with the camera Insert another memory card or format it Memory card is not loaded correctly Remove the memory card and reload it correctly NO IMAGE Nothing is recorded on the memory card Insert a memory card with recorded image data Take a picture CANCEL PRINT Printing is cancelled from the printer or camera Return the menu of Direct Print by selecting Check or Cancel If you restart printing che...

Страница 96: ...rdable images 9Auto Exposure mode page 60 0Sharpness page 58 AChroma page 57 Focus frame page 61 BWide AF CSpot AF DMacro Landscape mode page 48 ESelf timer page 50 FDigital zoom Long Exposure page 63 GExposure compensation page 54 HFocus gauge appears when focus mode is set to MF page 61 IDate JBattery indicator KRemaining seconds that can be recorded for LCustom setting indicator C_AE Exposure c...

Страница 97: ...WB PRESET AE MODE SETTINGS 1 2 COLOR SET SPOT AF COLOR MODE WB PRESET FOCUSING SETTINGS SPOT AF OFF AUTO EVALUATION ON FOCUSING LONG EXP ISO METERING DIGITAL ZOOM SETTINGS 2 2 Camera mode Movie mode page 56 page 57 page 58 page 59 page 60 page 61 page 63 page 64 page 65 page 66 page 56 page 59 page 61 1MULTI page 67 2PROTECT page 70 3ERASE page 70 4ERASE ALL page 71 Menu icons 5RESIZE page 72 6ROT...

Страница 98: ...TE FORMAT POWER SAVE 2003 01 01 NO DATE EXECUTE 3MIN SET UP 2 3 MODE LOCK ON BEEP CUSTOMSET COLOR SELECT START SCREEN OFF LCD BRIGHT YELLOW SET REC REVIEW 2SEC LANGUAGE ENGLISH SET UP 3 3 FILE NO MODE RESET EXECUTE EXECUTE page 80 page 16 page 81 page 82 page 82 page 84 page 84 page 85 page 88 page 89 page 90 page 90 page 91 page 92 ...

Страница 99: ...nt illumination Blue Red Self timer LED Red Each LED lights after the power of the camera is turned on after a mode is selected or when the camera is connected to the PC Flashes U P TES While using the self timer Lights U P T E S U P T ES When Playback p or SET UP mode is selected U P TES When shooting still images or movies PC MODE When the camera is connected to a PC ...

Страница 100: ...y card door or remove the memory card Failure to do so might break the data Camera s mode Movie m mode Ready to take a picture as the focus is set The focus is not set But you can still take a picture Camera s mode As the shutter speed is slow you need to take care of camera shake As the flash is being charged you need to wait to take the next picture until the LED stops flashing ISP ENU Flashes L...

Страница 101: ...UALITY Previous NORMAL s m EXP COMP Locked 0 0 s m WHITE BALANCE Locked AUTO s m SET DETAILS COLOR MODE Default COLOR s SET DETAILS CHROMA Previous STANDARD s SET DETAILS SHARPNESS Previous STANDARD s m SET DETAILS WB PRESET Previous Previous s SET DETAILS AE MODE Previous PROGRAM s m SET DETAILS FOCUSING Previous SPOT AF s SET DETAILS LONG EXP Default OFF s SET DETAILS ISO Previous AUTO s SET DET...

Страница 102: ...r or modify your AC adapter since dangerous electrical shock could result AC adapters that have become laden with dirt or household dust should not be used or approached with metal objects since electricity might be transmitted through the metal causing fire or personal electrical shock In the event of heavy soiling of a plug remove it from its outlet and clean away the dirt before reusing In the ...

Страница 103: ...the table below 䡬 Selectable combination Unselectable combination Shape of Plug Socket Voltage Country Type Terminal front Terminal side A 100v 125v Japan B 100v 125v USA Mexico Brazil etc C 220 240v Each country in Europe BF 220 240v England Singapore etc Menu items AUTO 80 160 320 Menu items OFF 䡬 䡬 䡬 䡬 LT2S 2 SEC 䡬 䡬 䡬 䡬 LT4S 4 SEC 䡬 䡬 䡬 LT8S 8 SEC 䡬 䡬 In this case the unselectable menu icons a...

Страница 104: ...ls gross Lens f 5 8 mm to 17 4 mm L4 35 mm camera equivalent to about 35 mm to 105 mm L3 35 mm camera equivalent to 38 mm to 115 mm 3x zoom lens F2 8 to 4 7 Focusing Range from CCD About 64 5 cm 2 to infinity In Macro Mode About 24 5 cm 1 to 64 5 cm 2 fixed to wide angle position Exposure Control Metering Method CCD multi area evaluation center weighted spot metering Control Method Programmed AE A...

Страница 105: ...lor B W sepia white balance auto daylight tungsten cloudy fluorescent preset Custom Setting focus Wide AF Spot AF MF Playback modes Multiple image display protect erase single image all erase erase all images in folder DCIM rotation right left 90 degrees slide show DPOF setting Resizing Setup modes Brightness control date date inserting memory card format auto power off setting function ON OFF and...

Страница 106: ...cate focus display Caution LED red lights to indicate flash charging or camera shake warning Front illumination lights when the camera is turned on and goes off automatically when starting operation or when selecting mode Input Output Input output connector External power input connector USB connector Battery Power Power Lithium battery pack CR V3 2 AA nickel metal hydride rechargeable batteries a...

Отзывы: