7
4.
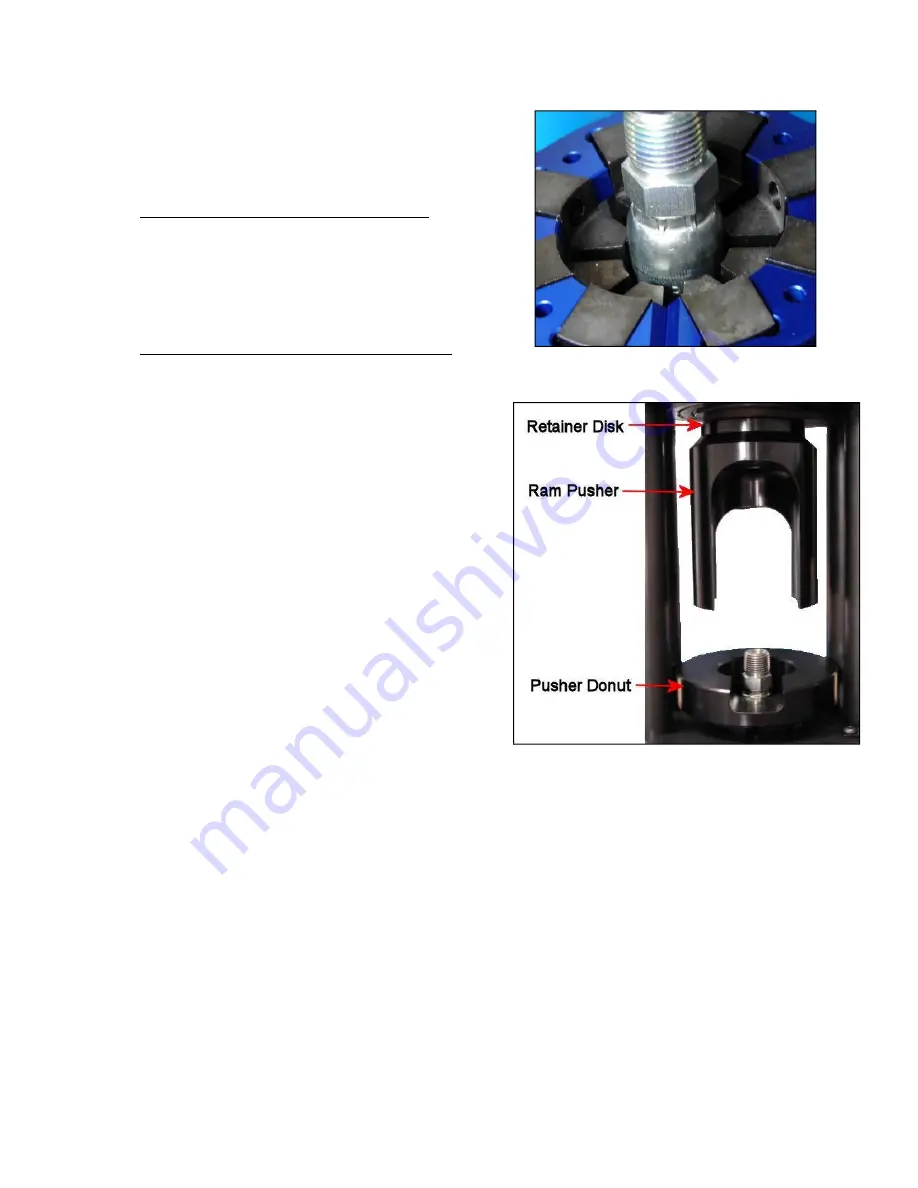
Insert the hose and coupling into the die set as
illustrated. Position the coupling to the proper depth
according to the following guideline:
Coupling with crimp location markings: Several
Kurt Hydraulics couplings are manufactured with a
knurl mark on the circumference of the ferrule.
Looking down from the die set, line up the middle
of the knurl with the top edge of the die set.
Coupling without crimp location markings:
Refer to the Kurt Hydraulics crimp specification for die position.
5.
Manually place the pusher donut on top of the die
set with the clearance slot facing forward to the
operator. Be sure the top rings of the die set are
evenly contained inside the bottom of the pusher
donut.
6.
Seat the die set in the cone base by firmly
pushing down on the pusher donut. Check the
alignment of the die set to make sure the die
holders are level and are not overlapping.
7.
Slide the ram pusher onto the retainer disk at the
end of the ram.
8.
Select the proper micrometer setting from the
Kurt Hydraulics crimp specification and twist the
top of the micrometer until that number appears on the micrometer barrel.
9.
Depress and hold the foot switch.
10.
Ram pusher will travel downward and engage pusher donut until the micrometer foot contacts
the limit switch.
11.
Release the foot switch once the micrometer contacted the limit switch and the pump has shut
off.


