12
Installation instructions - EKWE/EKWH - USA
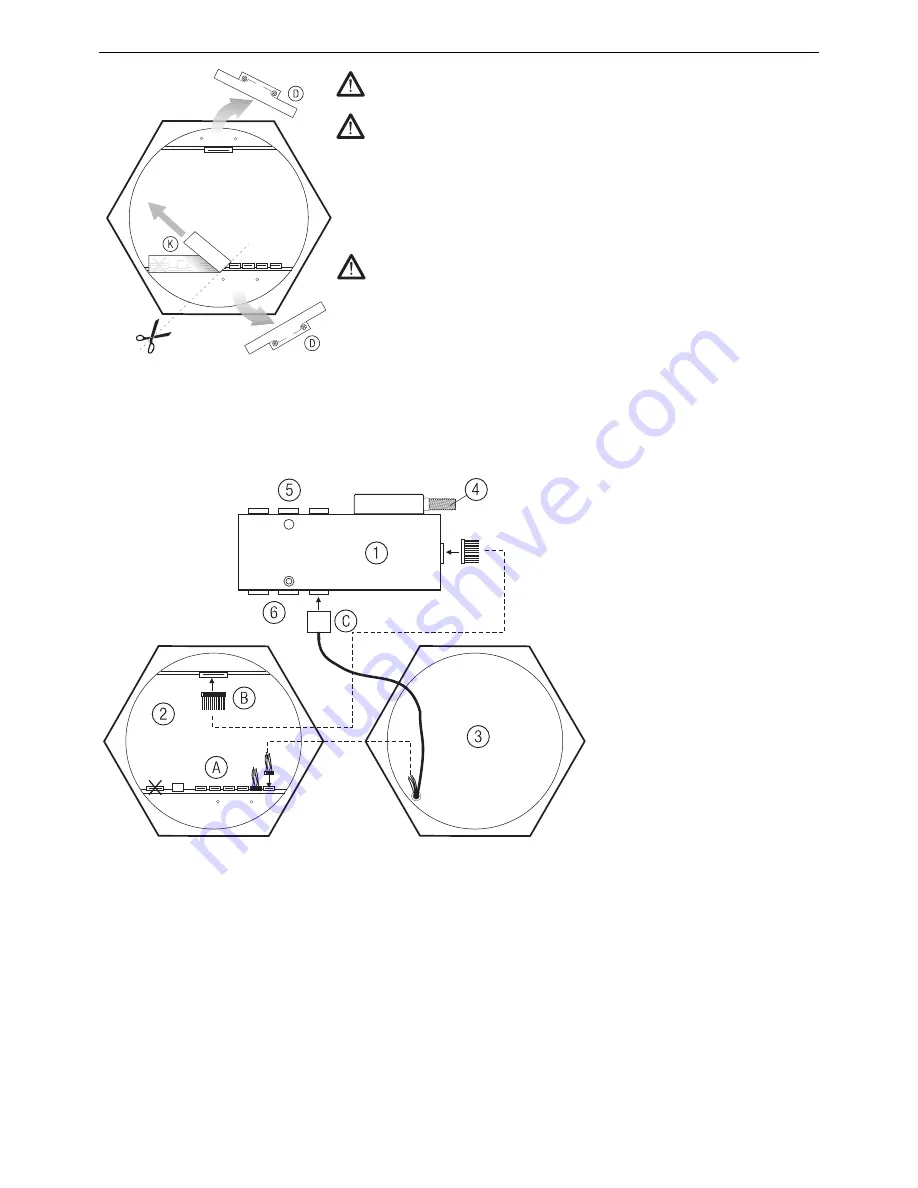
Connecting the honeycomb cooking units to the control honeycomb and to the power module
Any superfluous cable must be pulled out from the installation area beneath
the honeycomb cooktop.
Only the EKWH 320.14, EKWH 320.18 and EKWH 320.18Z honeycomb
cooking units may be connected to the EKWE 320 control honeycomb. A
dangerous situation may otherwise arise.
Apart from the first connection socket the sockets for the control honeycomb
are covered with adhesive tape
from installation side.
The sockets that are not being used must stay covered with adhesive tape.
– Unscrew the steel plate
,
.
– Pull off the adhesive tape only from the needed sockets.
– Cut off the drawn off part of adhesive tape.
– Insert the plug of the control line
of the respective honeycomb into one
of the six sockets of the control honeycomb. The lines must point to the
middle of the control honeycomb.
– Insert the plug
+
of the power cable into a socket on the power module.
Any socket may be used for single-circuit cooking zones,
for dual-circuit
cooking zones
one of the three sockets suitable for dual-circuit
cooking zones on the power module must be used (sockets on the
side opposite the mains connection).
– Connect the control honeycomb and the power module to the trip line
.
– Screw steel plate
,
back on.
– Connect the power module to a cooker connection socket by means of a
mains supply cable.
Power module
Control honeycomb
Cooking zone
Mains connection cable
Power connections for
single-circuit cooking zones
Power connections for
dual-circuit and single-circuit
cooking zones
Содержание EKWE 320.S
Страница 15: ...Installation instructions EKWE EKWH USA 15 ...


