background image

-20-

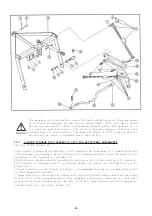
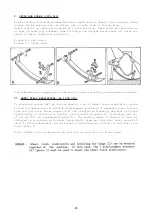
Crumbler roller scraper

If so desired, the EL 100N Power Tiller

equipped with a crumbler roller can be

fitted

with a roller scraper (D) with cleaning

plates (P) which rest against the outer

and intermediate roller support rings.

The scraper increases the efficiency of

the roller when working in wet condi-

tions,

minimising clogging.

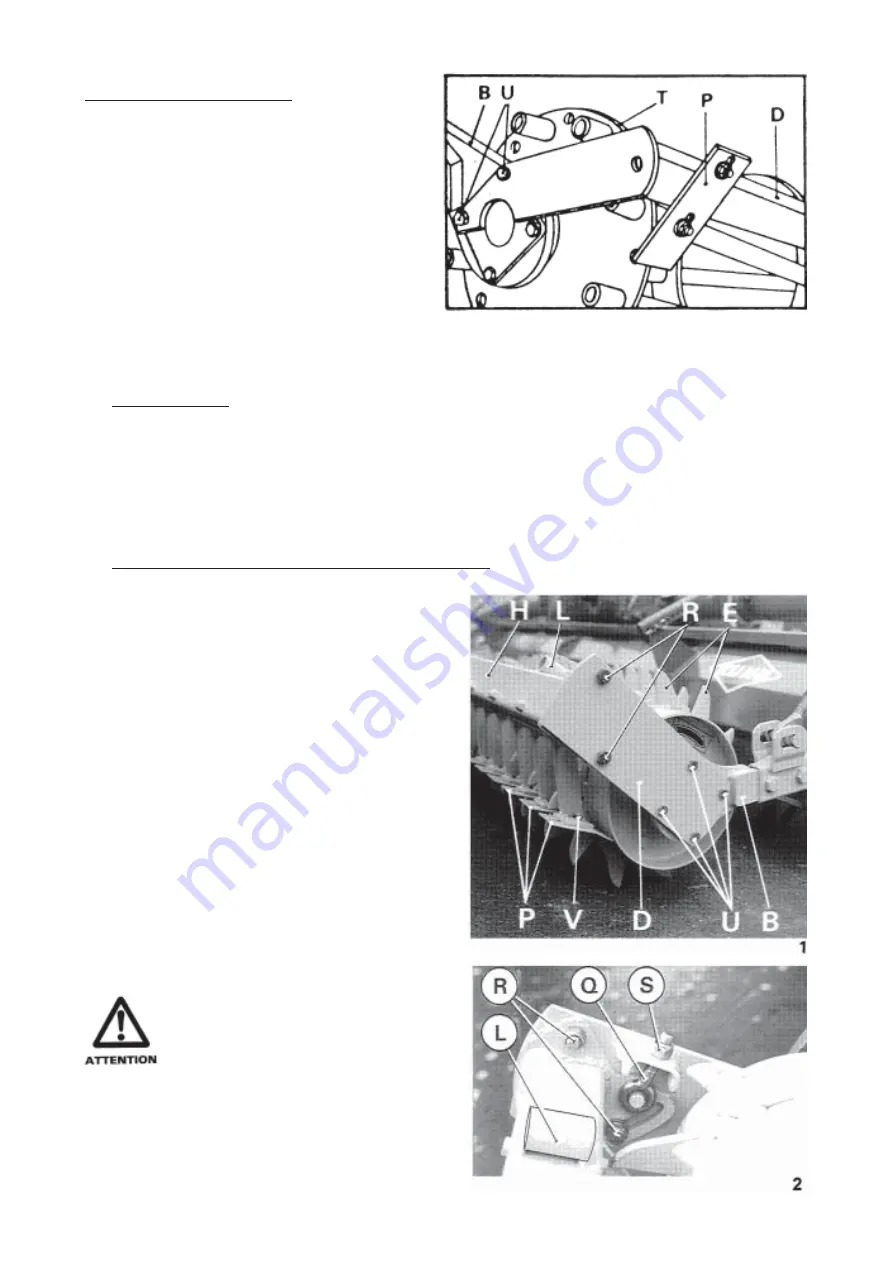
The scraper connecting tube (D) is mounted on the support arms (B) by four screws

(U). The cleaners can be individually adjusted thanks to their slot shaped mounting

holes.

2) Packer roller

This roller is particularly for use in wet, sticky conditions. Good crumbling,

efficient packing and proper levelling are always ensured by the studs welded on the

outside diameter of the cylinder (the number of which are specifically calculated

for optimal efficiency).

Mud scrapers are an integral part of the packer roller. These scrapers, placed between

the rows of studs, ensure that the roller is cleaned.

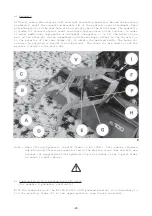
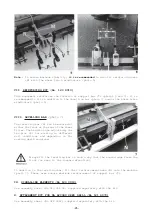
a) Assembly of the packer roller and scrapers (photo 1)

When assembling the roller, take

particular care concerning the direc-

tion of rotation (see arrow) (the

direction of rotation is indicated on

the decal fixed on the side of the

roller).

Fit the roller and the arm supports (D)

of the scraper onto the 2 arms (B) using

the bearing housing and the 8 screws (U).

Fit the scraper’s connecting tube (H)

onto the 2 arm supports (D) using the 4

nuts (R). Check that all the cleaners (P)

of the scraper are in the retracted

position. Position the 2 tensioners (Q)

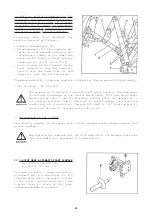
(photo 2). Using the two nuts (S) tighten

against the tensioners to pivot the

scraper towards the roller until the two

elongated holes almost butt out (photo

2). Thereafter lock the four bolts (R)

and adjust the scraper plates (P) as

described on next page.

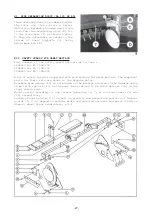
The roller arms (B) are fitted

with 8 holes for scraper arm

supports (D) fixation. Assem-

ble in place using the 4 holes

which allow the cleaners (P) to

be positioned most closely to

the ground (photo 1).

Содержание EL 100 N

Страница 1: ...ASSEMBLY OPERATOR S MANUAL EL 100 N POWER TILLER N 95458 A GB 12 1999...

Страница 2: ...instruct you on the general operation of your machine He is interested that you get the best performance possible and will be glad to answer any special questions that may arise regarding the operati...

Страница 3: ...O drive shaft 11 Slip clutch settings 12 Rotor speed rotational frequency 13 Fitting the blades 14 Use 17 Lubrification 17 Equipments 18 Important recommendations 28 Limited warranty 30 MAXIMUM ALLOWA...

Страница 4: ...other than the designated operation is at the risk and responsibility of the operator Designated use of the machine also means following operation maintenance and repair recommendations given by the...

Страница 5: ...ork check the surrounding area beware of children Make sure there is sufficient visibility Keep all people and animals away from the danger zone of the machine risk of projection 8 Carrying people or...

Страница 6: ...ng can exist when components are operated by hydraulic or pneumatic controls 25 Before leaving the tractor or before adjusting maintaining or repairing the machine turn off the engine remove ignition...

Страница 7: ...ing PTO ensure that PTO speed rotational frequency and direction are in accordance with manufacturer s recommendations 9 Before engaging PTO keep all people and animals clear from the machine 10 Never...

Страница 8: ...t lower the machine depressurize the circuit turn off the engine and remove ignition key MAINTENANCE 1 Before checking any machine malfunction and before adjusting maintaining or repairing the machine...

Страница 9: ...LS HAVE BEEN PLACED ON YOUR MACHINE IN THE AREAS INDICATED THEY ARE INTENDED FOR YOUR PERSONAL SAFETY AND FOR THE SAFETY OF THE PEOPLE WORKING WITH YOU THE TEXT SHOWN ON THEM GIVES THEIR PRECISE MEANI...

Страница 10: ...8...

Страница 11: ...and 11 respectively to front support tube 13 side gear casing 14 and side plate 15 as shown on assembly diagram below 1 Thrust washer 13 x 24 x 3 2 9 Hexagon bolt M12x50 4 Self locking nut M 10 16 Hex...

Страница 12: ...n cultiplow rotor 76 84 100 Weight with standard rotor wheels kg 715 756 850 lbs 1573 1663 1870 Weight with cultiplow rotor wheels kg 780 830 930 lbs 1716 1826 2046 Weight with cultitiller rotor and k...

Страница 13: ...5 28mm Figure A L 870 mm 1 1 1 10 34 1 4 Cat III Diameter 31 37mm Figures B and C M and N 1010mm 1 1 5 11 39 3 4 PTO DRIVE SHAFT Before attaching the PTO shaft to the slip clutch flange it is essentia...

Страница 14: ...ot exceed 40 If above situation does not exist proceed as follows Shorten both tubes by an equal length Decrease lifting height of the tractor lower link arms but ensure that there is sufficient groun...

Страница 15: ...clutch is correctly set for the prevalent ground conditions Check that working temperature remains between 30 and 40 86 and 104 F Setting too light over heating and rapid wear of the friction plates S...

Страница 16: ...ear PTO shaft 1 3 8 6 spline profil should not be used to transmit more than 37 kW 50 hp If the rear PTO shaft is not used always put cover E in place FITTING THE BLADES 1 STANDARD ROTOR According to...

Страница 17: ...Next fit the diametrically opposite blade by facing the cutting edge towards the right hand side of the machine Keep fitting left hand and right hand blades alternatively moving towards the right hand...

Страница 18: ...16...

Страница 19: ...FINE TILTH COARSE TILTH Rotor speed rotational frequency 2nd 1st Rear shield Down Up Forward speed Slow Fast Blade formation 3 pairs 2 pairs Proposed combinations Rotor speed Rear shield Tractor Blad...

Страница 20: ...11 Item 7 Drain plug Item 9 Item 3 Fill just to level plug Item 10 Item 5 Quantity oil SHELL SPIRAX SAE 90 EP 4 5 l 8 Imp pts 1 75 l 2 9 Imp pts Check the oil levels weekly Lubricate all other exposed...

Страница 21: ...side plate B The component parts of these are shown below 1 Self locking screw M 12 x 35 mm 6 Hexagon screw M 12 x 30 mm 2 Hexagon screw M 16 x 35 mm 7 Hexagon nut M 12 3 Hexagon screw M 12 x 70 mm 8...

Страница 22: ...ers placed between the rows of studs ensure that the roller is cleaned a Assembly of the packer roller and scrapers photo 1 When assembling the roller take particular care concerning the direc tion of...

Страница 23: ...bly is pivoted to the rear around the two upper bolts R one on left hand side of scraper assembly and the other on the right photo 1 Loosen the self locking nuts S photo 2 Release the two eyebolts Q R...

Страница 24: ...ulic lift reduces the overhang of a combination EL 100 N seeder for example by lifting back the combined machine over the Power Tiller by means of the hydraulic cylinder V This transfer of mass makes...

Страница 25: ...er to the interior or to the exterior of the rear frame C to obtain the desired width The hooks A can also be adjusted in height two positions The locks D are used to lock the machine linkage in the h...

Страница 26: ...gearbox is fitted with a rear PTO shaft which turns at the same speed rotational frequency as the tractor drive shaft This rear drive shaft should not be used to drive a secondary machine while the g...

Страница 27: ...machine is parked VI WHEEL TRACK ERADICATORS No 1208 000 To eliminate tracks left by tractor wheels a set of wheel track eradicators can be fitted to support bar T without displacement brackets S dep...

Страница 28: ...ar of the Power Tiller The height can be adjusted by the two pins K for working in different soil conditions and depending on the working depth required Always fit the levelling bar in such a way that...

Страница 29: ...for EL 100N 255 1208460 for EL 100N 305 A set of safety guards is supplied with each machine for Great Britain The component parts for these sets are shown in the diagram below Assemble side guards 2...

Страница 30: ...to check that there is no gap between roller and nylon cleaning plate Re adjust the plate if this is not the case Also check that the upper carrier plate is set parallel to the roller segment and does...

Страница 31: ...ETY ADVICE GIVEN ON THE DECALS THE OPERATOR HOLDS ALL RESPONSIBILITY WHEN OPERATING OR TRANSPORTING THE MACHINE IN PUBLIC PLACES THE OPERATOR SHOULD RESPECT ALL HEALTH AND SAFETY REGULATIONS BEFORE TR...

Страница 32: ...dance on methods of testing Annex to AIC 1896 117 REV February 1988 Health and Safety Executive The method employed corresponds to the method No 4 in this document Unspecified testing conditions compl...

Страница 33: ...it has been misused neglected or damaged by accident or let out on hire Nor can claims be accepted if parts other than those manufactured by us have been incorporated in any of our equipment Furtherm...

Страница 34: ...ions on all questions as to defect and to the exchange of any part or parts That all safety instructions in the Operator s Manual shall be followed and all safety guards regularly inspected and replac...

Страница 35: ...tive The Operator should respect all Health and Safety regulations as well as the Highway Code For your own safety use only genuine KUHN spare parts The manufacturer disclaims all responsibilities due...

Страница 36: ...abriques F 67706 SAVERNE CEDEX FRANCE T l 33 0 3 88 01 81 00 Fax 33 0 3 88 01 81 03 www kuhnsa com E mail info kuhnsa com Soci t Anonyme au Capital de 19 488 000 Euros For your safety and to get the b...

Отзывы: