-9-
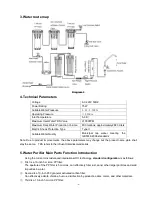
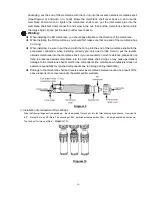
a little on and then screw the ball valve into the corresponding hole of the 3-way inlet water joint (See
Diagram 6). Take out the
Ø 9mm water pipe from the accessories box, using scissors cut a suitable
length of pipe, connect one end of the pipe with the inlet water ball valve (See Diagram 4), finally
screw the nut in place.
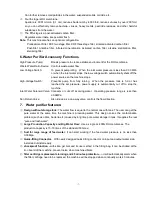
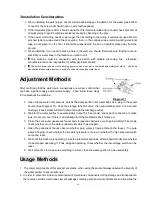
Diagram 5 Diagram 6
③
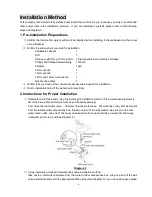
Gooseneck faucet installation
In the counter where the faucet is to be installed drill a φ12mm hole in an appropriate position, then
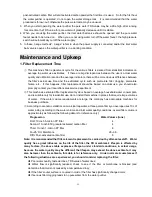
take out the faucet from the water purifier accessory box. Start the faucet installation: first put the
stainless steel neck on the faucet main body (See Diagram 7), then lower the main part of the faucet
into the already drilled hole, and then put the spacer on the lower part of the faucet. Screw the fixed
nut into the bottom end of the faucet to fix the faucet to the counter, finally put the appropriate length
of 6mm pipe into the water inlet connection, put the 6mm pipe stopper into one end, put on the 6mm
nut, screw to the bottom of the faucet (see Diagram 7). If you want to fix the faucet to the wall,
please use the faucet hanging piece. (when installing be sure to tighten the joints to prevent
leakage)
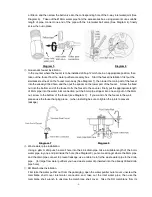
Diagram 7 Diagram 8
④
Waste water pipe installation
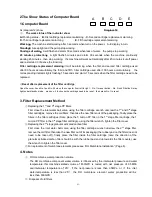
Using a
φ6mm drill punch a small hole into the sink drain pipe, take a suitable length of the 6mm
water pipe, lay one end just inside the hole (See Diagram 8), put some silica gel where the 6mm pipe
and the drain pipe connect to prevent leakage, use a cable tie to fix the waste water pipe to the drain
pipe. (for large flow water purifiers you need waste water clip inserted into the already drilled drain
pipe hole)
⑤
RO Membrane Installation
First take the water purifier out from the packaging, open the water purifier outer cover, unscrew the
membrane shell cover inlet water connection end, take out the inlet water pipe, then use the
membrane shell wrench to unscrew the membrane shell cover. Take the RO membrane from its


