29
4.Pattern mode
○ ○ ○ ○ ○ ○ ○ ○ ○ ○ ○ ○ ○ ○ ○ ○ ○ ○ ○ ○ ○ ○ ○ ○ ○ ○ ○ ○ ○ ○ ○ ○ ○ ○ ○ ○ ○ ○ ○ ○ ○ ○
4.Pattern mode
Convenient functions for
editing patterns
If you wish to save the pattern you edit using these func-
tions, you must perform the Write operation before se-
lecting a different pattern or turning off the power.
Erasing rhythm pattern data from
a part
To erase the rhythm pattern data for the selected part, you can
use one of the following two methods in addition to turning
each of the sixteen step keys off.
• Erasing data during playback or
recording (Erase)
1. Press a part key to select the part from which you wish to
erase data.
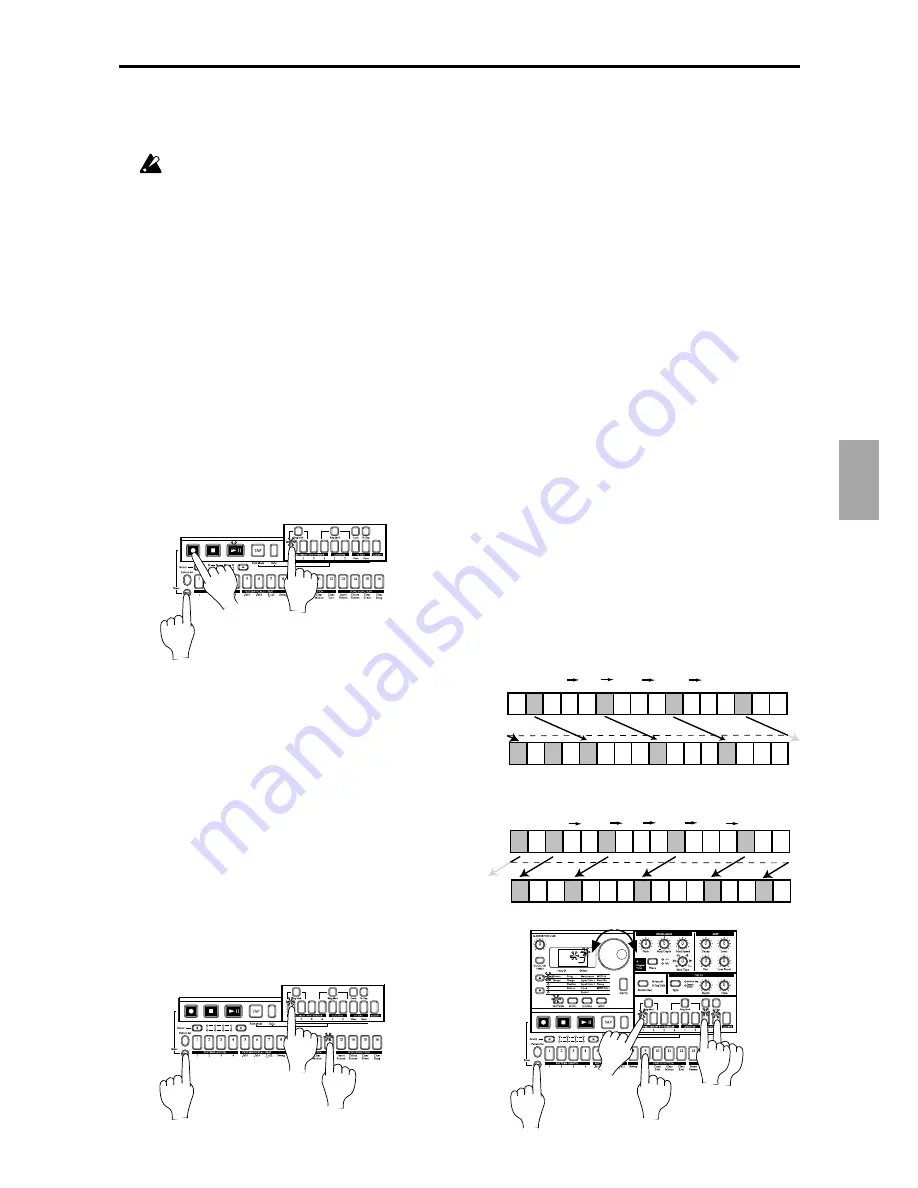
2. During playback or recording, hold down the Shift key and
press the Rec key. As long as you continue holding these keys,
data will be automatically be erased from the selected part.
1
2
2
• Erasing all data from a part
(Clear Part)
This operation erases all rhythm pattern and motion sequence
data at once.
1. If the pattern is playing, press the Stop/Cancel key to stop
playback.
2. Press a part key to select the part whose data you wish to
erase.
3. Hold down the Shift key and press step key 12 (
Clear Part
).
(Key 12 will blink.)
4. Once again press step key 12 to clear the data.
To cancel without clearing the data, press the Stop/Cancel key.
3,4
3
2
Moving data within a part
(Move Data)
The Move Data operation lets you move the rhythm pattern
and motion sequence data of a part backward or forward by –
16...+16 steps.
You can use this when you want to change the starting location
of a pattern.
1. If the pattern is playing, press the Stop/Cancel key to stop
playback.
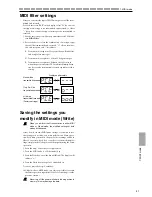
2. Hold down the Shift key and press step key 9 (
Move Data
).
(Key 9 will blink.)
3. All of the part keys will blink. Each time you press a part key,
it will alternate between dark and blinking. Press the part
keys so that only those parts that you wish to move are blink-
ing. (You can select two or more parts.)
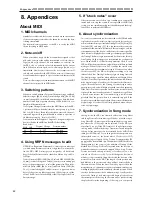
4. A number will blink in the display. Rotate the dial to select
the number of steps and the direction (positive or negative)
in which the data will be moved.
5. Press the blinking step key 9 to execute the Move Data opera-
tion.
To cancel without executing, press the Stop/Cancel key.
The Move Data operation applied to all steps of the selected
part. Data that is moved beyond the last step of the pattern will
"wrap around" to the first step. For example if 64-step data is
moved for "
5
" steps, the data that was in steps 60 through 64
will be moved to steps 1 through 5. Likewise, data that is moved
earlier than the first step of the pattern will "wrap around"to
the last step. For example if 48-step data is moved for "
–3
" steps,
the data that was in steps 1 through 3 will be moved to steps 46
through 48.
Step
1
Step
2
Step
3
Step
4
Step
5
Step
6
Step
7
Step
8
Step
9
Step
10
Step
11
Step
12
Step
13
Step
14
Step
15
Step
16
Step
1
Step
2
Step
3
Step
4
Step
5
Step
6
Step
7
Step
9
Step
10
Step
11
Step
12
Step
13
Step
14
Step
15
Step
16
Step
1
Step
2
Step
3
Step
4
Step
5
Step
6
Step
7
Step
8
Step
9
Step
10
Step
11
Step
12
Step
13
Step
14
Step
15
Step
16
Step
1
Step
2
Step
3
Step
4
Step
5
Step
6
Step
7
Step
8
Step
9
Step
10
Step
11
Step
12
Step
13
Step
14
Step
15
Step
16
With a setting of 3
The data of each step will be moved three steps toward
the end of the pattern.
Example: 2 5, 6 9, 10 13, 14 1
Step
1
Step
2
Step
3
Step
4
Step
5
Step
6
Step
7
Step
8
Step
9
Step
10
Step
11
Step
12
Step
13
Step
14
Step
15
Step
16
Step
1
Step
2
Step
3
Step
4
Step
5
Step
6
Step
7
Step
8
Step
9
Step
10
Step
11
Step
12
Step
13
Step
14
Step
15
Step
16
Step
1
Step
2
Step
3
Step
4
Step
5
Step
6
Step
7
Step
8
Step
9
Step
10
Step
11
Step
12
Step
13
Step
14
Step
15
Step
16
Step
1
Step
2
Step
3
Step
4
Step
5
Step
6
Step
7
Step
8
Step
9
Step
10
Step
11
Step
12
Step
13
Step
14
Step
15
Step
16
With a setting of –2
The data of each step will be moved two steps toward
the beginning of the pattern.
Example: 1 15, 3 1, 6 4, 10 8, 14 12
4
2,5
2
3
3
Содержание Electribe R ER-1
Страница 47: ...47 8 Appendices 8 Appendices ...


