


Open Frame Monitor- 15”, 17”, 19” - User Guide Rev. 1.0
// 27
6.3.
Starting Up
To start up the Open Frame Monitor connect the signal and power cables following proper cabling procedures.
Ensure that both the Open Frame Monitor and PC system are switched off and the power
cable is properly disconnected from the power connector or main power supply before
connecting any I/O cables.
To start up the Open Frame Monitor, perform the following:
1.
Connect the signal cables, see Chapter 6.2.1: Connecting the Signal Cables.
2.
To use the touch screen functionality, see Chapter 6.2.2: Setting up the Touch Screen (Option).
3.
To connect the PSU, see Chapter 6.2.3: Connecting to Power.
4.
The power indicator LED on the OSD panel turns green (Figure 16, pos. 2) to indicate the Open Frame Monitor is
ready to be switched on.
5.
Press the power button (Figure 16, pos. 1) to switch on and then set up the display options, see Chapter 6.4:
Setting up the Display Options.
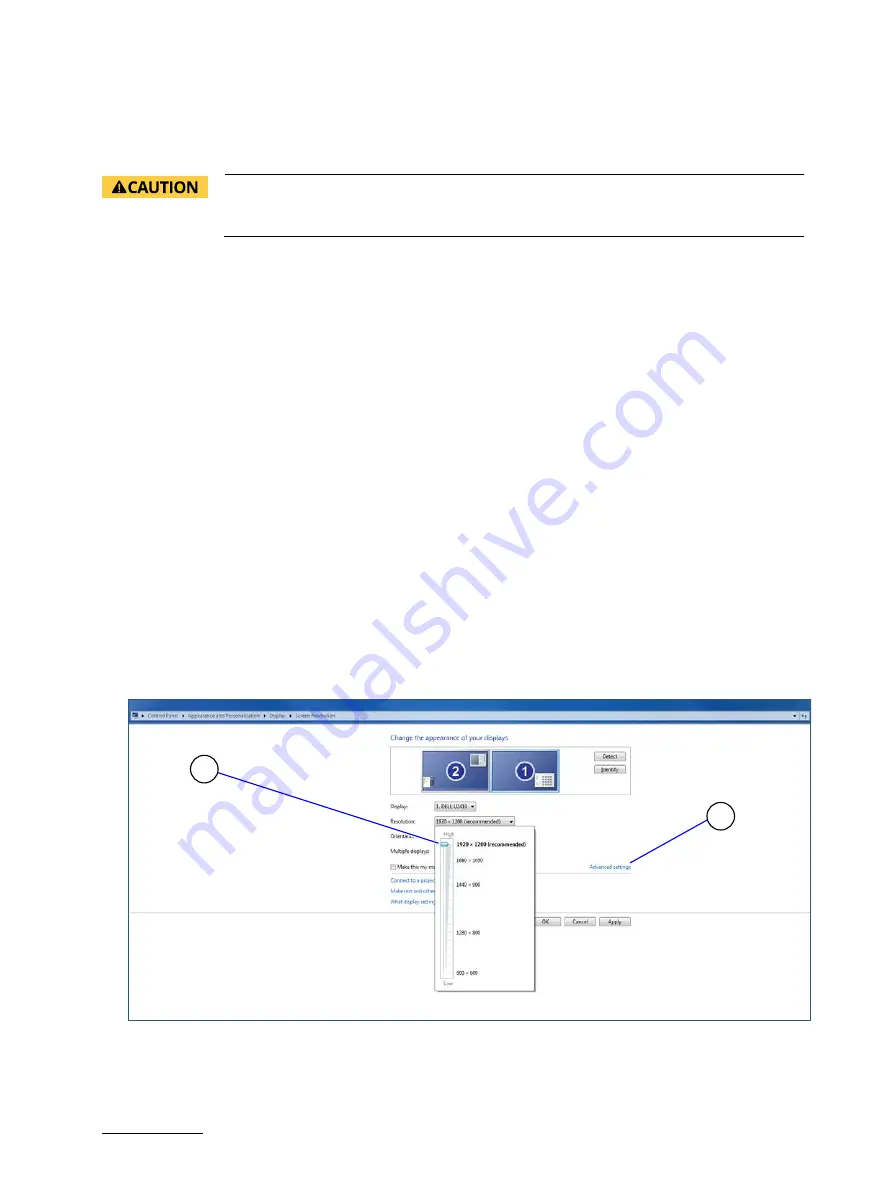
6.4.
Setting up the Display Options
To set the best display resolution, refresh rate, and color options, perform the following:
1.
Select the following in Windows:
Control Panel > Hardware and Sound>Display > Adjust Resolution > Resolution>
2.
Click on the arrow (downward facing) to access the Resolution drop down list.
3.
Move the arrow (Figure 14, Pos. 1) to the required resolution, and click OK.
Figure 14: Changing the Display Resolution
1
Arrow to change Resolution
2
Advanced Settings to change the refresh rate
2
1


