28
SECTION 3: EXAMINING IMAGES
3.13 SAVE
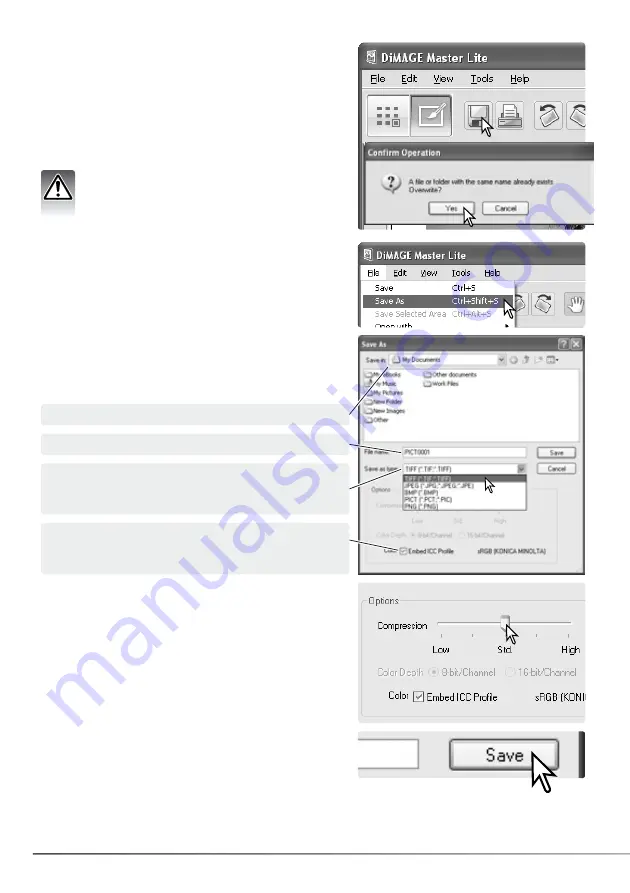
To save an image after applying processing, click the
save button or select the save option from the file menu.
The save command overwrites the original data. A
confirmation screen appears before an images is saved.
Click the yes button to save the file.
Save erases and replaces the original file data.
To protect this data, use the save-as command
to rename the file, see below.
3.14 SAVE AS
Click the save button to save the image.
To save an image file under a new name or in a new file
format, select the save-as option from the file menu. The
operating system’s save-as dialog box opens.
If JPEG is selected, the compression rate must be fixed
using the slide bar in the option box. The higher the
compression rate, the smaller the file size, and the lower
the image quality.
If RAW data is saved as a TIFF file, the color depth must
be specified between 8-bit per channel and 16-bit per
channel.
The save-as dialog box varies with the operating system.
Refer to the operating system’s help section for more
information. The following should be specified:
Specify the location to save the file.
Enter the file name.
Specify the file format of the image from the list box.
The file does not need to be saved in the original file
format.
Embed color profile if appropriate. Unchecking the
box deletes any embedded profile. Not available with
all file formats.
Содержание DiMAGE Master Lite
Страница 1: ...INSTRUCTION MANUAL ...


