background image

5

ASSEMBLY

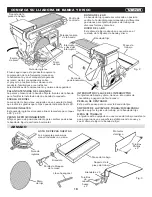
LOOSE PARTS LIST

The following items are included with the saw:

UNPACKING

This product requires assembly.
• Carefully lift sander from carton and place on a level work

   surface.

• Inspect the tool carefully to make sure no breakage or

   damage occurred during shipping.
• Do not discard the packing material until you have carefully

   inspected and satisfactorily operated the product.
• The sander is factory set for accurate sanding. After

   assembling it, check for accuracy. If shipping has influenced

   the settings, take to an authorized service center.
• If any parts are damaged or missing, please call

   01-800-70-knova (56682), for assistance.

• Remove the backing from the sanding disc.
• Align perimeter of sanding disc with plate and press firmly

   into position.
• Position disc guard against the lower one-third of the disc

   aligning holes.
• Using the two phillips head screws, securely tighten the

   disc guard in place.

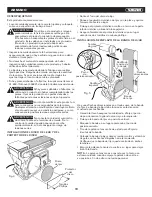
WARNING

WARNING

WARNING

WARNING

                   Do not use this product if any parts on

the Loose Parts List are already assembled to your

product when you unpack it. Parts on this list are not 

assembled to the product by the manufacturer and

require customer installation. Use of a product that

may have been improperly assembled could result in

serious personal injury.

                   If any parts are damaged or missing do

not operate this product until the parts are replaced.

Use of this product with damaged or missing parts

could result in serious personal injury.

                   Do not attempt to modify this product or

create accessories not recommended for use with this

tool. Any such alteration or modification is misuse and

could result in a hazardous condition leading to

possible serious personal injury.

                   Do not connect to power supply until

assembly is complete. Failure to comply could result

in accidental starting and possible serious personal

injury.

INSTALLING SANDING DISC AND DISC GUARD

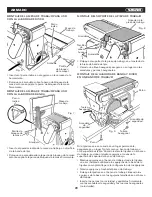
Fig. 4

Work table

Miter

 gauge

Sanding

disc

Socket head

screws

x 2

Disc

 guard

Work

 support

Washers

x 2

Sanding 

disc

Disc 

guard

Phillips 

screws

Hex key

Table

lock knob

Washer

Phillips 

screws

x 2

Fig. 3

Содержание KN BD-46B

Страница 1: ...KN BD 46B Belt and disc sander 4 x6 101 6 mm 914 4 mm Lijadora de banda y disco ...

Страница 2: ...oduct Call Knova customer service for assistance This tool has many features for making its use more pleasant and enjoyable Safety performance and dependability have been given top priority in the design of this product making it easy to maintain and operate 1 DANGER WARNING CAUTION NOTICE Indicates an imminently hazardous situation which if not avoided will result in death or serious injury Indic...

Страница 3: ...s bits cutters etc all tools should be disconnected from power source AVOID ACCIDENTAL STARTING Be sure switch is off when plugging in any tool USE RECOMMENDED ACCESSORIES Consult the operator s manual for recommended accessories The use of improper accessories may result in injury NEVER STAND ON TOOL Serious injury could occur if the tool is tipped CHECK DAMAGED PARTS Before further use of the to...

Страница 4: ...able at a time ALWAYS FEED WORKPIECE FROM LEFT TO RIGHT against the direction the drum sleeve is rotating DO NOT USE DRUMS sanding sleeves or belts which show visual signs of wear such as grooves tears or rips ALWAYS STAY ALERT Do not allow familiarity gained from frequent use of your sander to cause a careless mistake ALWAYS REMEMBER that a careless fraction of a second is sufficient to inflict s...

Страница 5: ...ssary do not connect the equipment grounding conductor to a live terminal Check with a qualified electrician or service personnel if the grounding instructions are not completely understood or if in doubt as to whether the tool is properly grounded Repair or replace a damaged or worn cord immediately This tool is intended for use on a circuit that has an outlet like the one shown in figure 1 It al...

Страница 6: ...ING Do not use this product if any parts on the Loose Parts List are already assembled to your product when you unpack it Parts on this list are not assembled to the product by the manufacturer and require customer installation Use of a product that may have been improperly assembled could result in serious personal injury If any parts are damaged or missing do not operate this product until the p...

Страница 7: ...e tension lever back into place to avoid personal injury Fig 7 Fig 8 MOUNTING THE WORK TABLE FOR USE WITH THE DISC SANDER MOUNTING THE WORK TABLE FOR USE WITH THE BELT SANDER ASSEMBLING WORK SUPPORT Insert the work table index pin into the hole in the tool s housing Position a washer over the table lock knob then tighten the table lock knob securely Insert the work table index pin into the hole in...

Страница 8: ...iliarity with tools to make you careless Remember that a careless fraction of a second is sufficient to inflict serious injury Always wear eye protection with side shields marked to comply with ANSI Z87 1 Failure to do so could result in objects being thrown into your eyes resulting in possible serious injury Do not use any attachments or accessories not recommended by the manufacturer of this too...

Страница 9: ...r to the edge of the work bench and mount sander in place as shown in figures 9 and 10 To tilt the worktable Loosen the table lock knob by turning it counterclockwise Set worktable to desired angle Tighten the table lock knob by turning it clockwise Switch on Switch off Switch key removed Fig 11 WARNING WARNING WARNING ALWAYS remove the switch key when the tool is not in use and keep it in a safe ...

Страница 10: ...ng operations Using the hex key provided loosen the positioning bolt by turning the bolt counterclockwise Move the sanding belt into a vertical position Lock the sanding belt by retightening the positioning bolt Fig 15 Fig 16 Fig 15 b Miter gauge Miter gauge Directional arrows Vertical position Horizontal position Positioning bolt Directional arrows WARNING ALWAYS use the work support for horizont...

Страница 11: ...g work evenly on the left side of the sanding disc NOTE Always move the workpiece across the sanding disc from the left side toward the center Plug in belt disc sander To check belt tracking Turn the switch ON and then immediately turn it OFF If the belt tends to slide off the idler drum or drive drum the belt is not tracking properly To adjust belt tracking If the sanding belt moves toward the di...

Страница 12: ...belt Motor pulley Fig 21 Fig 22 MAINTENANCE WARNING WARNING WARNING WARNING When servicing use only identical replacement parts Use of any other parts may create a hazard or cause product damage Always wear eye protection with side shields marked to comply with ANSI Z87 1 during product operation If operation is dusty also wear a dust mask Before performing any maintenance make sure the tool is un...

Страница 13: ...sher M4 x 6 4 2 Base Bottom 1 3 Philips screw Spring washer Flat washer M4 x 8 3 4 Toothed Locking washer ø4 3 5 Philips Screw ST4 2 x 10 2 6 Disc Cover 1 7 Disc Paper 80 1 8 Inner Hex screw Toothed locking washer M6 x 16 1 9 Disc 1 10 Dust Collection Chute 1 11 Electric box 1 12 Philips Screw M5 x 8 7 13 Philips screw Spring washer M5 x 25 3 14 Sanding Belt Tension Lever 1 15 Bushing 1 16 Philips...

Страница 14: ...Belt and disc sander 4 x6 101 6 mm 914 4 mm Lijadora de banda y disco KN BD 46B SCHEMATIC VIEW 13 ...

Страница 15: ...iguientes palabras de señalización y sus significados tienen el objeto de explicar los niveles de riesgo relacionados con este producto Es posible que se empleen en este producto algunos de los siguientes símbolos Le suplicamos estudiarlos y aprender su significado Una correcta interpretación de estos símbolos le permitirá utilizar mejor y de manera más segura el producto PELIGRO ADVERTENCIA PRECA...

Страница 16: ... para sujetar la pieza de trabajo cuando resulte práctico hacerlo es más seguro que utilizar la mano y quedan ambas manos libres para manejar la herramienta NO ESTIRE EL CUERPO PARA ALCANZAR MAYOR DISTANCIA Mantenga una postura firme y buen equilibrio en todo momento DE MANTENIMIENTO CON CUIDADO A LAS HERRAMIENTAS Mantenga afiladas y limpias las herramientas para obtener de las mismas un desempeño...

Страница 17: ...na parte del cuerpo en línea con la trayectoria de la pieza de trabajo PLANIFIQUE EL TRABAJO CON EL FIN DE DISMINUIR EL RIESGO DE CAUSAR CONTRAGOLPES cuando la pieza de trabajo se pega al tambor de lijado y éste se la arrebata de las manos ASEGURESE DE QUE NO HAYA DESECHOS entre la pieza de trabajo y los soportes de la misma AL LIJAR UNA PIEZA DE FORMA IRREGULAR planifique el soporte de la misma d...

Страница 18: ...de corriente llame a un electricista calificado para que instale una toma de corriente adecuada Si se conecta de forma incorrecta el conductor de conexión a tierra del equipo puede presentarse un riesgo de descarga eléctrica El conductor con aislamiento que tiene una superficie exterior verde con o sin tiras amarillas es el conductor de conexión a tierra del equipo Si es necesaria la reparación o ...

Страница 19: ... todas las características de funcionamiento y normas de seguridad PALANCA TENSORA DE LA BANDA La palanca tensora de la banda afloja la tirantez de la banda para facilitar la instalación de una banda de repuesto ESCALA DE BISEL La mesa de trabajo viene equipada con una escala de bisel que indica los grados que la mesa puede inclinarse hasta 45 GUIA DE INGLETES Esta guía de ingletes sirve para alin...

Страница 20: ... lugar apretando el perno de posicionamiento Tire de la palanca tensora hacia usted para aflojar la tirantez de la banda Coloque la banda de lijar sobre el tambor motriz y el tambor de guía con las flechas dirigidas hacia la izquierda Verifique que la banda de lijar quede centrada en ambos tambores Empuje la palanca tensora de vuelta a su lugar para dejar tirante la banda NOTA La palanca tensora e...

Страница 21: ... PARA USO CON LA LIJADORA DE BANDA MONTAJE DEL SOPORTE DE LA PIEZA DE TRABAJO Perilla de bloqueo de la mesa Mesa de trabajo Arandela Perno índice Fig 8 Tornillos de cabeza hueca Soporte de la pieza de trabajo Arandelas Arandelas Si la lijadora va a ser usada en un lugar permanente asegúrela en un lugar fijo tal como un banco de trabajo u otra superficie estable Cuando instale la lijadora en el ban...

Страница 22: ...rada Esta característica tiene la finalidad de evitar el uso no autorizado y posiblemente peligroso por niños y otras personas PARA ENCENDER LA LIJADORA DE BANDA Y DISCO Introduzca la llave en el interruptor y levante el botón de éste a la posición ON ENCENDIDO PARA APAGAR LA LIJADORA DE BANDA Y DISCO Para apagarla baje el botón del interruptor a la posición OFF APAGADO FUNCIONAMIENTO No permita q...

Страница 23: ...CIES CON EXTREMO PEQUEÑO USANDO LA GUIA DE INGLETE Coloque el interruptor en la posición OFF APAGADO Espere hasta que la lijadora se haya detenido completamente Retire la llave del interruptor Guarde la llave en un lugar seguro Con su herramienta se incluye una guía de inglete para mayor exactitud Se recomienda el uso de una guía de inglete para lijar en el disco de lijar superficies con extremo p...

Страница 24: ...JAR Su lijadora de banda y disco puede lijar tanto vertical como horizontalmente Dependiendo de la pieza de trabajo utiliza el soporte de trabajo para operaciones horizontales de lijado y utiliza la mesa del trabajo para operaciones verticales de lijar Usando la llave hexagonal suministrada afloja el perno de posicionamiento girando el cerrojo a la izquierda Coloque la banda de lijar en posición v...

Страница 25: ...a banda Encienda el interruptor y apáguelo inmediatamente Si la banda tiende a salirse del tambor de guía o del tambor motriz la banda no está debidamente centrada Ajuste del centrado de la banda Si la banda de lijar se mueve hacia el disco gire la perilla de centrado de la banda 1 4 de vuelta hacia arriba Si la banda de lijar se aleja del disco gire la perilla de cen trado de la banda 1 4 de vuel...

Страница 26: ...floje los tres tornillos de la tensión dentro de la alojamiento del polea entonces aprieta la alojamiento para aflojar la tensión de la banda Retire la correa motriz antigua Instale la nueva correa motriz en la polea motriz primero y luego en la polea del motor Compruebe la tensión de la banda apretando la correa con sus dedos Levante la alojamiento del polea para aumentar la tensión de la correa ...

Страница 27: ... de trabajo izquierdo 1 95 Tornillo Philips 4 1 Tornillo Philips y arandela M4 x 6 4 2 Base inferior 1 3 Ensamble de tornillo Philips M4 x 8 3 4 Arandela de bloqueo dentada ø4 3 5 Tornillo phillips ST4 2 x 10 2 6 Cubierta de disco 1 7 Disco de papel 80 1 8 Tornillo hex interior y arandela de bloqueo M6 x 16 1 9 Disco 1 10 Tolva collectora de polvo 1 11 Caja electrica 1 12 Tornillo Philips M5 x 8 7...

Страница 28: ...VISTA ESQUEMATICA 27 Belt and disc sander 4 x6 101 6 mm 914 4 mm Lijadora de banda y disco KN BD 46B ...

Страница 29: ...www knova com mx ...

Отзывы: