Klutch 101670 Скачать руководство пользователя страница 10

Page 10 of 20 


Positioning the work stop 

Use the work stop if you have to do several cuts on pieces of the 
same length. 

1. 

Loosen the lock handle A and place the work stop at the 
desired distance from the blade.  

2. 

Retighten the lock handle. 


CAUTION


Make sure that the work stop does not interfere with the downward movement of the blade!


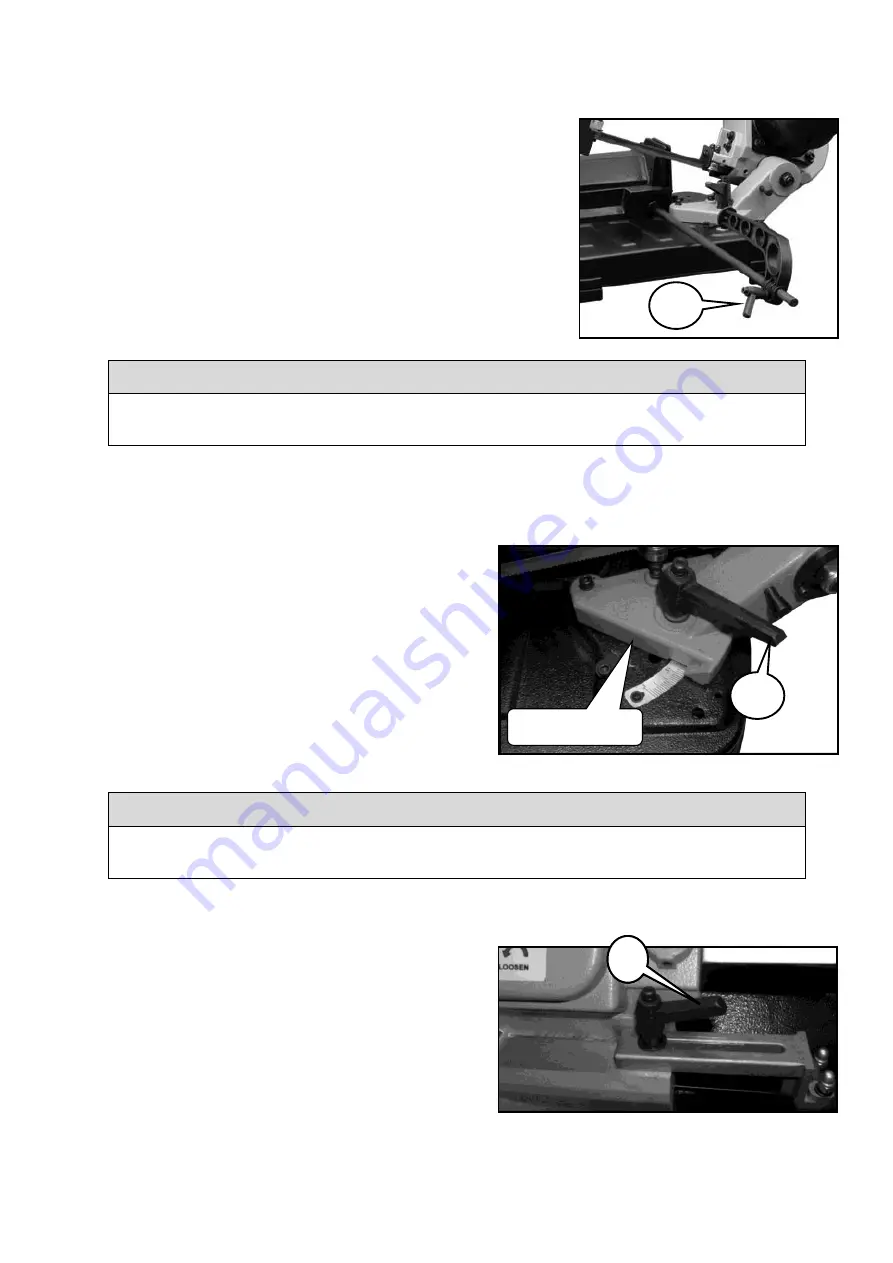
Cutting angle adjustment 

The band saw can cut at angles from 0º to 60º. 

1. 

Loosen the lock handle B. 

2. 

Turn the swivel support until the mark on support 
matches desired angle on the scale. 

3. 

Retighten the locking handle. 


CAUTION! Make sure the lock handle B has been 
tightened before turning on the machine. 


CAUTION


Make sure the lock handle B has been tightened before turning on the machine. 


Adjusting the blade guide 

The sliding blade guide must be adjusted to bring the 
guide close to the material. If the adjustment is not 
done, it will result in an unclean cut. 

1. 

Loosen the lock handle C. 

2. 

Slide  the  blade  guide  to  move  it  closer  to  the 
workpiece.  

Swivel support 

Содержание 101670

Страница 1: ...g Band Saw Owner s Manual WARNING Read carefully and understand all ASSEMBLY AND OPERATION INSTRUCTIONS before operating Failure to follow the safety rules and other basic safety precautions may resul...

Страница 2: ...tant that you read the entire manual to become familiar with this product before you begin using it This product is designed for certain applications only Northern Tool Equipment is not responsible fo...

Страница 3: ...Specifications 4 Important Safety Information 4 Grounding 6 Extension Cords 7 Main Parts of Product 8 Assembly Instructions 8 Before Each Use 9 Operating Instructions 11 Maintenance 13 Troubleshootin...

Страница 4: ...e conditions or situations that could occur Exercise common sense and caution when using this tool Always be aware of the environment and ensure that the tool is used in a safe and responsible manner...

Страница 5: ...use cancer and birth defects or other reproductive harm Wash your hands after handling WARNING WORK AREA SAFETY Inspect the work area before each use Keep work area clean dry free of clutter and well...

Страница 6: ...heck for damaged parts before each use Carefully check that the product will operate properly and perform its intended function Replace damaged or worn parts immediately Never operate the product with...

Страница 7: ...ould look like those in the following illustration Double Insulated Tools Tools with Two Prong Plugs Tools marked Double Insulated do not require grounding They have a special double insulation system...

Страница 8: ...ains at least the minimum wire size required If you are using one extension cord for more than one tool add the nameplate amperes and use the sum to determine the required minimum cord size If you are...

Страница 9: ...the thread hole on vise base Tighten the nut to fix it 4 Attach the work stop to the guide rail Secure it by tightening the lock handle Before Each Use WARNING Make sure the band saw is securely fast...

Страница 10: ...60 1 Loosen the lock handle B 2 Turn the swivel support until the mark on support matches desired angle on the scale 3 Retighten the locking handle CAUTION Make sure the lock handle B has been tighten...

Страница 11: ...ructions WARNING The machine must be switched off before inserting material to be cut in the vice or before removing material to be cut from the vice Keep your hands and fingers in a safe distance fro...

Страница 12: ...eed adjustments 4 Push the green button to turn on the main switch Using the index finger of your right hand press the run button 5 Gradually lower the machine body until it comes lightly into contact...

Страница 13: ...opting a program of conscientious repair and maintenance in accordance with the following recommended procedures It is recommended that the general condition of any tool be examined before it is used...

Страница 14: ...utout has tripped Check the machine and reset the overload cutout Overload cutout tripped Motor overload caused by excessive cutting pressure Motor breakdown Perform the cut on the piece at the correc...

Страница 15: ...Page 15 of 20 Parts Diagram...

Страница 16: ...21 22 5x5x10mm Key 1 22 23 15mm Retaining ring 1 23 24 50T Gear 1 24 25 6202ZZ Ball bearing 2 25 26 35mm Retaining ring 2 26 28 607ZZ Ball bearing 2 27 29 11mm Retaining ring 1 28 30 43T Gear 1 29 31...

Страница 17: ...ZZ Ball bearing 2 76 79 5mm Flat washer 4 77 80 5x24mm Pin 1 78 81 M6X25 Socket head screw 1 79 82 6mm Lock washer 1 80 83 Blade guard 1 81 84 6mm Flat washer 4 82 85 607ZZ Ball bearing 8 83 86 Shaft...

Страница 18: ...1 133 137 8mm Lock washer 6 134 138 M8X12mm Socket head screw 6 135 139 M12 Nut 1 136 140 Work stop rod 1 137 141 Work stop 1 138 142 Lock handle 1 139 143 M6X25mm Hex head bolt 1 140 144 serrated was...

Страница 19: ...laim contact Us at 1 800 222 5381 identify the product by make and model number and follow the claim instructions that will be provided The product and the purchase receipt must be provided to Us in o...

Страница 20: ...Page 20 of 20 Distributed by Northern Tool Equipment Company Inc Burnsville Minnesota 55306 www northerntool com Made in China...

Отзывы: