10
INSTALLATION
INSTALLATION
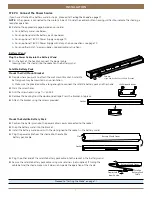
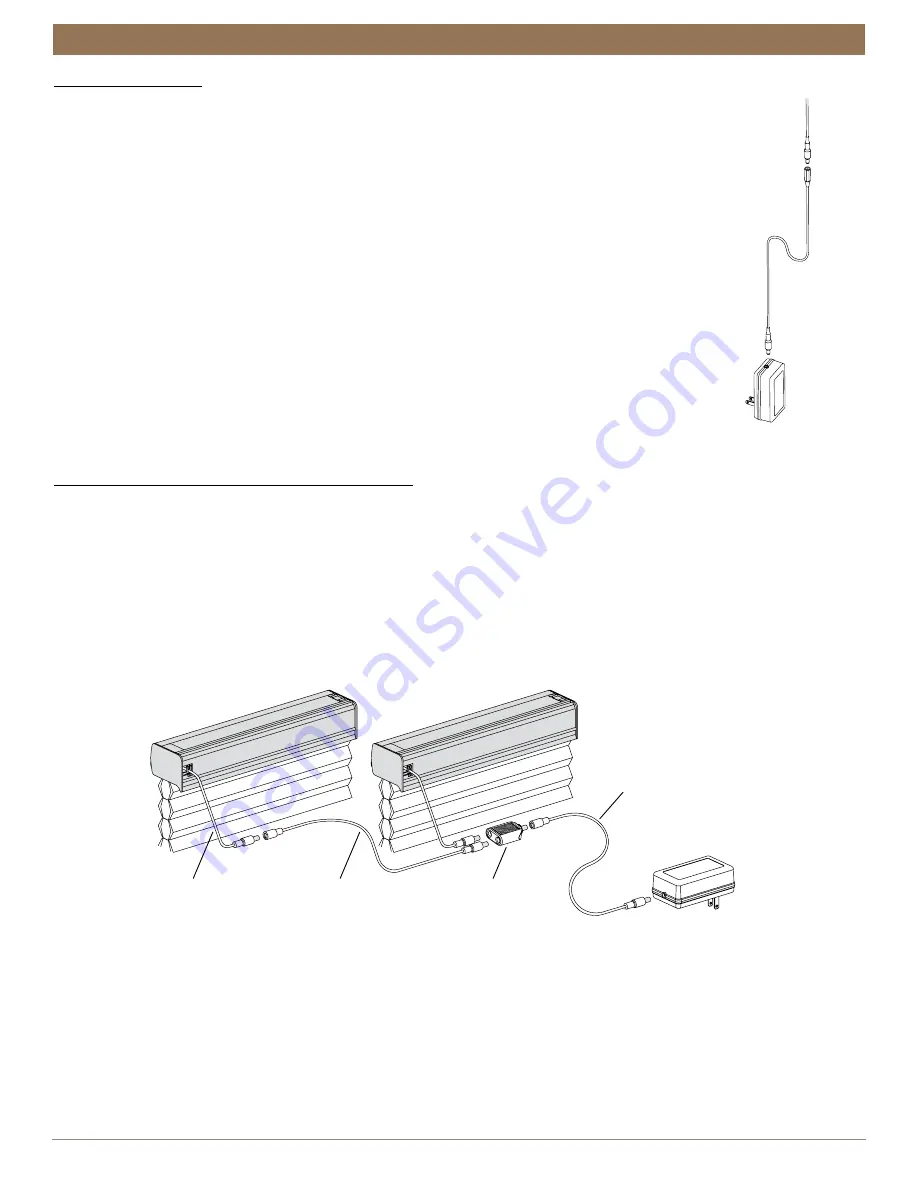
18V DC Power Supply
NOTE:
When power is connected to the motor, a blue LED inside the control button
housing will flash to indicate the shade is ready for operation.
■
Plug the power cable from the shade motor into the extension cable.
■
Plug the other end of the extension cable into the 18V DC power supply.
■
Plug the 18V DC power supply into a power source
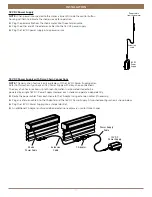
18V DC Power Supply with Daisy-Chain Connections
NOTE:
The daisy-chain feature is only available with the 18V DC Power Supply option.
Refer to this section if you have an 18V Power Supply with daisy-chain connections.
The daisy-chain feature allows up to three Automation III automated shades to be
powered by a single 18V DC Power Supply. However, each shade can operate independently.
■
Route the power cables from each shade to the Y Adapter using extension cables (if necessary).
■
Plug an extension cable into the Y Adapter and the 18V DC Power Supply. A two-shade configuration is shown below.
■
Plug the 18V DC Power Supply into a standard outlet.
■
An additional Y Adapter and two additional extension cables are used for three shades.
Power cable
from shade motor
Extension
cable
18V DC
Power
Supply
Shade
Power Cable
Extension
Cable
Y Adapter
Power Supply
Cable
18V DC
Power Supply
Содержание Cellular Shade Automation III
Страница 22: ...21 INSTALLATION CHILD SAFETY...


