8
INSTALLATION
INSTALLATION
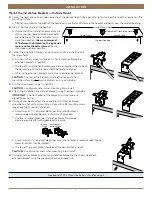
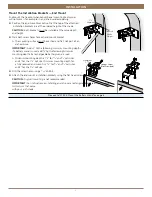
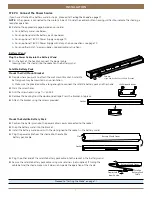
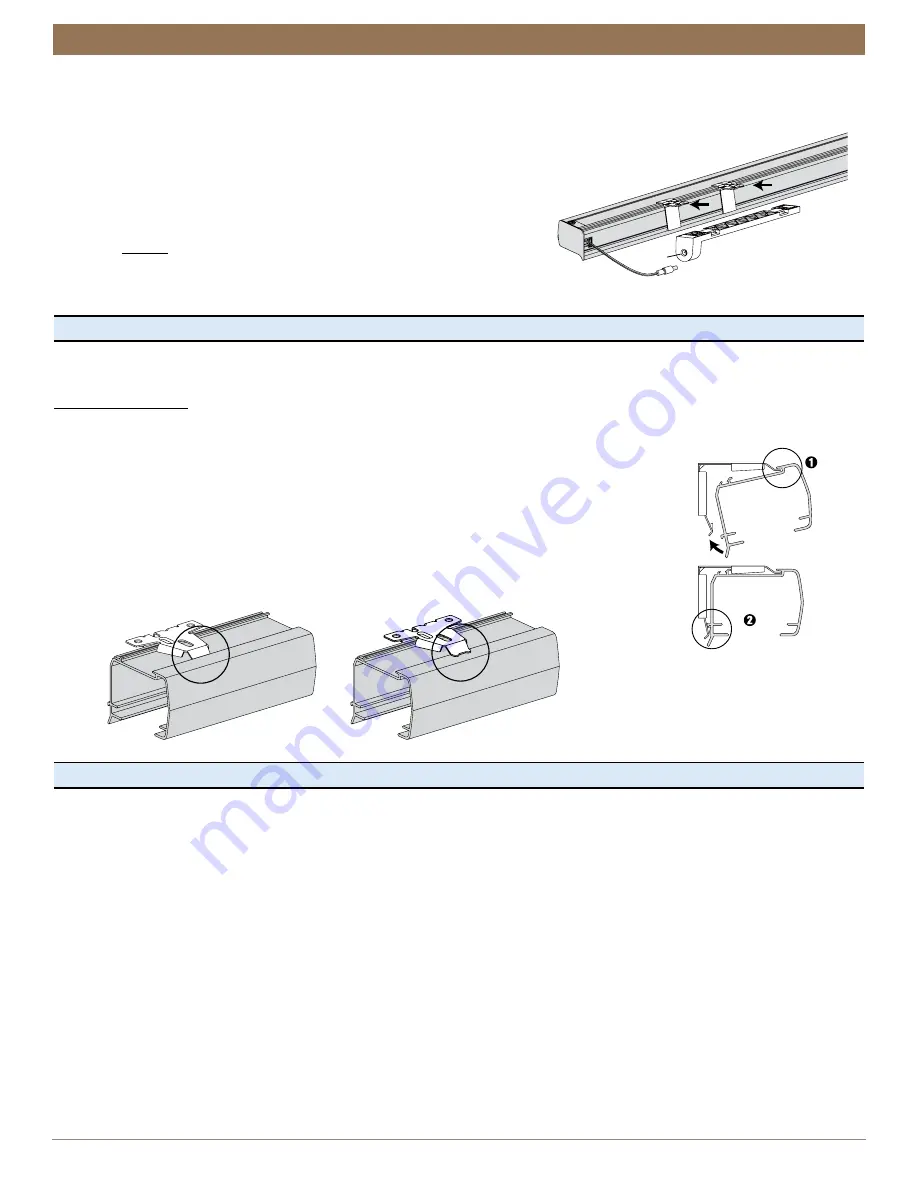
Mount the Rechargeable Battery Mount into the Rechargeable Clips
■
From the back of the shade headrail, connect the power cable from the motor side into the socket on the rechargeable battery
mount.
■
Align the slots in the battery mount with the battery wand clips.
■
Push the battery mount onto the battery wand clips until it snaps into place.
Check to make sure the battery mount is secure.
CAUTION:
Be sure the cable does not become pinched by the battery wand
clips during installation. Damage or overheating of components could result.
NOTE:
Do not
install the rechargeable battery wand into the battery
mount before installing the shade. See "STEP 4: Connect the Power Source"
on page 13 for instructions on inserting the battery wand into the
battery mount.
Proceed to "STEP 3: Install the Shade" on page 8
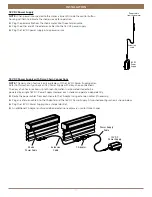
STEP 3: Install the Shade
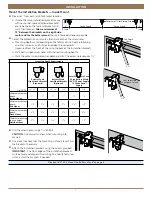
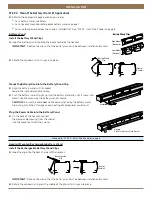
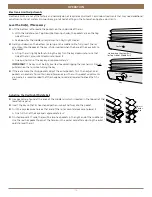
Mount the Headrail
CAUTION:
Be sure no cables are pinched by the brackets or headrail during installation; damage or
overheating of components could result.
■
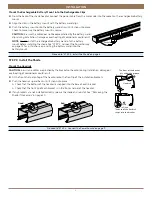
Fit the front channel on top of the headrail onto the front lip of the installation brackets.
■
Push the headrail up and back until it snaps into place.
➤
Check that the bottom of the headrail is snapped into the base of each bracket.
➤
Check that the front lip of each bracket is in the front channel of the headrail.
■
If any brackets are not installed correctly, release the shade and reinstall. See “"Removing the
Shade, If Necessary" on page 20.
Proceed to "STEP 4: Connect the Power Source" on page 9
Socket
The back of the headrail
snaps into the bracket.
The front of the bracket
fits under the groove.
Headrail
Bracket
Snap
in Place
Good
Bad
Содержание Cellular Shade Automation III
Страница 22: ...21 INSTALLATION CHILD SAFETY...


