background image

KINTERA FLOOR MODEL GAS FRYERS                    OWNER’S/INSTALLER MANUAL 

Page  15 

Owner’s/Installers Manual Rev 20180822                   For Warranty Service Call 866-909-2855


DAILY CLEANING 
 

1.  Turn thermostat knob to “OFF” position. 
2.  Place hot-oil safe container under the drain and drain the frypot completely. 
3.  Remove the basket support frame (if applicable) and flush out any sediment remaining in the frypot 

with a little hot oil. 

4.  Wipe off the basket support frame and the inside of the frypot with a clean cloth. 


SOME AREAS OF THE FRYPOT MAY BE HOT! 


DAILY CLEANING (Continued) 
 

5.  Close drain valve and strain the oil back into the frypot through several thicknesses of cheesecloth, 

or filter it back using a filter machine. 

6.  Replace the basket support frame (if applicable) 
7.  Add oil or shortening to MIN oil level mark on rear of frypot. 
8.  To resume cooking, turn the combination gas valve knob to “ON” position. 


WEEKLY CLEANING 


1.  Follow steps 1 through 4 of the Daily Cleaning procedure (see previous section). 
2.  Close drain valve and fill frypot with a solution of warm water and boil-out compound. 
3.  Relight the fryer and bring the solution to a gentle boil for at least five minutes. 
4.  Turn off main burners and let the solution stand until the gum deposits are softened and the carbon 

spots and burned grease spots can be rubbed off. 

5.  Scrub the frypot walls and heat tubes, then drain out frypot and rinse it with clean water. 
6.  Refill the frypot with clean water and boil again. 
7.  Turn off gas and drain and rinse well until clean. 
8.  Wipe dry with a clean cloth. 
9.  Refill as specified in the “Filling the Frypot” section (see page 13). 


MONTHLY CLEANING 


1.  Perform the Weekly Cleaning procedure (see previous section). 
2.  Clean around burner and orifices if lint has accumulated. 
3.  Visually check that burner carry-over ports are unobstructed. 


Содержание KF Series

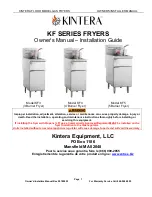
Страница 1: ...injury or death Read the installation operating and maintenance instructions thoroughly before installing or servicing this equipment If installing the fryer with Propane LP gas a Commercially Approved Regulator MUST be installed on the fryer in addition to the tank regulator Units installed without an external appliance regulator will cause damage to parts and will void the warranty Kintera Equip...

Страница 2: ...urchase from _________________________________ Name of Installer ________________________ Phone Number __________________________ Model Number _________________________________ Serial Number ______________________________________ FOR WARRANTY SERVICE CALL 866 909 2855 BE SURE TO HAVE MODEL NUMBER AND SERIAL NUMBER AVAILABLE WHEN CALLING FOR SERVICE OR PARTS REGISTER YOUR WARRANTY ON LINE AT www en...

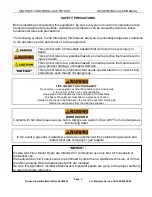
Страница 3: ...ention or must be fully understood even though not dangerous FIRE HAZART FOR YOUR SAFETY Do not store or use gasoline or other flammable vapors and liquids in the vicinity of this or any other appliance Keep area around appliances free and clear of combustibles Purchaser of equipment must post in a prominent location detailed instructions to be followed in the event the operator smells gas Obtain ...

Страница 4: ...ETAIN THIS MANUAL FOR FUTURE REFERENCE MODELS This manual is for Kintera Gas Floor Model Fryers with 35 pound KF3 55 pound KF4 and 85 pound KF5 capacities The capacity is described on the serial plate that is located on the inside of the front door TABLE OF CONTENTS Specifications Page 5 Installation Page 6 Operation Page 12 Cooking Hints Page 14 Cleaning Page 14 Parts Page 16 Read these instructi...

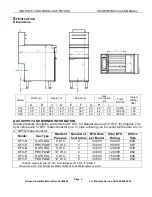
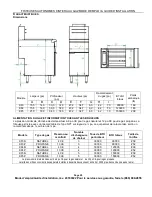
Страница 5: ...e should be a minimum of 6 W C for Natural Gas and 12 W C for propane The fryer comes with NPT male connector on a pipe allowing you to connect with either a or NPT female connector Model Gas Type Manifold Pressure Number of heat tubes BTU Rate per Burner Total BTU Rating Orifice Size KF3 N NATURAL 4 W C 3 30 000 90 000 39 KF3 P PROPANE 10 W C 3 30 000 90 000 52 KF4 N NATURAL 4 W C 4 30 000 120 00...

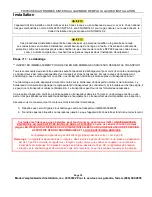
Страница 6: ...he time of delivery The freight bill must then be signed by the carrier representative Driver If the bill is not signed the carrier may refuse the claim The carrier can supply the necessary forms A request for inspection must be made to the carrier within 15 days if there is concealed damage or loss that is not apparent until after the equipment is uncrated The carrier should arrange an inspection...

Страница 7: ...r of the fryer 5 Attach restraints as required by local codes Unit must be level to assure maximum performance and proper ventilation Improper leveling may void warranty When this appliance is installed with casters it must be installed with the casters supplied a connector complying with either ANSI Z21 69 CSA 6 16 and a quick disconnect device complying with ANSI Z21 41 CSA 6 9 It must also be i...

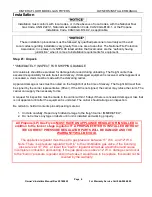
Страница 8: ...vice Call 866 909 2855 Step 3 Flue Installation 1 Unpack the flue box and flue wrap 2 Slide the flue box over the flue and secure it with the two self tapping screws using a 5 16 socket 3 Slide the flue wrap over the flue 4 Secure it with four self tapping screws two on the back and one on each side using a 5 16 socket ...

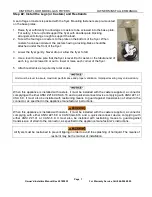
Страница 9: ...nausea or could result in death Unit Must be installed under a ventilation hood All units must be installed in such a manner that the flow of combustion and ventilation air is not obstructed Provisions for adequate air supply must also be provided Do NOT obstruct the bottom front of the unit as combustion air enters through this area Be sure to inspect and clean the ventilation system according to...

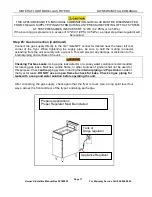
Страница 10: ... in the absence of local codes with the National Fuel Gas Code ANSI Z223 1 Natural Gas Installation Code CAN CGA B149 1 or the Propane Installation Code CAN CGA B149 2 as applicable An adequate gas supply is imperative Undersized or low pressure lines will restrict the volume of gas necessary for satisfactory performance A combination gas valve and pressure regulator which is provided with each un...

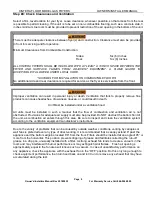
Страница 11: ... hold the mating connector extending from the unit securely with a wrench This will prevent any damage or distortion to the internal piping and controls of the unit Checking For Gas Leaks Using a gas leak detector or a soapy water solution is recommended for locating gas leaks Matches candle flame or other sources of ignition shall not be used for this purpose Check entire piping system including ...

Страница 12: ...knob down 3 While pressing the knob down use a lit match to ignite the pilot Continue to press the knob down for about 30 seconds If the pilot does not stay lit when the knob is released repeat the lighting procedure and keep the knob down longer Adjustment of pilot flame may be necessary 4 When the pilot stays lit turn the knob counterclockwise to the ON position Do not press down on the knob in ...

Страница 13: ...n the solid shortening weaken the frypot and could result in a fire NEVER ATTEMPT TO MELT A SOLID BLOCK OF SHORTENING ON TOP OF THE HEAT TUBES NEVER START THE BURNERS WHEN THE FRYPOT IS EMPTY THIS WILL CAUSE CRACKED SEAM WELDS AND YOUR FRYER WILL LEAK COOKING OIL THIS IS AN UNSAFE CONDITION 7 To prevent burning or scorching the solid shortening keep the thermostat set at the lowest temperature unt...

Страница 14: ...on page 15 Use different oil for oily foods mackerel nutmeg etc other than for foods with water soluble flavors potatoes onions etc Taste cool oil for quality Replace it regularly Remember good oil produces good food CLEANING Kintera equipment is constructed with the best quality materials and is designed to provide durable service when properly maintained To expect the best performance your equip...

Страница 15: ... frypot 8 To resume cooking turn the combination gas valve knob to ON position WEEKLY CLEANING 1 Follow steps 1 through 4 of the Daily Cleaning procedure see previous section 2 Close drain valve and fill frypot with a solution of warm water and boil out compound 3 Relight the fryer and bring the solution to a gentle boil for at least five minutes 4 Turn off main burners and let the solution stand ...

Страница 16: ...ubbing the surface with SCOTCH BRITE scouring pads or STAINLESS scouring pads DO NOT USE ORDINARY STEEL WOOL as any particles left on the surface will rust and further spoil the appearance of the finish NEVER USE A WIRE BRUSH STEEL SCOURING PADS EXCEPT STAINLESS SCRAPER FILE OR OTHER STEEL TOOLS Surfaces that are marred collect dirt more rapidly and become more difficult to clean Marring also incr...

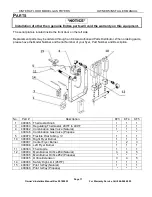
Страница 17: ...nd Serial Number of your fryer Part Number and Description No Part Description KF3 KF4 KF5 1 400045 Thermostat Knob 1 1 1 3 400044 Regulating Thermostat 200 F to 400 F 1 1 1 4 400042 Combination Gas Valve Natural 1 1 1 400146 Combination Gas Valve Propane 5 400070 Flexible Pilot Tubing 1 1 1 10 300036 Right Fryer Burner 1 1 1 300037 Center Fryer Burner 1 2 3 300038 Left Fryer Burner 1 1 1 11 40004...

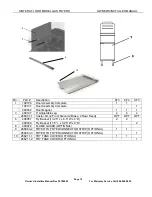
Страница 18: ...5 PARTS CONTINUED No Part Description KF3 KF4 KF5 1 400037 Basket Support 1 1 400058 Basket Support 1 2 400036 Drain Valve Ball Style 1 1 1 3 C200016 Fry Tank Only 1 C200017 Fry Tank Only 1 C200056 Fry Tank Only 1 4 400071 Drain Extension 1 1 1 5 400075 Flue Top 1 400076 Flue Top 1 400077 Flue Top 1 6 400078 Flue Wrap 1 1 400079 Flue Warp 1 ...

Страница 19: ...plete 1 300032 Door Magnet 1 1 1 3 400147 6 Adjustable Leg 4 4 4 266001 1 Caster Kit 2 Front Swivel w Brake 2 Rear Fixed OPT OPT OPT 6 400057 Fry Basket 13 25 L x 6 5 W x 6 D 2 2 400039 Fry Basket 17 5 L x 9 25 W x 6 D 2 8 400072 FLAME GUARD OPTIONAL 9 266863 2 FRYER TO FRYER CONNECTOR STRIP OPTIONAL 1 1 266863 3 FRYER TO FRYER CONNECTOR STRIP OPTIONAL 1 10 266211 1 FRY TANK COVER OPTIONAL 1 1 266...

Страница 20: ...paired with parts not authorized or by a nonqualified Kintera Service Technician then Kintera shall not be responsible for warranty claim 7 Adjustments such as calibrations leveling tightening off Fasteners and pipe unions or utility connections normally associated with original installation are the responsibility of installer and not that of Kintera Regular maintenance and cleaning shall be the r...

Страница 21: ...R USAGE KINTERA ASSUMES NO LIABILITY FOR PARTS OR LABOR COVERAGE FOR COMPONENT FAILURE OR OTHER DAMAGES RESULTING FROM IMPROPER USAGE OR INSTALLATION OR FAILURE TO CLEAN AND OR MAINTAIN PRODUCT AS SET FORTH IN THE OWNER S MANUAL PROVIDED WITH THE UNIT RELOCATION OF EQUIPMENT FOR REPAIR Kintera is not responsible for the cost to move the unit for any reason from its position of operation on the cus...

Страница 22: ...KINTERA FLOOR MODEL GAS FRYERS OWNER S INSTALLER MANUAL Page 22 Owner s Installers Manual Rev 20180822 For Warranty Service Call 866 909 2855 Notes ...

Страница 23: ...KINTERA FLOOR MODEL GAS FRYERS OWNER S INSTALLER MANUAL Page 23 Owner s Installers Manual Rev 20180822 For Warranty Service Call 866 909 2855 This page intentionally left blank ...

Страница 24: ... warranty online at www entree biz A product with the Kintera name incorporates the best in durability and low maintenance We all recognize however that replacement parts and occasional profession service may be necessary to extend the useful live of this unit When service is needed contact a Kintera Authorized Service Provider or your equipment dealer To avoid confusion always refer to the model ...

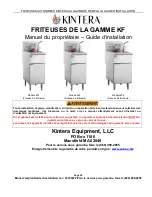
Страница 25: ...n faits incorrectement peuvent entraîner des dommages matériaux des blessures ou la mort Lire ce manuel attentivement avant d installer ou d entretenir cet équipement Si cet appareil est installé pour fonctionner au gaz GPL un régulateur approuvé commercialement DOIT être installé sur la friteuse en plus de celui de la cuve Les pièces des appareils installés sans régulateur externe seront endommag...

Страница 26: ...ndeur _________________________________ Nom de l installateur ________________________ No de téléphone _____________________ No de modèle _________________________________ No de série ______________________________________ Pour le service sous garantie faire le 866 909 2855 ASSUREZ VOUS D AVOIR EN MAIN LES NUMÉROS DE MODÈLE ET DE SÉRIE LORSQUE VOUS APPELEZ LE SERVICE DE L ENTRETIEN OU DES PIÈCES D...

Страница 27: ... D INCENDIE POUR VOTRE SÉCURITÉ Ne pas ranger ni utiliser de l essence ou tout autre vapeur ou liquide inflammables près de cet appareil ou de tout autre appareil Maintenez la zone autour des appareils libre et exempte de matériaux combustibles L acheteur de l appareil doit afficher dans un endroit bien en vue les instructions précises à suivre en cas de senteurs de gaz On peut se procurer ces inf...

Страница 28: ...UEL POUR RÉFÉRENCES FUTURES MODÈLES Ce manuel couvre les friteuses au gaz autonomes Kintera d une capacité de 35 lb KF3 55 lb KF4 et 85 lb KF5 La capacité est indiquée sur la plaque signalétique qui se trouve à l intérieur de la porte frontale TABLE DES MATIÈRES Caractéristiques Page 29 Installation Page 30 Opération Page 36 Conseils de cuisson Page 38 Nettoyage Page 38 Pièces de rechange Page 40 ...

Страница 29: ...tuer à 6 po CE pour le gaz naturel et 12 po CE pour le gaz propane La friteuse est livrée avec un raccord mâle de po NPT sur tuyau de po ce qui permet de la raccorder soit à un raccord femelle de ou bien de po Modèle Type de gaz Pression au manifold Nombre d échangeurs de chaleur Taux de BTU par brûleur BTU totaux Taille de l orifice KF3 N NATUREL 4 CE 3 30000 90000 39 KF3 P PROPANE 10 CE 3 30000 ...

Страница 30: ...ransport au moment de la livraison Le bordereau doit ensuite être signé par le représentant du transporteur le conducteur Si le bordereau n est pas signé il se peut que le transporteur refuse la réclamation Le transporteur peut fournir les formulaires nécessaires Une requête d inspection doit être produite auprès du transporteur dans les 15 jours si un dommage caché ou une perte n ont pas été déco...

Страница 31: ...a laissez pas tomber 9 Servez vous d un niveau pour vous assurer que la friteuse est bien de niveau Chaque roue ou l extrémité tubulaire de chaque pied peut être vissée ou dévissée pour abaisser ou relever chacun des coins de la friteuse 10 Fixez des dispositifs de retenue selon les exigences des codes locaux Pour assurer des performances maximales et une ventilation appropriée l appareil doit êtr...

Страница 32: ...ape no 3 Installation du carneau 4 Déballez la boîte du carneau et son enveloppe 5 Glissez la boîte du carneau par dessus le carneau et fixez la avec les deux vis autotaraudeuses à l aide d une douille de 5 8 po 6 Glissez l enveloppe du carneau par dessus le carneau 7 Fixez la avec les 4 vis autotaraudeuses deux à l arrière et une de chaque côté à l aide d une douille de 5 8 po ...

Страница 33: ...air de combustion et de ventilation ne soit pas obstruée Il faut prévoir également un apport d air suffisant NE PAS obstruer le bas de l avant de l appareil car l air de combustion pénètre par cet espace Assurez vous d inspecter et de nettoyer le système de ventilation en suivant les instructions du manufacturier de l équipement de ventilation En raison des problèmes nombreux que les conditions mé...

Страница 34: ...ropane norme CAN CGA B149 2 Une alimentation de gaz suffisante est un impératif Les conduites de gaz sous calibrées ou à basse pression vont restreindre le volume de gaz nécessaire pour des rendements satisfaisants Un régulateur de pression intégré dans une valve à gaz multi fonctions qui est livré avec chaque appareil est calibré pour maintenir une pression au manifold de 4 po CE pour le gaz natu...

Страница 35: ...ion des fuites de gaz Il est recommandé d utiliser un détecteur de fuites ou une solution d eau savonneuse pour la détection des fuites de gaz On ne devrait pas utiliser d allumettes la flamme d une bougie ou d autres sources d allumage à cette fin Vérifiez tout le système de conduites y compris la tuyauterie et les raccords internes de la friteuse pour y déceler des fuites NE PAS se servir d une ...

Страница 36: ...s longtemps Il se peut qu il faille ajuster la flamme de la veilleuse 10 Lorsque la veilleuse reste allumée tournez le bouton dans le sens antihoraire à la position ON Ne pas pousser le bouton vers le bas pendant cette étape 11 Ne mettez pas le thermostat à la position ON tant que la cuve de friture ne s est pas remplie d huile ou de graisse alimentaire solide 12 Une fois que la cuve de friture es...

Страница 37: ...E SUR LE DESSUS DES ÉCHANGEURS DE CHALEUR N ALLUMEZ JAMAIS LES BRÛLEURS SI LA CUVE DE FRITURE EST VIDE CELA FERA CRAQUER LES CORDONS DE SOUDURE ET COULER L HUILE DE CUISSON DE VOTRE FRITEUSE CE SONT LÀ DES CONDITIONS DANGEREUSES 15 Pour empêcher la graisse alimentaire solide de brûler ou de roussir gardez le réglage du thermostat à la plus basse température tant que la graisse autour et au dessus ...

Страница 38: ... Utilisez un gras différent pour des produits huileux maquereau muscade etc autres que les aliments hydrosolubles pommes de terre oignons etc Goûtez l huile froide pour en tester la qualité Remplacez la régulièrement Souvenez vous qu une huile de qualité produit de bons aliments NETTOYAGE L équipement Kintera est fabriqué avec des matériaux de la meilleure qualité et est conçu pour offrir de longu...

Страница 39: ...le bouton de la valve multifonction à la position ON NETTOYAGE HEBDOMADAIRE 10 Suivez les étapes 1 à 4 des procédures de nettoyage quotidien voir la rubrique précédente 11 Fermez le robinet de vidange et remplissez la cuve de friteuse avec de l eau chaude mélangée à un traitement à solution bouillante 12 Rallumez la friteuse et amenez la solution à ébullition lente pendant au moins cinq minutes 13...

Страница 40: ...ROSSE MÉTALLIQUE DE TAMPONS À RÉCURER EN ACIER SAUF EN INOX DE GRATTOIRS LIME OU AUTRES OUTILS EN ACIER Les surfaces marquées captent la saleté plus rapidement et deviennent plus difficiles à nettoyer Les rayures augmentent également la possibilité d une attaque de corrosion Une réfection du revêtement peut alors s avérer nécessaire Les zones noircies qu on appelle coloration de recuit peuvent par...

Страница 41: ...n Naturel 1 1 1 400146 Valve à gaz multifonction Propane 5 400070 Tube de veilleuse flexible po 1 1 1 10 300036 Brûleur droit de la friteuse 1 1 1 300037 Brûleur central de la friteuse 1 2 3 300038 Brûleur gauche de la friteuse 1 1 1 11 400043 Thermopile 1 1 1 12 300034 Orifice 39 pour brûleur principal Naturel 3 4 5 300035 Orifice 52 pour brûleur principal Propane 300045 Rallonge de l orifice 3 4...

Страница 42: ...No de pièce Description KF3 KF4 KF5 1 400037 Support à paniers 1 1 400058 Support à paniers 1 2 400036 Robinet de vidange Style à bille 1 1 1 3 C200016 Cuve de friture seule 1 C200017 Cuve de friture seule 1 C200056 Cuve de friture seule 1 4 400071 Rallonge de vidange 1 1 1 5 400075 Tête du carneau 1 400076 Tête du carneau 1 400077 Tête du carneau 1 6 400078 Boîte du carneau 1 1 400079 Boîte du ca...

Страница 43: ...nt de porte 1 1 1 3 400147 Pied réglable de 6 po 4 4 4 266001 1 Jeu de roues 2 roues avant pivotantes avec frein 2 arrière fixes OPT OPT OPT 6 400057 Panier de friture Long 13 25 x Larg 6 5 x Prof 6 po 2 2 400039 Panier de friture Long 17 25 x Larg 9 25 x Prof 6 po 2 8 400072 PARE FLAMME EN OPTION 9 266863 2 BANDE DE JUMELAGE DE FRITEUSE À FRITEUSE EN OPTION 1 1 266863 3 BANDE DE JUMELAGE DE FRITE...

Страница 44: ...rvice non qualifié par Kintera alors Kintera ne sera pas tenue responsable de la réclamation sous garantie 7 Les réglages comme les calibrages le nivellement le serrage des attaches et des raccords de tuyaux ou des raccordements aux services publics normalement reliés à l installation originale relèvent de la responsabilité de l installateur et non de celle de Kintera L entretien régulier et le ne...

Страница 45: ... RESPONSABILITÉ TOUCHANT LA GARANTIE DES PIÈCES OU DE LA MAIN D ŒUVRE DES COMPOSANTS DÉFECTUEUX OU D AUTRES DOMMAGES RÉSULTANT D UNE MAUVAISE UTILISATION OU INSTALLATION OU DU MANQUE DE NETTOYAGE ET OU D ENTRETIEN DU PRODUIT TEL QUE STIPULÉ DANS LE MANUEL DU PROPRIÉTAIRE LIVRÉ AVEC L APPAREIL DÉMÉNAGEMENT DE L ÉQUIPEMENT POUR LE RÉPARER Quelle qu en soit la raison Kintera n est pas responsable des...

Страница 46: ...FRITEUSES AUTONOMES KINTERA AU GAZMODE D EMPLOI GUIDE D INSTALLATION Page 46 Mode d emploi Guide d installation rév 20180822 Pour le service sous garantie faire le 866 909 2855 Notes ...

Страница 47: ...TONOMES KINTERA AU GAZMODE D EMPLOI GUIDE D INSTALLATION Page 47 Mode d emploi Guide d installation rév 20180822 Pour le service sous garantie faire le 866 909 2855 Cette page a été laissée vide intentionnellement ...

Страница 48: ...it qui porte le nom de Kintera intègre ce qu il y a de mieux en matière de durabilité et de faible coût d entretien Cependant nous reconnaissons tous que le remplacement de certaines pièces et à l occasion l appel à un service d entretien professionnel peuvent être nécessaires pour prolonger la vie utile de cet appareil Si une intervention de service devient nécessaire contactez une agence de serv...

Отзывы: