background image

4

Connections

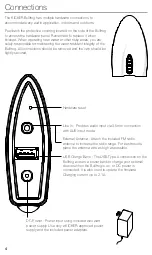
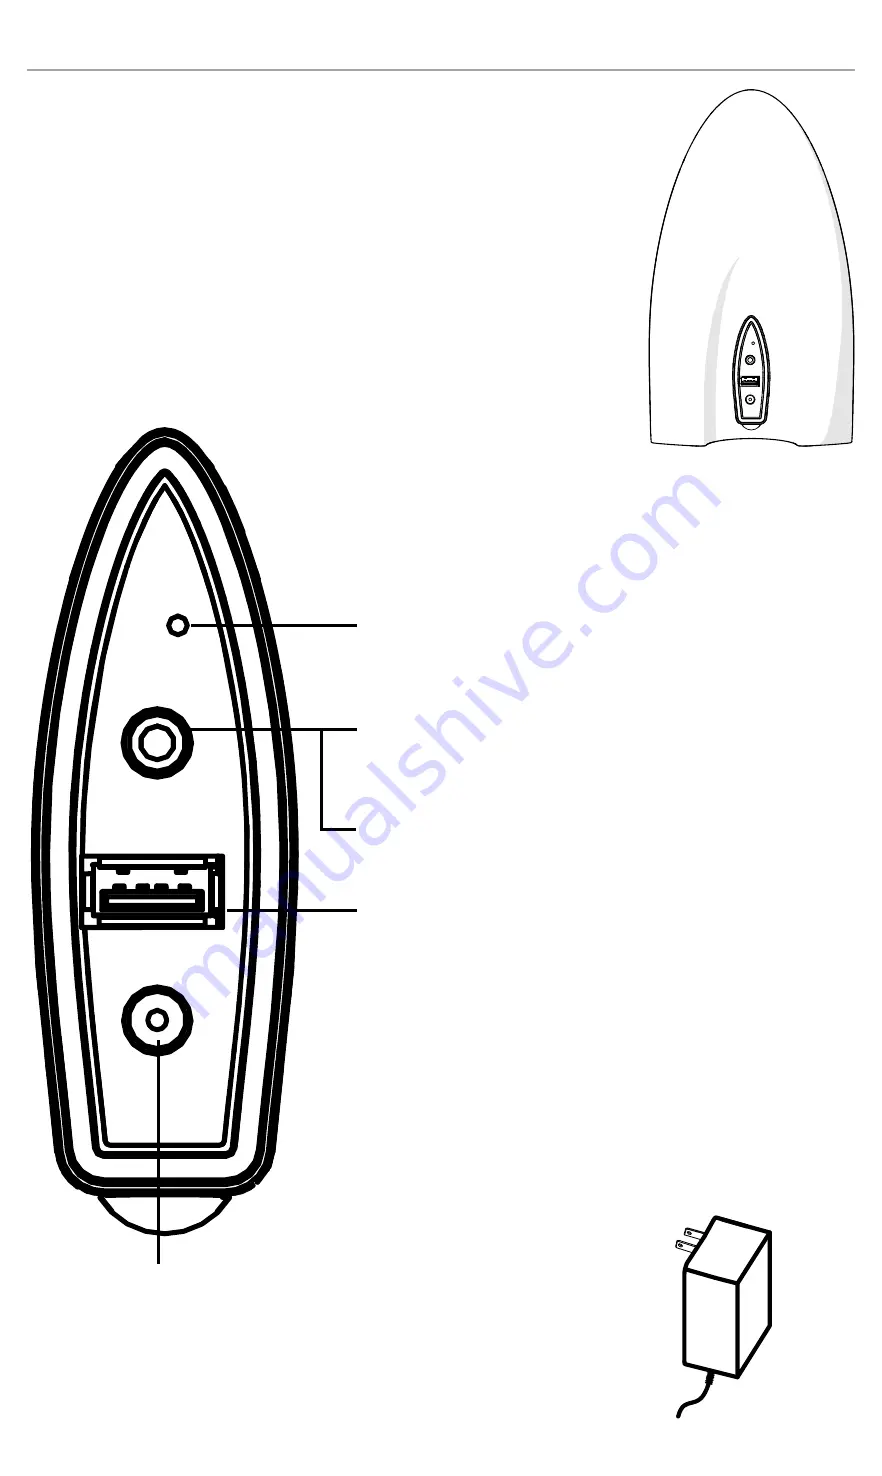
The KICKER Bullfrog has multiple hardware connections to 
accommodate any audio application, indoors and outdoors.

Peel back the protective covering located on the side of the Bullfrog 
to access the hardware panel. Remember to replace it when 
fi nished. When operating near water or other risky areas, you are 
solely responsible for maintaining the water-resistant integrity of the 
Bullfrog. All connections should be removed and the cap should be 
tightly secured.

Hardware reset

Line In - Provides audio input via 3.5mm connection 
with AUX input mode. 

External Antenna - Attach the included FM radio 
antenna to increase the radio range. For best results, 
place the antenna wire as high as possible.

USB Charge Bank - The USB Type A connection on the 
Bullfrog acts as a power bank to charge your external 
devices when the Bullfrog is on, or DC power is 
connected. It is also used to update the fi rmware. 
Charging current up to 2.1A.

DC Power - Power input using included wall-wart 
power supply. Use only a KICKER-approved power 
supply and the included power adapters.

Содержание Bullfrog BF200

Страница 1: ...llfrog Series Audio Systems Manual del Propietario para los Sistemas de Audio de la Serie KICKER Bullfrog Manuel d utilisation des systèmes audio KICKER Bullfrog BF200 Owner s Manual Manual del Propietario Manuel d utilisation ...

Страница 2: ...ción del hardware 10 Indicadores de estado 10 Conexiones 11 Controles 12 Funcionamiento del Hardware 13 Modo Bluetooth 13 Modo FM 15 Modo AUX 15 KICKER Connect App próximamente Solución de problemas 16 Especificaciones 24 Seguridad Garantía 25 Introduction 2 Présentation du matériel 17 Indicateurs d état 17 Branchements 18 Commandes 19 Fonctionnement du matériel 20 Mode Bluetooth 20 Mode FM 22 Mode...

Страница 3: ...ente Double Kick Necesita más potencia Conecte dos Bullfrog Utilice KICKER Connect o las configuraciones del hardware para agregar otro Bullfrog a su coro Certificación IP66 en su bote en el lago o en su patio trasero el Bullfrog cuenta con una certificación que prueba su resistencia Ahora puede reproducir lo que quiera donde quiera Rango Bluetooth de 100 pies la diversión lo acompañará adonde vaya U...

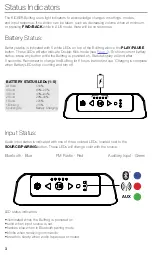
Страница 4: ...white LEDs on top of the Bullfrog above the PLAY PAUSE button These LEDs will also indicate Double Kick mode see Page 4 To show current battery status press any button while the Bullfrog is powered on Status display will end after 5 seconds Remember to charge the Bullfrog for 6 hours before first use Charging is complete when Battery LEDs stop counting and turn off BATTERY STATUS LEDs 1 5 All Solid...

Страница 5: ...moved and the cap should be tightly secured Hardware reset Line In Provides audio input via 3 5mm connection with AUX input mode External Antenna Attach the included FM radio antenna to increase the radio range For best results place the antenna wire as high as possible USB Charge Bank The USB Type A connection on the Bullfrog acts as a power bank to charge your external devices when the Bullfrog ...

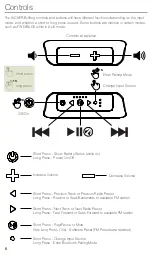
Страница 6: ...e on Long Press Power On Off Increase Volume Decrease Volume Short Press Previous Track or Previous Radio Preset Long Press Rewind or Seek Backwards to available FM station Short Press Next Track or Next Radio Preset Long Press Fast Forward or Seek Forward to available FM station Short Press Play Pause or Mute Very Long Press 10s Software Reset FM Presets are retained Short Press Change Input Sour...

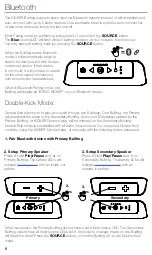
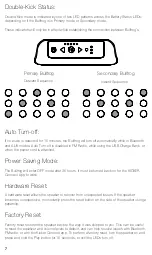
Страница 7: ...you to play your audio through two Bullfrogs One Bullfrog the Primary will broadcast the audio to the Secondary Bullfrog Audio and EQ settings applied by the Primary Bullfrog or KICKER Connect app will be mirrored on the Secondary Bullfrog Double Kick mode is compatible with all audio input sources You may enter Double Kick mode by using the KICKER Connect app or manually with the following button...

Страница 8: ...ank or when the power cord is attached Power Saving Mode The Bullfrog will enter OFF mode after 36 hours It must be turned back on for the KICKER Connect App to work Hardware Reset A hardware reset allows the speaker to recover from unexpected issues If the speaker becomes unresponsive momentarily press the reset button on the side of the speaker using a paperclip Factory Reset Factory reset resto...

Страница 9: ...ch elevation as possible Enter FM Radio mode by short pressing the SOURCE button until the red LED is selected Use the KICKER Connect app to tune to specifc frequencies or save stations to Preset AUX The KICKER Bullfrog features auxiliary audio input via the 3 5mm 1 8 input jack located on the hardware panel Enter AUX mode by short pressing the SOURCE button until the green LED is selected When us...

Страница 10: ...nnected Begin playing music on mobile device Set audio output to Bluetooth Move your mobile device closer to the speaker Avoid obstacles that may block the wireless signal FM Mode Check that the status LED is solid red Push PLAY PAUSE button to ensure speaker is not muted Use the Kicker Connect App to tune into a stronger FM station AUX Mode Check that the status LED is solid green Begin playing m...

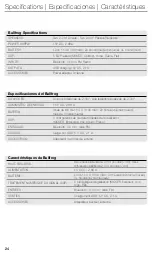
Страница 11: ...ones de litio de 11 4 V 3100 mAh 20 horas volumen medio más de 3 horas fuerte DSP 5 configuraciones predeterminadas del ecualizador KICKER Exteriores Voz Agudo Plano ENTRADAS Bluetooth 3 5 mm radio FM SALIDAS Carga por USB 5 V DC 2 1 A ACCESORIOS Adaptador de potencia antena Caractéristiques du Bullfrog HAUT PARLEURS Deux haut parleurs de 2 3 4 pouces 7 cm deux diffuseurs passifs de 2 3 4 pouces 7 ...

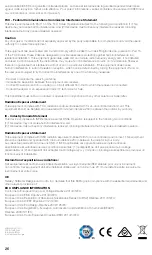
Страница 12: ...isposal of this product This marking indicates that this product should not be disposed with other household wastes throughout the EU To prevent possible harm to the environment or human health from uncontrolled waste disposal recycle it responsibly to promote the sustainable reuse of material resources To return your used device please use the return and collection systems or contact the retailer...

Страница 13: ...Radiation Exposure Statement This equipment complies with FCC radiation exposure limits set forth for an uncontrolled environment This equipment should be installed and operated with minimum distance 20cm between the radiator your body IC Industry Canada Statement This device complies with ISED s licence exempt RSSs Operation is subject to the following two conditions 1 This device may not cause h...

Страница 14: ...l appareil Respectez l espace minimum autour de l appareil pour assurer une ventilation suffisante Veillez à ne pas entraver la ventilation de l appareil en couvrant les orifices de ventilation avec des objets quelconques notamment des journaux nappes rideaux etc Mise au rebut du produit Ce pictogramme indique que dans l Union européenne ce produit ne doit pas être jeté avec les ordures ménagères Po...

Страница 15: ...té nous recommandons à l utilisateur d essayer de remédier à la situation par l un ou plusieurs des moyens suivants Réorienter ou déplacer l antenne réceptrice Augmenter la distance entre l appareil affecté et le récepteur Brancher l appareil à une prise de courant sur un circuit différent de celui auquel le récepteur est branché Demander conseil au revendeur ou à un technicien radio TV qualifié Ce...

Отзывы: