Kendrion Binder Magnete GmbH
Operating Instructions 76 ..P..B00
Last updated: 30 Dec. 2009
Page 17
Warning!
Before starting the machine (e.g. motor) test run without driven components, the feather key (if used) must
be secured in such a way that it cannot be hurled out. The shaft must not be exposed to load torques. Before
the machine (e.g. motor) is re-started, the brake must be de-energised.
Caution!
The brake surface temperature may rise to over 100°C. Heat-sensitive parts such as conventional cables or
electronic components must not be fixed to or be in contact with these surfaces. If necessary, suitable
protections and hand guards must be installed to avoid accidental contact with hot surfaces! If the shaft
needs to be turned during set-up operations while the machine (e.g. motor) is switched off, the brake must
be released electromagnetically or by means of the hand release lever (29).
Caution!
High-voltage tests performed during brake installation within an overall system or during start-up must be
carried out in such a way that damage to the built-in electronic accessories is avoided. The limits for high-
voltage tests and follow-up tests specified by DIN VDE 0580 must be observed.
Attention!
Check that the brake has been connected in accordance with the specifications provided on the rating plate
before it is put into operation. Even short-term operation outside the specified supply voltage limits may
cause irreversible damage to the brake or electronic accessories. Such damage may not be apparent
immediately. DC side brake switching without protective circuit as described in Section 3.4 will cause
damage to electronic rectifiers, electronic accessories, switching contacts and to the field coil (1.2).
3.6 M
2
rated torque adjustments
The brakes are factory-adjusted to the M
2
rated torque (as
specified in the purchase order). The M
2
rated torque is specified
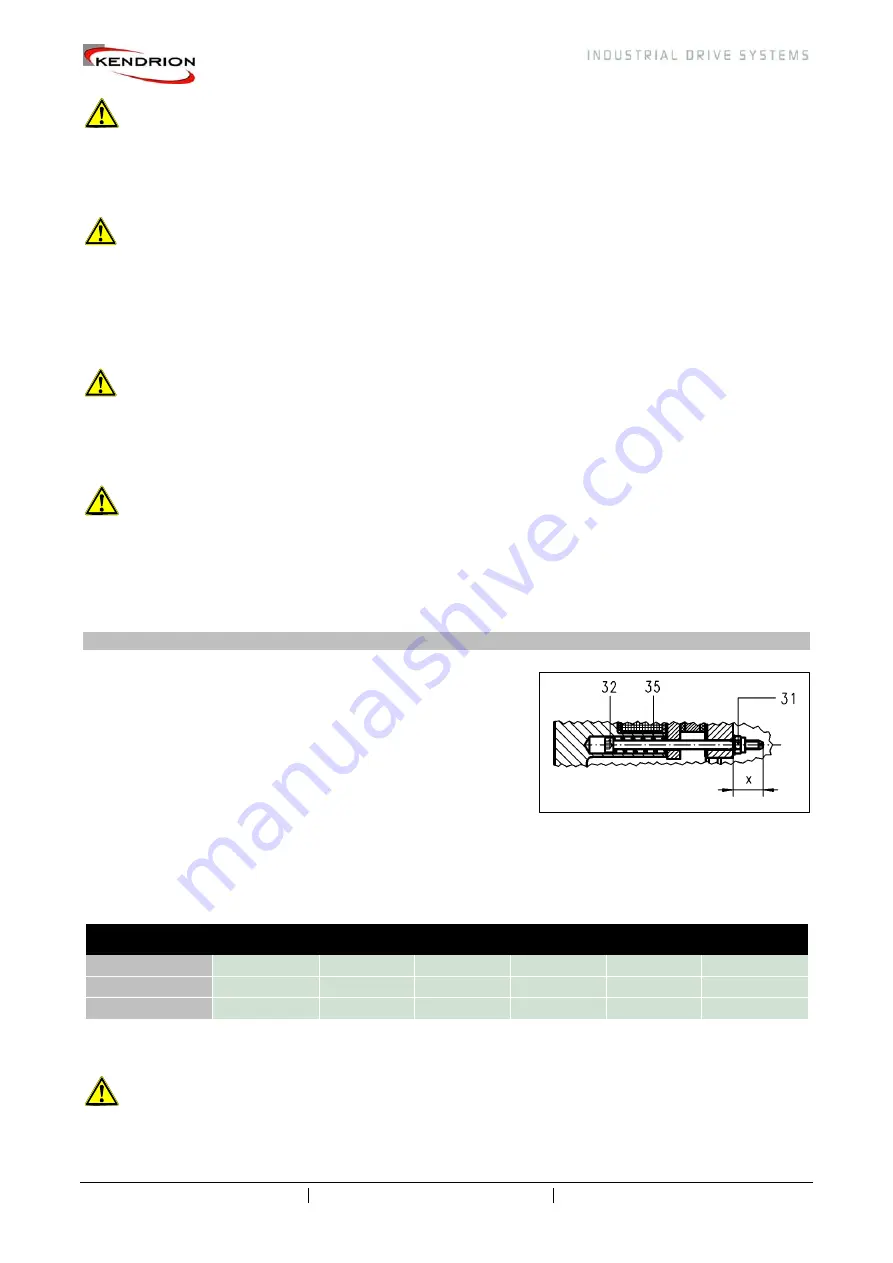
on the rating plate (33) of the brake. In case fine adjustment is
required, the M
2
rated torque can be continuously reduced.
However, it must not be increased. In order to adjust the torque,
proceed as follows: Loosen the machine screws (20) provided on
the cover (7) and remove the cover (7). Screw in the machine
screw (32) clockwise by means of a screwdriver, making sure to
secure the nut (31) in such a way that it cannot turn. Fine
adjustment must be carried out uniformly on all machine screws (32). Check that the requirements in terms
of the minimum length of projection x
min
(see Table 17/1) of the machine screw (32) from the flange (3) are
met. The change in the M
2
rated torque resulting from these adjustments is specified in Table 17/1. The
factory-set nominal value (approximate value) of the length of projection x
nom
(see Table 17/1) is marked on
the flange.
Size
10
11
13
16
19
24
Δ
M
2
/mm [Nm]
0.5
0.65
4
7.5
7.5
10
x
nom
[mm]
10.5
10.5
11.5
11
11
11
x
min
[mm]
7.5
7.5
9
9
9
9
Table 17/1: Change in the M
2
rated torque from 1 mm axial adjustment of the machine screw (32);
permitted projection x
min
Warning!
Any adjustment of the rated torque must be performed by the manufacturer's authorised personnel.


