background image

243

Содержание FLEX 17-5701

Страница 1: ...OPERATORS MANUAL Edition 03 18...

Страница 2: ......

Страница 3: ...FLEX Black 17 5705 FLEX White 17 5707 FLEX Blue 24VDC Class I Single Phase 115 Volts 50 60 Hz 7 Amps 230 Volts 50 60 Hz 3 5 Amps Machine Dimensions Width 59 5 151 13 cm Height 16 5 41 91 cm Length 44...

Страница 4: ...t be responsible for any expedited shipping charges Customer will be invoiced for Warranty Items that are not promptly returned per the required procedures Outside the contiguous United States the bow...

Страница 5: ...loth for the first three 3 years of operating the machine To accept the program simply check the box on the front of the Warranty card In the event that a selected part should fail a verification proc...

Страница 6: ...servicing to qualified personnel This machine is designed and manufactured for many years of dependable service To ensure the durability of this equipment please handle it carefully Do NOT drop or ban...

Страница 7: ...ver Removal 34 Things You Can Do with No Cord Attached 37 LANE MAINTENANCE 101 38 CHAPTER 2 40 CONDITIONING OVERVIEW 40 How Conditioner is Metered and Controlled 40 Calibrating the Oil Pump 41 Matchin...

Страница 8: ...gle tank 91 Fine Tuning for Stopping the Machine at the End of Lane 93 Pindeck Treatment Settings 94 Application Tip Cover 94 Programming the Pindeck Feature 95 Adjustments 96 Pindeck Treatment Can Re...

Страница 9: ...em Problems Indicated by Error Messages 143 Drive System Problems that Do Not Display Errors on Lane or Approach 149 CHAPTER 6 150 COMPUTER AND CONTROL RELAYS 150 Programmable Logic Controller 150 PLC...

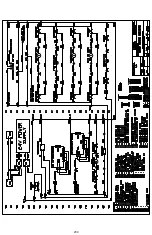
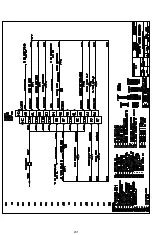
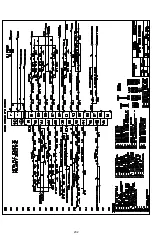
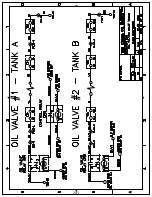
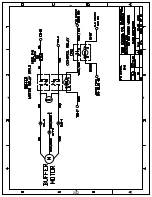
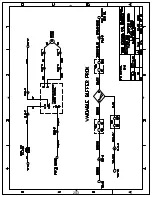
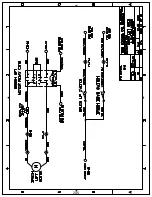
Страница 10: ...ayout 243 Flex Oil Pump Driver Motor Wiring Layout 244 Flex L R R L Proximity Sensor Wiring Layout 245 Flex Oil Valves Wiring Layout 246 Flex Buffer Motor Wiring Layout 247 Flex Variable Buffer Motor...

Страница 11: ...otor Wiring Layout 278 Flex Squeegee Motor Switch Wiring Layout 279 Flex Duster Unwind Motor Switch Wiring Layout 280 Flex Duster Windup Motor Switch Wiring Layout 281 Flex Cleaner Pump 1 Wiring Layou...

Страница 12: ......

Страница 13: ...ing transfer system along with the vacuum squeegee cleaning system and duster system allow the machine to maintain clean and consistent bowling conditions In addition to this manual Kegel has develope...

Страница 14: ...d maintain the FLEX Should you have any questions after reading this manual about proper operation or procedures please contact Kegel at 863 734 0200 or via email at lmc kegel net for technical suppor...

Страница 15: ...tioners and cleaners that are used in our lane conditioning machines as well as other areas in bowling and beyond Lane Maintenance Central LMC Regarded by many as the best in the industry LMC provides...

Страница 16: ...4 Wah lah I did them the same...

Страница 17: ...ftware on USB drive PLC Cable 154 8781 Extra Roll of EZ Core Cloth 153 0047EZ Maintenance Supplies Starter Kit 154 8866 External Charging Assembly K2 Battery Assembly Date Unpacked ___________________...

Страница 18: ...l all of the components 5 Inspect all of the switches and sensors and describe the function of each one a 7 pin 10 pin Whiskers Switches adjusting screw is hard to see FW only b Bumper Switches FW onl...

Страница 19: ...e on balancing the motors 10 Inspect all the relays and describe their function Make sure all are seated properly in the socket bases 11 On the Walker show the two steering relays CR15 CR16 and notice...

Страница 20: ...than the other Omron PLCs 21 View all of the menus on the touchscreen 1 When the machine is powered ON the touchscreen will illuminate With power applied press the MOVE MACHINE icon on the touchscree...

Страница 21: ...roach drive functions and will sound the entire time while on the approach 10 Watch closely as the machine exits the lane This is where you can see if the adapters from gutter to approach will cause a...

Страница 22: ...ne down into the operating position roll the machine away from you a foot or two This will allow the casters to face the best direction for ease of lowering If using the lift do the same thing only pu...

Страница 23: ...the Cleaner Supply Tank the machine should be in the down or operating position on the lane Prepare an appropriate mixture of cleaner and water Open the splash guard and place a towel beneath the tank...

Страница 24: ...ausing improper operation A wet switch may also produce a dim LED light on the PLC Any spills or drops of cleaner onto the approach should be wiped up immediately Any spills on the machine can stain t...

Страница 25: ...f the On Lane Sensor OLS does not close the contacts in 8 seconds then the PLC assumes that the machine has failed to seat on the lane or it is going too slowly and displays an OLS LATE error If the O...

Страница 26: ...TRAVEL error will be displayed 11 As the Walker travels down the lane the lane distance sensor LDS is counting inches traveled and is also monitoring the movement of the machine If travel is interrup...

Страница 27: ...assembly is line with the 2 3 pin deck spots then drop the duster refer to Chapter 3 for more information 20 The machine will then start up the moving head to apply the Pin Deck Treatment After applic...

Страница 28: ...e cleaner will then need to be filled and then re started Always empty the recovery tank when filling the cleaner tank 31 The Walker cannot be resumed if the following errors occur APPROACH 7 10 OLS L...

Страница 29: ...and the machine will begin its forward travel down the lane When using the factory settings the buffer motor does not turn on until the rear of the machine is about 3 feet 0 914 meters past the foul...

Страница 30: ...proceed to lift up and stop when the squeegee up switch normally open contacts close If the contacts do not close a SQUEEGEE UP error will be displayed 15 If the Pindeck Treatment function is disable...

Страница 31: ...pproach with the cleaning end behind the foul line Locate the E Stop and rotate the red button to reset and turn the machine on Next press the Machine Power button for the machine to boot up When the...

Страница 32: ...the MACHINE SETUP I screen from the Main Menu screen press MORE MENUS then the MACHINE SETUP button The ENABLE BUTTON at the bottom will need to be pressed AT THE SAME TIME as one of the listed functi...

Страница 33: ...return towards the fouline Disabling this function will stop the machine from doing the reverse forward reverse jog in the pit When the default setting has been changed in a menu screen the background...

Страница 34: ...isable this function This feature allows the machine to back up to the end pairs that are built next to a wall or other obstacles The MOON WALK TO POLES OR WALLS is useful when there is a pole or wall...

Страница 35: ...curately as possible From the home screen simply press the MOVE MACHINE button In Move Machine you can adjust the turning and how far it goes forward or backward The left number is the Forward value w...

Страница 36: ...the machine to run the first two lanes twice press the BURN PAIR OFF button When used on a Walker the machine will turn and come back to the starting lane when activated When used on a FLEX it will a...

Страница 37: ...O TO STARTING LANE When entering the pattern number each digit must be adjusted The left digit will go no lower than 0 and no higher than 3 the right digit will go from 0 to 9 as long as there is not...

Страница 38: ...operating at If the Burn Pair function has been enabled this will be displayed in place of the RUNNING LANE and ENDING LANE When the TEST CLEAN button is pressed the machine will change to CLEAN ONLY...

Страница 39: ...rors that require more explanation If errors are present when the machine is turned on the screen will display the ERRORS DETECTED message as shown above Pressing on the message will take you to the E...

Страница 40: ...reen Refer to Chapter When the machine loses battery power or if the E STOP is pressed while operating on the lane the machine will display this error message when the power resumes Press anywhere on...

Страница 41: ...is still under warranty and should not be adjusted to prevent voiding your warranty Technical support on the machine is available at any time day or night To reach a technician press the CONTACT KEGE...

Страница 42: ...creen is used to enter the serial number of your battery and the date of installation It s a good idea to monitor usage so that you can prepare for future battery replacement By pressing the bottom BA...

Страница 43: ...to keep track of the centers conditioning program It will also monitor any operational error codes as well as restarts If many restarts are recorded this may indicate a potential operating problem It...

Страница 44: ...s are sometimes worse than bowling in a parking lot It is the only place on the planet where the lane man gets no grief from the players since no one cares if two lanes play the same Keeping your mach...

Страница 45: ...hine The machine should be stored in a safe and warm environment and as close to the lanes as possible Some centers build dog houses for their machine next to the approach or behind the pinsetters If...

Страница 46: ...n the AC power side the charger will NOT charge properly Refer to Chapter 5 for more detailed information on charging Lid and Side Cover Removal In some cases it may be necessary to remove the Lid and...

Страница 47: ...at secure the top of the cover and remove from the attaching pins located on the bottom Rear Cover Removal With the machine in the up right transport position locate the two screws that are on the ins...

Страница 48: ...of the side cover as shown on a Flex Walker The Flex machine will have three 3 mounting screws like the one shown at the top of picture NOTE On the Flex Walker it will be necessary to remove the bumpe...

Страница 49: ...you can do it and not worry about the machine running over the cord when you turn your head 6 Watch the machine do its job Make sure it is conditioning oiling and cleaning properly because it s not mu...

Страница 50: ...he gutters caps and division rails each and every day This greatly reduces the amount of dirt the lane machine pulls into the conditioning compartment It sounds like a lot of work but so what it makes...

Страница 51: ...39...

Страница 52: ...of applying precise amounts of lane conditioner An explanation of how this is accomplished will help you understand the art form of oil pattern application When conditioning a lane the oil head travel...

Страница 53: ...etting for the pump is 50 microliters per board To give you a visual perspective of how much conditioner is being applied in 50 microliters consider that about 20 microliters make up one drop of oil S...

Страница 54: ...duated cylinder This is equivalent to a total oil stream of 400 boards 3 Remove the tip from the graduated cylinder and read the amount If the pump is set at 50 microliters then the output in the cyli...

Страница 55: ...as explained in step 5 1 Slide the oil head to the center of the head bar assembly 2 Remove the two screws on the oil pump cover and tilt the cover back as far as you can 3 Reach under the assembly an...

Страница 56: ...ads are multiplied and added together the result is the total number of boards that are covered by a stream of oil TOTAL PATTERN BOARDS 37 x 1 37 21 x 3 63 15 x 3 45 13 x 2 26 15 x 4 60 17 x 4 68 19 x...

Страница 57: ...is correct it will tell you if the pump needs adjusting The KOSI software provides a Total tab in the Advanced Designer screen that allow you to see the forward reverse and total oil volumes and board...

Страница 58: ...18 17 16 15 7 32 31 30 29 28 27 26 25 24 23 22 21 20 19 18 17 16 15 14 L 8 31 30 29 28 27 26 25 24 23 22 21 20 19 18 17 16 15 14 13 E 9 30 29 28 27 26 25 24 23 22 21 20 19 18 17 16 15 14 13 12 F 10 2...

Страница 59: ...d at an exact flow rate to a three way valve known as the Oil Pattern Control Valve The valve in its OFF state routes the conditioner back to the conditioner tank When turned ON the valve routes the c...

Страница 60: ...the special adjustments that can be made for each pattern can be selected Lane Pattern Design is where the pattern is created To the left of the screen you can press the VIEW ALL feature to see a list...

Страница 61: ...to the right of the function you want to adjust The screen will then change to the adjustment screen as shown below All cleaning related adjustments will be discussed in detail in Cleaning System Chap...

Страница 62: ...Monitor the on times and adjust the Buffer Brush Start Distance to come on sooner or later to avoid potential lane machine shut down This feature is great for open play bowling when it is near impossi...

Страница 63: ...in this screen before changing them Be careful when changing the values and for each change you need to make sure you test your machine for the desired results Start Applying Oil to the Brush as Mach...

Страница 64: ...a of oil patterns and mixing your two favorite conditioners you must understand that NOT ALL LANE CONDITIONERS ARE COMPATIBLE Please contact KEGEL s Lane Maintenance experts for compatibility of lane...

Страница 65: ...o increase the volume in the center of the pattern for increased hold area It can also be useful when more or less volume is needed in a given part of the line without compromising another part of the...

Страница 66: ...ng left to right or right to left pending on the oil pattern requirements Therefore we have set some guidelines in the chart on right to show how many boards it will require for the oil pump to change...

Страница 67: ...SPEED 3 500 default speed without the Variable buffer upgrade SPEED 4 700 Tank Selection continued To choose which tank is to be used press on the TANK SELECT button located above the END DIST button...

Страница 68: ...er speeds and gradually increase through the 6 available conditioning speeds The ability to change speeds while applying these loads is a patented feature of Kegel lane machines Start Distances and En...

Страница 69: ...p wherever the REVERSE DROP BRUSH is set to and buff the lane until the END DIST is reached The END DIST is also where the beginning of where the Reverse oil will start to be applied The rest of the L...

Страница 70: ...in Zones 2 3 the Zones are disabled To create a second Zone press on the Ending Lane number in Zone 1 and decrease the TO LANE Number that is highlighted By doing this you will see that the line belo...

Страница 71: ...nd rear drive wheels shown above The buffer brush material should extend approximately 3 32 to 3 16 2 38 mm to 4 76 mm beyond the straight edge for proper adjustment The buffer brush is factory adjust...

Страница 72: ...head bolts and back them away so that the transfer brush can move all the way in and out of the buffer brush assembly 2 Loosen the five 20 bolts on the front side that secure the adjustment bar but k...

Страница 73: ...e tip holder up or down Re tighten the set screw when desired height is achieved The oil tip pitch can be adjusted by using the set screws located in the front and back of the Oil Head block assembly...

Страница 74: ...ives the board counting disk and the cleaner assembly making it important that the belt not run loose A loose belt can cause the machine to lose its oil head timing and the timing that controls the mo...

Страница 75: ...and the proximity sensor should be 0 010 0 005 or about 0 254 mm The proximity sensor should be mounted square to the plate 4 The next procedure is to adjust the board counting target by using the in...

Страница 76: ...e head assembly and re insert the two mounting screws Replace the fuse for the motor Oil Head Target The moving Oil Head uses a flat head screw as a target for the Board Edge Sensors to see The screw...

Страница 77: ...uts are on the oil head runs right to left The Oil Pump Motor Control is set to run the pump motor in a counter clockwise rotation and is controlled by output 100 00 The controller is wired to run the...

Страница 78: ...he chart below as reference Speed Control board settings The above speed pots are held in place by electric tape after being adjusted in factory SPEED 1 60 RPM SPEED 2 200 RPM SPEED 3 500 RPM SPEED 4...

Страница 79: ...any conditioner A viscosity cup thermometer and a stopwatch are valuable tools if you are mixing your own blend of conditioner Call Kegel for more information on how to obtain this equipment The oil p...

Страница 80: ...ntenance 1 Remove guards from both sides of machine to clean and inspect motor and sensor shaft 2 Lightly oil sensor extension shaft and bushings in the cleaning compartment 3 Inspect buffer belt and...

Страница 81: ...ry to remove the conditioner compartment lid assembly as well as the cleaner compartment lid Refer to Chapter 1 for removal of lids Once the lids have been removed remove the three screws on the back...

Страница 82: ...the operating or down position 1 Remove the oil assembly from the rear wall 2 Clean the area around the oil assembly 3 Use a Phillips screwdriver to remove the two screws holding the valve to the bac...

Страница 83: ...th a cotton swab and alcohol to remove the debris IMPORTANT If a valve is found to have only one groove please contact KEGEL for an immediate replacement All machines should have the high flow valves...

Страница 84: ...Input 005 fails to receive a signal within 3 5 seconds of the motor starting Here are the possible causes that can produce a BRUSH DOWN ERROR If the Brush Lift Motor does not run menu to the INPUT OU...

Страница 85: ...Possible Cause Fuse is blown or fuse holder is bad Brush bearings are causing a bind not allowing free movement up and down Relay came loose in socket or has failed Faulty motor Bad connection to moto...

Страница 86: ...ration and voltages Both the Brush lift motor and the Squeegee motor will time out in 9 seconds if the position switch that the PLC is looking for is not actuated Before the motor times out the machin...

Страница 87: ...or is starting too slow due to lack of lubrication on the oil and cleaner sliding head bars Cleaner belt jumped timing causing the cleaner head to jam against the wall of the machine A set screw can c...

Страница 88: ...back on This will usually reset the error A flashing green light will indicate the drive has been de activated which is a wiring problem at the CN2 plug Check terminals 7 9 on that plug The following...

Страница 89: ...efore the bowlers notice them but only if the operator is paying attention Doing a calibration test every day will eliminate many problems from turning into disasters 1 Oil Pump fails to run a Motor i...

Страница 90: ...nding at correct footage a Oil Head not running at correct speed Check Oil and Cleaner Heads for lubrication b Machine speeds are not set correctly 6 Oil Valve time has increased a Oil Head is not run...

Страница 91: ...the best customer service Landmark Pattern Settings As modern bowling trends change it is important for our environment to evolve with them To accomplish this we have created the Landmark Pattern Ser...

Страница 92: ...ed to have a saying they always like em easy in St Louis The Gateway Arch pattern is a tribute to that saying and yes the composite shape is one large arch from 9R 9L One of the most popular landmarks...

Страница 93: ...eak can often make climbing to the top of this oil pattern more difficult than it appears Known as the Crown of Palaces this Challenge Series pattern is also a wide crown shaped pattern at 38 in lengt...

Страница 94: ...stances In bowling red numbers means under 200 average so will you be stuck in the red or can you make it in the black on the Red Square The Sphinx pattern can take on many forms and requires numerous...

Страница 95: ...gel s award winning technical support department Lane Maintenance Central will also be available for questions and to assist in setting up these patterns in your bowling center for your customers LAND...

Страница 96: ...your lanes are not coming clean like they should this could be your only problem Check your squeegee cleaner volume and duster adjustments Refer to Chapter 3 for the cleaning troubleshooting for solu...

Страница 97: ...re that conditioner was not put in the cleaner tank Sounds funny but this happens more than you think and it is no fun to fix 10 Did someone put the wrong conditioner in the oil tank or use the wrong...

Страница 98: ...creates hold This area is known as the mid lane from about 18 32 feet The mid lane provides direction to the breakpoint and dictates the score ability of a pattern Starting the reverse oil loads fart...

Страница 99: ...the return pass provides longevity and stability This application of oil can be started further down the lane on the return without drastically affecting the forward oil readings and ball reaction Q...

Страница 100: ...quence is started the cleaner pump will turn on and stay on until the last squirt distance has been reached The moving head will apply an equal amount of cleaner across the width of the lane as it tra...

Страница 101: ...also be achieved with poor maintenance If you have synthetic lanes there is no room for error Every scratch will be part of that surface forever and the more you do to prevent it the longer they will...

Страница 102: ...NED TO A GEL AND CAN CAUSE POTENTIAL BLOCKING REFER TO CHAPTER 1 FOR LONG TERM STORAGE From this screen you will be able to set your ratio for cleaning You can choose between normal concentrate cleane...

Страница 103: ...peed of the pump motor just before the forward oil distance has been reached The machine will reduce the volume output for the rest of the cleaner travel distance The CLEANER LAST SQUIRT refers to the...

Страница 104: ...ll cause the machine to travel farther When the LDS stops the machine the touchscreen buzzer will sound If the Sensor stops the machine there is no sound Use the increase and decrease value buttons to...

Страница 105: ...If Stop by LDS has several counts left then it is set too high and an adjustment is needed A good starting point for this adjustment would be to reduce the number by how much was left over in STOP by...

Страница 106: ...k but rather stopping on the tail plank The cloth will wind up and the machine will resume reverse operation After the machine has delivered its last load of oil the moving head will park so the treat...

Страница 107: ...ing the machine the other is to have it enabled by the 7 Day Planner If using this feature on start you can turn this on or off from the confirmation start screen shown to the right by simply pressing...

Страница 108: ...ls the more treatment will be allowed to be applied while the faster the head travels will result in less treatment Pindeck Treatment Can Replacement When it comes time to replace the Pindeck Treatmen...

Страница 109: ...ire cap remove the protective cap after installing the actuator cap and press down to break the plastic on the actuator button 5 After installing too ensure proper flow go to the output menus and with...

Страница 110: ...function to OFF The PRESENT UNWIND TIME will increase by 1 10 one tenth of a second every 35 lanes until the cloth runs out If you install a partial roll you may need to adjust the PRESENT UNWIND TIME...

Страница 111: ...he duster cloth is allowed to count down to zero and is not reset the GO TO STARTING LANE button will change to DUSTER NEEDS RESET screen on left the next time that the machine is turned on to be star...

Страница 112: ...the foul line It is very important that the rear squeegee blade clears the tail plank The values for the wipe distances can be changed to fine tune where the squeegee contacts the lane This function c...

Страница 113: ...ear out air bubbles 5 Press the button on the inside of the 10 pin side plate 6 The machine will now dispense 4 passes of the head into a graduated cylinder The factory setting is 30 l Anywhere from 2...

Страница 114: ...os equally By pressing TEST WATER followed by the ENABLE TEST button you will be able to check the volume of water that is being dispensed After pressing the ENABLE TEST button the screen will change...

Страница 115: ...test would be at 5 60 or 70 x 8 To set a different ratio other than what is being used in your daily use go to the PRESET ADJUSTMENT screen explained on the following pages in this manual By pressing...

Страница 116: ...also be in the center Before loosening the idler place a reference mark on the belt and drive pulley Loosen the idler and shift the belt one cog on the drive pulley in the proper direction Do not adju...

Страница 117: ...points out the adjustments for the duster switches Adjust the duster switches only when the machine is standing up in the transport position Adjustment Screws Stop Machine By Duster Switch Duster Win...

Страница 118: ...en the lane machine has been operated in any combination that requires cleaning this maintenance pop up will appear after 100 miles have been reached Replace the squeegee blades and follow the below i...

Страница 119: ...y If a pitch adjustment is necessary follow the steps below to make the adjustment Make sure the squeegee motor does not bind up when making an adjustment If the link is too short the motor cannot rot...

Страница 120: ...nance pop up will appear after 200 miles have been reached It may be possible to replace the cushion roller wrap only The cushion roller wrap comes stamped with a letter on the underside to determine...

Страница 121: ...ent The cleaner belt should be inspected and the sliding head bar lubricated at this time 3 Remove the pipe from the old duster core and insert into the new one Unroll about 3 feet of cloth and then i...

Страница 122: ...n the splash guard and place a towel beneath the tank Open the tank cap and place a towel around the base of the funnel to prevent foam from over flowing into the machine 2 Slowly pour the mixture int...

Страница 123: ...ce the Filter 1 Remove the Allen screws from the cover to access the filter 2 Remove the filter and replace or clean it 3 Inspect the gasket and re fasten the cover to the recovery tank Pump Tubing Re...

Страница 124: ...the end bells together Be careful not to pinch the tubing If the end bells do not snap tightly together you need to reload the tubing If necessary turn the key in the slot on rotor shaft to adjust tu...

Страница 125: ...tubing out of the slots and dispose of the old pump tubing 6 Take the new pump tube and slide one end into the slot and stretch around the bearing wheel assembly and insert the other end into the oppo...

Страница 126: ...there is any kind of problem with your cleaning system Reviewing this before calling for Technical Support may help in correcting any problems you have Cleaning System Problems Indicated by Error Mes...

Страница 127: ...wn fuse Duster Unwind relay failed or is loose in socket base Duster motor wire is damaged or there is a loose wire between the motor and CR4 relay Cleaner dumped onto switch causing it to short but o...

Страница 128: ...onds of the motor starting If the Motor does not run menu to the INPUT OUTPUT TEST and press SQUEEGEE LIFT to check relay operation and voltages Problem The Squeegee motor runs but the down switch fai...

Страница 129: ...o the motor Possible Cause Fuse is blown Squeegee linkage is in a bind Relay came loose in socket base or has failed Motor has failed Bad connection to the motor Check all power wiring to motor PLC Ou...

Страница 130: ...features will have to be reset Cleaning System Problems that Do Not Display Errors There are a number of things that can go wrong when cleaning but the machine will appear to operate correctly Most of...

Страница 131: ...been cleaned in months just oiled 6 Machine strips only where cleaner is applied on the lane a The duster is definitely not touching the lane 7 Machine drips dirty cleaner and oil off of the squeegee...

Страница 132: ...loose from the side of the machine c Duster switch is broken on one side d Cushion Roller may be on the large side e Duster cloth stretched and needs to be balanced and tightened up f Duster motor bra...

Страница 133: ...atteries or the lane machine the display on the charger will read BC Once the charger is plugged into the lane machine and a connection is made it will operate as normal ProNautic Charger set for Lith...

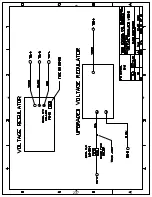
Страница 134: ...tain a constant 26 2 26 6 volts to the key components of the machine The CVR regulates the voltage output to the drive motor oil pump sliding head motor and the buffer motor Located on the CVR is a 25...

Страница 135: ...s When running the machine twice per day the maximum amount of lanes that can be done is 46 lanes per cycle or a total of 92 lanes per day This means that you can run 46 lanes or less recharge the bat...

Страница 136: ...mpartment plate and tilt the plate up toward you 4 Remove the mounting strap across the top of the battery 5 Unplug the battery and carefully remove the battery Given the weight of the battery care sh...

Страница 137: ...is advisory screen will pop up when the battery voltage is equal to or lower than 24 Volts This may indicate the machine was not charged or the machine meter is not calibrated check voltage with a rel...

Страница 138: ...from the external voltmeter The screen to the left provides information about calibrating the Voltage display Each time the machine is powered up after charging the machine will detect the full charg...

Страница 139: ...or charging problems The two screens below will show up when the battery voltages have dropped below their preset warning voltages set in the PLC If these show up contact your Distributor immediately...

Страница 140: ...chine runs but the number of lanes have been reduced or are reducing Any time this occurs the charging voltage should be monitored daily to determine if the charger is working 100 of the time 1 The ch...

Страница 141: ...an adjust the turning and how far it goes forward or backward In the screen shot shown above the left number is the Forward value the middle number is the turning value and the right is the Reverse va...

Страница 142: ...S can be enabled Press on a STEP and it will change color to show it is enabled to be adjusted Use the buttons at the bottom to increase or decrease the value In most cases the STOP ON APPROACH value...

Страница 143: ...Programming Around Poles or Walls To view Super Advance settings menu back to the LANE TO LANE ADJUSTMENT screen and press on SUPER ADVANCE A password screen will appear enter your password and press...

Страница 144: ...has to back up to a lane other than the end lanes you will need to menu to MACHINE SETUP and press the Forward Green Arrow and advance to MACHINE SETUP II From here you press MOON WALK SETUP The MOON...

Страница 145: ...heck and change the no load speed settings generally the motor will run 3 to 4 IPS faster under no load If a Flex Walker make sure wheels are not touching approach before starting motor Press AUTO SPE...

Страница 146: ...change the step number Warning ODD numbers are for FORWARD travel and EVEN numbers are REVERSE travel Do not run the wrong step number in forward or reverse travel The following list shows the Inches...

Страница 147: ...e Walker will not move in reverse Adjustments Main Drive Motor Chains It is important for the drive chains to stay tight but not too tight First determine what adjustment needs to be made A chain that...

Страница 148: ...in the approach wheel 5 Re tighten the motor mount and adjusting screw jam nut then check the buffer belt tension and re adjust if needed 6 Hinge the PLC control plate into place and tighten the three...

Страница 149: ...Lanes Sensing Whiskers Adjusting a whisker is done by simply loosening the two set screws that hold it to its pivot mount and sliding the shaft in or out The whiskers will be around 6 inches 15 24 cm...

Страница 150: ...hrough the arm and the spring assembly on the floor plate The correct adjustment should be when the rear of the machine drops onto the lane and is fully setting on the lane the input light 0CH00 shoul...

Страница 151: ...wise will decrease the Decel time which could cause the machine to make sudden speed changes If you adjust the DECEL too much in the clockwise direction the machine may not properly slow down entering...

Страница 152: ...ise several times to see if the machine repeats its movements forward and back 7 If the machine repeats its error and is off by as much two boards then replace the proper jumper with a wire between 6...

Страница 153: ...ean the machine 4 Inspect the drive chain adjustment whenever the wheels are checked or cleaned 5 Inspect the LDS when cleaning the machine to make sure all parts are tight it takes just a second 6 In...

Страница 154: ...l have an additional drive motor to blow out This motor is located in the center compartment under the electrical panel To do this it will be necessary to remove the conditioner compartment lid assemb...

Страница 155: ...For the FLEX menu to the INPUT OUTPUT TEST screen to run the motor Problem The drive motor runs but gives a Forward or Reverse Travel Error Possible Cause Machine is not seated on the lane there are...

Страница 156: ...ward Relay is loose in socket or failed Reverse Relay is loose in socket or failed Motor control plugs is loose or unplugged Check speed control and drive motor plugs Blown fuse Drive Motor or Speed C...

Страница 157: ...n and input 110 is for the 10 pin Normally this Walker error screen appears when Input 1CH 06 fails to receive a signal within 1 5 seconds of the 7 pin Approach Motor starting On the following page ar...

Страница 158: ...ng target is loose or has fallen off Problem 7 pin Approach Motor does not run menu to MOVE MACHINE screen to test motors Possible Cause Drive motor has failed CR2 ZTR Enabling Relay is loose in socke...

Страница 159: ...ction between sensor and PLC Chain has broken that drives sensor target Main drive chain to rear wheel is off Problem 10 pin Main Drive Motor does not run menu to MOVE MACHINE screen to test motors Po...

Страница 160: ...eady closed due to a bad switch or the wheel was rotated causing it to close the switch Someone could wire the switch wrong as well The BUMPER error is displayed on the Walker when the bumper switch c...

Страница 161: ...stment to see if they are set properly for each lane b The 10 pin Approach Sensor is miss counting allowing it to go beyond 90 degrees 3 The machine drifts to right or left when traveling to the next...

Страница 162: ...ogrammable Logic Controller PLC Input Indicators Battery Analog Inputs Outputs Input Terminal Connections Output Terminal Connections Dip switches under door Default is OFF PLC Status Indicators Touch...

Страница 163: ...ITCH GREEN WHITE 005 BUFFER BRUSH DOWN SWITCH VIOLET YELLOW 006 DRIVE SHAFT TACHOMETER PROX SENSOR BLACK BLUE 007 LANE DISTANCE PROXIMITY SENSOR LDS WHITE PINK 008 RESUME BUTTON HANDLE BUTTON FLEX ONL...

Страница 164: ...iring drawings will show the simplest way a switch and proximity sensor connect to the PLC Below is an example of a typical input circuit using a switch One side of the switch goes to the PLC Input an...

Страница 165: ...e Brown to positive and Black is the signal which connects to the appropriate PLC Input The sensor operates when metal passes by the face An LED light located on the sensor will indicate operation The...

Страница 166: ...ING HEAD MOTOR RUN BLACK 100 05 MOVING HEAD MOTOR DIRECTION WHITE 100 06 BUFFER MOTOR PINDECK TREATMENT YELLOW BLUE 100 07 OIL CONTROL VALVE ORANGE 101 00 ZTR ENABLE RELAY WHITE GREEN 101 01 ZTR DIREC...

Страница 167: ...t test also shows the inputs that control the motor to stop in the proper position When testing the motor you are also testing and watching for correct switch operation at the same time To check input...

Страница 168: ...cement you will cause damage to the smaller motors In addition to fuses and breakers the PLC program also protects the machine by timing out after operating motors for a pre determined amount of time...

Страница 169: ...em to voltage the higher the analog voltage the higher the speed The analog outputs generate voltage from 0 to a maximum of 5 VDC The Gray Green wire on the bottom left is the drive motor output the B...

Страница 170: ...206 CONTROL RELAY 3 Control Relay CONTROL RELAY 4 Duster Polarity Switch CONTROL RELAY 5 Pindeck Treatment Relay CONTROL RELAY 6 Power Off Relay CONTROL RELAY 7 Duster Windup Motor CONTROL RELAY 8 Dus...

Страница 171: ...159...

Страница 172: ...160 CHAPTER 7 Miscellaneous Parts Stickers and Decals...

Страница 173: ...161...

Страница 174: ...162...

Страница 175: ...x 1 4 Elbow 3 8 NPT x 1 4 Tube 154 0225 Elbow 1 4 Stem x 1 4 Tube Elbow 3 8 Stem x 3 8 Tube Elbow 1 4 Stem x 1 4 Hose Barb Elbow 3 8 Stem x 5 16 Hose Barb Female Connector 1 4 Tube x 1 8 FPT 154 0257...

Страница 176: ...164...

Страница 177: ...x Walker Bottom View 187 Flex Walker Left Side View 189 Flex Walker Right Side View 191 Flex Walker LDS Assembly 193 Flex Walker Front Handle Assembly 195 Flex Walker Whisker Assembly 197 PLC Plate As...

Страница 178: ......

Страница 179: ...4 K2 LITHIUM 25 6 Ah 164 8471 EXTERNAL BATTERY CHARGER ASSEMBLY 115V EXTERNAL BATTERY CHARGER ASSEMBLY 230v 164 8471 E 158 1634C K2 LITHIUM 51 2 Ah 158 1634B K2 LITHIUM 38 4 Ah Battery Quick Disconnec...

Страница 180: ...Z y d h Z t d y d h Z h y d h Z y d h Z Z y Zd h Z t d y Zd h Z h y Zd h Z y Zd h Z Z ZKEd hDW Z t d ZKEd hDW Z h ZKEd hDW Z ZKEd hDW Z Z y W E t d y W E h y W E y W E Z E E Z KDW ZdD Ed t d E E Z KDW...

Страница 181: ......

Страница 182: ...KE y Z s E y EhD Z Ydz W Zd EhD Z Z Wd KE hKD E E WK d dZ E WKZd d Z D z KDW d dZ E WKZd d Z d Z KE z K t Z y Z E Z t Z Zh Z hDW Z Z D W W y d E y K Ehd D y D W W y K t Z t Z Ks Z dZ E WKZd d Z DKhEd...

Страница 183: ......

Страница 184: ...5B BUFFER MOTOR BRUSHES PAIR PR 1 164 9017 BUFFER MOTOR BELT VARIABLE EA 1 164 9014A BUFFER MOTOR PULLEY ASSEMBLY EA 2 1 164 8217 MAIN DRIVE MOTOR 24V EA 1 158 1405B DRIVE MOTOR BRUSHES PAIR PR 1 154...

Страница 185: ......

Страница 186: ...z s Z h Z Z h t D z KDW d d Kt dd W Zd Z EKd KtE Kh Z K d y WZ E KDWZ KE KZ h t h t D z Z Z ZKEd h t D z KDW d d Kt dd W Zd Z EKd KtE E h E y y WZ E KDWZ KE KZ h t h t D z ZKEd h t D z Z Z t KE z h t...

Страница 187: ...7 7...

Страница 188: ...Zd EhD Z Z Wd KE hKD D z h d Z DKdKZ s E Z WhDW D z KE EdZ d hW Z KE z E Z dh E KZ hW Z KE EdZ d E Z dh E KZ Z KE EdZ d h Z Kt Z E DKdKZ d Z D z E h t Z s DKdKZ D z t D z h Z d D z d E Z h Z d D z s...

Страница 189: ......

Страница 190: ...Z d y Z s E y EhD Z Ydz W Zd EhD Z Z Wd KE hKD Yh Zh d DKdKZ s h d Z DKdKZ D z s d Z D z E h t WZKy D dz E KZ t D z Z Z Z s d K...

Страница 191: ......

Страница 192: ...y Z s E y EhD Z Ydz W Zd EhD Z Z Wd KE hKD t D z d Z t y ZD D z E h E y y E h E y d Z t y E h d s WZKy D dz E KZ d Y D D W W y ZD DKhEd d Z t y ZD d dKZ KE WZ E Z dKZ KE WZ E t d Ez KE d t Z D W W y...

Страница 193: ......

Страница 194: ...2014 1 4 LOCKWASHER EA 3 4 153 2004 1 4 FLATWASHER EA 4 1 164 8073F FRONT HANDLE COMPLETE ASSY EA 5 4 153 2996 SCREW FHCS 10 24 X 3 4 BLACK OXIDE EA 6 2 164 6072 FRONT HANDLE PLUG EA 7 2 164 6087 FRON...

Страница 195: ......

Страница 196: ...Ydz W Zd EhD Z Z Wd KE hKD E D z KDW d E hddKE Z W D Ed D z t t Z Z t y Ky hddKE K Z y Ehd K t Z dt Z E d Ez K y E DKhEd y y E W Z hEd Z hZs W Z y D W W y Zh Z hDW Z y y W Zd d Z y E hDW Z Dd y WK zhZ...

Страница 197: ......

Страница 198: ...W W y d t Z K t Z d E K D d Z y d E K D d Z WZ E W hE Z d Z y t Z d h Z t d y t Z d h Z h y t Z d h Z y t Z d h Z Z y t Z Zd h Z t d y t Z Zd h Z h y t Z Zd h Z y t Z Zd h Z Z ZKEd hDW Z t d ZKEd hDW...

Страница 199: ...14 15 16 17 18 19 5 4 7 6 13 8 9 10 2 12 11 9 3 8 10 9 1 3 9 10 12...

Страница 200: ...E y t Z Z s E y EhD Z Ydz W Zd EhD Z Z Wd KE hKD E E WK d dZ E WKZd d Z D z KDW d dZ E WKZd d Z d Z KE z K t Z y Z E Z t Z Zh Z hDW Z Z D W W y d E y K Ehd D y D W W y K t Z t Z Ks Z dZ E WKZd d Z DKh...

Страница 201: ......

Страница 202: ...EMBLY EA 2 1 164 8217M RIGHT MAIN DRIVE MOTOR 24V EA 2 1 158 8602 LEFT DRIVE MOTOR 24V EA 1 158 1405B DRIVE MOTOR BRUSHES PAIR PR 1 154 9601 CHAIN FOR 153 9002 INSIDE AND OUTSIDE SPROCKET EA 1 153 944...

Страница 203: ......

Страница 204: ...Zh D z h Z d D z EKE s Z h Z d D z s Z h Kh Z K d y WZ E KDWZ KE KZ h t h t D z Z Z ZKEd h t D z KDW d E h E y y WZ E KDWZ KE KZ h t h t D z Z Z h t D z Z Z t KE z h t D z ZKEd t KE z Z DKD Ed Zz t D...

Страница 205: ...7 7...

Страница 206: ...4 8026 CLEANER TUBING 16 FOR REG CONCENTRATE EA 3 1 158 8402 BUFFER LOWERING MOTOR EA 4 1 164 8032 HEAD DRIVE MOTOR ASSEMBLY EA 5 6 153 0001BK CASTER ASSEMBLY 3 INCH DUAL WHEEL BLACK EA 6 1 164 9016 B...

Страница 207: ......

Страница 208: ...QTY PART NUMBER DESCRIPTION UOM 1 2 158 8402 SQUEEGEE BRUSH LIFT MOTOR 24VDC EA 2 1 158 8403 DUSTER MOTOR ASSEMBLY 24VDC EA 3 1 153 7203 BUMPER WHEEL EA 4 2 154 1220 PROXIMITY SENSOR EA 5 6 153 0001B...

Страница 209: ......

Страница 210: ...FHSCS 10 32 X 5 16 EA 9 2 164 6071 BUMPER ARM EA 10 4 153 2087 MS PHILLIPS 8 32 X 3 4 EA 11 2 153 2001 6 FLATWASHER EA 12 2 153 2231 LOCKNUT 4 40 EA 13 2 164 6032 FLEX BUMPER SWITCH BRACKET EA 14 4 1...

Страница 211: ......

Страница 212: ...t D z d Z t y ZD D z E h E y y E h E y d Z t y E h d s WZKy D dz E KZ d Y D D W W y ZD DKhEd d Z t y ZD d dKZ KE WZ E Z dKZ KE WZ E t d Ez KE d t Z D W W y dZh Ky Kz d y K t Z Z d Z ZK D W W y K t Z...

Страница 213: ......

Страница 214: ...Z d t Z D z y Ehd K t Z dt Z t Z Z E K D z t d h E D y Kh Z K d E KE t Z t d DKhEd W d K Ehd D ZK t d t ZK Z D W W y h E KE z d W W y y Ehd d Z t y dKZ KE WZ E Z d D W W y t Z WZ E DKhEd K d dKZ KE WZ...

Страница 215: ...7 5 7...

Страница 216: ...Z Z z KDZKE W d E Z WhZWK Z z KZ Z z Z z K d d Z z KZ Z z E K KhdWhd h dKh Z E DKhEd dKW Ky dKW t d D z Z Z KZ dKW s Z z W d t K Z z KZ Z z Wh hddKE Z EKZD z KW E hddKE h Z W E DKhEd h K Z h KDW d d...

Страница 217: ......

Страница 218: ...RESSURE GAUGE 60PSI EA 11 4 153 2087 MS PHILLIPS 8 32 X 3 4 EA 12 4 153 2013 10 LOCKWASHER EA 13 2 154 9208 PULLEY 12XL 5 16 BORE W SET SCREW EA 14 1 164 8029 OIL PUMP IDLER ASSEMBLY EA 15 4 164 2046...

Страница 219: ......

Страница 220: ...HILLIPS 10 32 X 1 2 SELF TAP EA 15 6 153 2013 10 LOCKWASHER EA 16 6 153 2003 10 FLATWASHER EA 17 1 164 6113 CONDITIONER TANK MOUNT EA 18 4 164 6153 CARTRIDGE RETAINER EA 19 153 2086A MS PHILLIPS 8 32...

Страница 221: ......

Страница 222: ...1 BELT FOR HEAD DRIVE EA 9 1 153 2937 SHAFT COLLAR 3 4 ID EA 10 1 153 2972 THREADED PIN 1 4 20 FOR TIP AND HOSE ASSY EA 11 1 164 6156 OIL TIP TUBE EA 12 1 164 6102 LEFT HEAD BAR MOUNT EA 13 2 153 2987...

Страница 223: ......

Страница 224: ...dZ DKhEd hWWKZd dt Z K t Z Wh z y KZ y E Zh dZ DKhEd d KZ dZ E Z ZK Z Z t y D W W y Z t y y y E Z E d Zh ZKd d K t Z dZ E Z ZK Z Z d K y Ehd y Ehd y D E Z t dZ E Z ZK Z d Z ZK Z y KE K d Kh Z Z t dZ E...

Страница 225: ......

Страница 226: ...A 8 3 153 2003 10 FLATWASHER EA 9 3 153 2013 10 LOCKWASHER EA 10 2 153 2092 MS PHILLIPS 10 32 X 1 EA 11 1 154 6243 MOTOR CAM DUAL LOBES STACKED SWITCHES EA 12 1 153 2515 SHOULDER BOLT 3 8 X 1 2 5 16 1...

Страница 227: ...7 7...

Страница 228: ...ADAPTER See Below EA 2 1 158 8618 VACUUM MOTOR HOUSING 2 1 154 0228S STOCK 1 8 IN GRAY FELT IN 3 4 153 2830 HEX HEAD SELF TAP 10 X 5 8 SCREW EA 4 2 153 2078 FHMS 1 4 20 X 3 4 EA 5 2 153 2004 1 4 FLAT...

Страница 229: ......

Страница 230: ...GREE 1 4NPT X 1 4IN TUBING EA 7 1 154 8817 VENT VALVE ASSEMBLY EA 8 2 153 2924 MS PHILLLIPS 1 4 20 X 3 4 EA 9 1 154 0212B FILTER ASSEMBLY FOR SUPPLY TANK EA 10 2 153 2086 MS PHILLLIPS 8 32 X 5 8 EA 11...

Страница 231: ......

Страница 232: ...T BLOCK EA 16 4 153 2091 MS PHILLIPS 10 32 X 3 4 EA 17 4 153 2013 LOCK WASHER 10 EA 18 153 2003 FLAT WASHER 10 EA 19 2 153 2051A SET SCREW 1 4 20 X 1 4 IN 20 1 164 6090 CLEANER HOSE SHAFT MOUNT EA 21...

Страница 233: ...7...

Страница 234: ...h d Z DKdKZ D z Ws d hW Z dt Z D W W y d Z t y h d Z Z s h D z y K t Z d t Z h KE ZK Z dh h d Z WZ E KZ dh DKhEd h d Z W h dh D W W y h KE ZK Z ZD z KZ dh DKhEd y Ehd K Ehd D ZK t d t d Khd ZK Z Z d...

Страница 235: ......

Страница 236: ...SHCS EA 3 1 164 6120 FLEX RECOVERY TANK COVER PLATE EA 4 1 153 8827T 1 1 4 PVC ELBOW TANK INLET NO THREADS EA 5 6 153 2406 HOSE CLAMP 2 INCH EA 6 1 154 0260 FLEXIBLE HOSE SOLD BY THE INCH IN 7 1 154 0...

Страница 237: ......

Страница 238: ...s Yh Zh DKhEd W d D z Z E D E dhZ K Ehd Ez K dt Z Yh K Wd Z Ez KE Yh DKhEd E h y ydZh Yh EE D E Yh EE E Zd y Yh D t d W d dt Z D W W y y D K Ehd Ez K K Ehd D ZK t d t ZK Z Kh Z K d y Yh h dD Ed ZD ZK...

Страница 239: ...3 2 9...

Страница 240: ...CAN CLIP BRACKET EA 10 1 164 6240 CAN CLIP EA 11 4 153 2742 FHMS 1 4 20 X 1 2 EA 12 1 164 6238 CAN CRADLE BOTTOM EA 13 1 164 6237 CAN CRADLE TOP EA 14 1 153 2004 FLAT WASHER 1 4 EA 15 1 164 2016 THUMB...

Страница 241: ......

Страница 242: ...23 2 153 2066 HHCS 3 8 16 X 1 EA 24 1 164 6222 ZTR PROXIMITY SENSOR MOUNT EA 25 164 7002A 1 WIDE KICK UP WHEEL ASSEMBLY EA 26 1 164 6162 GUARD STAND OFF EA 27 2 153 2802A FHSS 5 16 X 5 8 EA 28 1 158 8...

Страница 243: ......

Страница 244: ...24 1 164 6222 ZTR PROXIMITY SENSOR MOUNT EA 25 164 7002A 1 WIDE KICK UP WHEEL ASSEMBLY EA 26 1 164 6162 GUARD STAND OFF EA 27 2 153 2802 FHSS 5 16 X 5 8 EA 28 1 158 8601 ZTR SHAFT BUSHING BLOCK ASSEM...

Страница 245: ......

Страница 246: ...235...

Страница 247: ...x Oil Cleaner Head Driver Motor Wiring Layout 239 Flex L R R L Head Proximity Sensor Wiring Layout 240 Flex Oil Valves Wiring Layout241 Flex Buffer Motor Wiring Layout 242 Flex Variable Buffer Wiring...

Страница 248: ...230...

Страница 249: ...231...

Страница 250: ...232...

Страница 251: ...233...

Страница 252: ...234...

Страница 253: ...235...

Страница 254: ...236...

Страница 255: ...237...

Страница 256: ...238...

Страница 257: ...239...

Страница 258: ...240...

Страница 259: ...241...

Страница 260: ...242...

Страница 261: ...243...

Страница 262: ...244...

Страница 263: ...245...

Страница 264: ...246...

Страница 265: ...247...

Страница 266: ...248...

Страница 267: ...249...

Страница 268: ...250...

Страница 269: ...251...

Страница 270: ...252...

Страница 271: ...253...

Страница 272: ...254...

Страница 273: ...255...

Страница 274: ...261...

Страница 275: ...lex Walker L R R L Head Proximity Sensor Wiring Layout 267 Flex Walker Oil Valves Wiring Layout268 Flex Walker Buffer Motor Wiring Layout 269 Flex Walker Variable Buffer Wiring Layout 270 Flex Walker...

Страница 276: ...257...

Страница 277: ...258...

Страница 278: ...259...

Страница 279: ...260...

Страница 280: ...261...

Страница 281: ...262...

Страница 282: ...263...

Страница 283: ...264...

Страница 284: ...265...

Страница 285: ...266...

Страница 286: ...267...

Страница 287: ...268...

Страница 288: ...269...

Страница 289: ...270...

Страница 290: ...271...

Страница 291: ...272...

Страница 292: ...273...

Страница 293: ...274...

Страница 294: ...275...

Страница 295: ...276...

Страница 296: ...277...

Страница 297: ...278...

Страница 298: ...279...

Страница 299: ...280...

Страница 300: ...281...

Страница 301: ...282...

Страница 302: ...283...

Страница 303: ...290...

Отзывы: