manualshive.com logo in svg
background image

2 – 3 HP J SERIES FOUNTAIN

MANUAL

884168 / 2021.1.1

2

Contents

Important Safety �����������������������������������������������

2

Tools and Supplies Needed ������������������������������

3

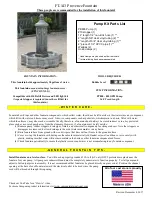
Unit Specs ��������������������������������������������������������

3

Parts Included ���������������������������������������������������

4

Nozzles Included ����������������������������������������������

5

Premium Nozzles (Not Included) ����������������������

6

Assembly Instructions ���������������������������������������

7

IMPORTANT SAFETY

•  Please read and follow these important instructions to help ensure your safety and the quality performance of your Kasco equip-

ment�

•  Use caution when dealing with any electrical and/or moving equipment�

•  Under NO CIRCUMSTANCE should anyone enter the water with the electrical equipment plugged in and/or in operation� 

• 

Kasco Aerating Fountains are intended for use with a Listed control panel having a GFCI protected receptacle, or field wiring 

terminals and disconnect switch, or a timer with a disconnect for use with a GFCI receptacle� Control panels MUST be installed by 

a qualified electrician. Ground Fault Circuit Interrupters (GFCIs) should be tested upon each installation and every month thereafter 

to ensure proper operation�

•  Single-phase units are supplied with an internal grounding conductor and/or a grounding-type attachment plug� To reduce the risk 

of electrical shock, be certain the unit is properly connected to the Kasco-supplied control panel (refer to the instructions included 

with your control panel)�

•  3-phase units (2�3JF, 3�3JF, 5�3JF, 7�3JF, 2�3HJF, 3�3HJF, 5�3HJF, 7�3HJF) require a startup test after wiring to ensure proper 

rotation of the impeller� If the impeller is rotating in the opposite direction, the unit will not perform properly and internal damage to 

the unit may occur (see 3-phase startup procedure on page 12)�

•  NEVER run the unit out of the water� This will damage the seals and create a dangerous situation for the operator�

•  Use extreme caution around water, especially cold water, as in Spring, Fall, and Winter, which poses a hazard in and of itself� 

•  NEVER lift or drag the equipment by the power cords� If you need to pull the unit to the side of the pond, use the anchoring ropes� 

•  Do not use boats that tip easily for installation and follow all boating safety rules and regulations, including wearing a PFD (Person-

al Flotation Device)� Do not use waders in deep ponds/lakes or ponds/lakes with drop-offs, drastic slopes, or soft bottom material�

•  For more information regarding your control panel instructions, refer to your control panel owner’s manual� A control panel must be 

Nozzle Installation Instructions �����������������������

10

Unit Installation Instructions ����������������������������

11

3-Phase Startup Procedure ����������������������������

12

Repair �������������������������������������������������������������

14

Non-Warranty Repairs ������������������������������������

15

Troubleshooting Tips ��������������������������������������

16

Repair Contact Form ��������������������������������������

17

This Kasco product is the result of years of innovation, and we are confident that 

you will be impressed with its quality and performance� If you have any questions 

about assembly, installation, or maintenance, please reach out to our friendly and 

knowledgeable customer care team� Thank you for trusting Kasco�

715.262.4488 www.kascomarine.com [email protected]

Содержание J Series

Страница 1: ...J Series Fountain 8400JF 3 1JF 2 3JF 3 3JF 2 3HJF 3 3HJF Operation Maintenance Manual 800 Deere Rd Prescott WI 54021 715 262 4488 sales kascomarine com www kascomarine com Document number 884168...

Страница 2: ...st after wiring to ensure proper rotation of the impeller If the impeller is rotating in the opposite direction the unit will not perform properly and internal damage to the unit may occur see 3 phase...

Страница 3: ...61 Hardwire C 95 Hardwire C 95 5 1JF 5 208 240 20 97 Hardwire C 95 Hardwire C 95 3 Phase Units 2 3JF 2 208 7 5 40 See control panel instructions 3 3JF 3 208 10 3 70 5 3JF 5 208 16 100 7 3JF 7 5 208 20...

Страница 4: ...O ring Large J 1 841217 G Large JF unit assembly 1 See Table below H Bottom screen Large J 1 284101 I 3 8 16 x 1 2 serrated hex head screw 3 820092 J 7 16 9 16 wrench tool 1 284139 K Rope 50ft not pic...

Страница 5: ...284302 3 19 34 5 18 34 284305 7 5 21 36 4 Linden Center geyser with lower conical pattern uses Outlet nozzle 2 15 5 38 284302 3 20 5 38 5 24 5 46 284305 7 5 26 46 5 Redwood Tall and narrow geyser use...

Страница 6: ...our local distributor for order information Mighty Oak Mahogany Palm Magnolia Fig 4 Pattern Description HP Height Width Part Palm 1 tier of 12 arcing streams 2 12 26 841320 3 16 36 5 20 5 40 7 5 22 42...

Страница 7: ...lines up with the power cord on the unit assembly This will allow the power cord to run in the power cord channel on the underside of the float later 2 Using the 9 16 side of the wrench tool J or a so...

Страница 8: ...x 1 2 serrated hex head screws I but do not tighten down at this time 4 Lift the unit and slide the bottom float screen H over the can and up to the bottom of the float allowing the unit power cord t...

Страница 9: ...rain relief as shown below Unit is ready for installation into the pond Any lights or other optional equipment installation including nozzle selection should be made at this time Refer to instructions...

Страница 10: ...are completely snug Nozzles can be changed conveniently without removing the float or using any tools Note If it is difficult to twist the nozzle into place dielectric grease M can be applied to the...

Страница 11: ...ded at the midpoint of the rope to take up any slack caused by a drop in water level 1 foot of 1 galvanized pipe works well The weight should be light enough so that the fountain can rise as the water...

Страница 12: ...sco 3 phase panel is supplied follow the instructions included with the panel in addition to the steps below Electrician 1 Verify all screw terminal connections are tightened to specified torque setti...

Страница 13: ...nit upside down if it will sit for a long period of time to ensure continued oil lubrication of seals units that sit upright for many months or years have a greater likelihood of seals drying out CLEA...

Страница 14: ...eipt and registering the equipment online at kascomarine com under the Warranty Information section Once warranty coverage has been established the unit may be sent to Kasco Marine or any Kasco Author...

Страница 15: ...k is performed All estimates that are rejected for repair will be destroyed unless otherwise directed by the customer Rejected equipment can be returned at the customer s expense for shipping and hand...

Страница 16: ...needs to be replaced by an Authorized Repair Center My unit turns itself off and back on without the timer and without tripping the GFI breaker single phase units only Each Kasco fountain has a Therm...

Страница 17: ...tomer to ship and pay freight to Kasco Note Contact Information should be that of the person or company to contact for repair information Company name Contact name First name Last name Address Street...

Отзывы: