background image


STEP FIVE 

With a felt-tip marker, draw three to four marks 
around the circumference of the motor housing at the 
appropriate measurement 
from the back (or bottom) 
of the motor housing 
given below: 
Model F2400:    3/4” 
Model F3400: 3-3/8” 
Model 4400:  3-3/8” 
Model 8400:  3-1/4” 


STEP SIX 

Place the two U-Brackets directly across from each 
other (180

O

) over the top ring of the motor cage.  The 

cord clamp on the cage should be 90

O

 from each of 

the U-Brackets.   

STEP SEVEN 

Insert the Spacer Bracket under the U-Bracket and 
inside the cage.  Secure this assembly using one 1/4” 
x 1” Bolt and a 1/4” Lock Nut, and one 1/4” x 1-1/4” 
Bolt and a 1/4” Hex Nut.  The longer bolt should be 
on the side of the U-Bracket that is closer to the cord 
clamp.  Tighten the hardware using the 7/16” wrench 
and socket & wrench until the U-Bracket clamps 
firmly around the cage (U-Bracket should pull to-
gether slightly).  Repeat with the second U-Bracket. 


STEP EIGHT 

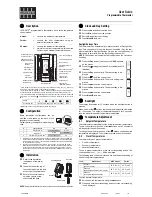
Attach an Angle Bracket to each of the longer (1-
1/4”) bolts on the U-Brackets (See photo for orienta-
tion) with a 1/4” Lock Nut. 


STEP NINE 

Wrap the Draw Band around the motor housing and 
position so that the back of the Draw Band touches 
the marks drawn in Step Five.  There is no front or 
back to the Draw Band itself - it is reversible.  Orient 
the arm of the Draw Band so it aligns with the cord 
clamp on the cage of the motor housing and is paral-
lel to the Angle Brackets attached in Step Eight.  Se-
cure using a 1/4” x 1” Stainless Steel Bolt and a 1/4” 
Lock Nut.  (See photo on next page.) 


18 

Содержание 2400D

Страница 1: ...Warranty Claim Return Policy Maintenance Recommendations De Icer Installation Instructions Specs Sizing Replacement Parts Assembly Diagram C 10 Instructions C 20 Instructions Universal Dock Mount Ins...

Страница 2: ...when operating NEVER run the unit out of water It will damage the seals and create a dangerous situation for the operator Extreme caution should be used around open water especially cold water which p...

Страница 3: ...vironments such as in marinas or other commercial applications or on demand use as may be needed Your Kasco Marine De Icer is ready for immediate use after installation The motor is of an oil filled d...

Страница 4: ...eriodically and replaced if necessary Note There are certain conditions under which no circulator can prevent ice damage such as ice that moves due to wind or current extremely cold weather where ice...

Страница 5: ...Kasco Marine will re turn units repaired under warranty at our expense via ground freight within the continental United States Other Repairs Most failed equipment can be repaired at substantially low...

Страница 6: ...t stagnant water areas and poor water quality If you do decide to store the unit during non freezing times it is not necessary to store Kasco motors upside down All internal seals are fully lubricated...

Страница 7: ...lifting or a combination of lifting expansion is your concern you may wish to keep your dock structure or boat area completely ice free Both of these concerns or objectives are very different and may...

Страница 8: ...the bow to the stern with the least resistance It is generally easier to De Ice a boat by installing the De Icer at or near the bow angled to push the De Icing flow of wa ter toward the stern It is ge...

Страница 9: ...TEP SIX OPTIONAL On installations where open water area is required or de sired to be limited controlled a curtain technique can be used to block the flow of water and restrict the open wa ter area By...

Страница 10: ...0280 SEALING PLUG 1 3 990285 SEALING WASHER 1 4 243475 ZINC ASSEMBLY 2400 3400 MODELS 1 4A 840475 ZINC ASSEMBLY 4400 MODELS 1 5 240170 2400 K PROP 2400 MODEL 1 5A 340125 3400 J PROP 3400 MODEL 1 5B 44...

Страница 11: ...ough to your power supply to allow at least a slight slack in the power cord from the C 10 Select the screw s with which to mount your C 10 You will need two for the mounting holes at the top of the b...

Страница 12: ...ase receipt is needed for limited warranty cover age Warranty is void If thermostat is damaged by unau thorized tampering or improper use KASCO SERVICE PARTS If the service parts listed below are not...

Страница 13: ...ogramming of the timer and thermostat see Programming below Install the De Icer power cord through the hole in the lower left portion of the C 20 housing and plug it into the receptacle inside the C 2...

Страница 14: ...nd operate only on temperature pull all trippers on the timer to the ON position Bypassing the thermostat to operate only on time can only be done when temperatures are below 40O F To do so set the th...

Страница 15: ...sco urges that the base be mounted as securely as possible For salt water use Kasco suggests that you use 1 stainless steel pipe STEP ONE Determine the most suitable application for your situation Ins...

Страница 16: ...e sure all bolts and nuts are now tight If more than one set of holes align use the holes closest to the de icer STEP SEVEN Place the Clam Shell Pipe Clamp onto the pipe extension Make sure the two ha...

Страница 17: ...Position the Float upside down lengthwise channels facing up and place the Base Strap so the three holes in the Base Strap align with the three threaded holes that comprise the lengthwise midline of t...

Страница 18: ...d be on the side of the U Bracket that is closer to the cord clamp Tighten the hardware using the 7 16 wrench and socket wrench until the U Bracket clamps firmly around the cage U Bracket should pull...

Страница 19: ...nd of the motor At this time use the Nylon Tie provided to connect the power cord and front Rope to prevent the cord from tangling in the prop Also if the power cord has a Quick Dis connect and Additi...

Страница 20: ...rt back up If you are noticing these symptoms the unit should be unplugged immediately because the Thermal Overload will continue to turn on and off until it burns out and damages the motor The unit s...

Страница 21: ...or by the customer You must include the power cord and cage assembly with each unit sent in for repair to be considered for warranty repair Do not ship the float and or control box with the unit for r...

Страница 22: ...gister your Kasco De Icer online at www de icer com solutions_warranty_registration htm Also fill in the information below and keep for your records Model Ex 2400D _______________________________ Seri...

Отзывы: