


25
1. Guide
6. Backup
B
ackup
24
1. Guide
B
ackup
6. Backup
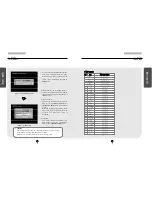
6.1 Saving backup to local drive
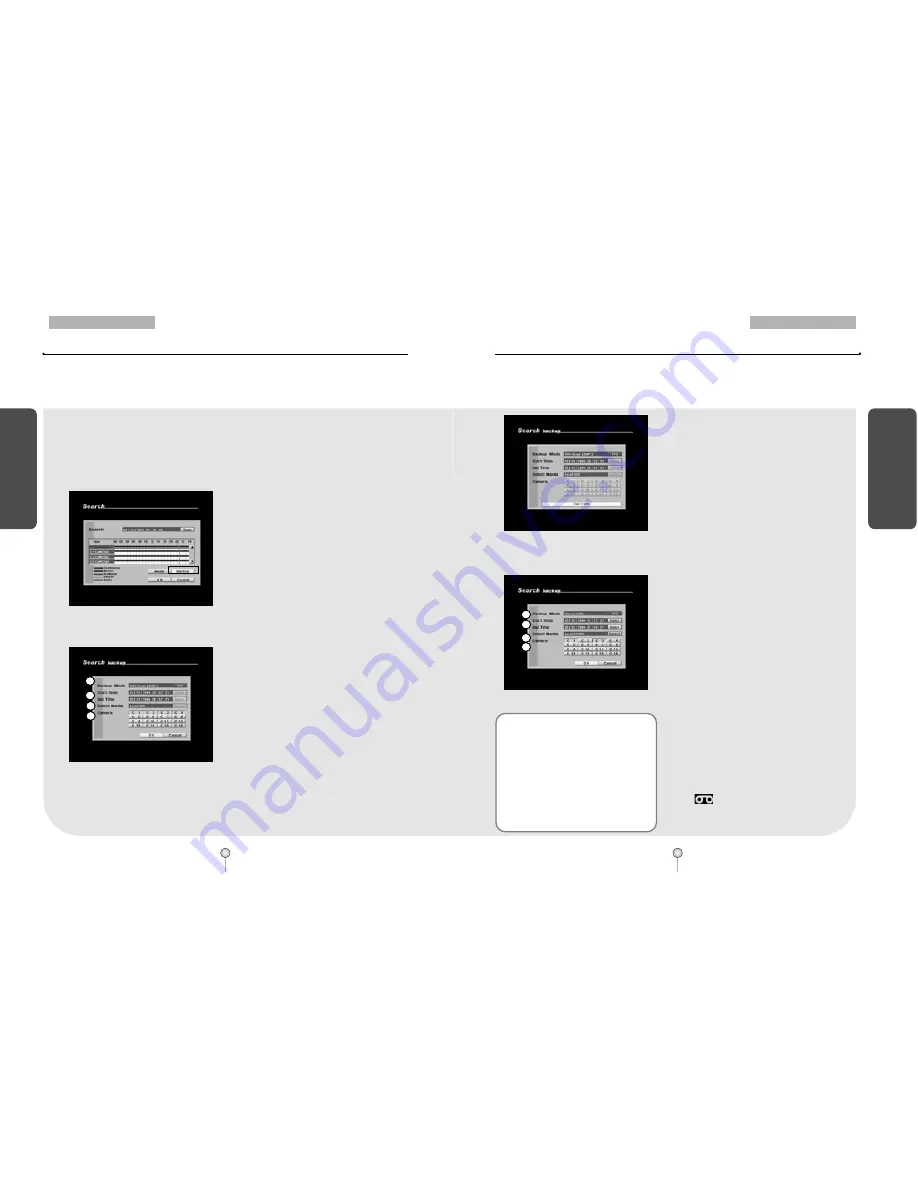
[Figure 6-1. Selecting [Backup] button]
[Figure 6-2. Backup options display(DW-716)]
From Search screen display, select [Backup] button to save a backup copy of the recording using
the system’s CD-RW, USB HDD, or a portable hard drive such as USB memory stick. The backup
files can be saved as AVI, BMP, JPEG, or KDB (Kaltech Data Base) formats.
�
When the system is playing the recording,
press Pause to select the frame you wish to
save, then press Enter (see page 23 for
playback controls).
�
As shown in Figure 6-1, press [Backup] button
to view backup options display (Figure 6-2).
①
[Backup mode – Still Image]
�
To select BMP or JPEG backup mode, use the
mouse wheel or the directional keys to
highlight [Backup Mode] then use the jog/
shuttle to change the option.
②
[Start Time] and [End Time]
�
The time and date input function is
automatically disabled. The image saved will
be the image selected and paused on the
Search screen.
③
[Select Media]
�
Select the media used for saving backup.
�
When Still Image mode is selected, it is
recommended to save to the Local USB drive.
④
[Camera]
�
When Still Image mode is selected, only those
cameras that were selected in Search mode
will be saved. Camera channels that do not
contain any data will be disabled.
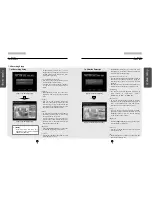
[Figure 6-3. Backup progress bar(DW-716)]
[Figure 6-4. Backup options display(DW-716)]
�
Press [OK] button to begin backup. You will
see the backup progress through the progress
bar.
�
When no USB drive is connected, the system
will return to Search mode display.
�
Once backup is complete, the system will
return to Search mode display.
①
[Backup mode – Video]
�
To select KDB (Kaltech data base) or AVI
backup mode, use the mouse or the
directional keys on the system to highlight
[Backup mode], then use the mouse wheel or
the jog/shuttle to change the option.
②
[Start Time] and [End Time]
�
Select the starting time and ending time of the
recording you wish to save.
�
To change the [Start Time] and [End Time],
use the mouse or the directional buttons to
highlight [Input] button, then click left mouse
button or press Enter (see page 26 for details).
③
[Select Media]
�
Select the media used for saving backup.
�
Press the [Select] button to choose different
media types (see page 26 for details on
selecting Local Drive backup).
④
[Camera]
�
Select the camera number that contains the
recording you wish to save.
�
When saving backup in KDB format, you can
select multiple camera channels.
�
When saving backup in AVI format, you can
only select one camera channel.
�
When saving backup in Video mode, you will
see displayed on the corresponding
camera channels in Surveillance mode.
6.1.1 Still Image backup
6.1.2 Video backup
☞
[Note]
�
To play a backup file saved in AVI format, the latest
DivX Codec must be installed on the PC you are using.
If you do not have DivX Codec installed, please use the
Internet resources to download the required Codec.
�
KDB(Kaltech Data Base) backup enables to backup of
the video with audio data. However, the other types of
backup such as AVI, BMP, JPG do not include audio.
�
When the is archived to CD-RW in KDB format the
viewer software will be copied automatically to the CD.
(For more information on the viewer program please
refer to page 91.)
1
2
3
4
1
2
3
4


