background image

 Svenska | 

135

Bosch ebike Systems

0 276 001 XXX | (17.1.11)

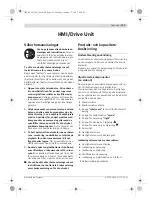
Efterladda batteriet före och under lagring

Om batteriet inte används under en längre tid 
ska det laddas upp till ungefär 60 % (3 eller 4 
LED lyser på laddningsdisplayen 

13

).

Kontrollera laddningstillståndet efter 6 måna-
der. Är nu endast en LED tänd på laddningsdis-
playen 

13

, ladda upp igen till ca 60 %.

Anvisning: 

Om batteriet under en längre tid lag-

ras utan laddning kan det även om självurladd-
ningen är låg skadas varvid ackumulatorkapaci-
teten kraftigt reduceras.
Låt inte batteriet permanent vara anslutet till 
laddaren.

Lagringsvillkor

Lagra batteriet på en möjligast torr och välventi-
lerad plats. Skydda batteriet mot fukt och vat-
ten. Vid ogynnsam väderlek rekommenderar vi 
att ta bort batteriet från elcykeln och att förvara 
det inomhus för nästa användning.
Batteriet kan lagras vid temperaturer mellan 
–10 °C och +60 °C. För en lång brukstid rekom-
menderar vi en kylig, men frostfri lagring. 
Kontrollera att högsta lagringstemperaturen in-
te överskrids. Låt därför inte batteriet t.ex. un-
der sommaren ligga kvar i bilen och lagra det in-
te heller i direkt solsken.

Underhåll och service

Underhåll och rengöring

Håll batteriet rent. Rengör försiktigt med en fuk-
tig, mjuk trasa. Batteriet får inte doppas i vatten 
och inte heller rengöras med vattenstråle.
Om batteriet inte längre fungerar, kontakta en 
auktoriserad cykelhandlare.

Kundservice och kundkonsulter

Vid frågor beträffande batterier kontakta en auk-
toriserad cykelhandlare.
Anteckna nyckelns 

15

 nummer. Om nyckeln går 

förlorad kontakta en auktoriserad cykelhand-
lare. Ange nyckelnumret.
Den närmaste cykelhandlaren kan via stöd-
punktssökning på internetsidans servicedel hit-
tas under 

www.bosch-ebike.com

.

Transport

Batterierna faller under begreppet riskgods. An-
vändaren kan utan ytterligare förpliktelser trans-
portera batterierna på allmän väg.
Vid transport genom tredje person (t.ex. flyg-
frakt eller spedition) ska speciella villkor för för-
packning och märkning beaktas. I detta fall bör 
vid förberedelse av transport en expert för far-
ligt gods konsulteras.
Försänd endast batterier med oskadat hölje. 
Tejpa öppna kontakter och förpacka batteriet så 
att det inte kan röras i förpackningen. Ta även 
hänsyn till eventuella nationella föreskrifter.
Vid frågor beträffande transport av batterier 
kontakta en auktoriserad cykelhandlare.

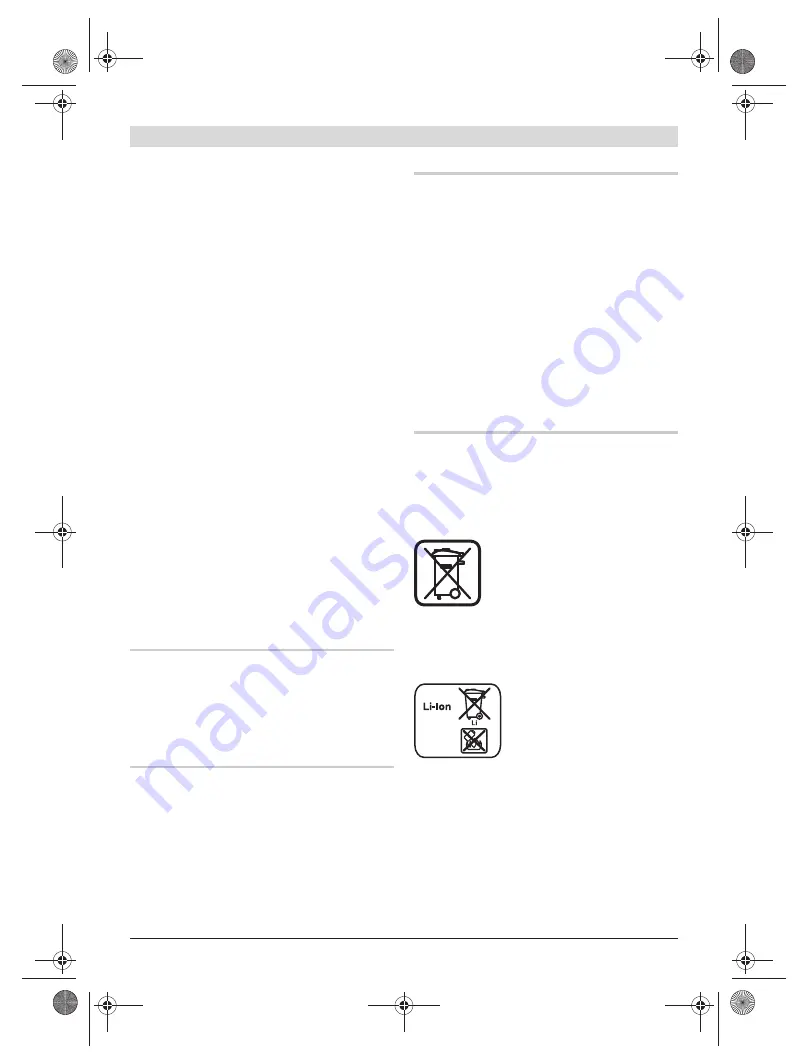
Avfallshantering

Batterierna, tillbehör och förpackning ska han-
teras på miljövänligt sätt för återvinning.
Släng inte batterierna i hushållsavfall!

Endast för EU-länder:

Enligt europeiska direktivet 
2002/96/EG måste obrukbara el-
apparater och enligt europeiska 
direktivet 2006/66/EG felaktiga 
eller förbrukade batterier separat 
omhändertas och på miljövänligt 
sätt lämnas in för återvinning.

Återlämna obrukbara batterier till en auktorise-
rad cykelhandlare.

Li-jon:

Beakta anvisningarna i avsnit-
tet ”Transport”, sida 135.

Ändringar förbehålles.

OBJ_BUCH-1407-001.book  Page 135  Monday, January 17, 2011  2:58 PM

Содержание BionX

Страница 1: ...ioni per l uso Pedelec veloce III Istruzioni per l uso Pedelec con motore centrale IV User Manual Pedelec with front motor English version V User Manual Pedelec Impulse English version VI User Manual Pedelec Groove English version VII User Manual BionX English version VIII Istruzioni per l uso Bosch ...

Страница 2: ...I Istruzioni generali per l uso Italiano Derby Cycle Werke GmbH 2011 ...

Страница 3: ...rie sterzo 5 Fanale anteriore 6 Parafango 7 Forcella 8 Freno anteriore 9 Gomme 10 Ruote 11 Cuscinetto interno 12 Pedali 13 Catena 14 Cambio 14 a Deragliatore anteriore 14 b Cambio posteriore 15 Fanale posteriore 16 Catarifrangente 17 Portapacchi 18 Sella 19 Telaio 7 10 10 13 5 4 2 3 6 6 16 15 17 18 8 11 14b 14a 12 19 9 9 1 ...

Страница 4: ...os sesso di conoscenze generali sull utilizzo di biciclette Chiunque utilizzi pulisca sottoponga a manutenzione o smaltisca questa bicicletta deve essere a conoscenza dell intero contenuto di queste istruzioni per l uso Accanto a testi tabelle ed elenchi nelle istruzioni per l uso compaiono i seguenti simboli che segnalano informa zioni importanti o pericoli ATTENZIONE a possibili danni alle perso...

Страница 5: ...la posizione di seduta 13 9 2 1 Regolare la sella della bicicletta 13 9 2 2 Utilizzare i bloccaggi rapidi 13 9 2 3 Determinare la giusta altezza della sella 14 9 2 4 Regolare l inclinazione della sella 15 9 2 4 1 Con reggisella a due viti 15 9 2 4 2 Con fissaggio a morsetto 15 9 2 4 3 Con reggisella molleggiato 16 9 3 Regolare la posizione del manubrio 16 9 3 1 Adattare allineare l altezza del man...

Страница 6: ...mbio al mozzo 38 19 2 1 Funzionamento del cambio al mozzo 38 19 2 1 1 Leva del cambio Shimano 7 8 rapporti 38 19 2 2 Regolare i rapporti di un cambio al mozzo Shimano 39 20 Catena della bicicletta 40 20 1 Eseguire la manutenzione delle catene 40 21 Freno leva del freno e sistemi frenanti 41 21 1 Indicazioni importanti e misure precauzionali 41 21 2 Leve del freno 42 21 2 1 Leva del freno standard ...

Страница 7: ...7 27 2 Componenti di usura 57 27 3 Gomme 58 27 4 Cerchi in abbinamento a freni a cerchio 58 27 5 Pastiglie dei freni 58 27 6 Dischi del freno 58 27 7 Catene e cinghie dentate 58 27 8 Pulegge pignoni e ingranaggi del cambio 58 27 9 Lampade dell impianto di illuminazione 58 27 10 Nastri del manubrio e manopole 59 27 11 Oli idraulici e lubrificanti 59 27 12 Cavi del cambio e del freno 59 27 13 Vernic...

Страница 8: ... in cui si muoverà Spiegate a vostro figlio l utilizzo il funzionamen to e le caratteristiche di tutti i freni Importanti informazioni al riguardo sono riportate al Ca pitolo 21 Freno leva del freno e sistemi frenanti In qualità di educatori siete voi i responsabili della sicurezza di vostro figlio e di eventuali dan ni che potrebbe causare andando in bicicletta È dunque indispensabile che vi acce...

Страница 9: ...ndizioni di scarsa visibilità come ad esem pio in caso di nebbia pioggia tramonto e buio guidate solo con una adeguata illuminazione Se utilizzate intensivamente la vostra bicicletta ricor date che essa è soggetta ad una maggiore usura Molti componenti soprattutto nel caso delle biciclette spor tive leggere sono concepiti per un determinato perio do di utilizzo Superato tale periodo vi è un notevo...

Страница 10: ...istruzioni per l uso valgono per tutti i tipi di biciclette Le informazioni che si riferiscono a determinati tipi di biciclette sono appositamente contrassegnate Rispettate le istruzioni per l uso fornite dai singoli fabbri canti di componenti su CD o reperibili in internet Qualora dopo aver letto la documentazione aveste altre domande rivolgetevi al vostro rivenditore specializzato Il concetto di...

Страница 11: ...bbliche strade occorre che siano dotate delle caratteristiche di equipaggiamento prescrit te Le biciclette sono esentate da tali prescrizioni solo per il periodo di partecipazione a manifestazioni ciclistiche ufficialmente autorizzate Il fabbricante e il rivenditore declinano ogni responsa bilità per qualsiasi utilizzo che esuli da quello conforme all uso previsto Ciò vale in particolare in caso d...

Страница 12: ...zate una bicicletta con cerchi in fibra di car bonio ricordate che questo materiale provoca un comportamento di frenata notevolmente peggiore ri spetto a quanto siete abituati con cerchi in alluminio Assicuratevi che le ruote siano saldamente fissate a telaio e forcella Verificate il corretto serraggio del bloccaggio rapido e di tutte le viti e i dadi di fissaggio più importanti Al Capitolo 9 2 2 ...

Страница 13: ...eggi sella e sella Se non siete sicuri che la vostra bicicletta sia in per fette condizioni tecniche non utilizzatela ma fatela controllare da un officina specializzata 9 Regolazione in base al ciclista Le biciclette da corsa o le mountain bike possono essere consegnate anche senza pedali Se dovete montare da soli i pedali della vostra bicicletta procedete come descritto di seguito 9 1 Montaggio d...

Страница 14: ...9 2 Regolare la posizione di seduta 9 2 1 Regolare la sella della bicicletta La posizione di seduta è fondamentale per il vostro be nessere e per il vostro rendimento durante l utilizzo della bicicletta Non rimuovete o manomettete il reggisella o il bloccaggio della sella La manomissione o la modifica dei componenti invalida la garanzia Stringete tutte le viti alla coppia di serraggio prescritta I...

Страница 15: ...ederne il lato esterno o a leggere la scritta CLOSE Una volta chiuse le leve del bloccaggio rapido devono essere aderenti a telaio forcella e colla rino reggisella Accertatevi che una volta chiusi i bloccaggi rapidi dei mozzi siano rivolti all in dietro Potrebbero altrimenti rimanere impigliati ad ostacoli ed aprirsi provocando gravi cadute 9 2 3 Determinare la giusta altezza della sella Sedetevi ...

Страница 16: ...9 2 4 1 Con reggisella a due viti Alcuni reggisella sono dotati di due viti che consentono di regolare l inclinazione della sella posizionate una davanti e l altra dietro il cannotto reggisella Se desiderate incli nare la sella in avanti allentate la vite posteriore con una chiave di Allen e stringete quella anteriore dello stesso numero di giri Per inclinarla indietro allentate la vite anteriore ...

Страница 17: ...persona di tenere stretta la bicicletta Piegate il busto verso il manubrio fino a trovare una posizione comoda per la schiena Stendete le braccia verso il manubrio Notate la posizione approssimativa delle mani per poter regolare il manubrio a tale altezza 9 3 1 Adattare allineare l altezza del manubrio con attacco del manubrio tradizionale Per allentare il cannotto dell attacco rispetto al tubo st...

Страница 18: ...fettamente perpendicolare alla ruota anteriore Stringete la vite a esagono cavo in senso orario con una chiave di Allen si veda Capitolo 30 Dati tecnici 9 3 4 Regolare la posizione del manubrio ruotando il manubrio Allentate le viti a esagono cavo sulla parte anteriore dell attacco Ruotate il manubrio fino a raggiungere una posizione comoda per voi Accertatevi di bloccare il manu brio all attacco ...

Страница 19: ...nti potete trovare una tabella con le coppie di serrag gio al Capitolo 30 Dati tecnici Nei modelli con nottolino di arresto integrato ruotate delicatamente la vite del nottolino in senso orario Il nottolino di arresto deve innestarsi sulla dentatura 10 Telaio La forma del telaio dipende dal tipo e dalla funzione della bicicletta I telai sono realizzati in vari materiali come ad esempio in lega di ...

Страница 20: ...racci dalla testa e dal cannotto Forcella in carbonio Forcella molleggiata La maggior parte delle mountain bike delle biciclette da trekking e delle biciclette da città è dotata di forcelle molleggiate che possono essere regolate in diverso modo e garantiscono maggiore comfort durante l utilizzo della bicicletta Potete trovare indicazioni relative al funzionamento alla manutenzione e alla cura del...

Страница 21: ...posizione di seduta appaiano diverse e ri sultino tali anche in fase di utilizzo rispetto a quanto siete abituati L ammortizzatore deve essere regolato in modo da reagire con morbidezza senza saltare eccessivamente quando si passa su un ostacolo Esso deve già comprimer si leggermente quando ci si siede sulla bicicletta 13 2 Cura e manutenzione Potete pulire la vostra MTB a sospensione completa nel...

Страница 22: ...letta e la strada Le asperità del fondo e il peso del ciclista sotto pongono le ruote ad una particolare sollecitazione Le ruote vengono attentamente controllate e centrate prima della consegna Tuttavia i raggi si impostano solo durante i primi chilometri percorsi Fate ricontrollare ed eventualmente centrare le ruote da un rivenditore specializzato dopo aver compiuto circa i primi 100 chilometri C...

Страница 23: ...re il cerchio non appena tali indicatori risultano abrasi 17 Gomme e camere d aria 17 1 Gomme Esistono numerosi tipi diversi di gomme L idoneità al fuoristrada e la resistenza al rotolamento dipendono dal battistrada della gomma Gonfiate la gomma al massimo alla pressione di gon fiaggio consentita altrimenti rischia di scoppiare Gonfiate la gomma almeno alla pressione di gonfiag gio minima indicat...

Страница 24: ... uso sportivo competitivo è possibile trovare anche le cosiddette gomme tubolari In questo caso la camera d aria è cucita sul copertone e l unità è poi incollata sull apposito cerchio con un adesi vo speciale I vantaggi offerti dalle gomme tubolari sono la resistenza alla foratura e le migliori caratteristiche di marcia di emergenza Utilizzate gomme tubolari solo per cerchi apposita mente concepit...

Страница 25: ...resenti bloccaggi rapidi del freno smon tate un unità freno si veda Capitolo 9 2 2 Utiliz zare i bloccaggi rapidi Se non sono presenti bloccaggi rapidi del freno fate fuoriuscire l aria dalle gomme Per gonfiare una camera d aria dotata di valvola Sclaverand o valvola per biciclette da corsa procedete come descritto di seguito Svitate il cappuccio della valvola con le dita in senso antiorario Aprit...

Страница 26: ... o sulla leva del freno Se non sono presenti bloccaggi rapidi del freno fate fuoriuscire l aria dalle gomme Ora potete sfi lare la ruota tra le pastiglie del freno 18 1 4 Allentare cambio al mozzo freni a rulli a tamburo o a contropedalata Allentate la vite serrafilo o il bloccaggio rapido pre sente sul braccetto del freno Nei freni a contropedalata è necessario aprire la vite del braccetto del fr...

Страница 27: ...te in grado di individuare il buco gonfiate maggiormen te la camera d aria In questo modo la camera d a ria si ingrossa e la maggiore pressione dell aria che fuoriesce vi indicherà facilmente dal rumore dove si trova il buco Fate asciugare la camera d aria Sfregate delicatamente la camera d aria con la carta vetrata sul punto danneggiato Applicatevi sopra la soluzione di gomma 2 Estraete la guaina...

Страница 28: ... in gomma sul punto danneggiato Lasciate asciugare la toppa in gomma per qualche minuto 18 5 Montare gomma e camera d aria Evitate che corpi estranei penetrino all interno della gomma Assicuratevi che la camera d aria sia sempre priva di pieghe e non venga schiacciata Rispettate il senso di scorrimento in fase di montaggio della gom ma Se la gomma ha un senso di scorrimento questo è impresso sul f...

Страница 29: ...forcella posteriore con il fermaglio del braccetto del freno Braccetto del freno Dado a fermaglio Vite a fermaglio Fermaglio del braccetto del freno Tubo inferiore della forcella posteriore Quando installate il fermaglio del braccetto del freno serrate saldamente la vite a fermaglio mantenendo il dado a fermaglio con una chiave da 10 mm Coppia di serraggio 2 3 Nm Dopo aver installato il fermaglio ...

Страница 30: ...gia come mo strato nell illustrazione Passate il cavetto interno attraverso l apertura nella forcella del giunto a cassetta quindi inserite saldamente nel portaguai na I estremità della guaina CJ 8S20 JAPAN LOCK CJ 8S20 JA PAN Cavetto interno Forcella Portaguaina Apertura Puleggia del giunto a cassetta Forcella 1 2 1 passare attraverso I apertura 2 inserire nel portaguaina Se vi risulta più facile...

Страница 31: ...rispettivi fabbricanti In caso di domande su montaggio regolazione manuten zione e funzionamento rivolgetevi al vostro rivenditore specializzato di biciclette Se i componenti del cambio sono allentati usurati danneggiati o non correttamente regolati il ciclista si espone al rischio di incidenti Fate regolare il cambio a catena da un officina specializzata Contattate sempre il vostro rivenditore sp...

Страница 32: ...to caso di un difetto che dan neggia la trasmissione Non appena la catena scorre più in asse il rumore non si verifica più Non utilizzate la bicicletta senza disco salvaraggi Se il disco salvaraggi non è montato occorre che lo in stalliate Altrimenti la catena della bicicletta o il cam bio possono incastrasi tra ruota dentata e raggi Azionando la leva del cambio cambiate nella marcia più piccola p...

Страница 33: ...premere la leva b Fate ugualmente attenzione a non premere la leva a quan do fate funzionare la leva b Le marce non cambiano quando entrambe le leve vengono premute contempo raneamente Funzionamento della leva del deragliatore anteriore standard Leva a cambia da una marcia anteriore più piccola ad una più grande Leva a Posizione di partenza leva a Scatto cambio marcia completo Scatto attuale Se il...

Страница 34: ...ne del trim ming il meccanismo di prevenzione del rumore Un secondo scatto di maggiore entità segnala il completamento del cambio di marcia Dopo il trimming la spinta successiva determina il completamento del cambio di marcia Trimming operazione prevenzione rumore A seconda della posizione della catena dopo il cambio di rapporto la catena potrebbe sfregare contro la piastra esterna o interna del g...

Страница 35: ...il trimming Spostamento del cambio di deragliatore Piastra esterna Catena Moltiplica mediana Ruote denta te più piccole Moltiplica più piccola Ruote denta te più piccole Moltiplica più grande Ruote denta te più grandi Catena tocca piastra interna Leva b scatto colpi Trimming Prima del trimming Dopo il trimming Spostamento del cambio di deragliatore Piastra interna Catena Moltiplica mediana Ruote d...

Страница 36: ...e verso l interno la leva piccola del cambio fino ad avvertire un lieve clic Regolare la portata La portata delle leve del cambio e del freno può essere personalizzata per adattarsi alla dimensione della vostra mano Impostate innanzitutto la regolazione della por tata sulla leva del cambio e aggiustate quindi la leva del freno fino a quando il respingente di quest ultima tocca appena la leva del c...

Страница 37: ...ondo scatto segnala il completamento del cambio di marcia Dopo il trimming il meccanismo di prevenzione del rumore smetterà di scattare e si attuerà soltanto lo scatto completo del cambio di marcia Posizione della catena Spostamento del cam bio di deragliatore Se la catena si trova sulla moltiplica grande e sulla ruota dentata grande la catena e la piastra batteranno contro il deragliatore produce...

Страница 38: ...mbio o sul telaio A B Vite di regolazione Vite di regolazione della guaina Regolazione ottimale La regolazione ottimale si ha quan do la catena viene a contatto e fa rumore contro la terza marcia men tre si preme la leva del cambio di quel tanto necessario a riprendere il gioco del cavo del cambio Riportate la leva nella posizione d origine la leva è nella seconda posizione e si toglie il dito da ...

Страница 39: ...nstallate solo su un lato o i dadi non sono serrati correttamente si può veri ficare un malfunzionamento del mozzo che potrebbe anch esso ruotare Di conseguenza può accadere che il manubrio venga tirato da una parte dal cavo del cam bio con rischio di causare un grave incidente Le marce possono essere cambiate mentre si pedala In rari casi può accadere che alla cambiata gli in granaggi all interno...

Страница 40: ...n due posti Usate quella che è più facilmente visibile CJ 8S20 JAPAN L O C K CJ 8S20 JAPAN L O C K Puleggia del giunto a cassetta Puleggia del giunto a cassetta Quando la bicicletta è in posizione eretta normale Quando la bicicletta è capovolta devono essere in linea retta devono essere in linea retta Forcella Forcella Ruotate il bullone di regolazione del cavetto della leva del cambio per allinea...

Страница 41: ...chio la catena significa che quest ultima è usurata e deve essere sostituita con una nuova Nei cambi al mozzo la tensione della catena deve essere regolata in modo che la sua flessione tra moltiplica e pignone presenti un gioco verticale di 1 2 centimetri Se volete tendere la catena della bicicletta procedete come descritto di seguito Allentate i dadi della ruota posteriore Tirate indietro la ruot...

Страница 42: ...letta Per poter contare sulle corrette guarnizioni di attrito utilizzate solo pastiglie adatte al cerchio Altrimenti lo spazio di frenata si allunga e l usura aumenta Soprattutto per i cerchi in carbonio si devono utilizzare solo pastiglie espressamente previste per questo tipo di impiego I pattini e le pastiglie dei freni non devono venire a con tatto con olio o grasso Se pattini e pastiglie dei ...

Страница 43: ...one prolungata i freni a rulli e a tamburo tendono a surriscaldarsi molto Questo riduce l azione frenante fino addirittura al possibile com pleto cedimento del freno Adeguate di conseguenza il vostro stile di guida I freni a rulli e a tamburo richiedono una leva apposi tamente regolata Controllate regolarmente che le viti della leva del freno siano serrate correttamente Se necessario stringetele i...

Страница 44: ...orza con cui si aziona il freno a contrope dalata dipende dalla posizione dei vostri piedi e dei bracci del pedale Se i bracci delle pedivelle sono in verticale per cui uno dei vostri piedi si trova in alto e l altro in basso sui pedali non si sta frenando con forza Portate i bracci delle pedivelle in orizzontale se volete o dovete essere pronti a frenare Il freno a contropedalata può essere ben d...

Страница 45: ...amente e la corsa della leva del freno si estende Occorre dunque controllare periodicamente i freni e regolarli nuovamente nel caso in cui la corsa della leva sia eccessiva o il freno non freni più correttamente Per controllare i freni procedete come descritto di seguito Tirate con forza la leva del freno anteriore e poi quella del freno posteriore così come fareste in caso di frenata d emergenza ...

Страница 46: ...1 Regolare il freno Se il freno non funziona ancora correttamente o i pat tini sono talmente consumati che non si possono più regolare fate controllare la bicicletta da un officina specializzata e fate sostituire i pattini 21 5 Freni a disco Freno a disco In questo tipo di freno i dischi sono alloggiati sul mozzo mentre la pinza è montata sul telaio o sulla forcella Fate regolare i freni a disco d...

Страница 47: ...aggio rapido si trova dalla stessa parte del disco c è pericolo che possiate scottarvi quando azionate la leva Inoltre il bloccaggio rapido può perdere forza di serrag gio a causa del calore prodotto dal disco del freno Sostituite il disco del freno se è usurato crepato o defor mato Rivolgetevi ad un officina specializzata Se le pastiglie hanno uno spessore inferiore a 0 5 mm occorre sostituirle 0...

Страница 48: ...resso un officina specializzata 21 5 3 Pulire l impianto frenante Se olio o grasso si sono depositati sulle pastiglie sostitui tele Se il disco del freno entra in contatto con olio o gras so occorre pulirlo perché la sua forza frenante ne viene gravemente compromessa Per eseguire la pulizia e la manutenzione del si stema frenante usate alcool isopropilico acqua e sapone o un panno asciutto Non usa...

Страница 49: ... a 11 kg devono essere dotate di impianti di illuminazione a dinamo Guidate sempre biciclette dotate di questi acces sori Con biciclette superiori a 11 kg devono essere utilizzati impianti di illuminazione e dinamo L impianto di illuminazione deve recare il mar chio di omologazione ufficiale 22 3 Alternatore dinamo La dinamo genera l energia necessaria a far funzionare il fanale anteriore e quello...

Страница 50: ... lampada Per montare la ruota anteriore giratela in modo che il morsetto di collegamento del cavo della lampada ven ga a trovarsi sul lato destro rispetto alla direzione di marcia Se il morsetto rimane a sinistra la dinamo non gira correttamente e si può verificare un guasto dell impianto di illuminazione Rispettate la corretta polarità dei collegamenti 22 4 Guasto dell impianto di illuminazione I...

Страница 51: ...re dei componenti e gravi cadute Quando caricate un carico sulla bicicletta rispettate sem pre le portate massime ammesse per la bicicletta si veda Capitolo 30 Dati tecnici Se il portapacchi viene montato in un secondo momento deve essere conforme alla norma EN 14873 Sul portapacchi deve essere indicata la portata massima si veda Capitolo 30 Dati tecnici 23 1 1 Portapacchi anteriore Portapacchi an...

Страница 52: ...a forcella In questo modo il parafango può spostarsi e la ruota non si blocca Dopo tale evento occorre rifissare le aste Fate con trollare da un rivenditore specializzato che parafango aste e fissaggi in plastica siano ancora in perfette condizioni Non continuate ad utilizzare la bicicletta con un asta staccata ma ripristinatela Se non è possibile farlo rivolgetevi ad un officina specializzata per...

Страница 53: ...mente Non fissate mai il seggiolino per bambini diretta mente al manubrio poiché altrimenti la biciclet ta perde la propria manovrabilità Non utilizzate selle molleggiate se state traspor tando un bambino sull apposito seggiolino dietro alla sella Altrimenti il bambino rischia di schiac ciarsi le dita Le molle a spirale poste sotto alla seduta devono essere completamente avvolte o coperte in modo ...

Страница 54: ... vuoto Ricordate che anche il rimorchio partecipa alla massa complessiva della bicicletta Un rimorchio da bicicletta può fare aumentare lo spazio di frenata anche considerevolmente La mancata osservanza può causare incidenti 24 4 Cestino per bicicletta Il fissaggio del cestino non deve danneggiare la barra o l attacco del manubrio Montate il cestino in modo che non copra il fana le e il catarifran...

Страница 55: ...pettivi fabbricanti Un elenco dei link è riportato al Capitolo 29 26 Componenti in carbonio Il carbonio fibra di carbonio è un materiale particolare che richiede un trattamento ed una cura speciali in fase di montaggio manutenzione utilizzo ed anche trasporto e conservazione della bicicletta 26 1 Caratteristiche I componenti in carbonio non devono apparire defor mati ammaccati o piegati dopo un in...

Страница 56: ...no ogni 100 km i seguenti componenti e punti alla ricerca di crepe rotture o danni della superficie ed ispezionate queste parti dopo ogni caduta o incidente con la bicicletta 26 4 Telaio in carbonio Punto di serraggio del deragliatore occhiello per l attacco del cambio collarino reggisella calotte della serie sterzo calotte del movimento centrale mozzi per freno o sede del freno a disco gola dei f...

Страница 57: ...ssare nulla se non è già presente un apposito dispositivo allo scopo ad es inserti filettati per portaborraccia Il fissaggio di portapacchi rimorchi e altri dispositivi non è consentito a causa del rischio di rottura 26 10 Schegge Le fibre di carbonio sono molto sottili e dure Usate dunque molta cautela nel maneggiare i componenti in carbonio danneggiati Alcune fibre potrebbero stac carsi e sporge...

Страница 58: ...or mazioni del materiale Sostituite le parti difettose prima di utilizzare nuovamente la bicicletta Ritoccate la vernice nei punti danneggiati Soprattutto in inverno e negli ambienti più aggressivi come al mare trattate spesso tutti i componenti soggetti a corrosione con prodotti preservanti e per la cura Altri menti la bicicletta verrà intaccata dalla corrosione ruggi ne più abbondantemente e più...

Страница 59: ...pasti glie possono accorciarsi Controllate regolarmente lo stato di usura delle pastiglie e se necessario fatele sostituire da un officina specializzata 27 6 Dischi del freno Anche i dischi del freno si usurano in seguito a brusche frenate o nel corso del tempo Informatevi dei relativi limiti d uso presso il fabbricante dei vostri freni o presso il vostro rivenditore specializzato Se i dischi dei ...

Страница 60: ...ente tutte le superfici vernicia te alla ricerca di danni e riverniciatele subito Il vostro rivenditore specializzato può consigliarvi su come curare le superfici verniciate 27 14 Cuscinetti Tutti i cuscinetti della bicicletta come quelli di serie sterzo mozzi delle ruote pedali e quelli interni sono sog getti ad usura per funzionamento L usura dipende dalla frequenza e dalla durata di utilizzo e ...

Страница 61: ...do ad eccezione delle piste frenanti Fate sostituire le parti malfunzionanti e danneggiate 28 1 Piano di ispezione 28 1 1 Manutenzione controllo Dopo 200 chilometri dall acquisto poi almeno una volta all anno Fate controllare gomme e ruote Fate controllare la coppia di serraggio di manubrio pedali pedivelle sella della bicicletta reggisella e viti di fissaggio Fate registrare i seguenti componenti...

Страница 62: ... uso di lubrificanti e detergenti non idonei può cau sare danni e malfunzionamenti alla vostra bicicletta 29 Elenco dei link I seguenti link vi forniscono informazioni importanti sulla vostra bicicletta e sui componenti montati Generalmente sui siti web dei fabbricanti trovate accanto a suggerimen ti importanti sull utilizzo e la regolazione anche le varie istruzioni per l uso www rohloff de www s...

Страница 63: ...kg Bicicletta da strada semi XXL 150 kg max 135 kg Bicicletta da strada XXL 170 kg max 155 kg E Bike 130 kg max 105 kg E Bike semi XXL 150 kg max 125 kg E Bike XXL 170 kg max 145 kg MTB hardtail 110 kg max 100 kg MTB hardtail semi XXL 140 kg max 125 kg MTB Dirt 110 kg max 100 kg MTB sospensione completa 110 kg max 100 kg MTB sospensione completa semi XXL 140 kg max 125 kg Bicicletta da corsa 110 k...

Страница 64: ...no eccessivamente le viti si corre il ri schio di danneggiare i componenti Rispettate dunque sempre la coppia di serraggio pre scritta Rispettate la profondità minima di avvitamento Sulle leghe di alluminio più dure tale valore è pari almeno a 1 4 volte il diametro della vite ad es diametro nominale M5 1 4 7 mm Se possibile stringete tutti i collegamenti a vite rilevanti ai fini della sicurezza co...

Страница 65: ...Freno bloccaggio del cavetto M6 10 Dinamo laterale fissaggio M6 10 Occhiello per attacco del cambio M10x1 16 Cuscinetto interno BSA secondo istruzioni del fabbricante Pinza del freno a disco Shimano IS e PM M6 6 8 Pinza del freno a disco AVID IS e PM M6 8 10 Pinza del freno a disco Magura IS e PM M6 6 Bloccaggio della leva del cambio M5 5 Bloccaggio della leva del freno M5 5 Freno a V vite di fiss...

Страница 66: ... HD gomma ad alta pressione LARGHEZZA DELLA GOMMA in mm PSI BAR 25 HD 80 110 5 5 7 6 28 HD 70 80 4 8 5 5 28 60 4 1 32 60 70 4 1 4 8 37 50 3 5 40 60 4 1 42 60 4 1 47 40 50 3 5 4 1 57 62 30 40 2 1 2 8 Rispettate i valori eventualmente diversi forniti dal fabbricante delle gomme Altrimenti si rischia di dan neggiare gomme e camere d aria 30 5 Impianto di illuminazione A seconda del tipo di impianto d...

Страница 67: ...izio ini ziale presentato dal componente difettoso Si escludono dalla garanzia danni risultanti dall impiego in occasione di competizioni utilizzo improprio e cause di forza maggiore si veda Capitolo 6 Utilizzo conforme all uso previsto tutti i componenti soggetti ad usura per funziona mento a meno che non si tratti di vizi di produzio ne o del materiale si veda Capitolo 27 2 Compo nenti di usura ...

Страница 68: ...I Istruzioni generali per l uso 67 ...

Страница 69: ...nto con la vostra nuova bicicletta Copyright 2011 Derby Cycle Werke GmbH La riproduzione anche parziale è consentita solo previa autorizzazione di Derby Cycle Werke GmbH Con riserva di errori di stampa sbagli e modifiche tecniche ...

Страница 70: ...II Istruzioni per l uso Pedelec veloce Italiano Derby Cycle Werke GmbH 2011 ...

Страница 71: ...2 II Istruzioni per l uso Pedelec veloce 1 Batteria 2 Bloccabatteria 3 Unità motore 4 Elemento di comando 5 Caricabatteria 4 LCD di comando 5 Caricabatteria 4 2 3 1 ...

Страница 72: ...Capitolo 1 Guida rapida contiene le istruzioni brevi per iniziare subito ad utilizzare la bicicletta Alle pagine successive le singole operazioni vengono illu strate più in dettaglio ed integrate con immagini e schemi Il Capitolo 11 Dati tecnici contiene informazioni più dettagliate sulla bicicletta Pedelec veloce Le presenti istruzioni per l uso presentano solo informa zioni specifiche sulla bici...

Страница 73: ... 18 6 5 Durata di vita e garanzia 19 6 5 1 della batteria 19 7 Caricabatteria 20 Indice 1 Guida rapida 7 2 Pedelec veloce requisiti di legge 8 2 1 Requisiti di legge 8 2 1 1 Conseguenze per il ciclista 8 2 1 2 Pedelec veloce e piste ciclabili 8 2 1 3 Interruttore di velocità 8 3 Caricare la batteria 9 3 1 Procedura di ricarica 9 3 2 Installare la batteria 9 4 LCD di comando 10 4 1 Funzionamento de...

Страница 74: ...iante o assente 21 8 1 3 Indicazione E1 21 8 1 4 Indicazione E9 22 8 1 5 Indicatore della regolazione dell assistenza lampeggiante 22 8 1 6 Altre possibili cause di errore 22 9 Pulizia 22 10 Avvertimenti 23 11 Dati tecnici 24 12 Sostituzione di componenti della Pedelec veloce 25 12 1 Componenti da sostituire solo con parti identiche o parti omologate 25 12 2 Gomme di scorta 26 12 3 Componenti che ...

Страница 75: ...6 II Istruzioni per l uso Pedelec veloce ...

Страница 76: ...ella serratura oc corre ruotarla in senso orario e sfilarla per bloccare la batteria 7 Accertarsi che la batteria sia ben fissa e che la chiave non sia più infilata nel bloccabatteria 8 Premere il pulsante On Off dell elemento di comando posto sul manubrio Non muovere quindi i pedali per 2 secondi Questo tempo in assenza di sollecitazione è necessario affinché il sistema mo tore possa impostare co...

Страница 77: ... Vige l obbligo di patente È obbligatorio possedere l attestato per la guida dei ciclomotori Se si possiede una patente tedesca tale attestato è già incluso Se si è nati prima del 1 aprile 1965 in Germania si può guidare una Pedelec veloce anche senza patente Vige l obbligo di assicurazione La piccola targa di immatricolazione viene rilasciata da qualsiasi assicurazione Le piste ciclabili possono ...

Страница 78: ...ttare la targhetta identificati va sul caricabatteria Targhetta identificativa sul caricabatteria fronte e retro 2 Inserire la batteria nella sede del caricabatteria 3 La procedura di ricarica inizia I LED sulla bat teria si accendono o lampeggiano Quando tutti e cinque i LED si spengono la batteria è completa mente carica La batteria può essere lasciata inne stata sul caricabatteria Tuttavia se i...

Страница 79: ...di comando 4 1 1 Interruttore on off Quando si preme il tasto on off l elemento di comando e il motore si accendono Automaticamente viene impostato il grado di assistenza attivo al momento dello spegnimento La retroillumina zione si accende brevemente e poi si spegne Tutte le registrazioni chilometri giornalieri distanza attualmente percorsa velocità media velocità massima distanza tota le percors...

Страница 80: ...i dati di chilometri giornalieri velocità media e velocità massima vengono azzerati Tale procedura non consente di cancel lare la distanza totale percorsa 4 1 5 Accendere e spegnere il display La retroilluminazione ed il display dell LCD di comando possono essere attivati anche se il motore non è acceso Per farlo premere il pulsante Light Il motore resta in modalità NO ASSIST nessuna assistenza Il...

Страница 81: ...selettore visualiz zazione Pulsante selettore visualiz zazione Pulsante selettore visualiz zazione Pulsante selettore visualiz zazione Pulsante selettore visualiz zazione Pulsante selezione impostazione Pulsante selezione impostazione Pulsante Pulsante selezione impostazione Pulsante Pulsante selezione impostazione Pulsante Pulsante selezione impostazione Pulsante Pulsante selezione impostazione P...

Страница 82: ...aggiunge il valore 9999 9 km il display non indica più i decimali 4 1 10 Visualizzazione del livello di carica della batteria Indicatore del livello di carica della batteria Questo indicatore consente di utilizzare la bicicletta ridu cendo il consumo e con una maggiore autonomia La carica rimanente viene visualizzata con un indicatore a 5 elementi INDICAZIONE LIVELLO DI CARICA DELLA BATTERIA 5 LED...

Страница 83: ...otenza supplementare del motore elettrico Il cambio al moz zo contiene un dispositivo che impedisce le cambiate in presenza di carico eccessivo al fine di proteggere il cambio del mozzo 5 1 Funzionamento dell assistenza Non appena si attiva l assistenza e si inizia a pedalare il motore assiste la pedalata La spinta erogata dal motore dipende da tre fattori Pressione esercitata sui pedali Il motore...

Страница 84: ...inserita sulla Pedelec a tempera tura ambiente Scarica a diverse temperature curva di scarica a temperature normali curva di scarica a basse temperature capacità di scarica a basse temperature capacità di scarica a temperature normali capacità di scarica Ah o ore di utilizzo Differenza temperatura normale bassa Tensione nominale Tensione minima per il funzionamento a batteria tensione di disinserz...

Страница 85: ...i un autonomia di circa 35 km Autonomia delle diverse batterie AUTONOMIA RAPPORTO 1 2 Ø 32 KM H CONDIZIONI BUONE Batteria 8 Ah 22 km Batteria 12 Ah 35 km Batteria 18 Ah 60 km 5 3 Utilizzare la Pedelec risparmiando La Pedelec permette di controllare e determinare i costi del suo utilizzo Rispettando i consigli forniti per la mag giore autonomia possibile si riducono i consumi e di con seguenza anch...

Страница 86: ...del primo impiego o dopo una lunga inter ruzione di utilizzo accertarsi che la batteria sia completamente carica Per le prime tre cariche scaricare completamente la batteria in modo da raggiungere la capacità massima della batteria Durante il normale fun zionamento la durata di vita si riduce per effetto delle ripetute scariche complete Nel normale funzionamento la frequente carica parziale della ...

Страница 87: ...ello di carica e della capacità della batteria 6 4 1 Controllare il livello di carica della batteria Quando si preme brevemente il pulsante Push i LED si accendono indicando l attuale livello di carica della batteria INDICAZIONE LIVELLO DI CARICA DELLA BATTERIA 5 LED accesi 80 100 4 LED accesi 60 80 3 LED accesi 40 60 2 LED accesi 20 40 1 LED acceso 10 20 1 LED lampeggia 10 nessuna visualizzazione...

Страница 88: ... soggette ad usura Anche i componenti di usura sono coperti da una garanzia di due anni Se durante tale periodo si verifica un difetto il proprio rivenditore specializzato provvederà naturalmente a sosti tuire la batteria Il normale invecchiamento e l usura della batteria non rappresentano un vizio della cosa La durata di vita della batteria dipende da vari fattori I principali fattori che influis...

Страница 89: ... solo in ambienti asciutti Collocare il caricabatteria su una superficie ade guata solo in posizione sicura e stabile Non coprire il caricabatteria e non appoggiarvi sopra oggetti per evitare surriscaldamenti e in cendi 8 Risoluzione dei problemi L elemento di comando indica anche gli errori e i guasti tecnici Sul display LCD il guasto viene visualizzato con un codice Display dell elemento di coma...

Страница 90: ...40 20 1 LED acceso 20 0 8 1 2 Indicatore del livello di carica della batteria lampeggiante o assente Se l indicatore del livello di carica della batteria lampeg gia o è assente le cause e le possibili soluzioni sono le seguenti La batteria è sufficientemente carica Caricare la batteria se necessario Il secondo e il quarto LED dell indicatore di carica della batteria lampeggiano quando si preme il ...

Страница 91: ... Se ciò non si verifica rivolgersi al proprio rivendi tore specializzato 8 1 6 Altre possibili cause di errore Se la forza esercitata sui pedali è molto bassa l assistenza del motore non si attiva Se il motore non funziona e non se ne trova la causa controllare i pulsanti i cavi e i connettori dell impianto elettrico Se si rileva un punto di rottura o una crepa non cer care di riparare direttament...

Страница 92: ...ne Anche i punti di collegamento possono condurre tensione La manutenzione o la riparazione dell apparecchia tura aperta in tensione devono essere effettuate solamente dal rivenditore specializzato Durante la regolazione la manutenzione o la pulizia della Pedelec accertarsi che nessun cavo venga schiacciato o danneggiato da bordi taglienti Se si ritiene che l utilizzo in sicurezza della Pe delec n...

Страница 93: ...0 450 Wh Possibilità di impiego delle batterie NUM ART DCW NUM ART CAPACITÀ AH PESO KG POSSIBILITÀ DI IMPIEGO CENTRALE SPEED ANTERIORE 17017002 NKY226B02 10 2 4 X 250W 17017012 NKY226B02 10 2 4 X 250W 17019018 NKY252B02 10 2 4 X 17019103 NKY252B02 10 2 4 X KD170110010 NKY266B02 10 2 4 X 250W 170110010 NKY266B02 10 2 4 X 250W 170110003 NKY265B02 10 2 4 300W 170110016 NKY267B02 10 2 4 X 170111002 NK...

Страница 94: ...a Pede lec veloce è già dotata di tale autorizzazione Durante la procedura di immatricolazione sono stati de finiti i componenti il cui utilizzo è ammesso su questo veicolo L immatricolazione della Pedelec veloce resta dunque valida solo se si utilizzano esattamente gli stessi componenti del tipo approvato Se in un secondo momento si modificano o sostituiscono dei componenti si applicano le medesi...

Страница 95: ...thon Extreme Evolution Folding 37 622 115 kg 6 bar Marathon Extreme Evolution Folding 50 559 140 kg 5 bar Marathon Plus Performance Wired 37 622 110 kg 6 bar Marathon Plus Performance Wired 47 559 125 kg 5 bar Marathon Performance Wired 37 622 110 kg 6 bar Marathon Performance Wired 50 559 140 kg 5 bar Big Apple Performance Folding Wired 50 622 150 kg 5 bar Big Apple Performance Folding Wired 50 5...

Страница 96: ...ore del parafango anteriore deve essere arrotondato Portapacchi Sella Manopola del manubrio Componenti del cambio Solo se non viene modificato il rapporto più grande Reggisella Campanello Può essere sostituito con un altro campanello che produca lo stesso suono Specchietto retrovisore Può essere sostituito con un altro specchietto retrovisore omologato per il tipo Catena Serie sterzo Camera d aria...

Страница 97: ...o con la vostra nuova Pedelec veloce Copyright 2011 Derby Cycle Werke GmbH La riproduzione anche parziale è consentita solo previa autorizzazione di Derby Cycle Werke GmbH Con riserva di errori di stampa sbagli e modifiche tecniche ...

Страница 98: ...III Istruzioni per l uso Pedelec con motore centrale Italiano Derby Cycle Werke GmbH 2011 ...

Страница 99: ... Istruzioni per l uso Pedelec con motore centrale 4b LCD di comando 4a LED di comando 5 Caricabatteria 1 Batteria 2 Bloccabatteria 3 Unità motore 4 Elemento di comando 4a LED 4b LCD 5 Caricabatteria 2 3 1 4 ...

Страница 100: ...razioni vengono illu strate più in dettaglio ed integrate con immagini e schemi Il Capitolo 11 Dati tecnici contiene informazioni più dettagliate sulla bicicletta Pedelec Le presenti istruzioni per l uso presentano solo informa zioni specifiche sulla bicicletta Pedelec Informazioni più generali ad esempio di carattere tecnico relative alla Pedelec sono riportate nelle Istruzioni generali per l uso...

Страница 101: ...e e spegnere il display 14 4 2 1 6 Cancellare tutti i dati 14 4 2 1 7 Riprogrammare lingua circonferenza ruote e contrasto dell LCD 15 4 2 1 8 Spegnimento automatico 16 4 2 1 9 Intervalli di misura e di visualizzazione 16 4 2 1 10 Visualizzazione del livello di carica della batteria 16 4 2 1 11 Visualizzazione della potenza 16 5 Assistenza del motore elettrico 17 5 1 Funzionamento dell assistenza ...

Страница 102: ...n LED di comando 24 8 1 2 Pedelec con LCD di comando 25 8 1 2 1 Nessuna visualizzazione 25 8 1 2 2 Indicatore del livello di carica della batteria lampeggiante o assente 25 8 1 2 3 Indicazione E1 25 8 1 2 4 Indicazione E9 25 8 1 2 5 Indicatore della regolazione dell assistenza lampeggiante 26 8 1 2 6 Altre possibili cause di errore 26 9 Pulizia 26 10 Avvertimenti 26 11 Dati tecnici 27 ...

Страница 103: ...8 Groove F3 Denominaz prodotto Kalkhoff BionX Tipo Image B27 Image B24 Anno di fabbricazione 2011 è conforme a tutte le disposizioni pertinenti della Direttiva macchine 2006 42 CE Il prodotto è inoltre conforme a tutte le disposizioni della Direttiva sulla compatibilità elettromagnetica 2004 108 CE Sono state applicate le seguenti norme armonizzate DIN EN 15194 Biciclette Biciclette elettriche a p...

Страница 104: ...y C8 Connect Lady 8C Denominaz prodotto Kalkhoff Groove Tipo Groove F8 Groove F3 Denominaz prodotto Kalkhoff BionX Tipo Image BX27 Image BX24 Denominaz prodotto Kalkhoff Bosch Tipo Agattu B Anno di fabbricazione 2012 è conforme a tutte le disposizioni pertinenti della Direttiva macchine 2006 42 CE Il prodotto è inoltre conforme a tutte le disposizioni della Direttiva sulla compatibilità elettromag...

Страница 105: ...8 III Istruzioni per l uso Pedelec con motore centrale ...

Страница 106: ...e quindi i pedali per 2 secondi Questo tempo in assenza di sollecitazione è necessario affinché il sistema motore possa impostare correttamente il sensore di forza 9 Sul display del LED di comando compare la modalità di assistenza di grado medio Premendo il pulsante Mode è possibile scegliere l intensità dell assistenza debole LOW media MID o intensa HIGH Ad ogni pressione si varia l inten sità de...

Страница 107: ... deve diminuire sempre più all aumentare della velocità A 25 km h il motore deve spegnersi 2 1 Conseguenze per il ciclista Non vige l obbligo di indossare il casco Per la pro pria sicurezza si consiglia comunque di non utiliz zare mai la bicicletta senza casco Non vige l obbligo di patente Non vige l obbligo di assicurazione Per guidare una Pedelec non sussistono limiti di età Le regole per l util...

Страница 108: ... 230 V rispettare la targhetta identificati va sul caricabatteria Targhetta identificativa sul caricabatteria fronte e retro 2 Inserire la batteria nella sede del caricabatteria 3 La procedura di ricarica inizia I LED sulla bat teria si accendono o lampeggiano Quando tutti e 5 i LED si spengono la batteria è completamente carica La batteria può essere lasciata innestata sul caricabatteria Tuttavia...

Страница 109: ...egolare l intensità dell assistenza fornita dal motore I LED accanto al pulsan te superiore indicano l intensità attuale dell assistenza da parte del motore All accensione tutti e tre i LED si illuminano per due se condi Non muovere i pedali durante questo tempo Il sensore di forza viene reimpostato ad ogni accensione al fine di re golare con precisione l alimentazione del motore In quei due secon...

Страница 110: ...arla agendo sull elemento di comando 4 2 LCD di comando Display spento Display acceso 1 On Off 2 Interruttore illuminazione 3 Indicatore di carica 4 Indicatore anabbaglianti 5 Indicatore potenza compare solo durante la marcia 6 Velocità di marcia 7 Indicatore distanza attualmente percorsa 8 Velocità media 9 Velocità massima 10 Distanza totale percorsa 11 Campo di visualizzazione 12 Grado di assist...

Страница 111: ...enza del motore Premendo il pulsante Diminuisci grado di assistenza l assistenza diminuisce ad ogni pressione fino a riportarsi al grado massimo alla fine del ciclo Nella modalità NO ASSIST nessuna assistenza la biciclet ta funziona come una bicicletta normale ed il motore resta spento 4 2 1 4 Resettare i dati registrati Se una volta acceso l elemento di comando si preme il se lettore del campo in...

Страница 112: ...ulsante selettore visualiz zazione Pulsante selettore visualiz zazione Pulsante selettore visualiz zazione Pulsante selettore visualiz zazione Pulsante selettore visualiz zazione Pulsante selezione impostazione Pulsante selezione impostazione Pulsante Pulsante selezione impostazione Pulsante Pulsante selezione impostazione Pulsante Pulsante selezione impostazione Pulsante Pulsante selezione impost...

Страница 113: ...a ridu cendo il consumo e con una maggiore autonomia La carica rimanente viene visualizzata con un indicatore a 5 elementi INDICAZIONE LIVELLO DI CARICA DELLA BATTERIA 5 LED accesi 80 100 4 LED accesi 60 80 3 LED accesi 40 60 2 LED accesi 20 40 1 LED acceso 10 20 1 LED lampeggia 10 nessuna visualizzazione 0 E batteria scarica ingl empty F batteria carica ingl full 4 2 1 11 Visualizzazione della po...

Страница 114: ...a dalla potenza massima del motore Andamento dell assistenza elettrica Propulsione Velocità più forza sui pedali ed assi stenza meno assi stenza assistenza disat tivata modalità di assistenza 1 2 forza sui pedali 22 km h 25 km h propulsione forza sui pedali assistenza elettrica assistenza elettrica 1 0 2 Pedelec 28 8 rapporti Shimano Grado di assistenza selezionato Nel grado assistenza intensa HIG...

Страница 115: ...rature capacità di scarica a basse temperature capacità di scarica a temperature normali capacità di scarica Ah o ore di utilizzo Differenza temperatura normale bassa Tensione nominale Tensione minima per il funzionamento a batteria tensione di disinserzione Grado di assistenza selezionato Se si desidera percorrere una lunga distanza usu fruendo dell assistenza del motore si consiglia di seleziona...

Страница 116: ...i del suo utilizzo Rispettando i consigli forniti per la mag giore autonomia possibile si riducono i consumi e di con seguenza anche i costi I costi operativi dell assistenza del motore per una batte ria di 18 Ah si calcolano come segue Una batteria nuova costa circa 599 euro Con una carica si possono compiere in media 112 km La batteria si può ricaricare circa 1 100 volte 1 100 ricariche per 112 ...

Страница 117: ...imenti Prima del primo impiego o dopo una lunga inter ruzione di utilizzo accertarsi che la batteria sia completamente carica Per le prime tre cariche scaricare completamente la batteria in modo da raggiungere la capacità massima della batteria Durante il normale funzionamento la durata di vita si riduce per effetto delle ripetute scariche complete Nel normale funzionamento la frequente carica par...

Страница 118: ...el livello di carica e della capacità della batteria 6 4 1 Controllare il livello di carica della batteria Quando si preme brevemente il pulsante Push i LED si accendono indicando l attuale livello di carica della bat teria INDICAZIONE LIVELLO DI CARICA DELLA BATTERIA 5 LED accesi 80 100 4 LED accesi 60 80 3 LED accesi 40 60 2 LED accesi 20 40 1 LED acceso 10 20 1 LED lampeggia 10 nessuna visualiz...

Страница 119: ...batterie sono soggette ad usura Anche i componenti di usura sono coperti da una garanzia di due anni Se durante tale periodo si verifica un difetto il proprio rivenditore specializzato provvederà naturalmente a sosti tuire la batteria Il normale invecchiamento e l usura della batteria non rappresentano un vizio della cosa La durata di vita della batteria dipende da vari fattori I principali fattor...

Страница 120: ...ezzi originali In questo modo si garantisce la propria sicurezza e si evita ogni problema con la garanzia in caso di sinistro 7 Caricabatteria Leggere i due adesivi applicati sul caricabatteria prima di utilizzarlo per la prima volta Non utilizzare altri caricabatteria Caricare la batteria solamente con il caricabatteria fornito in dotazione o con uno approvato da Derby Cycle Se si verifica un err...

Страница 121: ...a assistenza del motore Il sensore di forza non è stato impo stato correttamente Riavviare Il sistema ri esegue la taratura Nel frattempo non si deve esercitare forza sui pedali per circa due secondi Nessuna assistenza del motore Si è verificato un problema con l uni tà motore Motore sensore o cavo difettosi Rivolgersi al proprio rivenditore specializzato La potenza del motore è ridotta Sovraccari...

Страница 122: ...ni sono le seguenti La batteria è sufficientemente carica Caricare la batteria La batteria ha una capacità sufficiente Verificare la capacità In caso di capacità residua insufficiente la batteria deve essere sostituita Controllare la capacità attuale della batteria Se si preme il pulsante Push per più di cinque secondi i LED indicano la capacità della batteria Capacità nell esempio di una batteria...

Страница 123: ...enzione in presenza di bambini soprattutto se vi è la possibilità che essi introducano ogget ti nell apparecchiatura attraverso le aperture dell alloggiamento Ciò comporta un rischio leta le di scossa elettrica 8 1 2 5 Indicatore della regolazione dell assistenza lam peggiante Se l indicatore della regolazione dell assistenza lampeggia nonostante la carica della batteria sia sufficiente la causa e...

Страница 124: ...go delle batterie NUM ART DCW NUM ART CAPACITÀ AH PESO KG POSSIBILITÀ DI IMPIEGO CENTRALE SPEED ANTERIORE 17017002 NKY226B02 10 2 4 X 250W 17017012 NKY226B02 10 2 4 X 250W 17019018 NKY252B02 10 2 4 X 17019103 NKY252B02 10 2 4 X KD170110010 NKY266B02 10 2 4 X 250W 170110010 NKY266B02 10 2 4 X 250W 170110003 NKY265B02 10 2 4 300W 170110016 NKY267B02 10 2 4 X 170111002 NKY284B2 10 2 4 X 300W X 170111...

Страница 125: ...ento con la vostra nuova Pedelec Copyright 2011 Derby Cycle Werke GmbH La riproduzione anche parziale è consentita solo previa autorizzazione di Derby Cycle Werke GmbH Con riserva di errori di stampa sbagli e modifiche tecniche ...

Страница 126: ...IV User Manual Pedelec with front motor English Derby Cycle Werke GmbH 2011 ...

Страница 127: ...2 IV User Manual Pedelec with front motor 3 Motor 5 Charger 4 LED control panel 1 Battery 2 Battery lock 3 Motor unit 4 Control panel 5 Charger 4 2 3 1 ...

Страница 128: ...ined in detail supplemented by illustrations and diagrams For more detailed information on your Pedelec refer to Chapter 12 Technical data The information in this User Manual specifically refers to your Pedelec only For general information on the bike technology that features in your Pedelec for example refer to the General User Manual Even if you can t wait to go for your first ride in the intere...

Страница 129: ...rating principle of assistance 12 5 2 Riding your Pedelec efficiently 13 6 Battery 14 6 1 Straightforward charging 14 6 2 High degree of safety due to battery management 14 6 3 Straightforward storage 14 6 4 Battery information system 15 6 4 1 Checking the battery charge state 15 6 4 2 Checking the battery capacity 15 6 5 Service life and warranty 16 6 5 1 the electric drive 16 6 5 2 the battery 1...

Страница 130: ...Groove Model designation Groove F8 Groove F3 Product description Kalkhoff BionX Model designation Image B27 Image B24 Year of manufacture 2011 comply with all of the relevant requirements of the Machinery Directive 2006 42 EC Furthermore the machine complies with all of the requirements of the Electromagnetic Compatibility Directive 2004 108 EC The following harmonized standards have been applied ...

Страница 131: ... Connect Lady C8 Connect Lady 8C Product description Kalkhoff Groove Model designation Groove F8 Groove F3 Product description Kalkhoff BionX Model designation Image BX27 Image BX24 Product description Kalkhoff Bosch Model designation Agattu B Year of manufacture 2012 comply with all of the relevant requirements of the Machinery Directive 2006 42 EC Furthermore the machine complies with all of the...

Страница 132: ...need to turn it clockwise and pull it out to allow the battery to lock in place 7 Make sure that the battery is securely posi tioned and that the key is no longer in the lock 8 Push the Power button on the control panel on the handlebar Wait for 2 seconds before turn ing the pedals The drive system requires this time when no force is applied to the pedals to adjust the power sensor correctly 9 The...

Страница 133: ...also increase more intensely The motor must switch off once the bike reaches a speed of 25 km h 2 1 Meaning for the rider You do not legally have to wear a helmet In the interest of your own safety however you should never ride without a helmet You do not legally have to have a driving licence You do not legally have to have insurance No age restriction applies for a Pedelec The regulations govern...

Страница 134: ...a socket 230 V ob serve type plate on the charger Type plate on charger Front and back 2 Put the battery in the docking station of the charger 3 The charging operation starts The battery LEDs light up or flash Once all 5 LEDs have gone out the battery is fully charged You can leave the battery standing in the charger However the charger al ways draws some current if you leave it plugged in 4 To sa...

Страница 135: ...he Mode but tons The LEDs next to the top button show the level of assistance you are currently receiving from the motor All three LEDs light up for two seconds when the power is switched on Please do not put your feet on the pedals during this time The power sensor is reset each time the power is switched on in order for the power supply to the motor to be pre cisely controlled A load must not be...

Страница 136: ...e riding with the lights on and switch off the as sistance the lights also switch off automatically You must therefore switch the lights on again You must always take the battery with you even if you want to ride without assistance as the lights will only work with the battery 4 2 Automatic switch off If you stop and do not move your Pedelec for 10 minutes the system switches off automatically If ...

Страница 137: ...ance Propulsive power Speed increasing pedal power and assistance reducing assistance assistance switched off Power assist mode 1 2 Pedal force 19 km h 25 km h Propulsive force pedal force electric assistance Electric assistance 1 0 2 Distance The distance you can travel using the power assist with the battery fully charged depends on several factors Ambient temperature If it is colder you will tr...

Страница 138: ...ERAGE UNDER FAVOUR ABLE CONDITIONS 8 Ah battery 60 km 12 Ah battery 90 km 18 Ah battery 140 km 5 2 Riding your Pedelec efficiently You can monitor and influence the cost of your journeys with the Pedelec yourself You can reduce your consump tion and therefore costs by following the tips for increas ing the travel distance The operating costs of power assist with an 18 Ah battery work out as follow...

Страница 139: ... your bike for the first time or after you have not used it for a while You should run the battery all the way down to empty for the first three charging cycles This al lows the battery to reach its maximum capacity If you continuously run the battery to empty during normal operation this reduces its service life If you partially recharge the battery frequently dur ing normal operation this has a ...

Страница 140: ...p and the way in which they light up Charge state and battery capacity indicator 6 4 1 Checking the battery charge state Press the Push button briefly the LEDs light up and dis play the current battery charge state DISPLAY BATTERY CHARGE STATE 5 LEDs light up 80 100 4 LEDs light up 60 80 3 LEDs light up 40 60 2 LEDs light up 20 40 1 LED lights up 10 20 1 LED flashes 10 no display 0 E Battery is em...

Страница 141: ...develops a fault during this period your specialist cycle shop will of course replace it A fault does not constitute normal ageing and battery wear The service life of the battery depends on different factors The most important wear relevant factors are the number of charge cycles and the age of the battery When you have fully charged and discharged your battery 1 100 times it will still have 60 o...

Страница 142: ... stable position on a suitable surface Do not cover the charger or place any objects on it as otherwise it could overheat and catch fire 8 Troubleshooting The control panel also indicates when faults and techni cal errors are present If a fault occurs the LEDs flash in a specific pattern and with a specific rhythm This indicates the cause of the problem and makes it easier for you to find a soluti...

Страница 143: ...ghly two sec onds No power assist A problem occurred in the drive unit Motor sensor unit or cable defective Con tact your specialist cycle shop The motor output is less The motor is over loaded Allow the motor to cool down and reduce the assistance The motor switches off The motor is extremely overloaded Allow the motor to cool down and reduce the assistance No power assist The battery is nearly e...

Страница 144: ... to see one white and one green cable connector Open these connectors and pull them apart 1 Green connector 2 White connector 1 2 To open the white connector push a sharp object tip of a key or ball point pen down onto the an gled surface of the snap in mechanism as shown below You can pull the two connector halves apart when pushing this surface back White connector To open the green connector pu...

Страница 145: ...heel refer to the General User Manual The General User Manual also contains all other bicycle related information on your Pedelec 10 Cleaning Remove the battery before you clean your Pedelec We recommend you clean your Pedelec with a damp cloth a sponge or a brush You can obtain suitable cleaning agents and additional information from your specialist cycle shop Make sure when cleaning that water d...

Страница 146: ...on the device when it is open and connected to the power supply must only be carried out by the specialist cycle shop When carrying out adjustments and maintenance or when cleaning the Pedelec avoid crushing cables or damaging them with sharp edges If risk free operation of your Pedelec cannot be assumed take it out of operation and make sure it cannot be used until you have it checked by a specia...

Страница 147: ...Wh Possible applications of batteries DCW ITEM NO ITEM NO CAPACITY AH WEIGHT KG POSSIBLE APPLICATION CENTRE FAST FRONT 17017002 NKY226B02 10 2 4 X 250W 17017012 NKY226B02 10 2 4 X 250W 17019018 NKY252B02 10 2 4 X 17019103 NKY252B02 10 2 4 X KD170110010 NKY266B02 10 2 4 X 250W 170110010 NKY266B02 10 2 4 X 250W 170110003 NKY265B02 10 2 4 300W 170110016 NKY267B02 10 2 4 X 170111002 NKY284B2 10 2 4 X ...

Страница 148: ...IV User Manual Pedelec with front motor 23 ...

Страница 149: ...ly enjoy using your new Pedelec Copyright 2011 Derby Cycle Werke GmbH Reproduction in whole or in part is not permitted without the consent of Derby Cycle Werke GmbH Subject to misprints errors and technical modifications ...

Страница 150: ...V User Manual Impulse Pedelec English Derby Cycle Werke GmbH 2011 ...

Страница 151: ...2 V User Manual Impulse Pedelec Control panel Charger 1 Battery 2 Battery lock 3 Motor unit 4 Control panel 5 Charger 4 5 2 3 1 4 ...

Страница 152: ...in Chapter 1 Quick start The individual steps are subsequently explained in detail supplemented by illustrations and diagrams More detailed information on your Pedelec is provided in Chapter 11 Technical data The information in this User Manual specifically refers to your Pedelec only For general information on the bike technology that features in your Pedelec for example refer to the General User...

Страница 153: ...play of power assist mode 13 5 1 4 Battery charge state indicator 13 5 2 Troubleshooting 14 6 Assistance by the electric motor 15 6 1 Operating principle of assistance 15 6 2 Distance 16 6 3 Riding your Pedelec efficiently 16 7 Battery 17 7 1 Straightforward charging 17 7 2 High degree of safety due to battery management 17 7 3 Straightforward storage 17 7 4 Battery information system 18 7 4 1 Che...

Страница 154: ...Groove Model designation Groove F8 Groove F3 Product description Kalkhoff BionX Model designation Image B27 Image B24 Year of manufacture 2011 comply with all of the relevant requirements of the Machinery Directive 2006 42 EC Furthermore the machine complies with all of the requirements of the Electromagnetic Compatibility Directive 2004 108 EC The following harmonized standards have been applied ...

Страница 155: ... Connect Lady C8 Connect Lady 8C Product description Kalkhoff Groove Model designation Groove F8 Groove F3 Product description Kalkhoff BionX Model designation Image BX27 Image BX24 Product description Kalkhoff Bosch Model designation Agattu B Year of manufacture 2012 comply with all of the relevant requirements of the Machinery Directive 2006 42 EC Furthermore the machine complies with all of the...

Страница 156: ...der on the Pedelec from the left hand side Tilt the battery outwards at an angle of roughly 45 as you do so as you did when you took it out of the holder Move the battery into the upright position until the lock ing mechanism engages If the key is still in the lock you will need to turn it clockwise and pull it out as otherwise the battery will not lock in place 6 Make sure that the battery is sec...

Страница 157: ...r 2 2 Pushing assistance You do not legally have to have insurance No age restriction applies for a Pedelec The regulations governing the use of cycle paths are the same as for normal bikes These regulations apply to you wherever you are in the European Union It is possible that different regulations exist in other countries also inside the EU in individual cases Before using your Pedelec abroad f...

Страница 158: ...herefore either turn the pedals more slowly low cadence with more effort or turn them more quickly high cadence with less effort The data provided is an example for the assistance function The data may vary depending on the model OTHER CENTRE MOTOR IMPULSE DRIVE GEAR CRANK REVOLU TIONS MIN SPEED KM H MOTOR SPEED CRANK REVOLU TIONS MIN SPEED KM H MOTOR SPEED 1 71 8 3 000 86 12 4 300 2 71 10 3 000 8...

Страница 159: ...ide in order to charge the battery in a warm room Carry handle LED display panel Grip the battery by the handle insert the key into the lock and turn it anticlockwise Unlocking the battery The battery is now unlocked and can be removed from the Pedelec by tilting it sideways In doing so hold on tight to the battery to prevent it from being dropped Tilt when removing You should now remove the key a...

Страница 160: ... battery is charged in five stages When charging of one stage is in progress the corresponding LED flashes Once the stage is fully charged this LED lights up continuously and the next LED now starts flashing After all five LEDs have gone out the battery is fully charged 5 If the LED of the charger flashes red permanent ly a charging fault has developed Take the battery out of the charger then put ...

Страница 161: ...e state and assistance The POWER button is located below the LEDs Press this button to switch the control panel on and off On Off button If the model features pushing assistance the switch for this will be on the underside of the control panel Button for pushing assistance 5 1 Operation 5 1 1 On Off button Press the POWER button to switch the control panel on and off After it has been switched on ...

Страница 162: ...s working with a medium level of effort The LED on the left of the display lights up when the lowest assist level ECO is activated and the assistance is working with a low level of effort If the assistance is switched off stand by only the charge state indicator LEDs remain lit You now receive no assistance at all from the motor 5 1 4 Battery charge state indicator The battery charge state indicat...

Страница 163: ...nsor on the chain stay max 5 mm clearance Speed sensor defective Have your specialist cycle shop check and if necessary repair it Cable connection defective Have your specialist cycle shop check and if necessary repair it No connection between motor unit and battery Connect the battery to the charger Use a different battery Have your specialist cycle shop check the control ca ble that runs from th...

Страница 164: ...ectrical assistance Impulse increasing pedal power and assistance reducing assistance assistance switched off The level of assistance you have selected With the POWER assist level the motor assists you by producing its maximum output which also con sumes the most energy With the SPORT assist lev el the motor produces slightly less power If you have selected ECO you receive the least amount of assi...

Страница 165: ... less rolling resistance This also increases the risk of a puncture Please consult your specialist cycle shop about this The distance you can travel also decreases if the brakes are rubbing Battery capacity The current battery capacity Chapter 7 4 2 Checking the battery capacity Topography You pedal harder when riding uphill This is de tected by the power sensor which then allows the motor to work...

Страница 166: ...bike for the first time or if you have not used it for a while You should run the battery all the way down to empty for the first three charging cycles This al lows the battery to reach its maximum capacity If you continuously run the battery to empty during normal operation this reduces its service life If you partially recharge the battery frequently dur ing normal operation this has a favourabl...

Страница 167: ...e state DISPLAY BATTERY CHARGE STATE 5 LEDs light up 100 80 4 LEDs light up 80 60 3 LEDs light up 60 40 2 LEDs light up 40 20 1 LED lights up 20 10 1 LED flashes 10 5 LEDs flash quickly 0 or overloaded 1st LED flashes quickly Charging fault All 5 LEDs flash quickly The battery is empty and is be ing switched off or is overloaded If the battery is overloaded it will switch back on after a short idl...

Страница 168: ...ace it Normal age ing and battery wear do not constitute a fault The service life of the battery depends on different factors The most important wear relevant factors are the number of charging operations and the age of the battery When you have fully charged and discharged your battery 1 100 times it will still have 60 of its initial capacity i e 6 6 Ah with a 11 Ah battery providing it has been ...

Страница 169: ... charger provided or a charger approved by us If a charging fault occurs the LED in the charger flashes red Take the battery briefly out of the charger then put it back in The charger tests the battery and cor rects any faults that may be present If the LED still flashes take the battery to your specialist cycle shop and have it checked If used incorrectly the device may be damaged or inflict inju...

Страница 170: ...en in operation It must be possible for the heat produced to dissi pate via the surrounding ventilation slots on the top and bottom 9 Cleaning Remove the battery before you clean your Pedelec We recommend you clean your Pedelec with a damp cloth a sponge or a brush You can obtain suitable cleaning agents and additional information from your specialist cycle shop Make sure when cleaning that water ...

Страница 171: ...nd freewheel Output 250 watts Maximum torque at chain ring 40 Nm Gross weight of electric drive battery control unit 7 8 kg 11 Ah battery Control via torque sensor and rota tional speed sensor in motor and speed sensor on rear wheel IMPULSE LI ION BATTERY Voltage 36 V Capacities 11 Ah Weight 2 85 kg ...

Страница 172: ...V User Manual Impulse Pedelec 23 ...

Страница 173: ...using your new Pedelec with Impulse drive Copyright 2011 Derby Cycle Werke GmbH Reproduction in whole or in part is not permitted without the consent of Derby Cycle Werke GmbH Subject to misprints errors and technical modifications ...

Страница 174: ...VI User Manual Groove Pedelec English Derby Cycle Werke GmbH 2011 ...

Страница 175: ...2 VI User Manual Groove Pedelec Battery and charger Battery lock 1 Battery 2 Battery lock 3 Motor unit 4 Control panel 5 Charger Motor unit Control panel 5 1 2 4 3 4 3 2 1 ...

Страница 176: ...subsequently explained in detail supplemented by illustrations and diagrams More detailed information on your Pedelec is provided in Chapter 12 Technical data The information in this User Manual specifically refers to your Pedelec only For general information on the bike technology that features in your Pedelec for example refer to the General User Manual Even if you can t wait to go for your firs...

Страница 177: ...l 11 5 3 Display of power assist mode 12 5 4 Battery charge state indicator 12 6 Assistance by the electric motor 13 6 1 Operating principle of assistance 13 6 2 Distance 13 6 3 Riding your Pedelec efficiently 14 7 Battery 14 7 1 Straightforward charging 14 7 2 High degree of safety due to battery management 14 7 3 Straightforward storage 14 7 4 Battery information system 15 7 5 Battery charge sta...

Страница 178: ...Groove Model designation Groove F8 Groove F3 Product description Kalkhoff BionX Model designation Image B27 Image B24 Year of manufacture 2011 comply with all of the relevant requirements of the Machinery Directive 2006 42 EC Furthermore the machine complies with all of the requirements of the Electromagnetic Compatibility Directive 2004 108 EC The following harmonized standards have been applied ...

Страница 179: ... Connect Lady C8 Connect Lady 8C Product description Kalkhoff Groove Model designation Groove F8 Groove F3 Product description Kalkhoff BionX Model designation Image BX27 Image BX24 Product description Kalkhoff Bosch Model designation Agattu B Year of manufacture 2012 comply with all of the relevant requirements of the Machinery Directive 2006 42 EC Furthermore the machine complies with all of the...

Страница 180: ...delec place the battery back into the holder in the pannier rack by reinserting it from behind Once you have inserted the battery turn the key clockwise and then remove it other wise the battery will not lock into position 6 Make sure that the battery is securely posi tioned and that the key is no longer in the lock 7 Press the round switch on the side of the bat tery housing The red LED inside it...

Страница 181: ...ally have to have a driving license unless you own a model with pushing assistance Chapter 2 2 Pushing assistance You do not legally have to have insurance No age restriction applies for a Pedelec The regulations governing the use of cycle paths are the same as for normal bikes These regulations apply to you wherever you are in the European Union It is possible that different regulations exist in ...

Страница 182: ... Quick start You can also remove the battery from the holder and charge it in the docking station This is recom mended if it is cold outside in order to charge the battery in a warm room Hold the battery by the recessed grip at the back of the battery and turn the key anticlockwise This unlocks the battery and you can now remove it by pulling it backwards out of the Pedelec In do ing so hold on ti...

Страница 183: ... on the battery to the right of the LEDs The greater the number of LEDs that light up the higher the charge state is LEDs on the battery 5 If the LED on the charger lights up green the battery is fully charged 6 To save power pull the charger plug out of the socket once the charging operation is complete You can also leave the charging cable plugged in once the charging operation is complete Howev...

Страница 184: ...on to switch the control panel on and off On Off button If the model features pushing assistance the switch for this will be on the underside of the control panel Button for pushing assistance 5 1 On Off button Press the POWER button to switch the control panel on and off After it has been switched on the system is always in the medium power assist mode SPORT 5 2 Switches for power assist level Yo...

Страница 185: ...evel ECO is activated and the assis tance is working only with a low level of effort 5 4 Battery charge state indicator The battery charge state indicator is located below the row of LED indicators that displays the power assist mode Battery charge state indicator If all three battery charge state indicator LEDs are lit the battery charge is between 100 and 65 If two LEDs are lit the battery charg...

Страница 186: ...al factors Ambient temperature If it is colder you will travel a shorter distance with the same battery charge To maximise the distance you can travel keep the battery in a heated room so that it is at room tem perature when you fit it on your Pedelec As the battery discharges when the motor is in use it generates enough heat to not lose too much of its power at low ambient temperatures Level of a...

Страница 187: ... Li Ion battery type for this application One of the main benefits of this type of battery is its low weight combined with a high capacity Li Ion batteries only weigh half as much as comparable nickel metal hydride or nick el cadmium batteries This means you carry less battery weight and more battery power 7 1 Straightforward charging There is no memory effect You can therefore fully recharge your...

Страница 188: ...re the battery inside your house or in a warm garage when the outside temperature is low In this case you should only fit the battery on your bike just before using it If you are transporting your Pedelec by car take the battery out of its holder and transport it separately The battery should ideally be stored for longer periods with a charge of between 50 and 75 at a temperature of 10 C Charging ...

Страница 189: ...f the battery According to the technical definition the battery is used if its capacity is only 60 in the new condition The battery of course also ages over time Even if you do not use your battery its capacity reduces In general the battery is expected to age at a rate of 5 per year Providing you can still cover the journey distances with the remaining battery capacity you can of course continue ...

Страница 190: ...first thing you must do before releasing the front wheel is to open the connection to the front wheel motor Undo the locking nut for the electrical connector which is located on the back of the fork Take the up per half of the connector in one hand and the lower half in the other and pull the two halves apart 1 Locking nut 2 Cable tie 1 2 The lower half of the connector and the power cable are fas...

Страница 191: ...e genuine battery Live parts may be exposed when you open covers or remove parts Connection points may also be live Maintenance or repairs on the device when it is open and connected to the power supply must only be carried out by the specialist cycle shop When carrying out adjustments and maintenance or when cleaning the Pedelec avoid crushing cables or damaging them with sharp edges If risk free...

Страница 192: ...ith planetary gear unit and freewheel Output 250 watts Maximum torque 35 Nm Weight of motor 2 88 kg Assist levels 70 150 250 watts Switch off speed 25 km h at all assist levels Control via speed sensor GROOVE LI ION BATTERY Voltage 36 V Capacities 9 Ah Watt hours 324 Wh Weight 2 4 kg ...

Страница 193: ...using your new Pedelec with Groove drive Copyright 2011 Derby Cycle Werke GmbH Reproduction in whole or in part is not permitted without the consent of Derby Cycle Werke GmbH Subject to misprints errors and technical modifications ...

Страница 194: ...BionX User Manual BIO_Anleitung_OEM_DERBY_ENGLISCH indd 1 13 05 11 18 25 ...

Страница 195: ...Groove Model designation Groove F8 Groove F3 Product description Kalkhoff BionX Model designation Image B27 Image B24 Year of manufacture 2011 comply with all of the relevant requirements of the Machinery Directive 2006 42 EC Furthermore the machine complies with all of the requirements of the Electromagnetic Compatibility Directive 2004 108 EC The following harmonized standards have been applied ...

Страница 196: ...an Classic Impulse Tasman Tour Impulse XXL Tasman City Impulse Tasman Tour Connect Lady C8 Connect Lady 8C Product description Kalkhoff Groove Model designation Groove F8 Groove F3 Product description Kalkhoff BionX Model designation Image B27 Image B24 Year of manufacture 2012 comply with all of the relevant requirements of the Machinery Directive 2006 42 EC Furthermore the machine complies with ...

Страница 197: ...and operating instructions from the manufacturer and follow the instructions if any prior to its first use 2 Familiarize yourself with your electric bicycle and the functions of the BionX system in a safe environment before participating in road traffic for the first time 3 Always wear a helmet when riding an electric bicycle for your own safety 4 Make sure that the tires have correct pressure bef...

Страница 198: ...Handling and Charging the Battery 7 Assist Mode Generate Mode 9 Operating the BionX Propulsion System 10 Programming the Basic Settings 12 Installing Removing the Rear Wheel 13 Maintenance and Care 14 Cleaning 15 Transporting an Electric Bicycle on a Car 15 Repair and Spare Parts 15 Troubleshooting 16 Warranty Information and Guarantee 17 BIO_Anleitung_OEM_DERBY_ENGLISCH indd 3 13 05 11 18 25 ...

Страница 199: ...k nom 250W nom 9Nm max 40Nm 4 7kg Brushless gearless Generate mode for energy recuperation Integrated torque sensor 3 Console Removable Illuminated LCD display with battery state of charge 4 assistance levels 4 generate levels Backlight controls Offers cycle computer functions speed odometer average speed total distance POWERED BY BIONX P O W E R E D B Y B I O N X POWERED BY BIONX P O W E R E D B ...

Страница 200: ...nsole by pushing the release lever on the console mount Slide the console out of the console mount 4 Brake switch A sensor integrated with the brake lever connected to the BionX console Upon activation assistance is shut off kill switch generate mode is activated Power Supply Power supply to recharge the LiMn battery Input voltage 100 240V Output voltage 26V Max charge current 3 45A Output 90W BIO...

Страница 201: ...he lock cylinder you will hear an audible click when the battery is properly inserted Removing the battery 1 Turn off the BionX propulsion system no illustration 2 Lightly press on the battery release arm insert the key and turn clockwise 3 The lock cylinder will protract freeing battery release arm no illustration 4 Remove the battery by opening release arm 5 Lift the battery from dock by sliding...

Страница 202: ...s where the temperatures can reach more than 45 C or fall below 10 C The battery should never be exposed to extreme temperature fluctuations or humidity and always protect the battery during storage from humidity to prevent corrosion on the connectors Never drop the battery and protect it from physical damage Damage may lead to short circuits and as a result cause overheating or ignition of the ba...

Страница 203: ...epleted to the level where there is risk it could fall into deep discharge the battery will signal that a recharge is needed by beeping Power Supply The delivered power supply is suitable for the voltage ranges 110 115V or 220 230V There is no need to manually set the voltage range Charging procedure Connect power supply and battery by inserting the charge connector into the touch port the system ...

Страница 204: ...or and recharges the battery When going downhill you can regulate your speed by varying the generate level This generate function provides a certain braking effect however it does not replace legally required brakes If either one of the two brake levers depending on bike model is pulled the drive system automatically enters generate mode The range can therefore be extended up to 15 depending on th...

Страница 205: ...ly push The battery will beep 5 times After 10 minutes of no operation the system turns off automatically Select assistance generate level Push key for more less assist see bar fields 1 4 above display A From mode push key to enter continuous generate mode 9 9 2 1 4 3 7 5 8 6 1 Power 2 Key 3 Key 4 Cycle 5 State of charge indicator 6 bicycle mode 7 Speedometer 8 Trip distance odometer chronometer a...

Страница 206: ...4 seconds Select the cycling computer functions Briefly push the key to change between Trip Distance DIST Odometer ODO Chronometer CHRONO Average Speed AVSPD To reset cycle computer functions Hold the key for a few seconds to reset the distance chronometer and average speed values to zero 4s BIO_Anleitung_OEM_DERBY_ENGLISCH indd 11 13 05 11 18 25 ...

Страница 207: ...the same manner until the desired program is displayed Code Description 2001 Select km h or mph 2002 Regeneration brake output for magnetic switch 0 40 ideally 30 40 2005 Tire circumference millimeters 2009 Flip Display Plus Minus 0 power left 1 power right Code 2001 Code 2002 Select unit km h or mph Select with or and confirm with Default value 30 adapt with and Confirm with Code 2005 Code 2009 S...

Страница 208: ...e Do not pull the brake lever with the brake disc on the rear wheel removed from the caliper Insertion of the wheel can be difficult or impossible as the brake pads will prevent brake disc from sliding in place POWERED BY BIONX P O W E R E D B Y B I O N X POWERED BY BIONX P O W E R E D B Y B I O N X POWERED BY BIONX P O W E R E D B Y B I O N X POWERED BY BIONX P O W E R E D B Y B I O N X POWERED B...

Страница 209: ...ve the spoke tension of the rear wheel and the torque of all screws checked by your qualified dealer after the first 200km In order to ensure extended use of the propulsion system all plug in contacts of the system should be checked every two to three months and cleaned with a soft and dry brush if necessary It must be ensured that no dirt or humidity penetrates the battery docking station when th...

Страница 210: ...ly sure that the bike rack on your car is suitable for the increased weight and the unique frame style of your electric bicycle A rack that is not suitable can be damaged or even break during the transport of the electic bicycle The electric bicycle can be damaged by an unsuitable bike rack For transportation of the electric bicycle on a bike rack always remove the battery and the console Repair a...

Страница 211: ...g it off and then on again If that does not solve the problem you can temporarily bypass it by removing the plug in connection from the console to the brake switch The motor is not as powerful after a repair or service Tighten the nuts of the rear axle with the specified torque 40Nm 30lb ft If the problem is not solved please contact your dealer The battery state of charge display on the console d...

Страница 212: ...omponents and or to replace such components at BionX discretion Service Replacement Unit 7 Warranty repairs have to be exclusively performed by BionX Any component to be repaired under the framework of this warranty has to be transferred to BionX at the client s own expenses and risks and after the completion of such repair has to be picked up at BionX or it has to be shipped at the request of the...

Страница 213: ...es wetness and humidity and or if the battery suffers damages due to non compliance with the special instructions set forth in the chapter Handling and Charging of the Battery f The model serial or product number on BionX product has been changed deleted blurred or removed The seal serial number sticker on the battery housing has been broken or obviously manipulated g Use of the battery in systems...

Страница 214: ... BionX BionX Design and powered by BionX are trademarks of BionX International Corporation 2011 BionX International Corporation All Rights Reserved BIO_Anleitung_OEM_DERBY_ENGLISCH indd 19 13 05 11 18 25 ...

Страница 215: ...bionxinternational com bionxinternational com Your dealer BIO_Anleitung_OEM_DERBY_ENGLISCH indd 20 13 05 11 18 25 ...

Страница 216: ...y Pack Charger 1 270 020 900 0 275 007 000 0 275 007 001 1 270 020 500 1 270 020 501 1 270 020 502 1 270 020 503 0 275 007 900 de Originalbetriebsanleitung en Original instructions fr Notice originale es Manual original it Istruzioni originali nl Oorspronkelijke gebruiksaanwijzing da Original brugsanvisning sv Bruksanvisning i original no Original driftsinstruks fi Alkuperäiset ohjeet OBJ_BUCH 140...

Страница 217: ... Connect Lady C8 Connect Lady 8C Product description Kalkhoff Groove Model designation Groove F8 Groove F3 Product description Kalkhoff BionX Model designation Image BX27 Image BX24 Product description Kalkhoff Bosch Model designation Agattu B Year of manufacture 2012 comply with all of the relevant requirements of the Machinery Directive 2006 42 EC Furthermore the machine complies with all of the...

Страница 218: ...harger Página 71 Italiano HMI Drive Unit Pagina 75 Battery Pack Pagina 83 Charger Pagina 88 Nederlands HMI Drive Unit Pagina 92 Battery Pack Pagina 100 Charger Pagina 105 Dansk HMI Drive Unit Side 109 Battery Pack Side 116 Charger Side 121 Svenska HMI Drive Unit Sida 125 Battery Pack Sida 132 Charger Sida 136 Norsk HMI Drive Unit Side 140 Battery Pack Side 147 Charger Side 151 Suomi HMI Drive Unit...
Страница 219: ...m o d e li ht i n f o r e s e t m o d e light i n f o r e s e t mode l i g h t i n f o r e s e t mode l i g h t i n f o r e s e t mode l i g h t e b a 6 7 8 c d f 5 9 1 2 10 4 3 2 1 A B OBJ_BUCH 1407 001 book Page 3 Monday January 17 2011 2 58 PM ...

Страница 220: ...0 276 001 XXX 17 1 11 Bosch ebike Systems 4 FA ST SL O W 11 17 18 21 19 20 16 15 16 15 12 14 13 14 13 0 275 007 900 OBJ_BUCH 1407 001 book Page 4 Monday January 17 2011 2 58 PM ...

Страница 221: ... 5 Bosch ebike Systems 0 276 001 XXX 17 1 11 18 15 16 18 20 19 17 16 11 12 15 17 16 15 19 D C OBJ_BUCH 1407 001 book Page 5 Monday January 17 2011 4 45 PM ...

Страница 222: ...0 276 001 XXX 17 1 11 Bosch ebike Systems 6 F A S T S L O W 230 25 26 22 23 22 24 21 27 28 29 OBJ_BUCH 1407 001 book Page 6 Monday January 17 2011 2 58 PM ...

Страница 223: ... 7 Bosch ebike Systems 0 276 001 XXX 17 1 11 F A S T S L O W 230 13 29 30 18 30 12 25 23 24 F E OBJ_BUCH 1407 001 book Page 7 Monday January 17 2011 2 58 PM ...

Страница 224: ...c am eBike beginnen es mit dem Auto oder dem Flugzeug transportieren oder es aufbewahren Bei unbeabsichtigtem Betäti gen des Ein Ausschalters besteht Verlet zungsgefahr f Verwenden Sie nur original Bosch Batte rien die vom Hersteller für Ihr eBike zuge lassen wurden Der Gebrauch anderer Batte rien kann zu Verletzungen und Brandgefahr führen Bei Gebrauch anderer Batterien übernimmt Bosch keine Haft...

Страница 225: ...inn und ziehen ihn aus der Halterung 2 f Entnehmen Sie den Bediencomputer bei ab gestelltem eBike damit der Antrieb nicht durch unberechtigte Dritte benutzt werden kann Ohne Bediencomputer kann der An trieb nicht eingeschaltet werden Antriebseinheit Drive Unit Sachnummer 0 275 007 000 0 275 007 001 Nenndauerleistung W 250 Drehmoment am Abtrieb max Nm 50 Nennspannung V 36 Betriebstemperatur C 5 40 ...

Страница 226: ...en Setzen Sie die Batterie in die Halterung und schalten Sie sie an der Ein Aus Taste ein siehe Betriebsanleitung der Batterie Hinweis Die Pedale des eBikes dürfen beim Ein schalten der Batterie nicht belastet sein weil sonst die Leistung des Antriebs eingeschränkt wird Wurde die Batterie versehentlich mit belasteten Pedalen eingeschaltet dann schalten Sie sie aus und ohne Belastung erneut ein Mit...

Страница 227: ...ann Maximal drei Unterstützungsstufen sowie das Abschalten der Unterstützung sind möglich Zum Erhöhen der Unterstützungsstufe drücken Sie die Taste 6 so oft bis die gewünschte Stufe in der Anzeige c erscheint Zum Senken der Unterstützungsstufe drücken Sie die Taste 7 so oft bis die gewünschte Stufe in der Anzeige c erscheint Bei Unterstützungsstufe 0 wird der Antrieb abgeschaltet Das eBike kann wi...

Страница 228: ...o lange bis die Anzeige auf Null gesetzt ist Anzeige Fehlercode Die Komponenten des eBike Antriebs werden ständig automatisch überprüft Wird ein Fehler festgestellt erscheint der entsprechende Feh lercode in der Anzeige e Abhängig von der Art des Fehlers wird der An trieb gegebenenfalls automatisch abgeschaltet Die Weiterfahrt ohne Unterstützung durch den Antrieb ist aber jederzeit möglich Vor wei...

Страница 229: ... des Schaltvorganges das Treten kurz zu unterbrechen Dadurch wird das Schal ten erleichtert und die Abnutzung des Antriebs stranges reduziert Durch die Wahl des richtigen Ganges können Sie bei gleichem Krafteinsatz die Geschwindigkeit und die Reichweite erhöhen 103 Verbindungsproblem der Be leuchtung Anschlüsse und Verbindungen überprüfen lassen 104 Verbindungsproblem des Be diencomputers Anschlüs...

Страница 230: ...r Schaltung umso weniger Energie wird der eBike Antrieb ver brauchen und umso größer wird die Reich weite einer Batterie Ladung sein Umso höher der Unterstützungsgrad Unter stützungsmodus und stufe bei ansonsten gleichen Bedingungen gewählt wird umso geringer ist die Reichweite Pfleglicher Umgang mit dem eBike Beachten Sie die Betriebs und Lagertemperatu ren der eBike Komponenten Schützen Sie An t...

Страница 231: ...ende nationale Vorschriften Bei Fragen zum Transport der Batterien wenden Sie sich an einen autorisierten Fahrradhändler Entsorgung Antriebseinheit Bediencomputer Batterie Ge schwindigkeitssensor Zubehör und Verpackun gen sollen einer umweltgerechten Wiederver wertung zugeführt werden Werfen Sie eBikes und ihre Komponenten nicht in den Hausmüll Nur für EU Länder Gemäß der europäischen Richtlinie 2...

Страница 232: ...schluss zwischen den Batteriekon takten kann Verbrennungen oder Feuer zur Folge haben Bei in diesem Zusammenhang entstandenen Kurzschlussschäden entfällt jeglicher Anspruch auf Garantie durch Bosch f Bei falscher Anwendung kann Flüssigkeit aus der Batterie austreten Vermeiden Sie den Kontakt damit Bei zufälligem Kontakt mit Wasser abspülen Wenn die Flüssigkeit in die Augen kommt nehmen Sie zusätzl...

Страница 233: ...Aus Taste 15 Schlüssel des Batterieschlosses 16 Batterieschloss 17 Obere Halterung der Standard Batterie 18 Standard Batterie 19 Untere Halterung der Standard Batterie 20 Tragegurt 21 Ladegerät Technische Daten Li Ionen Batterie Battery Pack Sachnummer Standard Batterie schwarz Standard Batterie weiß Standard Batterie silber Gepäckträger Batterie 1 270 020 500 1 270 020 501 1 270 020 502 1 270 020...

Страница 234: ...r der Batterie erreicht Ladezustandsanzeige Die fünf grünen LEDs der Ladezustandsanzeige 13 zeigen bei eingeschalteter Batterie den Lade zustand der Batterie an Dabei entspricht jede LED etwa 20 Kapazität Bei vollständig geladener Batterie leuchten alle fünf LEDs Der Ladezustand der eingeschalteten Batterie wird außerdem im Bediencomputer angezeigt Lesen und beachten Sie dazu die Betriebsanlei tun...

Страница 235: ...Anzeige 13 erlöschen Der eBike Antrieb wird damit eben falls ausgeschaltet Wird etwa 10 min lang keine Leistung des An triebs abgerufen z B weil das eBike steht schaltet sich die Batterie aus Energiespargrün den automatisch ab Die Batterie ist durch die Electronic Cell Pro tection ECP gegen Tiefentladung Überla dung Überhitzung und Kurzschluss geschützt Bei Gefährdung schaltet sich die Batterie du...

Страница 236: ...händler kön nen Sie über die Stützpunktsuche im Serviceteil der Internetseite www bosch ebike com finden Transport Die Batterien unterliegen den Anforderungen des Gefahrgutrechts Die Batterien können durch den Benutzer ohne weitere Auflagen auf der Straße transportiert werden Beim Versand durch Dritte z B Lufttransport oder Spedition sind besondere Anforderungen an Verpackung und Kennzeichnung zu ...

Страница 237: ... auftretenden Erwär mung des Ladegerätes besteht Brandgefahr f Bei Beschädigung und unsachgemäßem Ge brauch der Batterie können Dämpfe austre ten Führen Sie Frischluft zu und suchen Sie bei Beschwerden einen Arzt auf Die Dämpfe können die Atemwege reizen f Beaufsichtigen Sie Kinder Damit wird si chergestellt dass Kinder nicht mit dem Lade gerät spielen f Kinder und Personen die aufgrund ihrer phys...

Страница 238: ...äte können auch an 220 V betrieben werden Stecken Sie dann den Gerätestecker 25 des Netz kabels in die Gerätebuchse 23 am Ladegerät Schließen Sie das Netzkabel an das Stromnetz an Die Betriebsanzeige 28 am Ladegerät leuch tet auf f Verbinden Sie das Ladegerät erst mit dem Stromnetz wenn am Netzspannungsschal ter 24 die richtige Netzspannung eingestellt ist Das Ladegerät kann sonst beschädigt werde...

Страница 239: ...dung Die blinkende LED zeigt die Aufladung der nächsten 20 an Die Batterie ist vollständig geladen wenn alle fünf LEDs der Anzeige 13 dauerhaft leuchten Der Ladevorgang wird automatisch unterbrochen Trennen Sie das Ladegerät vom Stromnetz und die Batterie vom Ladegerät Beim Trennen der Batterie vom Ladegerät wird die Batterie automatisch abgeschaltet Sie können die Batterie jetzt in das eBike ein ...

Страница 240: ...n Fahrradhändler Den nächsten Stützpunkt Fahrradhändler kön nen Sie über die Stützpunktsuche im Serviceteil der Internetseite www bosch ebike com finden Entsorgung Ladegeräte Zubehör und Verpackungen sollen einer umweltgerechten Wiederverwertung zuge führt werden Werfen Sie Ladegeräte nicht in den Hausmüll Nur für EU Länder Gemäß der Europäischen Richtlinie 2002 96 EG über Elektro und Elektronik A...

Страница 241: ...when accidentally actuating the On Off switch f Use only original Bosch batteries approved for your eBike by the manufacturer Using other batteries can lead to injuries and pose a fire hazard When using other batteries Bosch shall not assume any liability and war ranty f Please read and observe the safety warn ings and instructions enclosed in the oper ating instructions of the battery as well as ...

Страница 242: ...he speed sensor 9 is not properly connected the speed indication a will fail and the eBike drive will op erate in emergency mode In this case loosen the screw of the spoke mag net 10 and fasten the spoke magnet to the spoke in such a manner that it runs past the speed sensor with the lowest clearance possi ble When the speed is still not being indicated in the speed indication a after this please ...

Страница 243: ...perating instructions of the battery When no power output of the drive is requested for approx 10 minutes e g because the eBike is parked the battery automatically switches off to save energy Indications and Settings of the Drive HMI Note Indications and settings on the drive HMI are only possible when the eBike battery is switched on The drive HMI does not have an own power supply Charge Conditio...

Страница 244: ...ing press the light but ton 5 again the lighting indicator b goes out Speed and Distance Indicators Note Depending on country specific version distance and speed can either be displayed in km and km h or in mi and mph Adjust ment of the drive HMI and the selection of the display possibilities for the km and mile version are identical The speed indication a always displays the cur rent speed The fo...

Страница 245: ... drive unit checked 101 Connection problem of the drive unit Have connections and contacts checked 102 Error of the speed sensor Have the speed sensor checked 103 Connection problem of the lighting system Have connections and contacts checked 104 Connection problem of the drive HMI Have connections and contacts checked 105 Temperature of the drive unit too high above 40 C Allow the drive unit to c...

Страница 246: ...raffic Try out the different assistance modes and as sistance levels As soon as you feel safe you can participate in traffic with the eBike as with any other bicycle Test the operating range of your eBike under dif ferent conditions before planning longer and more challenging rides Influences on the Operating Range With a fully charged battery and an efficient rid ing manner an operating range of ...

Страница 247: ...abelling must be observed For preparation of the item being shipped consulting an expert for hazardous ma terial is absolutely required Use the batteries only when the housing is un damaged Tape or mask off open contacts and pack up the battery in such a manner that it can not move around in the packaging Please also observe possibly more detailed national regula tions In case of questions concern...

Страница 248: ...accidentally occurs flush with water If liquid contacts eyes additionally seek medical help Liquid ejected from the battery may cause skin irritations or burns f Vapours can escape in case of damage and improper use of the battery Provide for fresh air and seek medical attention in case of complaints The vapours can irritate the respiratory system f Charge the battery only with chargers recom mend...

Страница 249: ...bserve the operating instructions of the battery charger The battery can be charged any time without re ducing the battery life Interrupting the charging procedure does not cause damage to the bat tery The battery is equipped with a temperature control indicator which enables charging only within a temperature range between 0 C and 40 C This provides for a long life of the battery Charge control I...

Страница 250: ...t of the holder 11 Operation Initial Operation f Use only original Bosch batteries approved for your eBike by the manufacturer Using other batteries can lead to injuries and pose a fire hazard When using other batteries Bosch shall not assume any liability and warranty Switching On and Off Before switching on the battery check that the lock 16 is locked Note When switching on the battery the pedal...

Страница 251: ...have the battery con nected permanently to the charger Storage Conditions Store the battery in a dry well ventilated loca tion Protect the battery against moisture and water Under unfavourable weather conditions it is recommended e g to remove the battery from the eBike and store it in an enclosed loca tion until being used again The battery can be stored at temperatures be tween 10 C and 60 C For...

Страница 252: ...observe possibly more detailed national regula tions In case of questions concerning transport of the batteries please refer to an authorised bicycle dealer Disposal The batteries accessories and packaging should be sorted for environmental friendly recycling Do not dispose of batteries into household waste Only for EC countries According to the European Guide line 2002 96 EC electrical devic es t...

Страница 253: ...e children This will ensure that children do not play with the charger f Children or persons that owing to their physical sensory or mental limitations or to their lack of experience or knowledge are not capable of securely operating the charg er may only use this charger under supervi sion or after having been instructed by a responsible person Otherwise there is dan ger of operating errors and i...

Страница 254: ... 220 V Then insert the charger plug 25 of the power cord into the charger socket 23 of the charger Connect the mains cable to the mains supply The operation indicator 28 on the charger lights up f Do not connect the charger to the mains supply until after the correct mains voltage has been set on the mains voltage selector switch 24 Otherwise the charger can be come damaged Switch the battery off ...

Страница 255: ... flashing LED indicates the charging of the next 20 The battery is completely charged when all five LEDs of indicator 13 light up continuously The charge procedure is automatically ended Disconnect the charger from the mains supply and the battery from the charger When disconnecting the battery from the charg er the battery is automatically switched off The battery can now be inserted into the eBi...

Страница 256: ...next service support bicycle dealer please refer to service support search in the Service Section of the Internet page www bosch ebike com Disposal Battery chargers accessories and packaging should be sorted for environmental friendly recycling Do not dispose of battery chargers into house hold waste Only for EC countries According to the European Guide line 2002 96 EG for Waste Electri cal and El...

Страница 257: ... vélo électrique avant de le transporter en voiture ou en avion ou de le stocker Appuyer par mégarde sur l in terrupteur Marche Arrêt peut provoquer des blessures f N utilisez que les batteries d origine Bosch autorisées par le fabricant pour votre vélo électrique L utilisation de toute autre batterie peut entraîner des blessures et un incendie Bosch décline toute responsabilité et garantie dans l...

Страница 258: ... l ordinateur de commande lorsque le vélo électrique est garé pour éviter que des tiers non autorisés n utilisent l entraî nement Sans ordinateur de commande il n est pas possible de mettre en marche l en traînement Unité d entraîne ment Drive Unit N d article 0 275 007 000 0 275 007 001 Puissance perma nente nominale W 250 Couple max de l entraînement Nm 50 Tension nominale V 36 Température de fo...

Страница 259: ...ise en marche sinon la puissance de l entraînement est réduite Si la batterie est mise en marche par mégarde quand les pédales sont chargées éteignez la et remettez la en marche sans charge L écran de l ordinateur de commande est mis en marche en même temps que la batterie L ordi nateur de commande affiche l état de charge de la batterie ainsi que les réglages de l unité d en traînement L entraîne...

Страница 260: ...enter le niveau d assistance appuyez plusieurs fois sur la touche 6 jusqu à ce que le niveau souhaité apparaisse sur l affichage c Pour diminuer le niveau d assistance appuyez plusieurs fois sur la touche 7 jusqu à ce que le niveau souhaité apparaisse sur l affichage c En niveau d assistance 0 l entraînement est arrêté Le vélo électrique peut être utilisé com me un vélo normal en pédalant Allumer ...

Страница 261: ...reur Le éléments de l entraînement du vélo électri que sont contrôlés automatiquement en perma nence Si une erreur est détectée le code d er reur correspondant apparaît sur l affichage e En fonction du type d erreur l entraînement est éventuellement automatiquement arrêté Il est cependant à tout temps possible de continuer à rouler sans être assisté par l entraînement Il est recommandé de faire co...

Страница 262: ...itesse Ceci faci lite le changement de vitesse et réduit l usure de l arbre d entraînement En choisissant la vitesse appropriée vous pou vez augmenter la vitesse et la portée en appli quant la même force 103 Problème de connexion de l éclairage Faire contrôler les raccords et connexions 104 Problème de connexion de l ordinateur de commande Faire contrôler les raccords et connexions 105 Température...

Страница 263: ...ale de la vitesse plus l énergie consommée par l entraînement sera faible et plus grande sera la portée d une charge de batterie Plus le degré d assistance sélectionné est éle vé mode et niveau d assistance dans des conditions constantes moins grande sera la portée Maniement soigneux du vélo électrique Respectez les températures de fonctionnement et de stockage des éléments du vélo électrique Prot...

Страница 264: ...s nationales éven tuellement en vigueur Pour toute question concernant le transport des batteries adressez vous à un vélociste autorisé Elimination des déchets L unité d entraînement l ordinateur de com mande la batterie le capteur de vitesse ainsi que leurs accessoires et emballages doivent pouvoir suivre chacun une voie de recyclage appropriée Ne jetez pas les vélos électriques et leurs élé ment...

Страница 265: ...ne à une autre Un court circuit entre les contacts de batterie peut provoquer des brûlures ou un incendie La garantie de Bosch est annulée dans en cas de dommages provoqués par un court circuit survenant dans ce contexte f En cas d une utilisation incorrecte du li quide pourrait s écouler de la batterie Evi tez tout contact En cas de contact acciden tel nettoyez à l eau Si le liquide entre en cont...

Страница 266: ...e de batterie 16 Serrure de batterie 17 Fixation supérieure de la batterie standard 18 Batterie standard 19 Fixation inférieure de la batterie standard 20 Sangle 21 Chargeur Caractéristiques techniques Batterie à ions lithium Battery Pack N d article Batterie standard noir Batterie standard blanche Batterie standard argentée Batterie de porte bagages 1 270 020 500 1 270 020 501 1 270 020 502 1 270...

Страница 267: ...ne longue durée de vie de la batterie Voyant lumineux indiquant l état de charge Les cinq LED vertes du voyant lumineux 13 indi quent l état de charge de la batterie lorsque la batterie est mise en marche Chaque LED correspond à environ 20 de ca pacité Si la batterie est complètement déchar gée les cinq LED s allument L état de charge de la batterie mise en marche est également indiqué par l ordin...

Страница 268: ...o électrique est en même temps également éteint Si l entraînement n est pas sollicité pendant 10 min par ex parce que le vélo électrique est arrêté la batterie s éteint automatiquement pour économiser l énergie La batterie est protégée par la Electronic Cell Protection ECP contre décharge profonde surcharge surchauffe et court circuit En cas de danger la batterie s éteint automatiquement grâce à u...

Страница 269: ...e com Transport Les batteries sont soumises aux règlements de transport des matières dangereuses L utilisa teur peut transporter les batteries sur la route sans conditions supplémentaires Lors d une expédition par tiers par ex trans port aérien ou entreprise de transport les exi gences spécifique à l emballage et au marquage doivent être respectées Dans un tel cas lors de la préparation de l envoi...

Страница 270: ...gmente le risque d in cendie f En cas d endommagement et d utilisation non conforme de la batterie des vapeurs peuvent s échapper Ventilez le lieu de tra vail et en cas de malaises consultez un mé decin Les vapeurs peuvent irriter les voies respiratoires f Ne laissez pas les enfants sans surveillance Veillez à ce que les enfants ne jouent pas avec le chargeur f Les enfants et les personnes souffra...

Страница 271: ...vent également fonction ner sous 220 V Introduisez ensuite la fiche de l appareil 25 du câble de secteur dans la prise de l appareil 23 Branchez le câble de secteur sur le réseau d ali mentation électrique Le voyant de fonctionne ment 28 du chargeur s allume f Ne raccordez le chargeur au réseau électri que que si la tension de secteur correcte et réglée sur le commutateur 24 Sinon le chargeur pour...

Страница 272: ...rie est complètement chargée quand les cinq LED du voyant lumineux 13 sont allumées en permanence Le processus de charge est automatiquement interrompu Déconnectez le chargeur du réseau électrique et la batterie du chargeur Lorsque la batterie est déconnectée du char geur elle est automatiquement éteinte Vous pouvez maintenant monter la batterie dans le vélo électrique Défaut Causes et remèdes Mod...

Страница 273: ...e le plus pro che à l aide de la recherche service vélociste sur notre site internet www bosch ebike com Elimination des déchets Les chargeurs ainsi que leurs accessoires et em ballages doivent pouvoir suivre chacun une voie de recyclage appropriée Ne jetez pas les chargeurs avec les ordures ménagères Seulement pour les pays de l Union Européenne Conformément à la directive euro péenne 2002 96 CE ...

Страница 274: ... transportarla en el coche o avión o al guardarla En caso contrario podría accidentarse al accionar for tuitamente el interruptor de conexión desco nexión f Únicamente utilice baterías originales Bosch homologadas por el fabricante de su eBike El uso de otro tipo de baterías puede acarrear lesiones e incluso un incendio Si se aplican baterías de otro tipo Bosch declina cualquier responsabilidad y ...

Страница 275: ...mprobación del captador de veloci dad ver figura B El captador de velocidad 9 y el imán de fijación a los radios 10 deberán montarse de forma que éste se encuentre a una distancia máxima de 17 mm al quedar encarado con el captador de velocidad Observación Si la separación entre el captador de velocidad 9 y el imán 10 fuese excesiva o si el captador de velocidad 9 no estuviese correcta Unidad motri...

Страница 276: ...to de co menzar a pedalear El grado de asistencia de pende de los ajustes realizados en su ordenador de control En el momento de dejar de pedalear o al alcan zar una velocidad de 25 km h deja de activarse el accionamiento de la eBike El accionamiento vuelve a reactivarse automáticamente al volver a pedalear o si la velocidad es inferior a 25 km h Para desconectar el accionamiento desconecte la bat...

Страница 277: ... en el indicador c En el nivel de asistencia 0 se desconecta el ac cionamiento La eBike solamente puede despla zarse entonces pedaleando como en una bicicle ta convencional Conexión desconexión de la iluminación Según las prescripciones vigentes en el respec tivo país existen dos formas de iluminación Con el ordenador de control pueden conec tarse y desconectarse simultáneamente la luz delantera y...

Страница 278: ...ador de código de fallos Los componentes del accionamiento de la eBike son permanentemente controlados de forma automática En caso de detectarse un fallo apa rece el respectivo código de fallos en el indica dor e Según el tipo de fallo puede que se desactive automáticamente el accionamiento Sin embar go es posible continuar la marcha en todo mo mento sin recurrir al accionamiento Antes de volver a...

Страница 279: ...de efectuar un cambio de mar cha Ello no sólo facilita el cambio de marcha sino que también reduce el desgaste del meca nismo de accionamiento Seleccionando el cambio de marcha correcto Ud puede aumentar la velocidad y el alcance aplicando la misma fuerza muscular 103 Problema de conexión en la iluminación Deje verificar las conexiones y las uniones 104 Problema de conexión del or denador de contr...

Страница 280: ...tima el cambio de marchas tanto menor será la energía consumida por el acciona miento de la eBike y tanto mayor la autono mía con un carga de la batería Cuanto mayor sea el grado de asistencia modo y nivel de asistencia manteniendo iguales las demás condiciones tanto menor será la autonomía obtenida Trato cuidadoso de la eBike Tenga en cuenta las temperaturas de servicio y de almacenaje de los com...

Страница 281: ...ripcio nes adicionales que pudieran existir al respecto en su país En todas las consultas referentes al transporte de las baterías diríjase a una tienda de bicicletas autorizada Eliminación La unidad motriz el ordenador de control la ba tería el captador de velocidad los accesorios y embalajes deberán someterse a un proceso de recuperación que respete el medio ambiente No arroje las eBike ni sus c...

Страница 282: ...s El cortocircuito de los contactos de la batería puede causar que maduras o un incendio En los daños deriva dos de un cortocircuito por los motivos ante dichos Bosch anula cualquier derecho a garantía f La utilización inadecuada de la batería pue de provocar fugas de líquido Evite el con tacto con él En caso de un contacto acci dental enjuagar el área afectada con abundante agua Si ha penetrado l...

Страница 283: ...cerradura de la batería 16 Cerradura de la batería 17 Soporte superior de la batería estándar 18 Batería estándar 19 Soporte inferior de la batería estándar 20 Correa de transporte 21 Cargador Datos técnicos Batería de Iones de Litio Battery Pack Nº de artículo Batería estándar negra Batería estándar blanca Batería estándar plateada Batería para portaequipajes 1 270 020 500 1 270 020 501 1 270 020...

Страница 284: ...consigue una eleva da vida útil de la batería Indicador de estado de carga El nivel de carga de la batería se señaliza me diante los cinco LED verdes del indicador de carga 13 Cada uno de los LED corresponde por lo tanto a una capacidad aprox de 20 Estando comple tamente cargada la batería se encienden los cinco LED El nivel de carga de la batería conectada se muestra además en el ordenador de con...

Страница 285: ...dad motriz y del orde nador de control Para desconectar la batería pulse nuevamente la tecla de conexión desconexión 14 Los LED de la pantalla 13 se apagan Con ello se desco necta asimismo el accionamiento de la eBike Si en el transcurso de 10 min el accionamiento sigue inactivo p ej al estar detenida la eBike la batería se desconecta automáticamente con el fin de ahorrar energía La batería va pro...

Страница 286: ...e El taller de bicicletas autorizado más próximo puede Ud localizarlo buscándolo en el área de servicio previsto para tal fin en la página web www bosch ebike com Transporte Las baterías están sujetas a los requerimientos fi jados en la legislación sobre mercancías peligro sas Las baterías pueden ser transportadas por carretera por el usuario sin más imposiciones En caso de un envío por terceros p...

Страница 287: ...no inflamable Puesto que el car gador se calienta durante el proceso de car ga existe un peligro de incendio f Si la batería se daña o usa de forma inapro piada puede que ésta emane vapores Ven tile con aire fresco el recinto y acuda a un médico si nota alguna molestia Los vapores pueden irritar las vías respiratorias f Vigile a los niños Con ello se evita que los ni ños jueguen con el cargador f ...

Страница 288: ...ti cas del cargador Los cargadores para 230 V pueden funcionar también a 220 V Introduzca entonces el enchufe 25 del cable de red en el conector hembra 23 del cargador Conecte el cable a la red El indicador de opera ción 28 del cargador se enciende f Únicamente conecte el cargador a la red tras haber ajustado la tensión de red co rrecta en el selector de tensión 24 En caso contrario podría dañarse...

Страница 289: ...iente La batería se encuentra completamente cargada al encenderse permanentemente los cinco LED del indicador 13 El proceso de carga es inte rrumpido automáticamente Desconecte el cargador de la red y la batería del cargador Al desconectar del cargador la batería ésta se desconecta automáticamente Acto seguido puede Ud montar la batería en la eBike Fallos causas y soluciones Modo de carga FAST SLO...

Страница 290: ...l taller de bicicletas autorizado más próximo puede Ud localizarlo buscándolo en el área de servicio previsto para tal fin en la página web www bosch ebike com Eliminación Los cargadores accesorios y embalajes deberán someterse a un proceso de recuperación que respete el medio ambiente No arroje los cargadores a la basura Sólo para los países de la UE Conforme a la Directiva Europea 2002 96 CE sob...

Страница 291: ...montaggio manu tenzione ecc alla eBike prima di traspor tarla con l auto o l aereo oppure prima di conservarla In caso di azionamento acciden tale dell interruttore di accensione spegni mento esiste pericolo di lesioni f Utilizzare esclusivamente batterie originali Bosch che sono state omologate dal produt tore per l eBike L uso di batterie diverse può causare lesioni e pericolo di incendio In cas...

Страница 292: ...nsore di velocità 9 ed il relativo magnete per raggi 10 devono essere montati in modo tale che durante un giro della ruota il magnete per raggi si muova davanti al sensore di velocità ad una di stanza massima di 17 mm Nota bene Se la distanza tra il sensore di velo cità 9 ed il magnete per raggi 10 è troppo grande oppure se il sensore di velocità 9 non è collegato correttamente non avviene alcuna ...

Страница 293: ...Non appena si smette di pedalare oppure non appena viene raggiunta una velocità di 25 km h l assistenza tramite l azionamento eBike viene disattivata L azionamento viene attivato di nuo vo automaticamente non appena si ricomincia a pedalare e la velocità è inferiore a 25 km h Per disattivare l azionamento disinserire la bat teria al tasto di accensione spegnimento vedi istruzioni per l uso della b...

Страница 294: ... desiderato Nel livello di assistenza 0 l azionamento viene disattivato L eBike può essere mossa come una bicicletta normale semplicemente pedalando Accensione spegnimento dell illuminazione A seconda delle norme specifiche del paese di impiego sono possibili due tipi di illuminazione Tramite il computer di controllo possono es sere accese e spente contemporaneamente la luce anteriore la luce post...

Страница 295: ...ento dell eBike ven gono costantemente controllati automaticamen te Se viene individuato un errore compare nella visualizzazione e il relativo codice di errore In funzione del tipo di errore l azionamento vie ne eventualmente disattivato automaticamente Il proseguimento della corsa senza assistenza tramite l azionamento è tuttavia possibile in ogni momento Prima di ulteriori corse l eBike dovrebbe...

Страница 296: ...o impiego di forza aumentare la velocità e l autonomia Prime corse di prova Si consiglia di effettuare le prime esperienze con l eBike lontano da strade con molto traffico Provare differenti modi di assistenza e livelli di assistenza Non appena Vi sentirete sicuri potre te guidare con l eBike nel traffico come con ogni bicicletta Provare l autonomia dell eBike con differenti condizioni prima di or...

Страница 297: ...sono venire danneggiati da temperature estreme Manutenzione ed assistenza Manutenzione e pulizia Mantenere puliti tutti i componenti dell eBike in modo particolare i contatti della batteria ed il re lativo supporto Pulirli con cautela con uno straccio umido e morbido Tutti i componenti inclusa l unità di azionamen to non devono essere immersi in acqua oppure puliti con un idropulitrice Per Service...

Страница 298: ...ettiva europea 2002 96 CE gli apparec chi elettrici diventati inservibili e in base alla direttiva europea 2006 66 CE le batterie ricarica bili batterie difettose o consumate devono essere raccolte separatamente ed essere inviate ad una riutilizzazione ecologica Vi preghiamo di consegnare batterie non più uti lizzabili ad un rivenditore autorizzato di biciclette Li Ion Si prega di tener presente l...

Страница 299: ...tteria può causare ustioni oppure fuoco In caso di cor tocircuiti verificatisi in relazione a queste condizioni decadrà qualsiasi pretesa di ga ranzia tramite Bosch f In caso di impiego errato può fuoriuscire liquido dalla batteria Evitare il contatto con il liquido stesso In caso di contatto acci dentale sciacquare con acqua Se il liquido dovesse venire a contatto con gli occhi richiedere anche l...

Страница 300: ... Chiave del dispositivo di chiusura batteria 16 Dispositivo di chiusura batteria 17 Supporto superiore della batteria standard 18 Batteria standard 19 Supporto inferiore della batteria standard 20 Cinghia portante 21 Stazione di ricarica Dati tecnici Batteria agli ioni di litio Battery Pack Codice prodotto Batteria standard nera Batteria standard bianca Batteria standard argentata Batteria per mon...

Страница 301: ...que LED verdi dell indicatore dello stato di carica 13 indicano con batteria attivata lo stato di carica della batteria stessa Ogni LED corrisponde a circa il 20 della capa cità Quando la batteria è completamente carica sono illuminati tutti i cinque LED Lo stato di carica della batteria attivata viene inoltre visualizzato sul computer di controllo A riguardo leggere ed osservare le istruzioni per...

Страница 302: ... spengono In questo modo l azionamento dell eBike viene spento anch esso Se per ca 10 min non viene richiesto alcun in tervento dell azionamento p es poichè l eBike è ferma la batteria di spegne automaticamente per ragioni di risparmio energetico La batteria è protetta tramite l Electronic Cell Protection ECP contro lo scaricamento tota le il sovraccarico il surriscaldamento ed il cor tocircuito I...

Страница 303: ...cerca del punto di assistenza nella sezione Service della pagina internet www bosch ebike com Trasporto Le batterie sono soggette ai requisiti di legge re lativi a merci pericolose Le batterie possono es sere trasportate su strada tramite l utente senza ulteriori precauzioni In caso di spedizione tramite terzi p es tra sporto aereo oppure spedizioniere devono es sere osservati particolari requisit...

Страница 304: ...ento del caricabatteria che si ha durante la fase di ricarica si viene a cre are il pericolo di incendio f In caso di danneggiamento ed un uso non corretto della batteria possono fuoriuscire vapori Aerare con aria fresca ed in caso di disturbi rivolgersi ad un medico I vapori possono irritare le vie respiratorie f Sorvegliare i bambini In questo modo viene assicurato che i bambini non giocano con ...

Страница 305: ...rica vedi figure E F Regolare sul selettore della tensione di rete 24 della stazione di ricarica la tensione della fonte di corrente È possibile selezionare tra 115 V e 230 V f Osservare la tensione di rete La tensione della rete deve corrispondere a quella indi cata sulla stazione di ricarica Stazioni di rica rica previste per l uso con 230 V possono es sere azionate anche a 220 V Stazione di ric...

Страница 306: ...unzione della stazione di ricarica è preimpostato il funzionamento di ricarica rapi da Per cambiare il modo operativo di ricarica premere il tasto 27 f Procedere con cautela in caso di contatto con la stazione di ricarica durante l opera zione di ricarica Mettere i guanti di prote zione In caso di funzionamento di ricarica ra pida ed elevate temperature ambientali la stazione di ricarica può risca...

Страница 307: ...96 CE sui rifiuti di apparecchiature elettriche ed elettroniche RAEE ed all attua zione del recepimento nel diritto nazionale le stazioni di ricarica di ventate inservibili devono essere raccolte sepa ratamente ed essere inviate ad una riutilizzazio ne ecologica Con ogni riserva di modifiche tecniche Causa Rimedi L indicatore di funzionamento 28 non è illu minato non è possibile alcuna operazione ...

Страница 308: ... werkzaamheden zoals montage on derhoud enz aan de eBike voordat u deze per auto of vliegtuig vervoert en voordat u deze opbergt Bij per ongeluk bedienen van de aan uit schakelaar bestaat verwondings gevaar f Gebruik alleen originele Bosch accu s die door de fabrikant voor uw eBike zijn toege staan Het gebruik van andere accu s kan tot lichamelijk letsel en brandgevaar leiden Als andere accu s wor...

Страница 309: ...zodanig gemonteerd zijn dat de spaakmagneet bij een omwenteling van het wiel op een afstand van maximaal 17 mm langs de snelheidssensor beweegt Opmerking Als de afstand tussen snelheidssen sor 9 en spaakmagneet 10 te groot is of de snel heidssensor 9 niet juist is aangesloten valt de snelheidsmeterindicatie a uit en werkt de aan drijving van de eBike in het noodprogramma Draai in dit geval de schr...

Страница 310: ...eeft bereikt wordt de ondersteuning door de aandrijving van de eBike uitgeschakeld De aandrijving wordt automatisch weer geactiveerd zodra u op de pe dalen trapt of de snelheid onder 25 km per uur daalt Als u de aandrijving wilt uitschakelen schakelt u de accu met de aan uit toets uit zie gebruiks aanwijzing van de accu Als er ca 10 minuten geen vermogen van de aan drijving wordt opgevraagd bijv o...

Страница 311: ...c verschijnt Bij ondersteuningsniveau 0 wordt de aandrij ving uitgeschakeld De eBike kan net als een nor male fiets alleen door trappen worden voortbe wogen Verlichting in en uitschakelen Afhankelijk van per land verschillende voor schriften zijn twee uitvoeringen van de verlich ting mogelijk Met de bedieningscomputer kunnen tegelij kertijd voorlicht achterlicht en displayver lichting in en uitges...

Страница 312: ...p nul wordt gezet Indicatie foutcode De componenten van de eBike aandrijving wor den voortdurend gecontroleerd Als een fout wordt vastgesteld verschijnt de desbetreffende foutcode in de indicatie e Afhankelijk van de aard van de fout wordt de aandrijving indien nodig automatisch uitgescha keld Verder rijden zonder ondersteuning door de aandrijving is echter altijd mogelijk Laat de eBike controlere...

Страница 313: ... bij gelijke krachtsinspanning de snelheid en het bereik vergroten Eerste ervaringen opdoen Geadviseerd wordt om de eerste ervaringen met de eBike op te doen op een weg zonder druk verkeer Probeer verschillende ondersteuningsmodi en ondersteuningsniveaus uit Zodra u zich zeker voelt kunt u met de eBike net als met elke ande re fiets aan het verkeer deelnemen Test het bereik van uw eBike onder vers...

Страница 314: ...eraturen beschadigd worden Onderhoud en service Onderhoud en reiniging Houd alle componenten van de eBike schoon in het bijzonder de contacten van de accu en de bijbehorende houder Reinig deze voorzichtig met een zachte vochtige doek Geen van de componenten ook de aandrijfeen heid niet mogen in water worden ondergedom peld of met een hogedrukreiniger worden gerei nigd Neem voor service of reparati...

Страница 315: ... de EU Volgens de Europese richtlijn 2002 96 EG moeten niet meer bruikbare elektrische apparaten en volgens de Europese richtlijn 2006 66 EG moeten defecte of lege accu s en batterijen apart worden ingeza meld en op een voor het milieu verantwoorde wijze worden gerecycled Geef niet meer bruikbare accu s bij een erkende rijwielhandel af Li ion Lees de aanwijzingen in het gedeelte Vervoer pagina 98 ...

Страница 316: ...de accucontacten kan brandwonden of brand tot gevolg hebben Bij in dit verband ontstane schade door kortsluiting vervalt elke aanspraak op garantie door Bosch f Bij verkeerd gebruik kan er vloeistof uit de accu lekken Voorkom contact daarmee Bij onvoorzien contact met water afspoelen Als de vloeistof in de ogen komt dient u bovendien een arts te raadplegen Gelekte accuvloeistof kan tot huidirritat...

Страница 317: ...aadindicatie 13 branden dient u de accu voor het eerste gebruik volledig op te laden Accu opladen f Gebruik alleen het oplaadapparaat dat op de pagina met afbeeldingen vermeld staan Alleen dit oplaadapparaat is afgestemd op de bij de eBike gebruikte lithiumionaccu Opmerking De accu wordt gedeeltelijk opgela den geleverd Om de volledige capaciteit van de accu te verkrijgen laadt u voor het eerste g...

Страница 318: ... vallen Trek de sleutel 15 na het afsluiten altijd uit het slot 16 Daarmee voorkomt u dat de sleutel eruit valt of de accu van een geparkeerde eBike door anderen wordt meegenomen Als u de standaardaccu wilt verwijderen 18 schakelt u deze uit en opent u het slot met de sleutel 15 Kantel de accu uit de bovenste hou der 17 en trek deze aan de draagriem 20 uit de onderste houder 19 Als u de bagagedrag...

Страница 319: ...ls er nog maar één led van de oplaadindicatie 13 brandt dient u de accu weer tot ca 60 op te laden Opmerking Als de accu lange tijd in lege toe stand wordt bewaard kan deze ondanks de ge ringe zelfontlading worden beschadigd en kan de opslagcapaciteit sterk worden verminderd Het is niet aan te raden de accu langdurig aan het oplaadapparaat aangesloten te laten Bewaaromstandigheden Bewaar de accu b...

Страница 320: ...n de ver pakking beweegt Neem ook eventuele overige nationale voorschriften in acht Neem bij vragen over het vervoer van de accu s contact op met een erkende rijwielhandel Afvalverwijdering Accu s toebehoren en verpakkingen moeten op een voor het milieu verantwoorde wijze worden gerecycled Gooi accu s niet bij het huisvuil Alleen voor landen van de EU Volgens de Europese richtlijn 2002 96 EG moete...

Страница 321: ...t opladen optredende verwarming van het oplaadapparaat bestaat brandgevaar f Bij beschadiging en onjuist gebruik van de accu kunnen er dampen vrijkomen Zorg voor frisse lucht en raadpleeg bij klachten een arts De dampen kunnen de luchtwegen irriteren f Houd toezicht op kinderen Daarmee wordt gewaarborgd dat kinderen niet met het op laadapparaat spelen f Kinderen en personen die op grond van hun fy...

Страница 322: ... ten kunnen ook met 220 V worden gebruikt Steek vervolgens de apparaatstekker 25 van het netsnoer in de apparaataansluiting 23 op het oplaadapparaat Sluit het netsnoer op het stroomnet aan De functie indicatie 28 op het oplaadapparaat gaat branden f Verbind het oplaadapparaat pas met het stroomnet als op de netspanningschakelaar 24 de juiste netspanning is ingesteld Het op laadapparaat kan anders ...

Страница 323: ...pladen van de volgende 20 aan De accu is volledig opgeladen als alle vijf leds van de indicatie 13 continu branden Het opla den wordt automatisch onderbroken Koppel het oplaadapparaat los van het stroom net en de accu van het oplaadapparaat Als de accu van het oplaadapparaat wordt losge koppeld wordt de accu automatisch uitgescha keld U kunt de accu nu in de eBike plaatsen Oorzaken en oplossingen ...

Страница 324: ...t een steunpuntrijwielhandel bij u in de buurt door deze op te zoeken in het servicege deelte van de website www bosch ebike com Afvalverwijdering Oplaadapparaten toebehoren en verpakkingen moeten op een voor het milieu verantwoorde wijze worden hergebruikt Gooi oplaadapparaten niet bij het huisvuil Alleen voor landen van de EU Volgens de Europese richtlijn 2002 96 EG over elektrische en elektroni...

Страница 325: ...igtet betjening af start stop kontakten er forbundet med kvæstelsesfare f Brug kun originale Bosch batterier der er blevet godkendt til din eBike af produen ten Brug af andre batterier kan føre til kvæ stelser og brandfare Bruges andre batterier fraskriver Bosch sig ansvaret og garantien bortfalder f Læs og følg sikkerhedsinstrukserne og an visningerne i batteriets betjeningsvejledning samt i betj...

Страница 326: ...agnet 10 for stor eller er hastig hedssensoren 9 ikke tilsluttet rigtigt fungerer fartmålerindikatoren a ikke og eBike drevet arbejder i nødkørselsprogrammet Løsn i dette tilfælde skruen i egemagneten 10 og fastgør egemagneten på egen på en sådan måde at den løber forbi hastighedssensoren i en så lille afstand som mulig Fremkommer der heller ikke herefter nogen hastighed i fartmåler indikatoren a ...

Страница 327: ...eriets betjeningsvej ledning Påvirkes drevet ikke i ca 10 min f eks fordi eBike står stille slukker batteriet automatisk for at spare på energien Visning og indstillinger på cykelcompu teren Bemærk Visninger og indstillinger på cykelcom puteren er kun mulige når eBike batteriet er tændt Cykelcomputeren har ikke sin egen strømforsyning Batteriets ladetilstandsvisning Undtagen på ladetilstandsvisnin...

Страница 328: ...light 5 igen belysningsvisningen b slukker Hastigheds og afstandsvisninger Bemærk Afhængigt af den landespecifikke ud førelse kan afstand og hastighed vises enten i km og km h eller i mi og mph Cykel computeren og udvalget af visemuligheder håndteres ens for kilometer og meile modellen I fartmålerindikatoren a vises altid den aktuelle hastighed I multifunktionsindikatoren d står følgende indikator...

Страница 329: ...heden kontrolleret 101 Forbindelsesproblem for dri venheden Få tilslutninger og forbindelser kontrolleret 102 Fejl på hastighedssensoren Få hastighedssensoren kontrolleret 103 Forbindelsesproblem for belysningen Få tilslutninger og forbindelser kontrolleret 104 Forbindelsesproblem for cykelcomputeren Få tilslutninger og forbindelser kontrolleret 105 Drivenhedens temperatur er for høj over 40 C Lad...

Страница 330: ... Prøv forskellige understøtningsfunktioner og understøtningstrin Så snart du føler dig sikker kan du også køre med eBike lige som en almin delig cykel på gader og veje med almindelig trafik Test rækkevidden for din eBike under forskellige betingelser før du planlægger længere og mere krævende ture Påvirkninger af rækkevidden Med helt opladt batteri og sparsom kørsel kan du køre op til 145 km med d...

Страница 331: ...særlige krav til embal lage og mærkning overholdes Her skal man ube tinget kontakte en faregodsekspert før forsendelsesstykket forberedes Send kun batterierne hvis huset er ubeskadiget Tilklæb åbne kontakter og indpak batteriet på en sådan måde at det ikke kan bevæge sig i em ballagen Følg også eventuelle yderligere natio nale forskrifter Spørgsmål vedr transport af batterierne bedes stillet til e...

Страница 332: ...e kontakterne En kortslutning mellem batterikontakterne kan føre til forbrændinger eller brand Opslutter der i denne sammenhæng kortslutningsska der bortfalder ethvert garantikrav over for Bosch f Forkert anvendelse kan medføre at væske slipper ud af batteriet Undgå at komme i kontakt med denne væske Hvis det allige vel skulle ske skylles med vand Søg læge hvis væsken kommer i øjnene Udstrømmen de...

Страница 333: ...15 Nøgle til batterilås 16 Batterilås 17 Øverste holder til standard batteri 18 Standard batteri 19 Nederste holder til standard batteri 20 Bærerem 21 Ladeaggregat Tekniske data Li ion batteri Battery Pack Typenummer Standard batteri sort Standard batteri hvid Standard batteri sølv Bagagebærer batteri 1 270 020 500 1 270 020 501 1 270 020 502 1 270 020 503 Nominel spænding V 36 Nominel kapacitet A...

Страница 334: ...a toren 13 viser batteriets ladetilstand når batte riet er tændt Hver LED lampe svarer til ca 20 af kapacite ten Når batteriet er helt opladt lyser alle fem LED lamper Ladetilstanden for det tændte batteri vises des uden i cykelcomputeren Læs og følg hertil be tjeningsvejledningen for drivenheden og cykel computeren Er batteriets kapacitet under 5 slukker alle LED lamper i ladetilstandsindikatoren...

Страница 335: ...or batteriet Batteriets levetid kan forlænges hvis det passes godt og især hvis det bruges og opbevares ved de rigtige temperaturer Driftstemperaturer mellem 5 C og 35 C anbefales Batteriets kapacitet forringes jo ældre det bliver også selv om det plejes godt Forkortes driftstiden væsentligt efter opladnin gen er det tegn på at batteriet er slidt op og skal udskiftes Skulle bæreremmen 20 til stand...

Страница 336: ... eller spedition skal særlige krav til embal lage og mærkning overholdes Her skal man ube tinget kontakte en faregodsekspert før forsendelsesstykket forberedes Send kun batterierne hvis huset er ubeskadiget Tilklæb åbne kontakter og indpak batteriet på en sådan måde at det ikke kan bevæge sig i em ballagen Følg også eventuelle yderligere natio nale forskrifter Spørgsmål vedr transport af batterier...

Страница 337: ... i brændbare omgivelser Pas på Lade aggregatet bliver varmt under opladningen Brandfare f Beskadiges batteriet eller bruges det for kert kan der sive dampe ud Tilfør frisk luft og søg læge hvis du føler dig utilpas Dam pene kan irritere luftvejene f Sørg for at børn er under opsyn Dermed sikres det at børn ikke leger med ladeaggre gatet f Børn og personer der på grund af deres fy siske sensoriske ...

Страница 338: ... kan også tilsluttes 220 V Sæt så netkablets stik 25 ind i bøsningen 23 på ladeaggregatet Tilslut netkablet til strømnettet Driftsindikato ren 28 på ladeaggregatet lyser f Forbind først ladeaggregatet med strøm nettet når den rigtige netspænding er ind stillet med netspændingskontakten 24 El lers kan ladeaggregatet blive beskadiget Sluk for batteriet og tag det ud af holderen på eBike Læs og overh...

Страница 339: ...nde LED lampe viser opladningen af de næste 20 Batteriet er helt opladt når alle fem LED lamper i indikatoren 13 lyser hele tiden Opladningen afbrydes automatisk Afbryd ladeaggregatet fra strømnettet og batte riet fra ladeaggregatet Når batteriet afbrydes fra ladeaggregatet sluk kes batteriet automatisk Nu kan du sætte batteriet ind i eBike Fejl Årsager og afhjælpning Ladedrift FAST SLOW Ladestrøm...

Страница 340: ...n autoriseret cykelforhandler Det næste støttepunkt for cykelforhandleren findes via støttepunktsøgningen i servicedelen på internetsiden www bosch ebike com Bortskaffelse Ladeaggregater tilbehør og emballage skal gen bruges på en miljøvenlig måde Smid ikke ladeaggregater ud sammen med det almindelige husholdningsaffald Gælder kun i EU lande Iht det europæiske direktiv 2002 96 EF om affald af elek...

Страница 341: ...n eller lagras Om strömställaren oav siktligt aktiveras finns risk för personskada f Använd endast originalbatterier från Bosch som tillverkaren rekommenderat för din el cykel Om andra batterier används finns risk för personskada och brand Om andra batte rier används fritar sig Bosch från allt ansvar f Läs och beakta säkerhetsanvisningarna och instruktionerna i batteriets bruksanvisning samt bruks...

Страница 342: ... 9 och ekermagneten 10 är för stort eller är hastighetssensorn 9 inte korrekt monterad fungerar inte hastighetsmätarens indikering a och elcykelns drivenhet fungerar i nödkörnings program Lossa i detta fall ekermagnetens 10 skruv och fäst ekermagneten så att den på möjligast kort avstånd passerar hastighetssensorn Om hastig hetsmätaren a fortfarande saknar indikering kontakta en auktoriserad cykel...

Страница 343: ...tomatiskt från för att spara energi Manöverdatorns indikeringar och inställningar Anvisning Indikeringar och inställningar på manöverdatorn är endast möjliga vid inkopplat elcykelbatteri Manöverdatorn saknar egen strömförsörjning Batteriets laddningsdisplay Förutom på laddningsdisplayen som sitter på batteriet kan laddningstillståndet även avläsas på manöverdatorns display f På displayen f motsvar...

Страница 344: ... 5 en gång till belysningsindikeringen b slocknar Hastighets och avståndsindikeringar Anvisning Alltefter landsspecifikt utförande kan avstånd och hastighet anges antingen i km och km h eller i mi och mph Manö verdatorns hantering och valet av indikerings möjligheter är lika för km och engelska mil ver sionen På hastighetsmätaren a indikeras alltid aktuell hastighet På multifunktionsdisplayen d ka...

Страница 345: ...01 Drivenheten med anknyt ningsproblem Kontrollera anslutningarna och förbindelserna 102 Fel i hastighetssensorn Låt hastighetssensorn kontrolleras 103 Belysningen med anknyt ningsproblem Kontrollera anslutningarna och förbindelserna 104 Manöverdatorn med anknyt ningsproblem Kontrollera anslutningarna och förbindelserna 105 Drivenhetens temperatur är för hög över 40 C Låt drivenheten svalna Åkning...

Страница 346: ...elcykeln avsides trafikerade vägar Öva olika hjälpfunktioner och hjälpsteg När du är säker på din sak kan du med elcykeln delta i trafiken som med en vanlig cykel Testa elcykelns räckvidd under olika villkor inn an du startar för längre turer Räckvidden påverkas av Med fullt laddat batteri och sparsam åkning är en räckvidd upp till 145 km möjlig Räckvidden påverkas dock av många fler fakto rer som...

Страница 347: ...ka speciella villkor för för packning och märkning beaktas I detta fall bör vid förberedelse av transport en expert för far ligt gods konsulteras Försänd endast batterier med oskadat hölje Tejpa öppna kontakter och förpacka batteriet så att det inte kan röras i förpackningen Ta även hänsyn till eventuella nationella föreskrifter Vid frågor beträffande transport av batterier kontakta en auktorisera...

Страница 348: ...vätska rinner ur batteriet Undvik kontakt med vätskan Vid oavsiktlig kontakt spola med vatten Om vätska kommer i kon takt med ögonen uppsök dessutom läkare Batterivätskan kan medföra hudirritation och brännskada f I skadat eller felanvänt batteri kan ångor uppstå Tillför friskluft och uppsök läkare vid åkommor Ångorna kan leda till irritation i andningsvägarna f Ladda upp batteriet endast i de lad...

Страница 349: ...isning Batteriet kan när som helst laddas upp eftersom detta inte påverkar livslängden Batteriet skadas inte om laddning avbryts Batteriet är försett med en temperaturövervak ning som endast tillåter laddning inom ett tem peraturområde mellan 0 C och 40 C Härvid uppnår batteriet en lång livslängd Laddningsdisplay De fem gröna lysdioderna på laddningsdisplay en 13 visar laddningstillståndet för påk...

Страница 350: ... allt ansvar In och urkoppling Kontrollera före inkoppling av batteriet att låset 16 är stängt Anvisning Elcykelns pedaler får inte belastas vid inkoppling av batteriet i annat fall begränsas driveffekten För inkoppling av batteriet tryck på På Av knap pen 14 Lysdioderna på displayen 13 tänds och visar samtidigt batteriets laddningstillstånd Anvisning Om batteriets kapacitet underskri der 5 tänds ...

Страница 351: ...lhandlare Kundservice och kundkonsulter Vid frågor beträffande batterier kontakta en auk toriserad cykelhandlare Anteckna nyckelns 15 nummer Om nyckeln går förlorad kontakta en auktoriserad cykelhand lare Ange nyckelnumret Den närmaste cykelhandlaren kan via stöd punktssökning på internetsidans servicedel hit tas under www bosch ebike com Transport Batterierna faller under begreppet riskgods An vä...

Страница 352: ...ännbar omgivning Vid laddningen värms laddaren upp vilket kan medföra brandrisk f I skadat eller felanvänt batteri kan ångor uppstå Tillför friskluft och uppsök läkare vid åkommor Ångorna kan leda till irritation i andningsvägarna f Håll barn under uppsikt Barn får inte leka med laddaren f Laddaren får inte användas av barn eller personer med begränsad fysisk sensorisk eller psykisk förmåga eller ...

Страница 353: ...rens typskylt Laddare märkta med 230 V kan även anslutas till 220 V Anslut sedan nätkabelns stickkontakt 25 till ap parathylsdonet 23 på laddaren Anslut nätkabeln till strömnätet Driftsindike ringen 28 på laddaren tänds f Anslut laddaren till strömnätet först sedan korrekt nätspänning ställts in på nätspän ningsbrytaren 24 I annat fall kan laddaren skadas Frånkoppla batteriet och ta bort det ur fä...

Страница 354: ...teriet är fullständigt laddat när de fem lysdio derna lyser kontinuerligt på displayen 13 Ladd ningen avbryts automatiskt Bryt strömmen till laddaren och koppla bort bat teriet från laddaren Batteriet frånkopplas automatiskt när det tas ur laddaren Batteriet kan nu anslutas till elcykeln Fel Orsak och åtgärd Laddning FAST SLOW Laddnings ström 4 A 1 A Driftsindi kering 28 blinkar lyser konti nuerli...

Страница 355: ...lhandlare Den närmaste cykelhandlaren kan via stöd punktssökning på internetsidans servicedel hit tas under www bosch ebike com Avfallshantering Laddare tillbehör och förpackning ska omhän dertas på miljövänligt sätt för återvinning Släng inte laddare i hushållsavfall Endast för EU länder Enligt europeiska direktivet 2002 96 EG för kasserade elek triska och elektroniska apparater och dess modifier...

Страница 356: ...eller oppbevarer den Det er fare for skader hvis du trykker på på av bryteren ved en feiltagelse f Bruk kun original Bosch batterier som er godkjent av produsenten for denne eBiken Bruk av andre batterier kan medføre skader og brannfare Ved bruk av andre batterier overtar Bosch intet ansvar og garanti f Les og følg sikkerhetsinformasjonene og in struksene i driftsinstruksen for batteriet og i drif...

Страница 357: ...sor 9 og ekemagnet 10 er for stor eller hastighets sensoren 9 ikke er riktig tilkoplet svikter tacho meterindikatoren a og eBike driften arbeider i nødprogrammet Du må da løsne skruen på ekemagneten 10 og feste ekemagneten slik på eken at den går forbi hastighetssensoren i en så liten avstand som mu lig Hvis det deretter fortsatt ikke vises en hastig het på tachometerindikatoren a må du henvende d...

Страница 358: ...sk ut for å spare energi Anvisninger og innstillinger på styreen heten Merk Anvisninger og innstillinger på styreenhe ten er kun mulig når eBike batteriet er innkoplet Styreenheten har ingen egen strømtilførsel Ladetilstandsindikator på batteriet På yttersiden av ladetilstandsindikatoren som befinner seg på batteriet kan ladetilstanden og så avleses på indikatoren f på styreenheten På indikatoren ...

Страница 359: ...på tasten light 5 en gang til belysningsindikatoren b slokner Hastighets og avstandsindikatorer Merk Avhengig av den nasjonale modellen kan avstanden og hastigheten enten anvises i km og km h eller i mi og mph Bruken av sty reenheten og utvalget for anvisningsmulighete ne er like for kilometer og mil versjonen På tachometerindikatoren a vises alltid aktuell hastighet På multifunksjonsindikatoren d...

Страница 360: ...lser sjekkes 100 Intern feil på drivenheten La drivenheten sjekkes 101 Forbindelsesproblem for dri venheten La kontakter og forbindelser sjekkes 102 Feil på hastighetssensoren La hastighetssensoren sjekkes 103 Forbindelsesproblem på belysningen La kontakter og forbindelser sjekkes 104 Forbindelsesproblem på sty reenheten La kontakter og forbindelser sjekkes 105 For høy temperatur på dri venheten o...

Страница 361: ... avsides fra trafikkerte veier Prøv forskjellige støttemoduser og støttetrinn Når du føler deg sikker kan du sykle med eBiken i vanlig trafikk som med en vanlig sykkel Test rekkevidden til eBiken under forskjellige vil kår før du planlegger lengre krevende turer Innflytelser på rekkevidden Med fullt oppladet batteri og sparsommelig kjøremåte er en rekkevidde på opp til 145 km mulig Men rekkevidden...

Страница 362: ...pesielle krav til emballasje og mer king Du må da absolutt konsultere en ekspert for farlig gods ved forberedelse av forsendelsen Send batteriene kun hvis huset ikke er skadet Lim igjen de åpne kontaktene og pakk batteriet slik at det ikke beveger seg i emballasjen Ta hensyn til eventuelle videregående nasjonale forskrifter Henvend deg til en autorisert sykkel forhandler angående alle spørsmål om ...

Страница 363: ...t Unngå kontakt med denne væsken Ved tilfeldig kontakt må det skylles med vann Hvis det kommer væske i øynene må du i tillegg oppsøke en lege Batterivæske som renner ut kan føre til irritasjoner på hu den eller forbrenninger f Ved skader og usakkyndig bruk av batteriet kan det slippe ut damp Tilfør frisk luft og gå til lege hvis det oppstår helseproblemer Dampene kan irritere åndedrettsorganene f ...

Страница 364: ...aratet til opplading av batteriet Batteriet kan lades opp til enhver tid uten at le vetiden forkortes Det skader ikke batteriet å av bryte oppladingen Batteriet er utstyrt med en temperaturovervå king som muliggjør en opplading kun i tempera turområdet mellom 0 C og 40 C Slik oppnås en lang levetid for batteriet Ladetilstandsindikator De fem grønne LEDene på ladetilstandsindikato ren 13 viser batt...

Страница 365: ... intet ansvar og garanti Inn utkobling Før batteriet koples inn må du sjekke om låsen 16 er låst Merk Pedalene til eBiken må ikke være belastet ved innkopling av batteriet ellers innskrenkes driveffekten Til innkopling av batteriet trykker du på på av tasten 14 LEDene på indikatoren 13 lyser og an viser samtidig ladetilstanden Merk Hvis batterikapasiteten er under 5 lyser det ikke en LED på batter...

Страница 366: ...eg til en autorisert sykkel forhandler angående alle spørsmål om batteriene Skriv opp nummeret på nøkkelen 15 Hvis du mis ter nøkkelen må du henvende deg til en autorisert sykkel forhandler Oppgi da nøkkelnummeret Nærmeste sykkel forhandler finner du i service delen på internettsiden www bosch ebike com Transport Batteriene oppfyller kravene i loven for farlig gods Brukeren kan transportere batter...

Страница 367: ... brennbare omgivelser Ladeapparatet oppvarmes under oppladingen og det er der for fare for brann f Ved skader og usakkyndig bruk av batteriet kan det slippe ut damp Tilfør frisk luft og gå til lege hvis det oppstår helseproblemer Dampene kan irritere åndedrettsorganene f Barn må være under oppsyn Slik kan du sør ge for at barn ikke leker med ladeapparatet f Barn og personer som på grunn av sine fy...

Страница 368: ...er som er merket med 230 V kan også brukes med 220 V Sett så apparatstøpselet 25 til strømledningen inn i apparatkontakten 23 på ladeapparatet Strømledningen koples til strømnettet Driftsin dikatoren 28 på ladeapparatet lyser f Forbind ladeapparatet først med strømnet tet når korrekt nettspenning er innstilt på nettspenningsbryteren 24 Ladeapparatet kan ellers ta skade Slå av batteriet og ta det u...

Страница 369: ... de neste 20 Batteriet er fullstendig oppladet når alle fem LEDer på indikatoren 13 lyser kontinuerlig Opp ladingen avbrytes automatisk Adskill ladeapparatet fra strømnettet og batteriet fra ladeapparatet Når batteriet skilles fra ladeapparatet koples batteriet automatisk ut Du kan nå sette batteriet inn i eBiken Feil Årsaker og utbedring Opplading FAST SLOW Ladestrøm 4 A 1 A Driftsindikator 28 bl...

Страница 370: ...nvende deg til en autorisert sykkel forhandler Nærmeste sykkel forhandler finner du i service delen på internettsiden www bosch ebike com Deponering Ladeapparater tilbehør og emballasje må leve res inn til miljøvennlig gjenvinning Ikke kast ladeapparater i vanlig søppel Kun for EU land Jf det europeiske direktivet 2002 96 EF vedr gamle elektris ke og elektroniske apparater og tilpassingen til nasj...

Страница 371: ...tokoneessa tai säilytät sitä Käynnistys kytkimen tahaton painallus muodostaa louk kaantumisvaaran f Käytä ainoastaan alkuperäisiä Bosch akku ja joita valmistaja sallii sinun eBike ssa Muiden akkujen käyttö saattaa johtaa louk kaantumiseen ja tulipaloon Muita akkuja käy tettäessä takuu raukeaa eikä Bosch ei ota mi tään vastuuta f Lue ja noudata akun ja eBike si käyttöohjei den turvallisuus ja muita...

Страница 372: ...n 10 on liian suuri tai jos nopeusanturi 9 on liitetty väärin jää nopeusmittarin näyttö a puuttumaan ja eBike käyttölaite toimii hätäkäyn tiohjelmassa Avaa tässä tapauksessa puolamagneetin 10 ruu vi ja kiinnitä puolamagneetti puolaan pinnaan niin että se ohittaa nopeusanturin mahdollisim man läheltä Jos nopeusmittarin näyttö a ei vielä tämänkään jälkeen näytä nopeutta käänny val tuutetun polkupyör...

Страница 373: ...utomaattisesti pois päältä energian säästä miseksi Käyttötietokoneen näytöt ja asetukset Ohje Käyttötietokoneen näytöt ja asetukset ovat mahdollisia vain kun eBike akku on kytket ty päälle Käyttötietokoneessa ei ole omaa virta lähdettä Akun lataustilan näyttö Lataustilan näytön lisäksi joka sijaitsee itse akussa voidaan varaustilanne lukea myös käyt tötietokoneen näytöstä f Näytössä f jokainen par...

Страница 374: ...aistuksen tunnus b Kytke valaistus pois päältä painamalla painiket ta light 5 uudelleen Valaistuksen tunnus b sammuu Nopeus ja etäisyysnäytöt Ohje Maakohtaisesta mallista riippuen voidaan etäisyys ja nopeus näyttää joko suureilla km ja km h tai mi ja mph Käyttötietokoneen käsittely ja näyttövaihtoehtojen valinta ovat sa moja kilometri ja mailiversiossa Nopeusmittarin näytössä a näkyy aina senhetki...

Страница 375: ...ksikön sisäinen vika anna tarkistaa käyttövoimayksikkö 101 ongelmiakäyttövoimayksikön liitännöissä anna tarkistaa liitokset ja kytkennät 102 vika nopeusanturissa anna tarkistaa nopeusanturi 103 ongelmia valaistuksessa anna tarkistaa liitokset ja kytkennät 104 ongelmia käyttötietokoneen liitännöissä anna tarkistaa liitokset ja kytkennät 105 käyttövoimayksikön lämpö tila on liian korkea yli 40 C Ann...

Страница 376: ...ehostustiloja ja tehostusvaihei ta Kun olet saavuttanut varmuuden voit käyttää eBike a liikenteessä kuten mitä tahansa polku pyörää Kokeile eBike si toimintamatkaa erilaisissa olo suhteissa ennen kuin suunnittelet pitkiä vaati via matkoja Toimintamatkaan vaikuttavat tekijät Täyteen ladatulla akulla ja säästäväisellä ajotaval la voit saavuttaa jopa 145 km toimintamatkan Toimintamatkaan vaikuttavat ...

Страница 377: ...svaatimuksia Tällöin on lähetyksen valmistelussa ehdottomasti käy tettävä vaara aineasiantuntijaa Lähetä akkuja ainoastaan jos kotelo on vaurioi tumaton Teippaa avoimet liittimet ja pakkaa ak ku niin että se ei pääse liikkumaan pakkaukses sa Ota myös huomioon mahdolliset tarkemmat kansalliset määräykset Käänny valtuutetun polkupyöräkauppiaan puo leen kaikissa akkujen kuljetuksiin liittyvissä kysy ...

Страница 378: ...kusta vuotaa nestettä Vältä koskettamasta nes tettä Huuhtele vedellä jos vahingossa kos ketat nestettä Jos nestettä pääsee silmiin tarvitaan tämän lisäksi lääkärin apua Akus ta vuotava neste saattaa aiheuttaa ihoärsy tystä ja palovammoja f Jos akku vaurioituu tai sitä käytetään asi aankuulumattomalla tavalla saattaa siitä purkautua höyryjä Tuuleta raikkaalla ilmal la ja hakeudu lääkärin luo jos ha...

Страница 379: ...tteen käyttöohjetta Akkua voidaan ladata milloin vain lyhentämättä sen elinikää Latauksen keskeytys ei vaurioita akkua Akku on varustettu lämpötilanvalvonnalla joka sallii lataamisen vain akun lämpötilan ollessa vä lillä 0 C ja 40 C Täten saavutetaan pitkä käyt töikä akulle Lataustilan merkkivalo Akun lataustilan merkkivalon 13 viisi vihreää LED iä osoittaa akun varaustilan sen ollessa kyt kettynä...

Страница 380: ...tys ja pysäytys Tarkista ennen akun kytkemistä että lukko 16 on lukittuna Ohje eBike n polkimia ei saa kuormittaa kun akku kytketään koska se rajaa käyttölaitteen tehoa Kytke akku painamalla käynnistyspainiketta 14 Näytön 13 LED it syttyvät ja näyttävät samalla varaustilan Ohje Jos kapasiteetti on alle 5 ei akun la taustilan näytössä 13 syty yhtään LED merkkiva loa Ainoastaan käyttötietokoneesta v...

Страница 381: ...ppiaan puo leen kaikkien akkuun liittyvien kysymyksien kanssa Merkitse muistiin avaimessa 15 oleva numero Käänny valtuutetun polkupyöräkauppiaan puo leen jos avain häviää Ilmoita tällöin avaimen nu mero Löydät lähimmän polkupyörän tukipistekauppi aan internetsivun www bosch ebike com huol to osan tukipiste etsinnän kautta Kuljetus Akut ovat vaara ainelain määräysten alaisia Käyttäjä saa kuljettaa ...

Страница 382: ... esim paperi kangas jne tai pala vassa ympäristössä Latauslaitteen kuume neminen latauksen aikana synnyttää tulipalo vaaran f Jos akku vaurioituu tai sitä käytetään asi aankuulumattomalla tavalla saattaa siitä purkautua höyryjä Tuuleta raikkaalla ilmal la ja hakeudu lääkärin luo jos haittoja ilme nee Höyryt voivat ärsyttää hengitysteitä f Pidä lapsia silmällä Täten varmistat että lapset eivät leik...

Страница 383: ...tkimellä 24 on valittu oikea jännite Muussa tapauk sessa latauslaite saattaa vaurioitua Kytke pois akku ja poista se eBike n pidikkeestä Lue ja noudata akun käyttöohjetta Työnnä latauslaitteen latauspistoke 29 akussa olevaan hylsyyn 30 Latauslaitteessa oleva käyt töilmaisin 28 vilkkuu Lataustapahtuma Lataustapahtuma alkaa heti kun latauslaite on kytketty akkuun ja sähköverkkoon Ohje Lataustapahtum...

Страница 384: ...yöräkauppiaan puo leen kaikissa latauslaitteeseen liittyvissä kysy myksissä Löydät lähimmän polkupyörän tukipistekauppi aan internetsivun www bosch ebike com huol to osan tukipiste etsinnän kautta Hävitys Latauslaitteet lisätarvikkeet ja pakkaukset tulee toimittaa ympäristöystävälliseen uusiokäyttöön Älä heitä latauslaitteita talousjätteisiin Vain EU maita varten Eurooppalaisen vanhoja sähkö ja el...

Отзывы: