36
15-3. Setting the View Point Image
This function changes the image settings, etc. of a View Point. The type of the dialog and setting subjects vary
according to the model of the View Point.
1
In the Tree View Area Layout, select the desired view point or view channel.
2
Double click on the View Point icon or the View Channel icon,
or open the [Setting] menu and select [View Point Control].
The [View Point Control] dialog box appears.
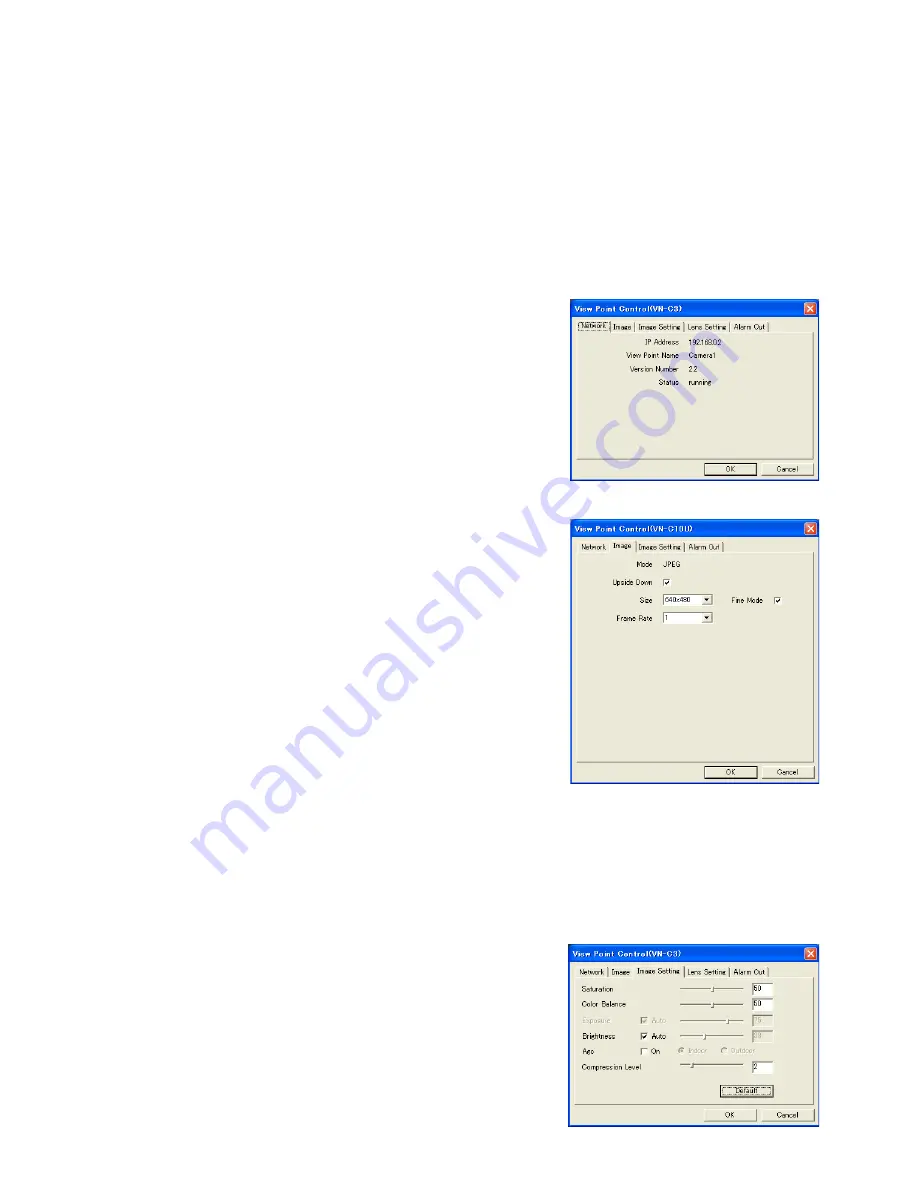
[Network tab]
Click on the [Network] tab.
This tab shows the information on the view point.
[Image tab]
Click on the [Image] tab.
Mode:
Shows either the "JPEG" or "MPEG4" mode.
Upside Down:
If checked, the image is displayed upside down.
Size:
Set the size of the image transferred from the view point.
Selecting a larger size makes the image clearer and less uneven.
(Note that this option sets the size of the transferred image and does
not set the size of the displayed View Window.)
Fine Mode:
If checked, the Fine Mode is effective.
- It is effective only with the VN-C10U Ver.1.4 or higher.
- It is effective only by 640 x 480 image size.
Fine Mode makes the still image clear and detailed, but the Fine Mode
does not suite for the subject if it is moving.
Frame Rate:
Set the maximum frame rate of image transfer from the view
point.Selecting a larger frame rate makes the motion in the image
smoother.
[Image Setting tab]
Click on the [Image Setting] tab.
Saturation:
Adjust the color saturation.
Color Balance:
Adjust the white balance.
Exposure:
Adjust the image exposure.
Brightness:
Adjust the image brightness.
Agc:
Adjust the gain of the built-in amplifier.
Compression Level:
Set the image compression level. Setting a
larger value increases the compression rate.
Image Setting tab
Image tab
Network tab


