LX-D1010G
4-6 (PA012)
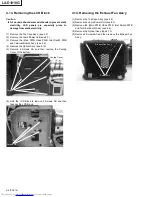
4.13. Removing the LCD Block
Caution
*
**
*
All workers should wear wristbands to prevent static
electricity. LCD panels are especially prone to
damage from static electricity.
(1) Remove the Top Case Ass’y.(see 4.2)
(2) Remove the Lamp Power Unit.(see 4.3)
(3) Remove the (Main PWB, Video PWB, Inlet Switch PWB
and Terminal Board) Ass’y.(see 4.4)
(4) Remove the Optical Ass’y.(see 4.10)
(5) Remove 6 Screws AA and then remove the Cooling
Cover of the bottom.
(6) Hold the LCD Block to remove 3 Screws AB and then
take out the LCD Block.
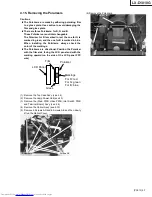
4.14. Removing the Exhaust Fan Ass'y
(1) Remove the Top Case Ass’y.(see 4.2)
(2) Remove the Lamp Power Unit.(see 4.3)
(3) Remove the (Main PWB, Video PWB, Inlet Switch PWB
and Terminal Board) Ass’y.(see 4.4)
(4) Remove the Optical Ass’y.(see 4.10)
(5) Remove 2 Screws AC and then remove the Exhaust Fan
Ass’y.
Screws AA
Cooling Cover
Screws AB
Screws AC
Exhaust Fan Ass’y
Содержание LX-D1010G - Lcd Projector
Страница 32: ...LX D1010G 4 10 PA012 Memo ...
Страница 36: ...LX D1010G 6 2 PA012 Memo ...
Страница 67: ... PA012 15 1 LX D1010G 15 BLOCK DIAGRAMS ...
Страница 68: ... PA012 15 2 LX D1010G ...
Страница 69: ...LX D1010G PA012 15 3 ...
Страница 70: ...LX D1010G PA012 16 1 ...
Страница 77: ...LX D1010G PA012 Parts 7 Memo ...
Страница 81: ...しろページ ...


