


9
Daily Operations
Turning on the main
power
I : Main power on
‡
: Main power off
On the rear panel
Turning on the monitor
From the remote control:
To turn off the monitor, press POWER OFF.
On the main unit:
Each time you press the button, the power
turns on and off.
• When the Control Lock is set to “ON”
(see page 15), you cannot use the
buttons on the main unit.
• When the Security Lock is in set to
“ON” (see page 17), you need to enter
the password when turning on the
monitor.
Adjusting the volume
From the remote control:
On the main unit:
To turn off the volume immediately:
Pressing the button again resumes
the previous volume level.
• When using the buttons on the main unit, set
“MUTING” to “ON” on the main menu (see “AUDIO
SETTING” on page 12).
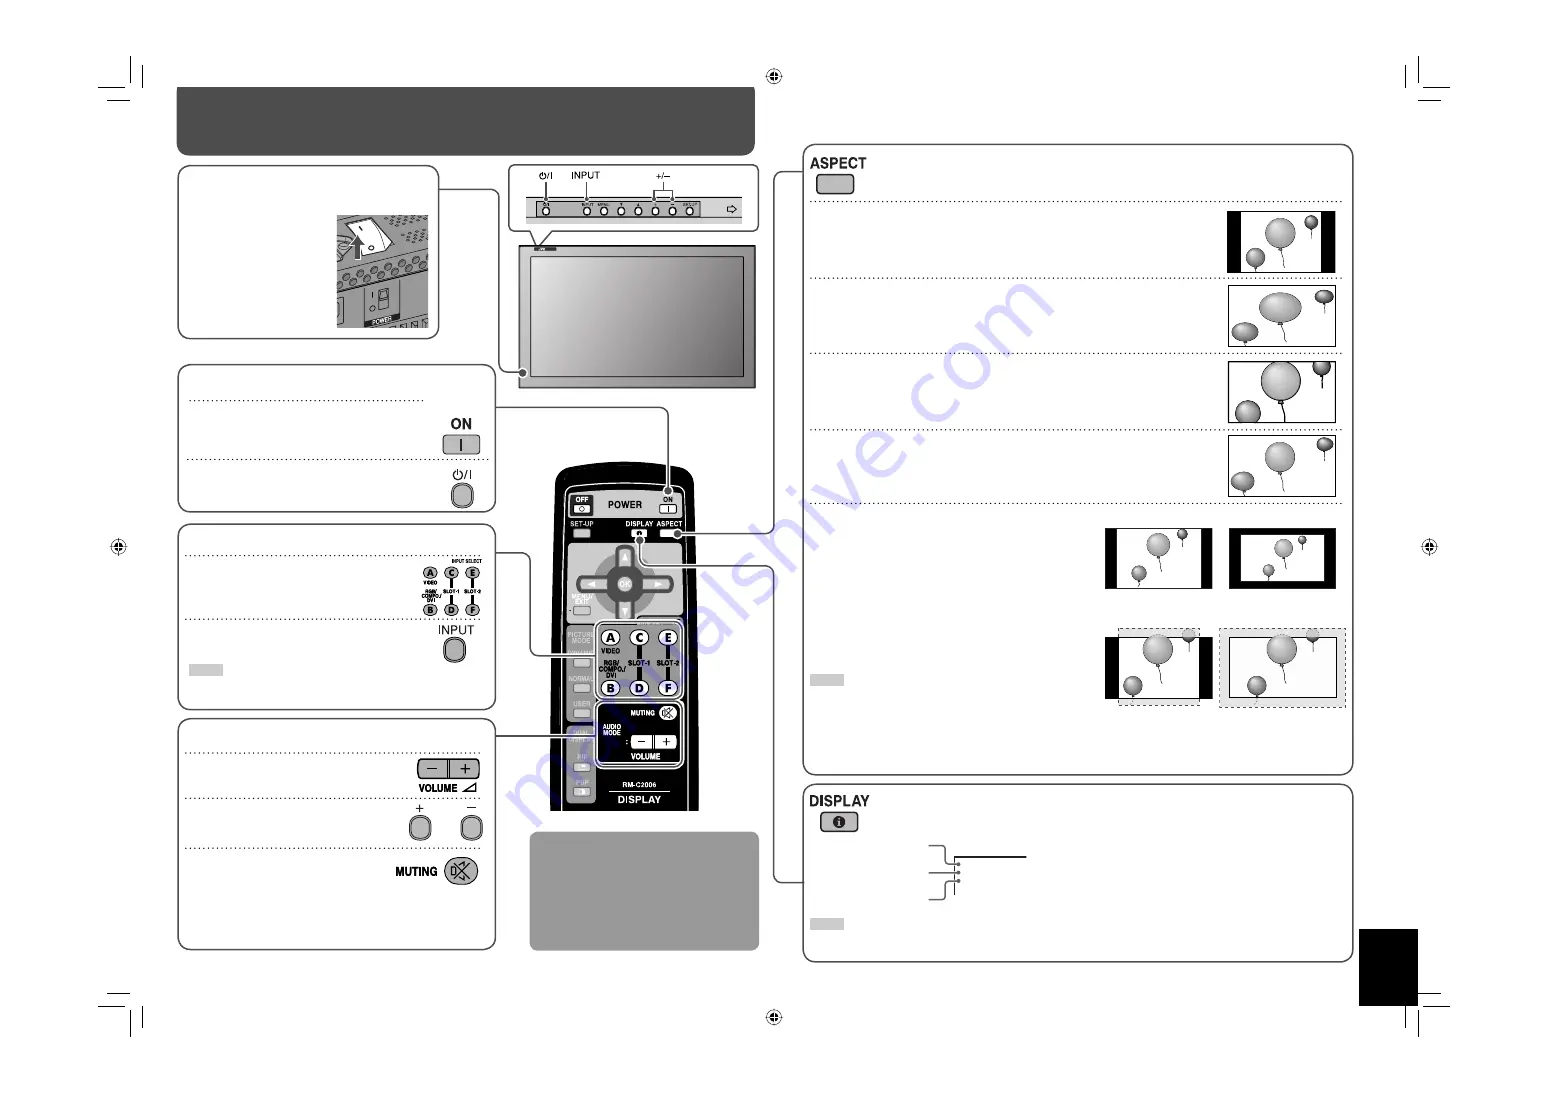
Changing the aspect ratio
Each time you press the button, the aspect ratio changes as follows:
REGULAR
Displays at conventional 4:3 aspect ratio.
FULL
Enlarges the picture of 4:3 aspect ratio horizontally.
• For the picture of 16:9 aspect ratio, the aspect ratio is not changed.
ZOOM
Enlarges the picture of 4:3 aspect ratio vertically and horizontally at the same
ratio.
PANORAMIC
Enlarges the picture of 4:3 aspect ratio horizontally to the extent that the
picture does not look abnormal.
<PC input ONLY>
REAL DOT
Displays center portion of the original picture
input from the personal computer without
changing the number of pixels.
This item is available only when one of the
following signals is input:
• WXGA (1280), WXGA (1360), 1280 * 720,
SXGA60
*1
, SXGA+60
*1
, SXGA+60*
*1
, UXGA60
*1
*1
Analog RGB only
NOTE
• For some signals, the aspect ratio cannot be changed or some
modes cannot be selected.
• While using multiple monitors (see page 13), the aspect ratio is
fixed to “FULL.”
• When using the buttons on the main unit for changing the aspect
ratio, use the main menu (see “SIZE SETTING” on page 11).
SXGA60
SXGA+60/SXGA+60*/UXGA60
WXGA (1280)/
WXGA (1360)
1280 * 720
Ex.
Displaying the current status
The information of the current input is displayed on the screen.
*2
When Input C, D, E, or F is selected with an optional input card
inserted, the type of the card appears. When no card is inserted, “NO
CARD” appears.
*3
When no signal is being input, “NO SYNC” appears. When a signal this
monitor does not support is being input, “Out of range” appears.
NOTE
• When “STATUS DISPLAY” on the main menu is set to “ON” (see page 13), the status is also displayed in the following cases:
– When you turn on the monitor, when you change inputs, or when you change signal types.
I N P U T A
V I D E O
N T S C
Current input
Input type
*2
Input signal format
*3
Selecting an input
From the remote control:
On the main unit:
Each time you press the button, the input
changes.
NOTE
• When “QUICK SWITCH” is set to “INPUT A&B,” you can change inputs A
and B quickly (see “INPUT CONFIGURATION” on page 12).
GM-H40L2UA_resize-2.indd 9
GM-H40L2UA_resize-2.indd 9
06.7.28 1:44:19 PM
06.7.28 1:44:19 PM