


4
Table of Contents
Safety Precautions ..................................... 2
IMPORTANT SAFEGUARDS ........................... 2
Maintenance ..................................................... 3
Parts Identification .................................... 4
Remote control ................................................. 4
Front panel ......................................................... 5
Rear panel .......................................................... 5
Installation ................................................. 6
Connecting external speakers .................... 6
Connections ............................................... 7
Available signals .............................................. 7
Daily Operations ........................................ 9
Turning on the main power ......................... 9
Turning on the monitor ................................. 9
Selecting an input ........................................... 9
Adjusting the volume .................................... 9
Changing the aspect ratio ............................ 9
Displaying the current status ...................... 9
Selecting the picture mode .......................10
Viewing Inputs A and B (analog RGB
input) at the same time
—Dual Display .........................................10
Menu Operations ..................................... 10
Menu Configuration—MAIN MENU ....... 11
Menu Configuration—SET-UP MENU ..... 14
Setting the Security Lock ............................17
How to Use External Control ................... 17
About the external control ........................17
Using the serial communication ..............18
Using the MAKE/TRIG. system ...................19
Troubleshooting ...................................... 20
Self-diagnostic indication ..........................21
Specifications ........................................... 22
Checking the accessories
The following accessories are included with the
monitor. Check for them. If any item is missing, please
contact the dealer where you have purchased the
monitor.
• Remote control (RM-C2006)
• Power cord x 1
• Batteries (AA/R6) x 2
• Ferrite cores x 2
NOTE
•
Be sure to attach the supplied ferrite cores to the speaker
cords when using external speakers to reduce interference
from the monitor on external equipment (see page 6).
Inserting the batteries
Use two AA/R6 dry cell batteries.
Insert the batteries from the
·
end, making sure the
ª
and
·
polarities are correct.
• Follow the warnings printed on the batteries.
• Battery life is about six months to one year,
depending on how much you use the remote
control.
• The batteries we supply are only for setting up and
testing your monitor, please replace them as soon
as you need to.
• If the remote control
does not work
properly, replace the
batteries.
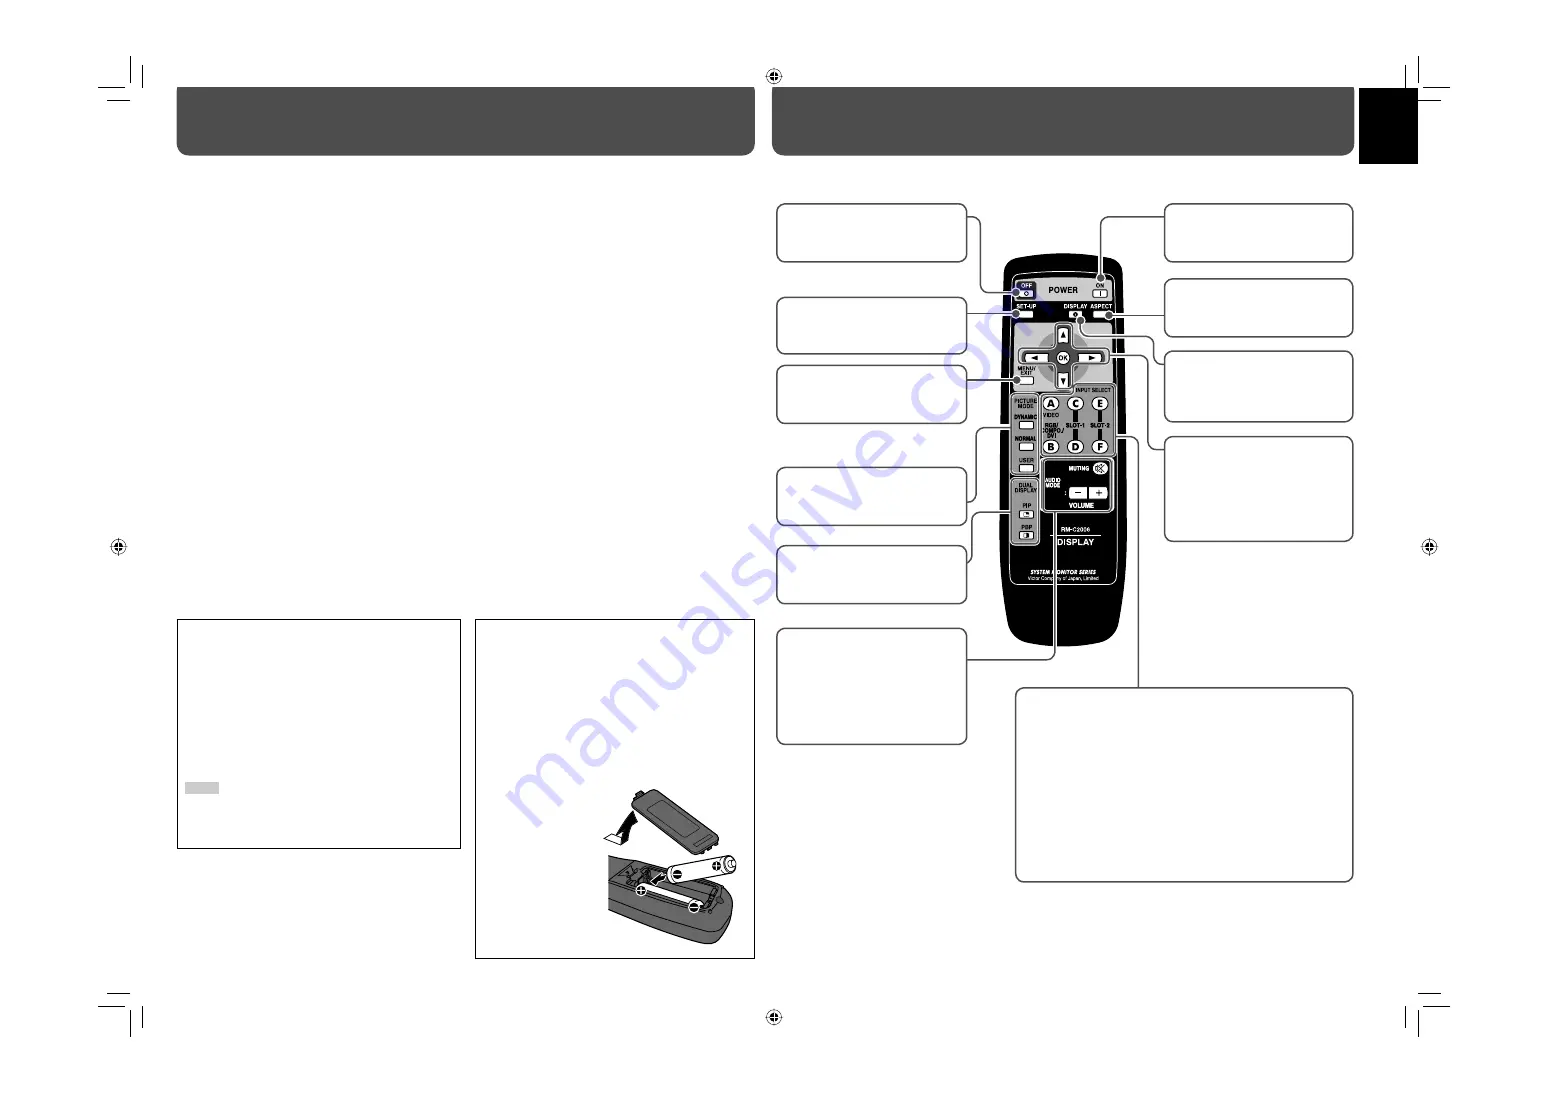
Parts Identification
Remote control
POWER OFF button
Turns off the monitor (see
page 9).
SET-UP button
Displays the set-up menu (see
page 10).
MENU/EXIT button
Displays the main menu (see
page 10).
PICTURE MODE buttons
Changes the picture mode (see
page 10).
DUAL DISPLAY buttons
Activates/deactivates the dual
display mode (see page 10).
AUDIO MODE buttons
/– buttons
Adjusts the volume level (see
page 9).
MUTING button
Turns off the volume
immediately (see page 9).
POWER ON button
Turns on the monitor (see
page 9).
DISPLAY button
Displays the information of
the current input (see page
9).
5∞2
3
buttons
Operates the menu (see page
10).
OK button
Enters the password for the
Security Lock (see page 17).
INPUT SELECT buttons
Selects the input (see page 9).
A (VIDEO) button
Selects the input to the VIDEO IN A terminal (Input A).
B (RGB/COMPO./DVI) button
Selects the input to the VIDEO IN B terminal (Input B).
C, D (SLOT-1) buttons
Selects the input to the optional input card inserted in the
slot 1 (Input C/D).
E, F (SLOT-2) buttons
Selects the input to the optional input card inserted in the
slot 2 (Input E/F).
ASPECT button
Changes the aspect ratio (see
page 9).
GM-H40L2UA_resize-2.indd 4
GM-H40L2UA_resize-2.indd 4
06.7.28 1:43:59 PM
06.7.28 1:43:59 PM