A FEW THINGS TO KEEP IN MIND | 9
QUICK START
Quick Start
This section is designed to get you up and running with
Solaris as quickly as possible. However, Solaris is a very
sophisticated device, and I highly recommend you spend
the time to thoroughly read the entire user guide. The Get-
ting Started section is especially important, as it introduces
some concepts that are unique to Solaris, as well as famil
-
iarizing you with the general layout of the synthesizer and
tips and tricks for navigating its user interface.
A few things to keep in mind:
Â
Unlike every other synth on the market, there are no
presets or preset memory inside the Solaris! What
this means is that ALL preset data (as well as the OS,
samples, factory patterns, and the Global init file) re
-
side on your CompactFlash (CF) card. DO NOT LOSE
YOUR CF CARD! It is highly recommended you get a
CF card reader and back up your card to a computer.
You do not need a CF card to get sound from the So-
laris; without a CF card inserted, a simple default patch
using a Square wave should sound.
Â
For most listening applications, Outputs 1 & 2 or the
headphone out are all you need. The factory presets
are designed for listening from Outputs 1 & 2, or the
headphone out. Outputs 1 & 2 act as Left & Right as
well. If you want to use the S/PDIF output, you must
change a System setting.
Â
Yes, the power supply is outside of the synth. This
avoids noise in the audio, and makes things simpler in
the design.
So, to get started, plug in the power supply and audio
cables, insert your CF card, and turn on the Solaris. Also,
it’s always a good idea to have you system volume down
when turning on gear. The five text displays should say,
“Booting...”, and the graphics (gfx) display will eventually
also show a number of ‘opening credits’ screens, the last of
which is the gracious support message from Waldorf Music,
giving permission to use their Wavetables.
Your keyboard comes with a CompactFlash card that pro-
vides organization and editing of presets, arpeggiator and
sequencer patterns, storage of samples, and several other
basic setup files. In addition, there are a few ‘hidden’ com
-
mands to call up system diagnostics and calibration.
Updating the Operating System
There are two ways to update Solaris’s operating system
(OS).
1.
There is a file in the OS folder of the CompactFlash card
that came with Solaris, called, “doFlash.txt”. There is a
single value in the text file, either a 1 or a 0. A value of
“1” will cause Solaris to automatically load the OS file in
the same folder. Once the operating system is loaded,
the value doFlash.txt file is rewritten as a 0, prevent
-
ing Solaris from updating the OS every time you turn it
on. You will see a progress screen, and a message to
reboot Solaris when the OS is finished loading.
2. If you hold down
Enter
during boot up when the graph-
ics screen first shows an image, you get a special menu
that offers a menu option to load the OS from the card.
Calibration Routines
You can re-initialize the Joystick, wheels, ribbon, and after-
touch sensing by accessing Solaris’s Self Test menu. Press
1, 3 and 8 on the numeric keypad simultaneously and fol-
low the instructions shown in the main display. See “Appen-
dix 6- Self Test Menu” on page 59 for details about the
Self Test menu.
Loading samples
Samples can be in .raw or .wav format, and have a text
file that describes each sample in a group (sample pool).
Refer to “Appendix 5- Sample Specifications” on page 58
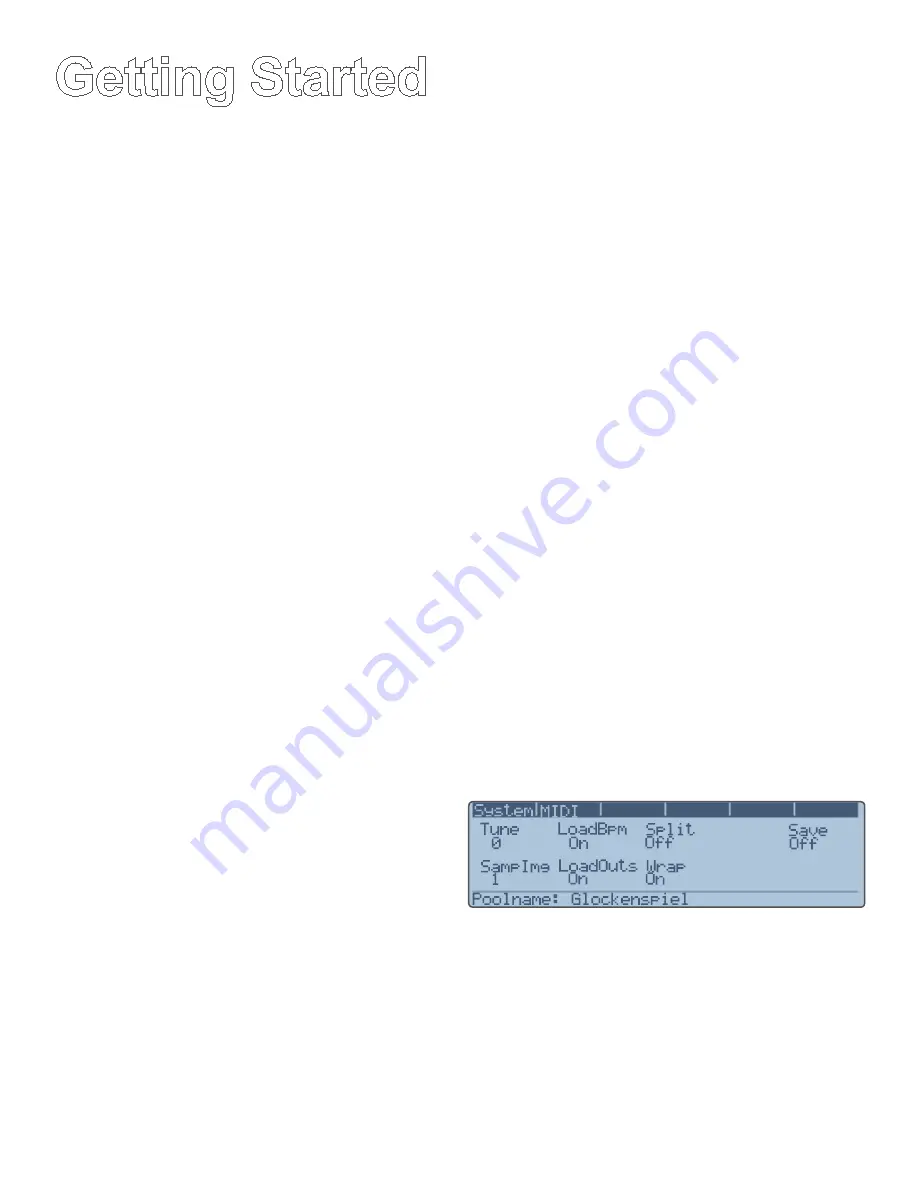
for details about creating sample pools. To load an exist-
ing sample pool from the CompactFlash card, access the
System
soft menu on the Graphic Display. Press the
Enter
button, and select from the available sample pools, as
shown in Figure 1.
Samples are loaded into RAM, so the CF card can be
removed while Solaris is on.
Figure 1. Loading a Sample Pool
Rotate the knob beneath the
Poolname
parameter to se-
lect a sample pool, then press
Enter
again to load. You will
see a progress menu as samples are loaded.
Move off of the System soft menu to avoid reload-
ing the sample pool if you hit the Enter key inad-
vertently.
Selecting Presets
About 30 seconds after the system is turned on, the Preset
screen should be shown on the graphic display. You should
Getting Started
Содержание Solaris
Страница 1: ...User Guide Version 1 ...


