STORING PRESETS | 11
LOADING SAMPLES
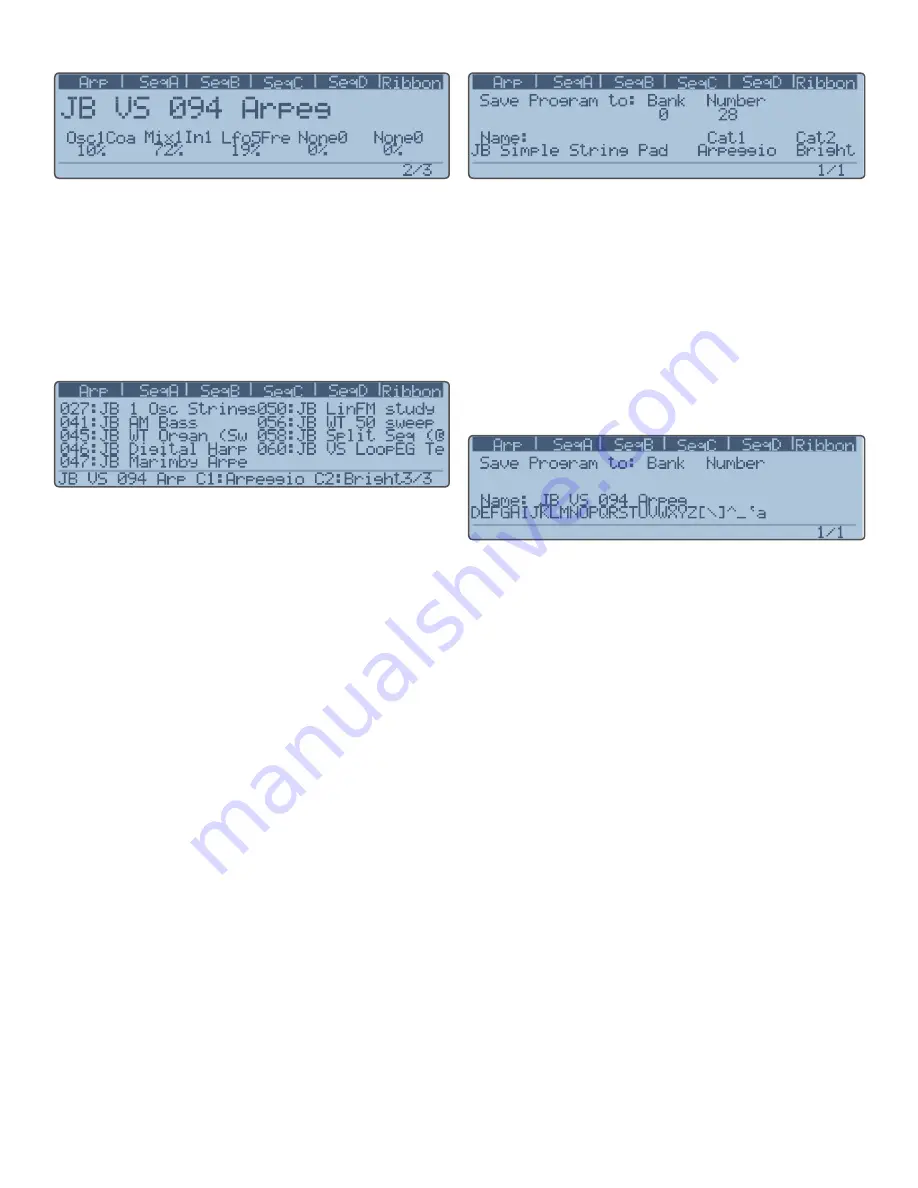
Figure 5. Preset Mode, page 2
The second page, shown in Figure 5, allows you to assign
5 knobs as Performance Knobs for any preset parameter in
the synth. The third page, shown in Figure 6, allows you to
view 10 presets at a time, to get a better overview of where
you are in the bank. Use the
Data Wheel
to scroll through
the preset names here. Note that the example shown has
category filtering enabled, so the list of presets displayed
on page 3 is limited to those that match the selected criteria
of C1:Arpeggio OR C2:Bright.
Figure 6. Preset Mode, page 3 with Category Filtering on
About Preset Categories
When you save (store) a preset, you have the option of
assigning two categories to the sound. These categories
allow you to search for matching presets when you use the
Category logic on the Preset Mode’s page 1. When you set
the logic to one of the three choices, scrolling though pre-
sets will be limited to only those that satisfy the conditions
of the search. The categories are:
Category 1: Arpeggio, Bass, Drum, Effect, Keyboard, Lead,
Pad, Sequence, and Texture
Category 2: Acoustic, Aggressive, Big, Bright, Chord, Clas-
sic, Dark, Electric, Moody, Soft, Short,
Synthetic, and Upbeat.
More categories will be available in the future!
If the
Category
logic is set to
AND
, both categories must
be valid to select a preset. If the Category logic is set to
OR, either category will be used to select a preset. If the
Category logic is set to NOT, all presets that do NOT have
the 2 categories listed will be available to select. If the logic
is blank, then all presets are available.
Storing Presets
As soon as you edit any parameter, the Preset LED will
go off, putting you in live edit mode. Once you have made
changes that you want to keep, press the
Store
button
above the numeric keypad.
Figure 7. Storing Presets, page 1
This gives you the first Store screen, as shown in Figure 7,
and lets you select a new bank and preset location in which
to store your preset. If you just want to store it in the same
location, you don’t need to change anything. If, however,
you want to listen to the new location to see if you don’t
want to keep what’s there, you can press
Compare
, which
will load the new location’s preset and allow you to play it.
Compare
will stay lit when you are listening to the Com-
pare buffer. Turn it off when you are ready to store your ed-
ited preset. You can also select category types here. Simply
scroll through both categories using the knobs below the
Cat1 and Cat2 soft labels to select.
Figure 8. Storing Presets, page 2
Press
Store
a second time, and now you will be taken to
the Naming page, as shown in Figure 8. Each Preset name
can be 25 characters long, and you must use the
Data
Wheel
and the
Inc/Dec
buttons above it to select the posi-
tion and character you want to use. Using the
Inc/Dec
will
shift the current letter position left or right through each of
the 25 positions, and scrolling the wheel will select through
the entire character list. Press
Store
a third time, and this
time, you are done! Turn on the Preset LED and
Inc/Dec
the preset, then go back to your newly edited preset, to
check and make sure all is saved as you wanted.
Loading Samples
The factory CF card comes with a folder in it labeled,
“Samples”. Inside here you will find 9 glockenspiel samples
and one harpsichord sample in .raw format, and two text
files called SamplePool-001.txt and SamplePool-002.txt.
These text files describe the name of the sample set, the
number and name of each sample in the set, and various
other aspects, such as root key, fine tuning, and low/high
key mapping.
Any new SamplePool must be numbered in the next avail-
able ascending number, otherwise the Solaris will not
recognize it! So, for the current factory CF card, one would
need to create a SamplePool[b]-003[/b].txt to describe the
next set of custom samples to be used. (You can, however,
re-number the factory SamplePools, so that the glocken-
spiel would be numbered -003, and your new file -001,
Содержание Solaris
Страница 1: ...User Guide Version 1 ...


