8
8-in x 13-in Horizontal Cut-Off Bandsaw
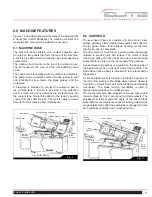
6.3 WORK STOP
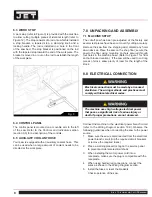
A work stop (refer to Figure 3) is provided with the machine
to allow cutting multiple pieces of identical length (refer to
Figure 12). The stop consists of a rod onto which is installed
a stop bracket, a tapered stop, a clamping knob and a
locking handle. The rod is installed in a bore in the front
of the saw bed. The stop bracket is positioned on the rod
with the tapered stop toward the end of the workpiece. The
bracket is moved in or out on the rod to establish the length
of the workpiece.
6.4 CONTROL PANEL
The control panel is mounted on a movable arm to the left
of the saw. Refer to the
Controls and Indicators
section
(section 9.0) for a description of the controls.
6.5 AUXILIARY COOLANT HOSE
Your saw is equipped with an auxiliary coolant hose. This
can be used when a large amount of coolant needs to be
directed at the work piece.
8.0 ELECTRICAL CONNECTION
7.0 UNPACKING AND ASSEMBLY
7.1 MACHINE SETUP
The cut-off saw has been pre-adjusted at the factory and
several test pieces have been cut to verify cutting accuracy.
Remove the saw from the shipping skid; discard any hold-
down devices. Place the saw on the shop floor; secure the
saw to the floor using mounting anchors secured through
four holes in the machine base. (Refer to Figure 1 for floor
anchor bracket location). If the saw will be used to cut long
pieces of stock, allow plenty of room for the length of the
stock.
Connect the machine to the electrical power branch circuit
(refer to the
Wiring Diagram
section 19.0). Observe the
following guidelines when connecting the saw to the power
source:
1. Make sure the saw is disconnected from the electrical
power branch circuit (trip the required circuit breakers
or remove the required fuses).
2. Place a warning placard or tag on the service panel
to prevent accidental electrical shock.
3. When installing the motor power cord into a
receptacle, make sure the plug is compatible with the
receptacle.
4. When using hard-wired connections, connect the
wires as shown in the
Wiring Diagram
section.
5. Install the fuses or reset the breakers.
Check operation of the saw.
Fig. 3
!
Electrical connection must be made by a licensed
electrician. The wiring methods and practices must
comply with local electrical codes.
!
The machine uses high voltage electrical power
that poses a significant risk of serious injury or
death if proper precautions are not observed.


