background image

FRANÇAIS 

GUIDE D'UTILISATION 


JB SYSTEMS

®


14/47 

SUPER QUADRA BEAM 


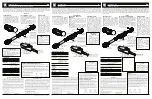
Assurez-vous que toutes les unités sont branchées au secteur. 


Chaque  effet  de  lumière  dans  la  chaîne  doit  avoir  sa  propre  adresse  de  début  afin  qu'il  sache  quelles 
commandes  du  contrôleur  à  décoder.  Dans  la  section  suivante,  vous  allez  apprendre  comment  définir 
les adresses DMX. 


COMMENT CONFIGURER : 

MENU PRINCIPAL : 

  Pour  sélectionner  l'une  des  options  du  menu, 

appuyez  sur  la  touche 

MENU

  jusqu'à  ce  que 

l'option souhaitée soit affichée à l'écran. 

  Utilisez  la  touche 

ENTER

  pour  sélectionner  la 

fonction. L'affichage se met à clignoter. 

  Utilisez  les  touches  BAS  et  HAUT  pour  choisir 

l'option souhaitée. 

  Une  fois  l'option  souhaitée  est  sélectionnée, 

appuyez sur la touche 

ENTER

 pour sélectionner.


  Appuyez sur la touche 

MENU

 pendant environ 2 

secondes pour mémoriser les réglages et revenir 
en mode de fonctionnement normale. Si vous ne 
le faites pas, le réglage ne sera pas mémorisé et 
au  bout  de  8  secondes,  l'appareil  revient  au 
mode de fonctionnement précédent. 


Configuration de l'adresse DMX512 

Permet de définir l'adresse de début dans une 
configuration DMX.


  Appuyez  sur  la  touche  MENU  jusqu'à  ce  que 

 soit affiché à l'écran. 

  Appuyez sur la touche ENTER pour sélectionner. 

  Utilisez  les  touches  BAS  et  HAUT  pour  changer 

l'adresse DMX512. 

  Une  fois  la  bonne  adresse  apparaît  à  l'écran, 

appuyez sur la touche ENTER pour confirmer. 

  Appuyez sur la touche 

MENU

 pendant environ 2 

secondes pour mémoriser les réglages et revenir 
en mode de fonctionnement normale. 


Mode Canal 

L'unité offre 2 différents modes canal. Reportez-vous au tableau DMX pour voir les différences. 

  Appuyez sur la touche MENU jusqu'à ce que 

 soit affiché à l'écran. 

  Appuyez sur la touche ENTER pour sélectionner. 

  Utilisez les touches BAS et HAUT pour sélectionner un des modes canal disponibles. 

  Une fois le mode sélectionné, appuyez sur la touche ENTER pour confirmer. 

  Appuyez  sur  la  touche 

MENU

  pendant  environ  2  secondes  pour  mémoriser  les  réglages  et  revenir  en 

mode de fonctionnement normale. 


Mode effet 

Pour choisir l'un des effets préprogrammés en cas d'utilisation en mode autonome ou 
maître/esclave. 

  Appuyez sur la touche MENU jusqu'à ce que 

 soit affiché à l'écran. 

  Appuyez sur la touche ENTER pour sélectionner. 

  Utilisez les touches BAS et HAUT pour sélectionner l'un des jeux de lumière préprogrammés : 


 tous les effets sont reproduits en mode aléatoire. 


 à 


 12 différents effets intégrés. 

  Une fois le bon effet sélectionné, appuyez sur la touche ENTER pour confirmer. 

Содержание LED Quadra Beam

Страница 1: ......

Страница 2: ......

Страница 3: ...o moving parts inside Long lifetime BEFORE USE Before you start using this unit please check if there s no transportation damage Should there be any do not use the device and consult your dealer first...

Страница 4: ...cal and mechanical safety in your country Check that the available voltage is not higher than the one stated on the unit The power cord should always be in perfect condition Switch the unit immediatel...

Страница 5: ...l DMX cables This input receives instructions from a DMX controller or from another SUPER QUADRA BEAM in master slave mode 15 DMX output 3pin female XLR connector used to connect the SUPER QUADRA BEAM...

Страница 6: ...ng immediately in the last selected mode Refer to chapter HOW TO SETUP to learn how to switch between the different working modes Electrical installation for two or more units in master slave Connect...

Страница 7: ...tore the setting and to return to running mode Channel Mode The unit has 2 different channel modes Refer to the DMX chart to see the differences Press the MENU button until is shown on the display Pre...

Страница 8: ...the ENTER button Use DOWN and UP button to select blackout or no blackout Once the mode is selected press the ENTER button to confirm Press the MENU button for about 2 seconds to store the setting an...

Страница 9: ...all the other units each slave projector can be set to its specific slave mode see chapter HOW TO SETUP the slave mode Connect all units to the mains and put on some music The units will start working...

Страница 10: ...ence of persons suffering from epilepsy MAINTENANCE Make sure the area below the installation place is free from unwanted persons during servicing Switch off the unit unplug the mains cable and wait u...

Страница 11: ...aning products Always dry the parts carefully Attention We strongly recommend internal cleaning to be carried out by qualified personnel SPECIFICATIONS Mains Input AC 100 240V 50 60Hz Mains Output Max...

Страница 12: ...er diff rents effets commande sonore 3 canaux DMX choix de l effet contr le sonore vitesse contr le stroboscopique T l commande CA 8 en option Aucune pi ce mobile l int rieur Dur e de vie prolong e AV...

Страница 13: ...votre pays V rifiez que la tension secteur n est pas sup rieure celle indiqu e sur l appareil Le cordon d alimentation doit toujours tre en parfait tat teignez imm diatement l appareil d s que le cor...

Страница 14: ...connecteur CEI vous pouvez utiliser un c ble d alimentation CEI sp cial pour connecter cette sortie avec l entr e d alimentation secteur du projecteur SUPER QUADRA BEAM suivant pour une interconnexion...

Страница 15: ...QUE ADRESSAGE Important L installation lectrique doit tre effectu e par du personnel qualifi conform ment la r glementation en mati re de s curit lectrique et m canique dans votre pays Installation le...

Страница 16: ...ouche MENU jusqu ce que soit affich l cran Appuyez sur la touche ENTER pour s lectionner Utilisez les touches BAS et HAUT pour changer l adresse DMX512 Une fois la bonne adresse appara t l cran appuye...

Страница 17: ...es effets s ex cutent vitesse lente Une fois le bon mode s lectionn appuyez sur la touche ENTER pour confirmer Appuyez sur la touche MENU pendant environ 2 secondes pour m moriser les r glages et reve...

Страница 18: ...mode fonctionnement Version du logiciel Utilis pour afficher la version du logiciel de l appareil Appuyez sur la touche MENU jusqu ce que soit affich l cran Appuyez sur la touche ENTER pour afficher l...

Страница 19: ...bliez pas d adresser correctement toutes les unit s Branchez toutes les unit s au secteur et allumez le contr leur DMX tant donn que chaque unit poss de sa propre adresse DMX vous pouvez les contr ler...

Страница 20: ...ant et les ouvertures de ventilation doivent tre nettoy s mensuellement L int rieur de l appareil doit tre nettoy une fois par an l aide d un aspirateur ou d un jet d air Le nettoyage des lentilles o...

Страница 21: ...ids geluidsaansturing stroboscoopregeling Een optionele CA 8 handbediening Geen bewegende delen in het apparaat Lange levensduur V R GEBRUIK Controleer het apparaat voordat u het in gebruik neemt op t...

Страница 22: ...ligheid in uw land te worden uitgevoerd Controleer of de beschikbare spanning niet hoger is dan op het apparaat is aangegeven Het netsnoer dient altijd in perfecte staat te zijn Schakel het apparaat o...

Страница 23: ...tuitgang met IEC aansluiting u kunt gebruik maken van een speciaal IEC netsnoer om deze uitgang aan te sluiten op de lichtnetingang van de volgende SUPER QUADRA BEAM voor gemakkelijker doorkoppelen ma...

Страница 24: ...te zijn dat de veiligheid nog steeds optimaal is ELECTRISCHE INSTALLATIE Belangrijk De elektrische installatie dient alleen door gekwalificeerd personeel en in overeenstemming met de voorschriften vo...

Страница 25: ...ts ingedrukt totdat op het scherm wordt weergegeven Druk op de ENTER toets om te selecteren Gebruik de toetsen NEER en OP om het DMX512 adres te wijzigen Druk zodra het juiste adres op het scherm word...

Страница 26: ...interne microfoon geactiveerd geluidsmodus UIT de shows draaien op lage snelheid Druk zodra de juiste modus is geselecteerd de ENTER toets om hem te bevestigen Druk de MENU toets gedurende ongeveer 2...

Страница 27: ...Wordt gebruikt om de softwareversie van het apparaat weer te geven Houd de MENU toets ingedrukt totdat op het scherm wordt weergegeven Druk de ENTER toets om de softwareversie van het apparaat weer t...

Страница 28: ...DUS Stroboscoop LED UIT Show LED AAN D Aangestuurd via de universele DMX controller Sluit alle apparaten op elkaar aan Zie het hoofdstuk Elektrische installatie voor een twee of meer apparaten in DMX...

Страница 29: ...et apparaat moeten stevig worden bevestigd en mogen niet gecorrodeerd zijn Behuizingen bevestigingen en installatieplaatsen plafond truss ophangingen moeten volledig vrij van vervorming zijn Wanneer e...

Страница 30: ...ekering 20 mm glas Geluidsaansturing Ingebouwde microfoon DMX aansluitingen 3 pens XLR mannelijk vrouwelijk Gebruikte DMX kanalen 1 3 kanalen Lichtbron 36 LED s van 1 Watt 8 x rood 8 x groen 8 x blauw...

Страница 31: ...euerung Stroboskopsteuerung Ein optionaler CA 8 Handcontroller Keine beweglichen Teile im Innern Lange Lebensdauer VOR DER ERSTBENUTZUNG Vor der Erstbenutzung bitte das Ger t zuerst auf Transportsch d...

Страница 32: ...it Ger teaufkleber bereinstimmt Das Ger t nicht mit einem besch digten Netzkabel in Betrieb nehmen Wenn das Netzkabel gequetscht oder besch digt wurde schalten Sie das Ger t sofort aus Im Falle von Be...

Страница 33: ...12 Netzeingang mit IEC Anschlussbuchse Schlie en Sie hier das mitgelieferte Netzkabel an 13 Netzausgang mit IEC Anschlussbuchse Sie k nnen ein spezielles IEC Netzkabel benutzen um diesen Ausgang einfa...

Страница 34: ...lationen sollten j hrlich durch qualifiziertes Fachpersonal berpr ft werden um jederzeit einen sicheren Betrieb zu gew hrleisten ELEKTROINSTALLATION ADRESSIERUNG Wichtig Die elektrische Installation d...

Страница 35: ...hrt nach ca 8 Sekunden wieder in den vorhergehenden Betriebsmodus zur ck DMX512 Adresseinstellung Einstellen der Startadresse in einer DMX Installation Dr cken Sie MENU bis auf dem Display angezeigt w...

Страница 36: ...ausgel st musikgesteuerter Modus AUS Die Shows laufen mit verringerter Geschwindigkeit Sobald der richtige Modus gew hlt wurde best tigen Sie mit ENTER Dr cken Sie die MENU Taste f r etwa 2 Sekunden...

Страница 37: ...Display angezeigt wird Zeigen Sie mit ENTER die Software Version des Ger ts an Halten Sie MENU f r ungef hr 2 Sekunden gedr ckt um in den Betriebsmodus zur ckzukehren BEDIENUNGSANLEITUNG A Standalone...

Страница 38: ...ODUS Stroboskop LED AUS Show LED LEUCHTET D Steuerung mittels Universal DMX Controller Verketten Sie alle Ger te Siehe Kapitel Elektrische Installation von zwei oder weiteren Ger ten im DMX Modus Lern...

Страница 39: ...Befestigung jeglicher Teile m ssen fest angezogen und rostfrei sein Geh use Befestigungsmaterialien und Aufh ngungen Decke Balken abgeh ngte Decken d rfen keine Anzeichen von Verformung aufweisen Wenn...

Страница 40: ...s Musiksteuerung Eingebautes Mikrofon DMX Anschl sse 3 poliger XLR Stecker Buchse Benutzte DMX Kan le 1 u 3 Kan le Lichtquelle 36 LEDs mit 1 Watt 8 rote 8 gr ne 8 blaue 12 wei e Abmessungen 830 x 171...

Страница 41: ...xima salida de luz Puede ser controlado a trav s de 1 canal DMX para seleccionar diferentes espect culos de luces controlados por sonido 3 canales DMX selecci n de espect culo control de velocidad aud...

Страница 42: ...la normativa sobre seguridad el ctrica y mec nica de su pa s Compruebe que la tensi n disponible no sea superior a la indicada en la unidad El cable de alimentaci n debe estar siempre en perfectas co...

Страница 43: ...ot n ARRIBA para ir hacia arriba en el men y aumentar los valores mostrados en pantalla 9 Bot n ENTER se usa para confirmar su elecci n 10 Soporte para colgar con dos mandos para apretar la unidad y u...

Страница 44: ...debe instalarse de forma que ninguna parte de la instalaci n pueda caer m s de 20 cm si la fijaci n principal falla El dispositivo debe fijarse bien un montaje que permita el balanceo es peligroso y n...

Страница 45: ...antalla parpadear Utilice los botones ABAJO y ARRIBA para escoger la opci n deseada del men Una vez seleccionada la opci n deseada del men pulse el bot n ENTER para confirmar Pulse el bot n MENU duran...

Страница 46: ...rante 2 segundos para guardar la nueva configuraci n y regresar al modo de funcionamiento Modo de sonido Se usa para activar o desactivar el modo sonido para activar los espect culos Pulse el bot n ME...

Страница 47: ...n la pantalla aparezca Pulse el bot n ENTER para mostrar la cantidad de horas de trabajo en la pantalla Pulse el bot n MENU durante unos 2 segundos para volver al modo activo Versi n de Software Se ut...

Страница 48: ...ctamente Conecte todas las unidades a la alimentaci n y encienda el controlador DMX Como cada unidad tiene su propia direcci n DMX puede controlarlas individualmente Recuerde que cada unidad utiliza 1...

Страница 49: ...ladores de enfriamiento si hay alguno y las aberturas de ventilaci n deben limpiarse mensualmente El interior del dispositivo debe limpiarse anualmente utilizando una aspiradora o chorro de aire La li...

Страница 50: ......

Страница 51: ......

Страница 52: ...W JB SYSTEMS EU Copyright 2014 by BEGLEC NV t Hofveld 2C B1702 Groot Bijgaarden Belgium Reproduction or publication of the content in any manner without express permission of the publisher is prohibit...

Отзывы: