background image

41

- The “

graphical measurement”

 menu also includes the “

time 

base

”: parameter, this is used to display the change in the values 

being examined over a period of 1, 6 or 24 hours.
  Once the graphic is displayed, pressing the “

enter

” key di-

splays a table that indicates the maximum, minimum and avera-
ge values related to the values being examined. 
  Pressing the “enter” key again displays the details of the pro-
gress of the measurement, and pressing the display a second 
time returns to the initial view.
 
- Press the 

S

T

 keys to scroll the data in the list.

 
- To change the measurement saving settings, access the “

archi-

ve

” menu - “

setup

” submenu and set the following parameters:

Step

: defines the saving interval (from 0 to 99 minutes); 

no 

value is saved if it is equal to 0.


Archive


type

: if the “ring” symbol is selected, once the archi-

ve is full the subsequent values overwrite the oldest data.
If the “arrow” symbol is selected, once the archive is full it is 
not possible to save any more data (the memory must first 
be emptied).


Reset memory

: deletes all the data in the archive.

 The 

occupation

” item indicates the percentage of used memory. 

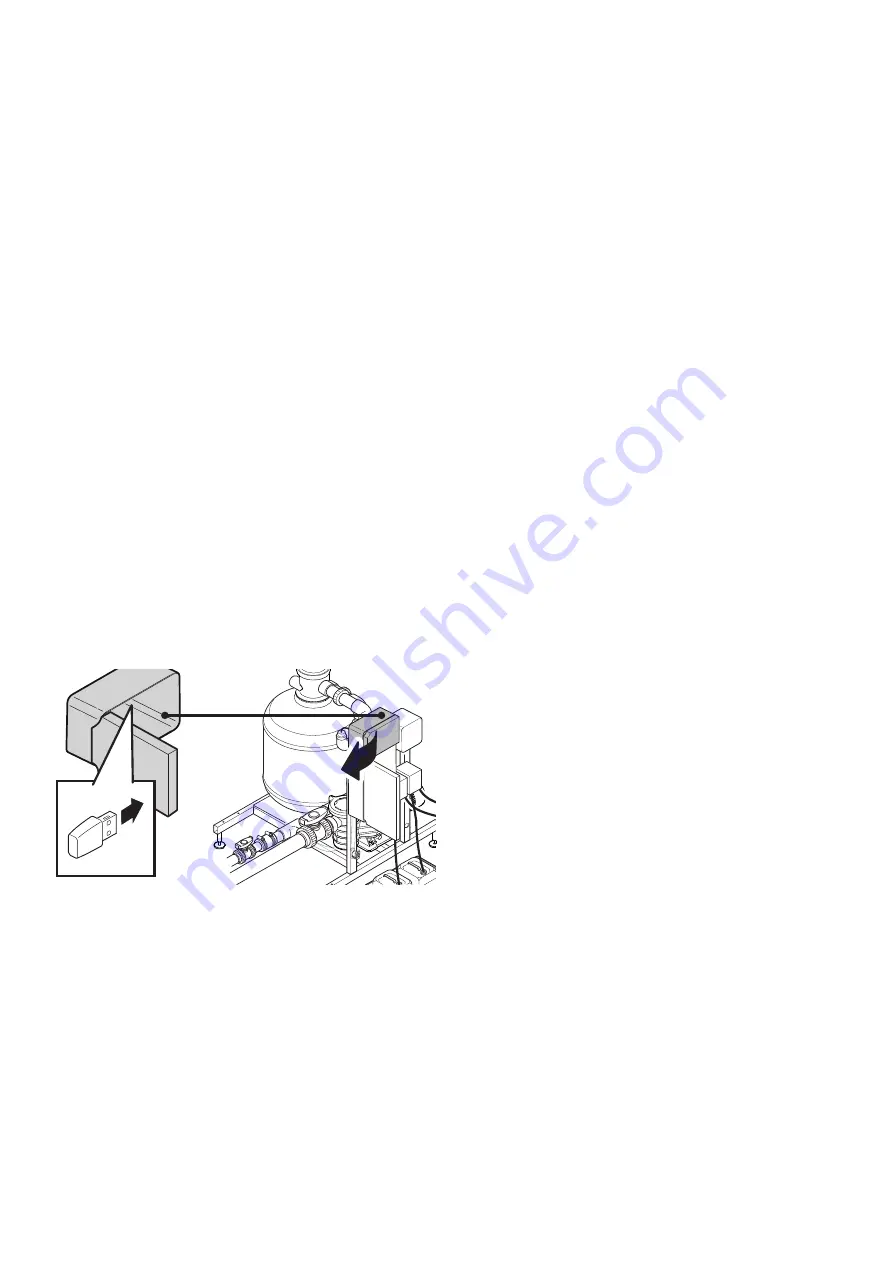
 - Using the 

“pendrive back-up” 

sub-menu,


it is possible to make 

a copy of the saved data, by inserting a USB key into the relevant 
connector.

 - The data can be imported into a normal spreadsheet and or-
ganised according to preference.

Q

Reset of the settings

If incorrect values are set that concern the calibration of the pa-
rameters related to the chlorine (or if you want to reset the fac-
tory parameters), proceed as follows:

- Access section 

3 - measurement setting”

.

- Then access 

“cl2 selection ”, “cl2 setting ”

 and 

“relay outputs”.

- Select “

calibration

” and finally 

“reset default”


(the factory set-

tings are restored, according to the test specifications of the indivi-
dual tool).

- Now set the new values..

Proceed in the same manner if you want to reset the parameters 
related to the pH and/or the redox (rx); in this case, access, re-
spectively “

pH selection

” and/or “

rx selection

”.


The factory stored values comply with the standard 
UNI 10637. For countries in which this directive has not 
been acknowledged or integrated in the local regula-
tions, refer to the respective legislation.

Reactant replacement

The reactant must be replaced when it is finished and/or when its 
colour goes darker.

- Shut off the power supply to the appliance.

- Prepare the solution using the two components (

8

).

 - Unscrew the finished reactant container top and place it on the 
new one; replace the finished container with the new one and 
insert the pump pipe (

8

). 

 NOTE: remove any traces of old reactant and replace the con-
tainer; do not add the new reactant to the old container.

 - Supply power and press the 

T

 key so that the reactant pene-

trates the pipes and any air bubbles are eliminated.

 - Switch the appliance off and then on again and carry out sen-
sor calibration (see 

“Reference calibration”

).


Containers, possible residues of chemical substances 
as well as the finished reactant must be disposed of in 
accordance with current applicable legislation. Also 
contact local authorities regarding the disposal of che-
mically treated water.

Suspending operation 

for medium-long-term periods

Where the appliance is not used for a few days (approximately one 
week), the following operations should be completed:

 - Remove the reactant replacing it with distilled or purified water.

 - Activate the reactant pump by pressing the 

T

 key for a few 

seconds, in order to wash the pipes upon completion, the pipes 
should be clean and filled with water).

 - Leave the appliance in operation for approximately ten min-
utes so that the measurement unit is cleaned 

(please refer to the 

section “Cleaning the measurement unit”)

. Remove the magnet 

present on the bottom (

7

), clean it and store it in a safe place.

- Shut off the power supply to the appliance using the built-in 
switch

.

 - Place the chlorine and pH corrector tanks in a safe place, clos-
ing the cover openings.
 

 Also clean the container which holds the tanks during nor-
mal operation.

Содержание booster KIT spa-pack

Страница 1: ...installation use maintenance KEEP CAREFULLY pre installation installation emploi et entretien CONSERVER AVEC SOIN Vorinstallationsblatt Installation Bedienung und Wartung SORGF LTIG AUFBEWAHREN preins...

Страница 2: ......

Страница 3: ...display segnala che una sonda guasta Il display visualizza mancanza H2 O Il display segnala problemi alla cella di misura L archivio dei dati relativi alle misure vuoto Index WARNINGS 7 Info 14 Set u...

Страница 4: ...ncanza H2 O absence de H2 O L a cheur signale des probl mes sur la cellule de mesure L archive des donn es relatives aux mesures est vide Inhaltsverzeichnis HINWEISE 9 Info 16 Vorbereitende Arbeiten E...

Страница 5: ...Suspensi ndelfuncionamiento duranteperiodosmedios largos 64 Calibraci n dereferencia 65 Mantenimiento 65 Comprobaciones Limpieza del equipo Limpieza de las sondas Limpieza de la celda de medici n Lim...

Страница 6: ...a livelli normali prima di utilizzare nuovamente la clorazione automa tica vedere anche In caso di difficolt errore cloro Verificare quotidianamente anche in relazione alla frequen za d uso della spa...

Страница 7: ...e concentration drops to normal levels before re using automatic chlorination see also Trouble shooting chloro error On a daily basis even dependent on spa frequency of use check that the device is wo...

Страница 8: ...escende des niveaux normaux avant d utiliser de nouveau la chloration automatique voir aussi En cas de difficult s erreur chlore V rifier quotidiennement aussi en fonction de la fr quence d utilisatio...

Страница 9: ...sollten Sie das Ger t aus schalten und warten bis die Chlor Konzentration wie der auf ein normales Niveau abgesunken ist bevor Sie wieder die automatische Chlorung aktivieren siehe auch Im Falle von...

Страница 10: ...rar a que la concentraci n de cloro baje hasta niveles normales antes de volver a utilizar la cloraci n auto m tica v ase tambi n En caso de problemas error de cloro Compruebe a diario y seg n la fre...

Страница 11: ...11 spa pack booster spa pack spa spa Jacuzzi Jacuzzi JacuzziEuropeS p A Jacuzzi...

Страница 12: ...3A MAX 60 80 93 97 MAX 6 m MAX 3 m b spa pack principale main spa pack spa pack principal Prim res Spa Pack spa pack principal spa pack spa pack booster kit spa pack booster kit spa pack booster kit S...

Страница 13: ...o H 05 VV F 2x0 75 mm2 Pesi peso max a pieno carico area d appoggio a pavimento carico a pavimento kg m2 kg m2 140 0 5 280 Eventuali pannelli o parti strutturali se di materiale conduttivo devono gara...

Страница 14: ...0 75 mm2 Weights max weight at full load ground resting surface ground load kg m2 kg m2 140 0 5 280 Any panels or structural parts where made from conductive materials must be connected to the protect...

Страница 15: ...05 VV F 2x0 75 mm2 Poids poids max pleine charge zone d appui au sol charge au sol kg m2 kg m2 140 0 5 280 Les panneaux ou parties structurelles si dans un mat riau conducteur doivent garantir le rac...

Страница 16: ...H H 05 VV F 2x0 75 mm2 entsprechen Gewicht H chstgewicht bei voller Beladung Auflagefl che auf dem Boden Bodenbelastung kg m2 kg m2 140 0 5 280 Eventuelle Platten oder Bauteile die aus leitf higem Mat...

Страница 17: ...caracter sticas no inferiores a las del tipo H 05 VV F 2x0 75 mm2 Pesos peso m x a plena carga rea de apoyo en el suelo carga sobre el suelo kg m2 kg m2 140 0 5 280 Los paneles o componentes estructur...

Страница 18: ...zzi Jacuzzi pH spa spa 0 50 C 10 95 RH UNI 10637 spa spa pack spa pack H 05VV F 3x1 5 2 220 240 50 60 3 5 a 0 7 b a 230 b H 05VV F 2x0 75 2 2 2 140 0 5 280 spa pack booster spa pack booster 1 III 30 A...

Страница 19: ...ent en le distribuant bien autour du tuyau en veillant ce qu il ne se d place pas de son si ge Une fois l op ration termin e retirer la bride et la conserver pour le remplacement du sable nettoyer le...

Страница 20: ...20 a1 a 1 2 a a1 tubo rigido stiff pipe tuyau rigide Rohr tubo r gido riscaldatore o scambiatore heater or exchanger r chauffeur ou changeur Heizger toderW rmetauscher calentador o intercambiador 1 2...

Страница 21: ...21 a1 a a1 a 1 2 b1 b b1 b b b1 a a1 1 2 tubo flessibile hose tuyau flexible Schlauch tubo flexible 3 4...

Страница 22: ...re in good condition Ins rer les bidons dans un r cipient tanche et y ajouter de l eau de mani re diluer toute fuite de liquide V rif ierp riodiquementlebon tatdur cipientetdesbidons Legen Sie die Kan...

Страница 23: ...e all interno della cella di misura Ensure that you place the magnet inside the measurement unit Veiller ins rer l aimant l int rieur de la cellule de mesure Achten Sie darauf den Magneten ins Innere...

Страница 24: ...tion Schalter der Filterpumpe interruptor bomba de filtraci n solo per spa pack trifase only for three phase spa pack uniquement pour Spa Pack triphas nur f r Spa Pack dreiphasig s lo para spa pack tr...

Страница 25: ...J8 M11 M10 J10 JS6 J9 PF1 F1 2AT K3 J12 1 M1 M5 K10 K4 K11 PF5 PF3 PF7 M9 M8 1 1 1 J13 J20 L N CIRC PUMP J20 J14 J21 J22 K12 J4 K7 M7 M6 JS1 JS2 CONFIG KEY J6 J7 TP5 TP4 J11 J5 J4 J3 JS5 TP6 TP8 TP7...

Страница 26: ...iti di liquido to suck the reactant keep the key T pressed down until the pipes are filled with liquid pour aspirer le r actif maintenir enfonc e la touche T jusqu ce que les tuyaux soient remplis de...

Страница 27: ...C ENTER Cal ESC Mode PUMP CL2 ppm OS1 OS1 OS2 19s pH 21 7 C 2 1 2 ENTER Cal ESC Mode PUMP CL2 ppm OS1 OS1 OS2 19s pH 21 7 C CL2 ppm WASHING 1 OS1 OS1 OS2 19s pH 21 7 C A C D E B IMPOSTAZIONI SISTEMA...

Страница 28: ...al ESC Mode PUMP 625 mV G H I J 1 2 mV C 4 F SETUP SYSTEM 1 soluzione di taratura J4U buffer solution redox J4U buffer solution redox setting solution solution d talonnage J4U buffer solution redox Ka...

Страница 29: ...al ESC Mode PUMP CALIBRATION pH 7 00 pH L M ENTER Cal ESC Mode PUMP SETUP MEASURES 2 K SETUP SYSTEM 1 soluzione di taratura J4U buffer solution pH 7 J4U buffer solution pH 7setting solution solution d...

Страница 30: ...calibration Calibrazione OK N P O C CALIBRATION pH TEMPERATURE SECOND CALIBRATION CALIBRATION pH INSERT PROBE PRESS ENTER SECOND CALIBRATION ENTER Cal ESC Mode PUMP ENTER Cal ESC Mode PUMP pH CALIBRAT...

Страница 31: ...li valori errati selezionare reset default e premere enter Impostazione del valore di redox Il redox misurato in mV millivolt legato alla concentrazione di cloropresenteinacqua sequestasuperauncertova...

Страница 32: ...lezionare il valore che s in tende assegnare alla prima cifra e premere nuovamente enter Agire allo stesso modo per le cifre restanti Premendo un ultima volta il tasto enter il display visualizza nuov...

Страница 33: ...alibrazione dei parametri relativi al cloro o si desideri reimpo stare i parametri di fabbrica necessario Accedere alla sezione 3 impostazione misure Accedere quindi a selezione cl2 impostazione cl2 e...

Страница 34: ...e indicato durante le fasi d installazione NOTA consigliabile sostituire le sonde ogni anno Manutenzione Prima di effettuare qualsiasi pulizia o sostituzione di componenti tassativo togliere tensione...

Страница 35: ...eccessiva ve dere anche mancanza H2 O Verificare la presenza del reagente ed eventualmente sostituirlo vedere Sostituzione del reagente Verificare che i tubi collegati alla cella di misura non siano o...

Страница 36: ...correttamente Verificare che la temperatura dell acqua non sia elevata Il valore del parametro taratura sensore H2 O potrebbe essere troppo basso Rivolgersi ad un Centro Assistenza Jacuzzi X Il displ...

Страница 37: ...off 050 modo rel modo rel soglia periodo pwm 10 sec uscita analogica range uscita 4 20 mA limite inf 0 00 ppm limite sup 5 00 ppm calibrazione automatica manuale reset default selezione rx impostazio...

Страница 38: ...archivio occupazione 6 reset memoria rs485 usb rs485 pendrive back up 5 grafici misure selezione CL2 selezione PH selezione TEMP selezione RX primo dato data ora base tempi Attenersi esclusivamente a...

Страница 39: ...tration in the water where this exceeds a certain threshold an alarm signal is issued It must be noted that the redox is dependent on the type of water used mineral salt content etc and it is therefor...

Страница 40: ...he password has been set To exit from the menu and return to normal operation press esc until exit appears on the display and then press enter At this stage save will appear on the display press enter...

Страница 41: ...d or the redox rx in this case access re spectively pH selection and or rx selection The factory stored values comply with the standard UNI 10637 For countries in which this directive has not been ack...

Страница 42: ...ck the operation and state of wear of the instrument pumps the pipes connecting the pumps to the instrument and or the chlorine or pH corrector containers measurement cell see below chlorine sensor an...

Страница 43: ...laying set up and back up of the values and or delete the data X The display presents std by The filtering cycle has been suspended interrupted refer to the main spa pack documentation Check that ther...

Страница 44: ...HTEN NO SETUP RELAY SETUP RELAY ALARM ALARM TIME CL 0000 ALARM TIME PH 0000 DISAB SET POINT SI 2 SETUP MEASURES SELECTVALUE SELECT CL2 SETUP CL2 RELAY OUTPUTS SET POINT 1 ON 0 80 ppm OFF 1 10 ppm ON T...

Страница 45: ...PUT REAL o OUTPUTS OUTPUTS RELAY SET1 CL o SET2 CL o SET PH o AUX o ALARM o ANALOG OUTPUTS OUTPUT 1 0 00 mA OUTPUT 2 0 00 mA OUTPUT 3 0 00 mA OUTPUT 4 0 00 mA CALIBRATION DAC RESET DEFAULT DIGITAL OUT...

Страница 46: ...et default et appuyer sur enter Configuration de la valeur de redox Le redox mesur en mV millivolt est li la concentration de chlore pr sente dans l eau si celle ci d passe une certaine valeur un sign...

Страница 47: ...mot de passe et nuova password nou veau mot de passe Pour activer d sactiver le mot de passe s assurer que soit s lec tionn stato password tat du mot de passe appuyer sur enter et avec les touches S...

Страница 48: ...essives sont crites sur les premi res Si le symbole fl che est s lectionn une fois l archive remplie il n est plus possible de sauvegarder aucune donn e il faut d abord vider la m moire R initialisati...

Страница 49: ...t opportun d effectuer ce calibrage m me lorsque l on rem place le r actif et ou le groupe de mesure form par le capteur et par le projecteur led situ s la base de la cellule de mesure sonde pH la fia...

Страница 50: ...e l alarme externe sur l afficheur appara t le symbole et ventuel arr t de l instrument V rifier que la temp rature de l eau ne soit pas excessive voir aussi absence de H2 O V rifier la pr sence du r...

Страница 51: ...zzi X L afficheur visualise mancanza H2 O absence de H2 O V rifier que le circuit qui introduit l eau dans la cellule de mesure et dans le r cipient des sondes fonctionne correctement V rifier que la...

Страница 52: ...EMPS OFF 050 MODE RELAY MODE RELAY soglia P RIODE PWM 10 sec SORTIE ANALOG CHAMP SORTIE 4 20 mA LIMITE INF 0 00 ppm LIMITE SUP 5 00 ppm TALONNAGE AUTOMATIQUE MANUEL R INIT D FAUT SELECTION RX MENU RX...

Страница 53: ...HIVE ENGAGEMENT 6 RESET MEMOIRE RS485 USB rs485 SAUVEGARDE CLEF USB 5 GRAPHIQUES MESURES SELECTION CL2 SELECTION PH SELECTION TEMP SELECTION RX PREMER DONN E DATE HEURE BASE TEMPS Suivre exclusivement...

Страница 54: ...ese einen bestimm ten Wert berschreitet wird ein Alarmsignal ausgegeben Es sollte jedoch beachtet werden dass der Redox Wert von der Art des ver wendeten Wassers abh ngt Mineralsalzgehalt usw Aus dies...

Страница 55: ...r cken und mit den Tasten S T on bzw off ausw hlen wenn das Passwort aktiv ist erscheint auf dem Display das Sym bol Zum ndern des Passworts nuova password Neues Pass wort ausw hlen und dann Enter dr...

Страница 56: ...fertigen indem Sie einen USB Stick an den entsprechenden Anschluss anschlie en Die Daten k nnen dann in ein normales Tabellenblatt eines Ta bellenkalkulationsprogramms kopiert und nach Belieben orga n...

Страница 57: ...esszellebefinden pH Sonde Die Zuverl ssigkeit der pH Sonde l sst sich anhand der Kalibrierl sungen in der Regel pH 7 0 und pH 4 0 ermittelt werden wie bei der Installation erl utert HINWEIS DieSondens...

Страница 58: ...ob die Pumpe des prim ren Spa Pack ordnungsgem funktioniert siehe entsprechende Unterlagen X Ausl sen des externen Alarms auf dem Display erscheint das Symbol und eventuelles Anhalten des Ger tes Pr f...

Страница 59: ...t ersetzen Sie die Sonde Wenden Sie sich an eine Jacuzzi Kundendienststelle X Auf dem Display erscheint mancanza H2 O H2 O fehlt Pr fen Sie das der Kreis der die Messzelle und den Beh lter der Sonden...

Страница 60: ...00 pH ZEIT ON 010 ZEIT OFF 050 MODE RELAY MODE RELAY soglia ZEIT PWM 10 sec OUTIN AKTUELL AUSG FELDE 4 20 mA UNT GRENZE 0 00 ppm OB GRENZE 5 00 ppm EICHUNG AUTOMATISCH MANUELL DEFAULT RESET AUSW HLEN...

Страница 61: ...IVSART BESCHAFTIGUNG 6 RESET RS485 USB rs485 USB STICK DOWNLOAD 5 GRAP MASSEINH AUSW HLEN CL2 AUSW HLEN PH AUSW HLEN TEMP AUSW HLEN RX ERSTE DATEN DATUM UHR ZEITBASIS Halten Sie sich ausschlie lich an...

Страница 62: ...centraci n de cloro en el agua si esta supera un cierto valor se da un aviso de alarma Sin embargo hay que destacar que el redox depende del tipo de agua empleado contenido en sales minerales etc por...

Страница 63: ...y pulse enter con las teclas S T seleccio ne el valor que desea asignar al primer d gito y vuelva a pulsar enter Siga el mismo procedimiento para los dem s d gitos Pulsando por ltima vez la tecla ente...

Страница 64: ...hoja de c l culo normal y organizarse seg n convenga Q Restablecimiento de los ajustes Si se ajustan valores incorrectos en lo que respecta a la cali braci n de los par metros del cloro o si se desea...

Страница 65: ...como se indica en las fases de instalaci n NOTA se recomienda sustituir las sondas una vez al a o Mantenimiento Antes de comenzar cualquier operaci n de limpieza o sustituci n de componentes es oblig...

Страница 66: ...a de medici n Compruebe que la celda de medici n no est sucia y l mpiela en caso necesario v ase Limpieza de la celda de medici n El cableado de la celda de medici n podr a estar estropeado Acuda a un...

Страница 67: ...medici n Compruebe que la celda de medici n est limpia v ase el cap Limpieza de la celda de medici n El proyector P y o el fotosensor F podr an estar estropeados Acuda a un Centro de Asistencia Jacuz...

Страница 68: ...010 TIEMPO OFF 050 MODO DE REL MODO DE REL soglia PERIODO PWM 10 sec OUT EN CORRIENTE RANGE SALIDA 4 20 mA L MITE INF 0 00 ppm L MITE SUP 5 00 ppm CALIBRACI N AUTOM TICA MANUAL RESET DEFAULT SELECCI...

Страница 69: ...HIVO OCUPACI N 6 RESET MEMORIA RS485 USB rs485 PENDRIVE BACK UP 5 GRAFICOS MEDIDAS SELECCI N CL2 SELECCI N PH SELECCI N TEMP SELECCI N RX PRIMER DATO FECHA HORA BASE TIEMPOS C ase nicamente a los men...

Страница 70: ...ox Redox redox spa pack 24 enter redox 50 esc impo stazioni sistema enter T impostazioni mi sure enter selezione rx rx enter abilita inibit on enter S T on inibit cl redox enter set point enter S T en...

Страница 71: ...mposta zioni sistema enter enter setup sistema T password enter password 0 0 enter stato password nuova password stato password enter S T on off nuova password enter S T enter enter nuova password esc...

Страница 72: ...72 Q esc impo stazioni sistema enter archivio grafici misure 1 6 24 enter enter S T 0 99 0 pendrive back up usb Q 3 cl2 cl2 pH redox rx pH rx UNI 10637 8 8...

Страница 73: ...73 T UNI 10637 T 7 pH spa pH pH pH 7 0 pH 4 0 spa pack Q pH pH Jacuzzi Q Q 10 Q 10...

Страница 74: ...74 Q spa pack Q spa pack Jacuzzi spa pack X X spa pack spa pack spa pack X H2 O Jacuzzi Jacuzzi X...

Страница 75: ...zzi F P X step 1 SETUP SYSTEM DATE HOUR SYSTEM DAY MONTH YEAR HOUR MINUTE LANGUAGE ENGLISH PASSWORD 00000 DISPLAY CONTRAST 88 BACK LIGHTEN NO SETUP RELAY SETUP RELAY ALARM ALARM TIME CL 0000 ALARM TIM...

Страница 76: ...OUT SET SI MAX ZERO MEAS 10 SELECT TEMP SETUP TEMP CURRENT OUTPUT OUTPUT RANGE 4 20 mA LOW LIMIT 0 00 ppm HIGH LIMIT 5 00 ppm CALIBRATION TEMPER OFFSET 04 5 C PH SELECT PH SETUP OUTPUT RELAY SETPOINT...

Страница 77: ...L CONTROL 45 0 C SET AGITATOR MOTOR DUTY CYCLE 33 FREQUENCY 1000 Hz ENABL INPUT 220V on 4 ARCHIVE SHOW RECORDS FIRST RECORD LAST RECORD DATE HOUR SETUP STEP 10 min ARCHIVE TYPE MEMORY FILLI 6 MEMORY R...

Страница 78: ......

Страница 79: ......

Страница 80: ...irezione e Coordinamento Jacuzzi Brands Corp USA S S Pontebbana km 97 200 33098 Valvasone PN ITALIA Tel 39 0434 859111 Fax 39 0434 85278 www jacuzzi eu info jacuzzi it Jacuzzi Spa Bath Ltd Woodlands R...

Отзывы: