www.ittcontrols.com
17
Model 581A Differential Pressure Switch
Section 3
Lightly tap the indicator to overcome friction. The pointer should accu-
rately indicate each applied pressure.
11. Test the instrument repeatability by applying 0%, 50%, 0%, 50% of full-
scale differential pressure. The indicator should accurately indicate each
applied pressure.
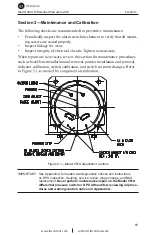
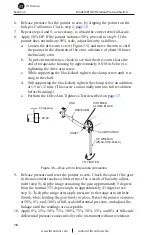
12. Set the drive arm stop to prevent the pointer from striking the post lock
on the scale.
13. Test the pointer for tightness per the pointer installation instructions on
page 13
.
14. If the drive arm screw has been loosened, check for tightness by perform-
ing the Drive Arm Tightness Test described below.
15. Reassemble the unit per the cover installation instructions on
page 12.
Drive Arm Tightness Test
This procedure tests the tightness of the drive arm's connection to the torque
Ap-
ply pressure slowly, as torque is being applied to the connection through the
torque tube drive shaft.
1. With the pointer at normal 0% torque tube rotation position (0% on a
normal 0 to 100% scale unit), adjust the drive arm stop bracket (or use
alternate means) to prevent the pointer from moving (the stop bracket
interferes with drive arm movement).
IMPORTANT: On reverse acting/split range units, it will be necessary to pressurize the
DPU to move the pointer to the minimum scale position. On suppressed
units, it will be necessary to apply pressure to establish a reference point
to check for "zero" shift.
2. Pressurize the DPU to full scale DP (100% of full scale range) to apply 8
degrees of equivalent torque to the connection.
3. Observe the shift in the "zero" indication following DPU depressuriza-
tion (as required) and drive arm stop bracket readjusting (to allow free
movement of drive arm and pointer). A downscale (counter-clockwise)
shift in "zero" of greater than 1/2% indicates drive arm slippage, neces-
sitating further clamp block tightening.
Drive Arm Stop Adjustment
1.
pointer against the full range post lock on the scale plate.
2. Slide the upper drive arm stop bracket against the drive arm and tighten
the drive arm stop bracket screw.
3.
pointer against the zero stop post lock on the scale plate.

