background image

Appendix C — Setup Parameters (Fingerprint)

EasyCoder PD42 Printer User’s Guide

83

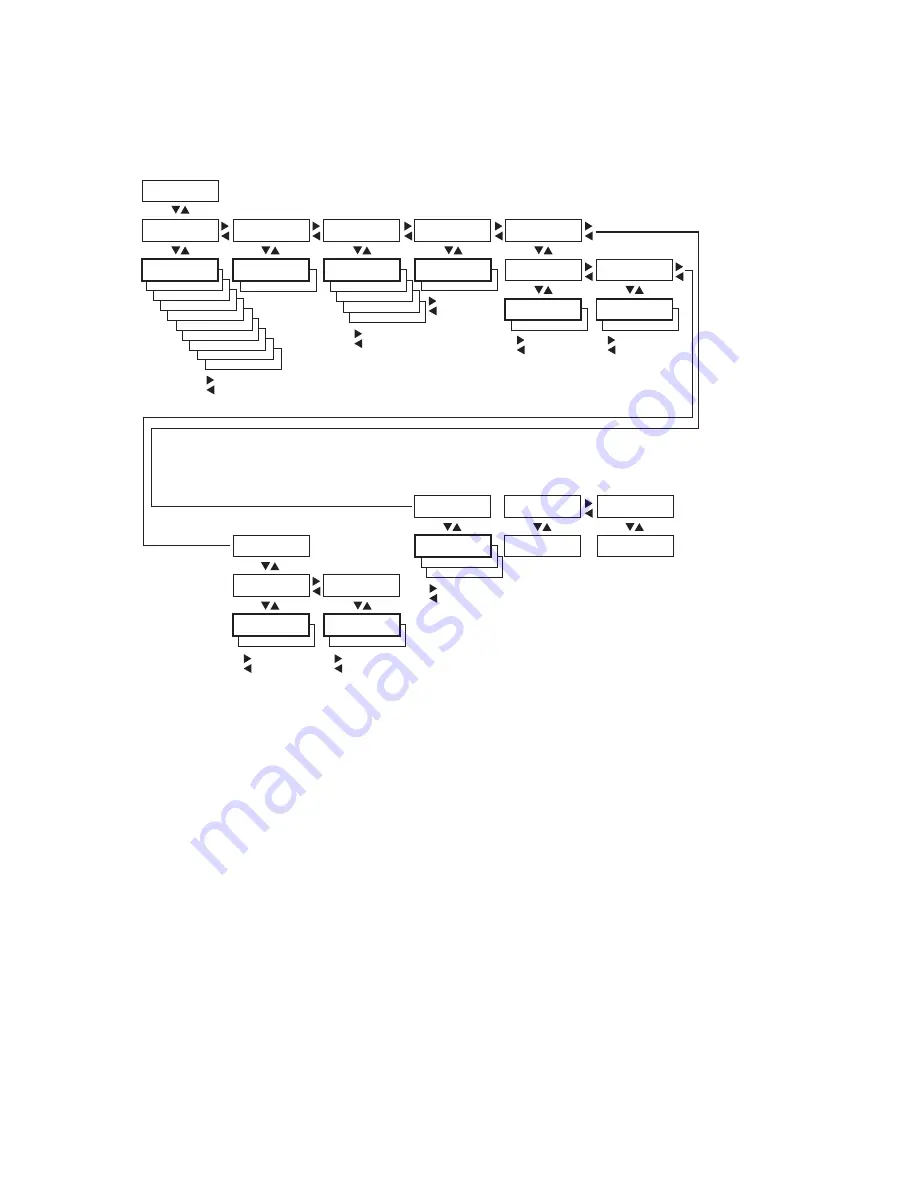
Setup Mode: Serial Communication (Ser-com, Uart1)

NEW LINE:

CR

NEW LINE:

LF

DATA TO HOST:

ENABLE

DATA FROM HOST:

ENABLE

BAUDRATE;

4800

BAUDRATE;

2400

BAUDRATE;

1200

BAUDRATE;

600

BAUDRATE;

300

BAUDRATE;

115200

BAUDRATE;

57600

BAUDRATE;

38400

BAUDRATE;

19200

PARITY:

SPACE

PARITY:

MARK

PARITY:

ODD

PARITY:

EVEN

CHAR LENGTH

7

STOP BITS:

2

ENQ/ACK:

ENABLE

SETUP:

SER-COM, UART1

SER-COM, UART1:

BAUDRATE

SER-COM, UART1:

CHAR LENGTH

SER-COM, UART1:

PARITY

SER-COM, UART1:

STOP BITS

SER-COM, UART1:

FLOWCONTROL

BAUDRATE;

9600

CHAR LENGTH

8

PARITY:

NONE

STOP BITS:

1

FLOW CONTROL:

RTS/CTS

FLOW CONTROL:

ENQ/ACK

ENQ-ACK:

DISABLE

ENQ/ACK:

ENABLE

RTS/CTS:

DISABLE

FLOW CONTROL:

XON/XOFF

SER-COM, UART1:

NEW LINE

NEW LINE:

CR/LF

XON/XOFF:

DATA TO HOST

XON/XOFF:

DATA FROM HOST

DATA TO HOST:

DISABLE

DATA FROM HOST:

DISABLE

SER-COM, UART1:

REC BUF

REC BUF:

[1024]:

SER-COM, UART1:

TRANS BUF

TRANS BUF:

[1024]:

Scroll forward
Scroll back

Scroll forward
Scroll back

Scroll forward
Scroll back

Scroll forward
Scroll back

Scroll forward
Scroll back

Scroll forward
Scroll back

Scroll forward
Scroll back

Scroll forward
Scroll back

Содержание EasyCoder PD42

Страница 1: ...EasyCoder PD42 Printer User s Guide...

Страница 2: ...ct to change without prior notice and do not represent a commitment on the part of Intermec Technologies Corporation 2007 by Intermec Technologies Corporation All rights reserved The word Intermec the...

Страница 3: ...king With the Print Button and LED Indicators 6 Working With the Display and the Soft Keys 7 2 Installing the Printer 9 Connecting the Printer to Your System 10 Connecting the Printer Through the USB...

Страница 4: ...on Settings From the Printer Home Page 33 Changing Configuration Settings Using the Command Line 33 Running Testmode and Extended Testmode 34 Running Testmode 34 Running Extended Testmode 36 Upgrading...

Страница 5: ...rface 63 Protocol 63 Interface Cable 63 USB Interface 64 USB Host Interface 65 EasyLAN Ethernet Interface 65 Parallel IEEE 1284 Interface 66 Interface Cable 66 Options 66 EasyLAN Ethernet Interface 66...

Страница 6: ...ion Setup 89 Feed Adjust Setup 90 Media Setup 91 Print Defs Setup 96 Network Setup 97 D Setup Parameters IPL 99 Setup Description 100 Printing Test Labels With IPL Commands 100 Navigating the Setup Tr...

Страница 7: ...cautions and notes that are in this document Global Services and Support Warranty Information To understand the warranty for your Intermec product visit the Intermec web site at www intermec com and c...

Страница 8: ...of the Intermec manuals contact your local Intermec representative or distributor Visit the Intermec technical knowledge base Knowledge Central at intermec custhelp com to review technical information...

Страница 9: ...e contains a list of related Intermec documents and their part numbers The Intermec web site at www intermec com contains our documents as PDF files that you can download for free Service Get a return...

Страница 10: ...Visit the Intermec web site at www intermec com 2 Click Service Support Manuals 3 In the Select a Product field choose the product whose documentation you want to download To order printed versions of...

Страница 11: ...Guide 1 1 Using the Printer This chapter includes the following sections Introducing the EasyCoder PD42 Printer Features of the Printer Working With the Print Button and LED Indicators Working With t...

Страница 12: ...environments It has all metal chassis and covers proven printing mechanics and powerful electronics providing sturdiness performance and reliability It features an intuitive user interface with a lar...

Страница 13: ...View of the Printer Back View Back View Connectors Side door Intake for external media supply Machine labels I O Ethernet RJ 45 port USB port MAC address label RS 232 serial port IEEE 1284 parallel po...

Страница 14: ...ia Compartment and Print Mechanism Media Compartment Print Mechanism Ink position lever Edge guide Media supply post Ribbon supply shaft Ribbon rewind shaft Printhead lever Media feed rods Thermal pri...

Страница 15: ...ct with it This manual contains information that applies exclusively to the type of firmware so it is strongly recommended that you familiarize yourself enough with your PD42 to know whether it runs F...

Страница 16: ...d which firmware it is running All this is explained in detail in Understanding Printer States on page 26 There are four LEDs Light Emitting Diodes surrounding the Print button LEDs and the Print Butt...

Страница 17: ...ore serious errors occur the indicator turns off completely and the red Error LED turns on or flashes There are a number of conditions that can cause this behavior for help see Chapter 4 Troubleshooti...

Страница 18: ...g a testfeed or changing setup parameters The function of each soft key is described below Note If the printer is running a Fingerprint application access to Setup mode is controlled by the applicatio...

Страница 19: ...e Printer This chapter contains the following sections Connecting the Printer to Your System Connecting Peripherals Through USB Host Loading Media Loading Thermal Transfer Ribbon Plugging in the Print...

Страница 20: ...Specification Interfaces and Options There are advantages and disadvantages associated with each of these interfaces which are described in the following sections Your current system setup will most l...

Страница 21: ...th the kit Connecting the Printer to a Network With an optional EasyLAN Ethernet card installed in your PD42 you can set it up as a network printer The printer is set to automatically retreive an IP n...

Страница 22: ...available on the PrinterCompanion CD to correct the network settings Alternatively set up a terminal connection through the serial interface and use the Fingerprint Setup command See Changing Configu...

Страница 23: ...your USB keyboard into the USB connector in the back of the printer 2 Turn the printer on 3 Press Setup 4 Navigate to COM USB KEYBOARD 5 Choose a keyboard layout 6 Exit Setup by pressing Fingerprint u...

Страница 24: ...Through Operation This section describes the case when media is torn off manually against the printer s tear bar This method is also known as straight through printing You can use different types of m...

Страница 25: ...syCoder PD42 Printer User s Guide 15 2 Pull out the printhead lever and turn it counterclockwise Lift the label feed guide 3 Load a media roll onto the media supply hub Be sure to push it all the way...

Страница 26: ...r User s Guide 4 Route the media through the print mechanism 5 If you are using fan fold media load it through the rear intake and route the it the same way as you would a media roll 6 Reset the label...

Страница 27: ...en sensor can hold the printing of the next label in a batch until the present label has been removed You can only use self adhesive labels with liner in peel off operation Use the same procedure when...

Страница 28: ...asyCoder PD42 Printer User s Guide 3 Route the label liner through the print mechanism and back into the media compartment 4 Wrap the liner around the takeup roll and lock it in place 5 Reset the labe...

Страница 29: ...makes it possible to use a wide range of receiving face materials and gives a durable printout that is less vulnerable to fat chemicals heat sunlight and so on than direct thermal printing Make sure...

Страница 30: ...se a pen or another sharp object to scratch through the ribbon against a piece of paper If it leaves a mark your ribbon is wound ink in or ink out according to the following model Test to determine wh...

Страница 31: ...rinter EasyCoder PD42 Printer User s Guide 21 3 Slide the ribbon roll onto the right ribbon hub and the empty ribbon core on the left hub 4 Ink out ribbon only route the ribbon and set the ink positio...

Страница 32: ...ition lever as indicated below 6 Load media in the printer if you have not already done so 7 Restart the printer and print test labels See Printing Test Labels on page 23 Plugging in the Printer 1 Mak...

Страница 33: ...Keep the Print button pressed down and turn on the power switch After approximately ten seconds the printer enters Testmode and three of the front LEDs start flashing one at a time The display window...

Страница 34: ...d send it to your printer You can design labels in Fingerprint or IPL use dedicated label design tools such as LabelShop and XMLLabel or use word processing software like Microsoft Word Your choice of...

Страница 35: ...uide 25 3 Configuring the Printer This chapter contains the following sections Understanding Printer States The Printer Startup Sequence Changing Configuration Settings Running Testmode and Extended T...

Страница 36: ...ay require a password if the printer is running a Fingerprint application In Setup mode you can change various printer settings i mode i mode is accessed from the display when the printer is idle In i...

Страница 37: ...nning Testmode and Extended Testmode on page 34 See Running Testmode and Extended Testmode on page 34 Extended Testmode See Running Testmode and Extended Testmode on page 34 See Running Testmode and E...

Страница 38: ...lash1 Off Application running On Off Printing On Flash1 Off Printing wait for LTS Quick flashes2 Off Paused Flash3 Off Error Off On Flash4 1 Flashing with 50 duty cycle 0 8 second period when receivin...

Страница 39: ...er also determines what functions icons are active in the display window Active soft keys in different printer states TEST Testmode TEST F1 F2 F3 F4 F5 Test Fingerprint 10 2 0 Setup navigation Running...

Страница 40: ...e startup with step 3 4 Check for the presence of a startup file AUTOEXEC BAT first on CompactFlash then on c If found run the startup file 5 Check to see if button is pressed If so go to Testmode 6 C...

Страница 41: ...Check to see if button is pressed If so go to Testmode 5 Continue power up Run a testfeed The process of entering and using Testmode and Extended Testmode is described later in this chapter Changing C...

Страница 42: ...firmware determines if optional equipment such as a cutter or an interface board is installed in the printer and these are added to the Setup tree The main nodes of the Setup tree Fingerprint Navigat...

Страница 43: ...rd and the printer is connected to your network you can use your web browser to browse to the printer home page and make any desired setup changes there Follow the instructions provided in Connecting...

Страница 44: ...tmode Use Testmode and Extended testmode when you want to verify printer settings print test labels restore factory default settings or enter Dumpmode for troubleshooting purposes Two testmodes are av...

Страница 45: ...one at a time The display window lights up and the printer runs a media setup routine As long as you keep the Print button pressed the printer cycles through the selectable media types Gap Mark Conti...

Страница 46: ...tended Testmode can be used to run additional tests This includes the option to print test labels running a testfeed in slow mode entering Dumpmode and resetting to factory defaults To run Extended Te...

Страница 47: ...way to resolve gap mark detection problems Test Labels Setup Info Print configuration labels one at a time Press Acknowledge to print the next label The display indicates which test label is next Dump...

Страница 48: ...a CompactFlash card NU suffix Boots with new firmware yet printer returns to previous firmware version on reboot No Upgrade Only applicable when upgrading through a Compact Flash card To upgrade your...

Страница 49: ...ubleshooting and Maintaining the Printer This chapter covers the following topics Printer Operation Problems Print Quality Problems Troubleshooting Communication Problems Contacting Product Support Ad...

Страница 50: ...nosis with the command SYSHEALTH Enter the line PRINT SYSHEALTH through a terminal connection to receive the printer s Ready to Work status Display Error Messages Blue Ready to Work LED Blinks Error S...

Страница 51: ...printer in Test mode see Running Testmode on page 34 and select the appropriate media type IP Configuration Error The printer is trying to acquire an IP address from the network Wait for it to complet...

Страница 52: ...er is correct see Media Setup on page 91 for Fingerprint and page 109 for IPL Verify that the Media type settings are correct This error can occur if you are for instance using continuous media but yo...

Страница 53: ...n printing labels are skipped Run a new testfeed press Check if label gap sensor is disturbed by dust or foreign particles see Adjusting the Label Gap Sensor on page 53 When using cutter label is not...

Страница 54: ...rinting on Direct Thermal media check that media is loaded with the heat sensitive side facing the printhead Printing with Thermal Transfer ribbon Check that the ink side of the ribbon faces the media...

Страница 55: ...ode and Extended Testmode on page 34 When Dumpmode has been entered the Printer will tell you this by printing DumpMode entered on a label The display shows the Dumpmode icon and the printer is ready...

Страница 56: ...rs received so far Before you exit Dumpmode you can choose to save the dump in the printer s internal memory The printer prints a label with the location of the saved file the maximum size of the save...

Страница 57: ...Support representative in the U S A or Canada call 1 800 755 5505 Outside the U S A and Canada contact your local Intermec representative Before you call Intermec Product Support make sure you have i...

Страница 58: ...low quality caused by ribbon wrinkling The ribbon shield mechanism is located on the thermal printhead It has two adjustable screws A and B as shown below Ribbon shield adjustment screws To adjust ri...

Страница 59: ...rint mechanism If the media has been wound up or is stuck on the platen roller carefully remove it by hand without using any sharp tools that can damage the platen roller or the printhead Avoid rotati...

Страница 60: ...e weaker on one side than on the other this is most likely due to an unbalanced printhead To adjust the printhead balance 1 Open the side door 2 If transfer ribbon has been installed remove it 3 Lift...

Страница 61: ...it a quarter of a turn counterclockwise 4 Use a straight slot screwdriver to turn the screw at the top of the balance boxes clockwise to increase the pressure or counterclockwise to decrease the press...

Страница 62: ...pulling the printhead lever and flipping it counterclockwise a quarter of a turn 5 Carefully turn both screws at the front of the printhead clockwise a quarter of a turn at a time a full turn correspo...

Страница 63: ...a photoelectric sensor that controls the media feed by detecting gaps between labels or slots or black marks in continuous stock This requires the label gap sensor to be aligned with the gaps slots o...

Страница 64: ...is able to detect gaps slots and black marks LSS Manual shows the sensor setting established by the latest Testfeed It is also possible to try other settings LSS Manual is intended for service and is...

Страница 65: ...p or a detection slot the cursor moves to the right 8 Black mark detection Lift the printhead and slowly pull out the media in the media feed direction When the LSS detects a black mark the cursor mov...

Страница 66: ...ia Type setup and perform a new Testfeed Maintaining the Printer In order to attain high productivity and a long life for your printer Intermec recommends that you regularly inspect the printer and it...

Страница 67: ...he media and ribbon 3 Pull out the printhead lever and flip it counterclockwise a quarter of turn 4 Use a cleaning card or a soft cotton swab moistened with isopropyl alcohol to dissolve any contamina...

Страница 68: ...opyl alcohol to dissolve the remaining adhesive Cleaning the Exterior of the Printer Make sure to keep the exterior of the printer clean this will reduce the risk of dust or foreign particles reaching...

Страница 69: ...Coder PD42 Printer User s Guide 59 A Specification Interfaces and Options This appendix contains a general technical specification as well as information about the printer interfaces and available opt...

Страница 70: ...mal Transfer Printhead resolutions 8 dots mm 203 2 dpi or 11 8 dots mm 300 dpi Print speed 8 dots mm 203 dpi 11 8 dots mm 300dpi 50 8 to 152 4 mm sec 2 to 6 in sec 50 8 to 101 6 mm sec 2 to 4 in sec P...

Страница 71: ...g temperature 5 C to 40 C 41 F to 104 F Storage temperature 20 C to 70 C 4 F to 122 F Operating humidity 20 to 80 non condensing Storage humidity 10 to 90 non condensing Media Media width 25 to 118 mm...

Страница 72: ...th LED backlight LED indicators Power Data Ready Error Ready to Work Keys 1 Print Button 5 Soft Keys Electronics Microprocessor ARM 9 Standard memory 8 MB flash 16 MB SDRAM Interfaces RS 232 serial Ye...

Страница 73: ...al settings see Chapter 3 Configuring the Printer Interface Cable The computer end of the cable depends on the computer model The printer end is a DB9 pin plug as shown below RS 232 DB9 pins Parameter...

Страница 74: ...a self powered device Intermec recommends that you only connect one printer to each USB port on the host either directly or via a hub Other devices like a keyboard and a mouse can be connected to the...

Страница 75: ...LAN Ethernet interface has an RJ 45 socket for use with a standard RJ 45 cable The interface supports 10 100 Mbps Fast Ethernet 10BASE T 100BASE TX and is fully compliant with the IEEE 802 3u standard...

Страница 76: ...the respective installation instructions document for each kit Please note that several of these options can only be factory installed or installed by an authorized service technician EasyLAN Etherne...

Страница 77: ...e separated from the liner backing paper after printing and the liner is wound up on an internal hub See Loading Media for Peel Off Self Strip Operation on page 17 It can also be used to roll up compl...

Страница 78: ...Appendix A Specification Interfaces and Options 68 EasyCoder PD42 Printer User s Guide...

Страница 79: ...Specifications This appendix explains the different media types the EasyCoder PD42 can operate with and states the allowed dimensions of the paper ribbon and rolls This appendix covers the following...

Страница 80: ...uality will be reduced the stiffness is also important and must be balanced against thickness to maintain print quality Diameters 38 to 76 2 mm 1 5 to 3 inches Width Must not protrude outside the medi...

Страница 81: ...st grit etc Any hard particles no matter how small can damage the printhead Ribbon Size The core of the ribbon must be 25 2 25 6 mm 1 inch as the empty ribbon core included in the box The outer dimens...

Страница 82: ...Coder PD42 Printer User s Guide Paper Types and Sizes Non Adhesive Strip Paper Type Setup Variable length strip Fixed length strip Non Adhesive Strip a Media Width Maximum 118 0 mm 4 65 inches Minimum...

Страница 83: ...length strip Self Adhesive Strip a Media Width Maximum 118 0 mm 4 65 inches Minimum 25 0 mm 1 00 inches b Liner The liner must extend evenly on both sides and not more than a total of 1 6 mm 0 06 inch...

Страница 84: ...mm 4 65 inches Minimum 25 0 mm 1 00 inches b Liner The liner must extend evenly on both sides and not more than a total of 1 6 mm 0 06 inches outside the face material c Label Width Excluding Liner M...

Страница 85: ...Appendix B Media Specifications EasyCoder PD42 Printer User s Guide 75 Self Adhesive Labels a b c e SELF ADHESIVE LABELS b d FEED DIRECTION...

Страница 86: ...n 6 mm 0 2 in 11 81 dots mm 300 dpi Maximum 558 8 mm 22 in 406 4 mm 16 in Minimum 6 mm 0 2 in 6 mm 0 2 in c Detection Position Variable 0 to 57 mm 0 to 2 24 inches d Detection Slit Length The length o...

Страница 87: ...Appendix B Media Specifications EasyCoder PD42 Printer User s Guide 77 Tickets With Gaps a TICKETS TAGS FEED DIRECTION b e d c...

Страница 88: ...aximum 558 8 mm 22 in 406 4 mm 16 in Minimum 6 mm 0 2 in 6 mm 0 2 in c Detection Position Variable 0 to 57 mm 0 to 2 24 inches d Black Mark Width The detectable width of the black mark should be at le...

Страница 89: ...terfere with the detection of the black mark should be avoided Note The black mark should be non reflective carbon black on a white or near white background Do not allow any perforations to break the...

Страница 90: ...Appendix B Media Specifications 80 EasyCoder PD42 Printer User s Guide...

Страница 91: ...ts all of the setup parameters that you can configure to fit your operating environment This appendix covers the following topics Setup Description Navigating the Setup Tree Serial Communication Setup...

Страница 92: ...n the setup tree as it is presented in the display window Note The recommended way to set your printer s configuration parameters is to use the PrintSet 4 program which is included on the PrinterCompa...

Страница 93: ...CHAR LENGTH SER COM UART1 PARITY SER COM UART1 STOP BITS SER COM UART1 FLOWCONTROL BAUDRATE 9600 CHAR LENGTH 8 PARITY NONE STOP BITS 1 FLOW CONTROL RTS CTS FLOW CONTROL ENQ ACK ENQ ACK DISABLE ENQ AC...

Страница 94: ...1 NET COM NET1 NEW LINE NEW LINE CR LF USB KEYBOARD GERMAN USB KEYBOARD FRENCH USB KEYBOARD SWEDISH BAUDRATE IEEE 1284 SETUP COM COM INTERFACE INTERFACE USB DEVICE COM USB KEYBOARD USB KEYBOARD US Scr...

Страница 95: ...EDIA SIZE LENGTH MEDIA TYPE LABEL w GAPS XSTART 0 WIDTH 832 LENGTH 1243 MEDIA PAPER TYPE PAPER TYPE TRANSFER TRANSFER RIBBON CONSTANT TRANSFER RIBBON FACTOR TRANSFER LABEL OFFSET RIBBON CONSTANT 90 RI...

Страница 96: ...roll back Enter to print for error info TESTPRINT HARDWARE INFO TESTPRINT SETUP INFO TESTPRINT BAR CODES 2 TESTPRINT BAR CODES 1 TESTPRINT CHESS SETUP PRINT DEFS PRINT DEFS CLIP DEFAULT PRINT DEFS TES...

Страница 97: ...of the host do not match the response from the printer to host will be garbled Baud Rate The baud rate is the transmission speed in bits per second There are 10 options 300 600 1200 2400 4800 9600 def...

Страница 98: ...C and vice versa CTS HIGH from the printer indicates that the unit is ready to receive data CTS LOW from the printer indicated that the receive buffer is full see XON XOFF In some computer programs fo...

Страница 99: ...terface If you have an optional Parallel IEEE 1284 interface installed in the printer it cannot be used at the same time as the USB Device interface In this menu you can choose which interface is acti...

Страница 100: ...ust part of Setup Mode controls how much of the media is fed out or pulled back before and or after the actual printing These settings are global and will be effected regardless of which program is ru...

Страница 101: ...he highest possible quality Media Size The size of the printable area is defined by three parameters X Start Width and Length X Start Specifies the position of the origin along the dots on the printhe...

Страница 102: ...th strip The length setup creates an emergency stop which works when the printer is set up for Label w gaps Ticket w mark or Ticket w gaps If the label stop sensor has not detected a gap or mark withi...

Страница 103: ...rk is used for labels tickets or continuous stock provided with black marks at the back Ticket w gaps is used for tickets and tags with detection slits Fix length strip is used for continuous stock wh...

Страница 104: ...lication are available from Intermec To attain optimal printout quality and extending the life of the printhead use Intermec supplies As a general rule high energy and or high print speed will shorten...

Страница 105: ...le settings The receiving material has been excluded from this table since the ribbon has the largest impact for heat settings for thermal transfer settings Use the above settings as initial values an...

Страница 106: ...a Testfeed may have been unable to succesfully identify gaps or marks in the media It is thus possible to set the Testfeed mode to Slow to allow the Label Stop Sensor to more easily identify media ga...

Страница 107: ...has an optional EasyLAN interface board If the information does not fit on one label two or more labels will be printed Print Speed The Print Speed is specified in mm second Allowed values are 50 150...

Страница 108: ...Appendix C Setup Parameters Fingerprint 98 EasyCoder PD42 Printer User s Guide...

Страница 109: ...you can configure to fit your operating environment This appendix covers the following topics Setup Description Printing Test Labels With IPL Commands Navigating the Setup Tree Serial Communication S...

Страница 110: ...the printer to print mode STX ESC T s R ETX Please refer to the IPL Programmer s Reference Manual P N 066396 xxx for more information on how to print test labels Navigating the Setup Tree This section...

Страница 111: ...2 SETUP SER COM SER COM BAUDRATE SER COM DATA BITS SER COM PARITY SER COM STOP BITS SER COM PROTOCOL BAUDRATE 9600 DATA BITS 8 PARITY NONE STOP BITS 1 ENQ ACK XON XOFF STATUS PROTOCOL XON_XOFF Scroll...

Страница 112: ...ALL PRINT FORMATS TESTPRINT TEST LABELS TEST LABELS PITCH TESTPRINT PAGE PAGE ALL ALL PRINT PAGES TESTPRINT UDC UDC ALL ALL PRINT UDCs TESTPRINT FONT Scroll forward Scroll back Scroll forward Scroll...

Страница 113: ...6 7 8 9 10 10 9 8 7 6 5 4 3 2 1 0 2 4 6 8 10 15 20 25 30 30 25 20 15 10 8 6 4 2 Scroll forward Scroll back 0 2 4 6 8 10 15 20 25 30 30 25 20 15 10 8 6 4 2 Scroll forward Scroll back 0 2 4 6 8 10 15 2...

Страница 114: ...rbled Baud Rate The baud rate is the transmission speed in bits per second There are eight options 1200 2400 4800 9600 default 19200 38400 57600 115200 Data Bits The Data Bits parameter specifies the...

Страница 115: ...length in this protocol is unrestricted That is the printer processes information as it is being downloaded and stops when there is no more information XON XOFF protocol conforms to generally accepte...

Страница 116: ...ter status before downloading a message block to the printer ENQ causes the printer to transmit its highest priority status while VT instructs the printer to transmit all status that applies in the or...

Страница 117: ...HW and Network test labels Network is only available if the printer is equipped with an EasyLAN Network card The Software Configuration Label contains this information Current configuration parameters...

Страница 118: ...setup Format The Format Label contains a single format that you can use to evaluate the print quality of a particular format This option prints labels for all the formats stored in the printer s memor...

Страница 119: ...nction allows you to test that the Label Gap Sensor also referred to as Label Stop Sensor or LSS is working properly Please see Adjusting the Label Gap Sensor on page 53 Media Setup The media paramete...

Страница 120: ...arks The options are Slow and Fast default Label Length Dots The Label Length setup specifies the length in dots of each copy along the media feed direction X coordinate This is used for label out det...

Страница 121: ...default sensitivity number is 420 for direct thermal printing and 567 for thermal transfer printing To find heat settings for different ribbon and media North America 1 Go to www intermec com 2 Naviga...

Страница 122: ...e Default is 0 Form Adj Dots Y Specifies where the Y position of the origin should be placed on the label Allowed range is 30 closest to the center section to 30 furthest from the center section Defau...

Страница 123: ...cutter in configuration mode STX R ETX Enter print configuration mode STX SI c1 ETX Enable cutter STX SI c0 ETX Disable cutter Network Setup Please refer to the EasyLAN User s Guide P N 1 960590 xx fo...

Страница 124: ...Appendix D Setup Parameters IPL 114 EasyCoder PD42 Printer User s Guide...

Страница 125: ......

Страница 126: ...Worldwide Headquarters 6001 36th Avenue West Everett Washington 98203 U S A tel 425 348 2600 fax 425 355 9551 www intermec com EasyCoder PD42 Printer User s Guide 934 009 002 P N 934 009 002...

Отзывы: